
Now you should have learned the basics, mounting the hook, attaching the tying thread and the whip finish. With these you should be able to start and finish a fly, its just what’s in between now!
I always believe its better to start with a simple pattern that illustrates other elementary techniques, than demonstrating each technique one for one. When you are tying this pattern you may find that handling the materials is a somewhat difficult task especially if you have large fingers and are not use to intricate work. But let me assure you, this will come with time. What I would like you to do, is tie six, of the following pattern. Try and make them as best you can, take your time and try and get the proportions correct. As you tie one after another and handle the materials and practice the technique, you will understand them more with each fly tied. As you tie, line up the flies one after another, and you should be able to see a substantial increase in quality and style from n.1 to n. 6.
Dont forget! If you have any questions please dont hesitate to ask. Just post your question at the foot of this page.
If you would like to receive a message when the next stage of the course is published, just add your e mail address at the top right of this page. Thanks, The feather bender.
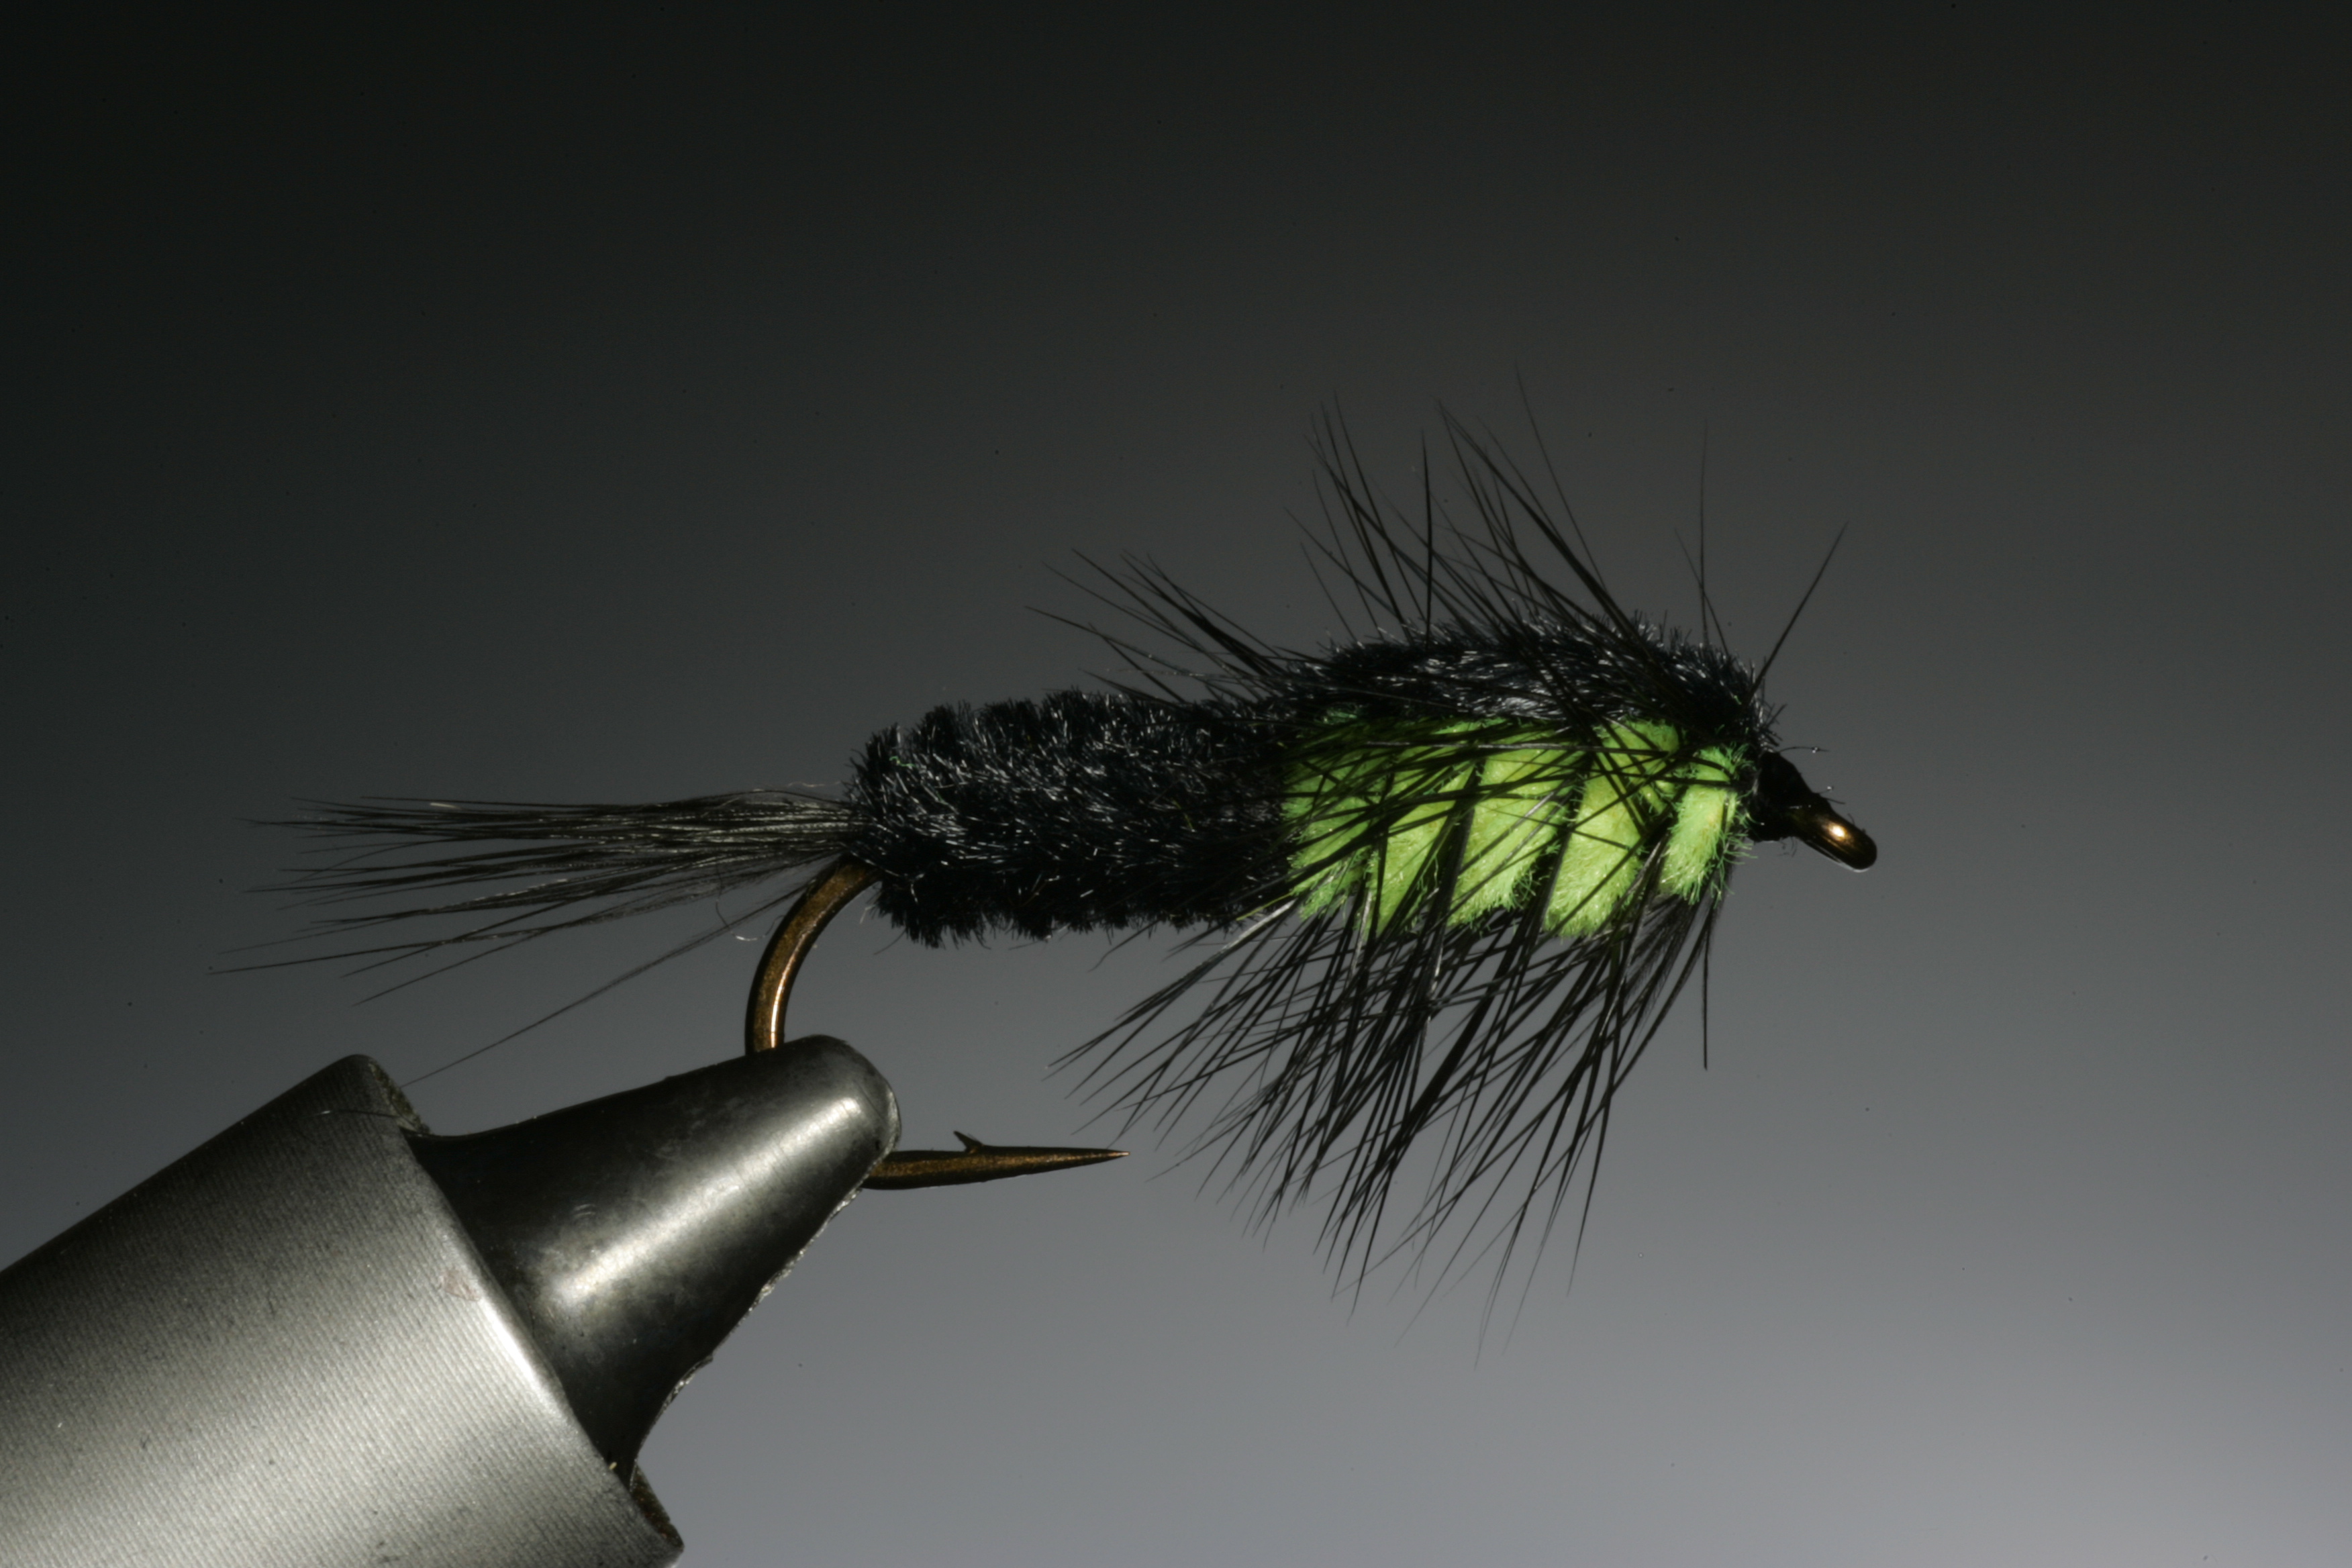
For this first pattern I have chosen the Montana nymph. This is no random choice, This is not only an excellent fishing fly that I have caught just about everything from perch to salmon on, but it also has many simple techniques that are used in hundreds, if not thousands of other patterns.
Before you start, make sure your work space is tidy, and you have only the materials you need for this pattern to hand. The only tools you need are some small sharp pointed scissors, dubbing needle, hackle pliers and whip finish tool.
Hook: Mustad R73 9671# 6-12
Tying thread: Black
Tail: Black hackle fibers
Body: Black chenille
Thorax: Green or yellow chenille with lead wire under
Wing case: Black chenille
Hackle: Black
Today the Montana nymph has a almost classic status. The original, Montana Stone, was tied by Lew Oatman from New York. It was tied to represent a range of large stonefly nymphs and not one particular species. The tying technique for the Montana is like learning to eat with chopsticks! At first it looks extremely difficult, but if shown the correct tying process it very simple, and when you have tied a half dozen you’ll never forget it! Today its tied in several variants. The yellow chenille can be changed for green or red and the black chenille with light olive. It can also be tied with a bead head.
1
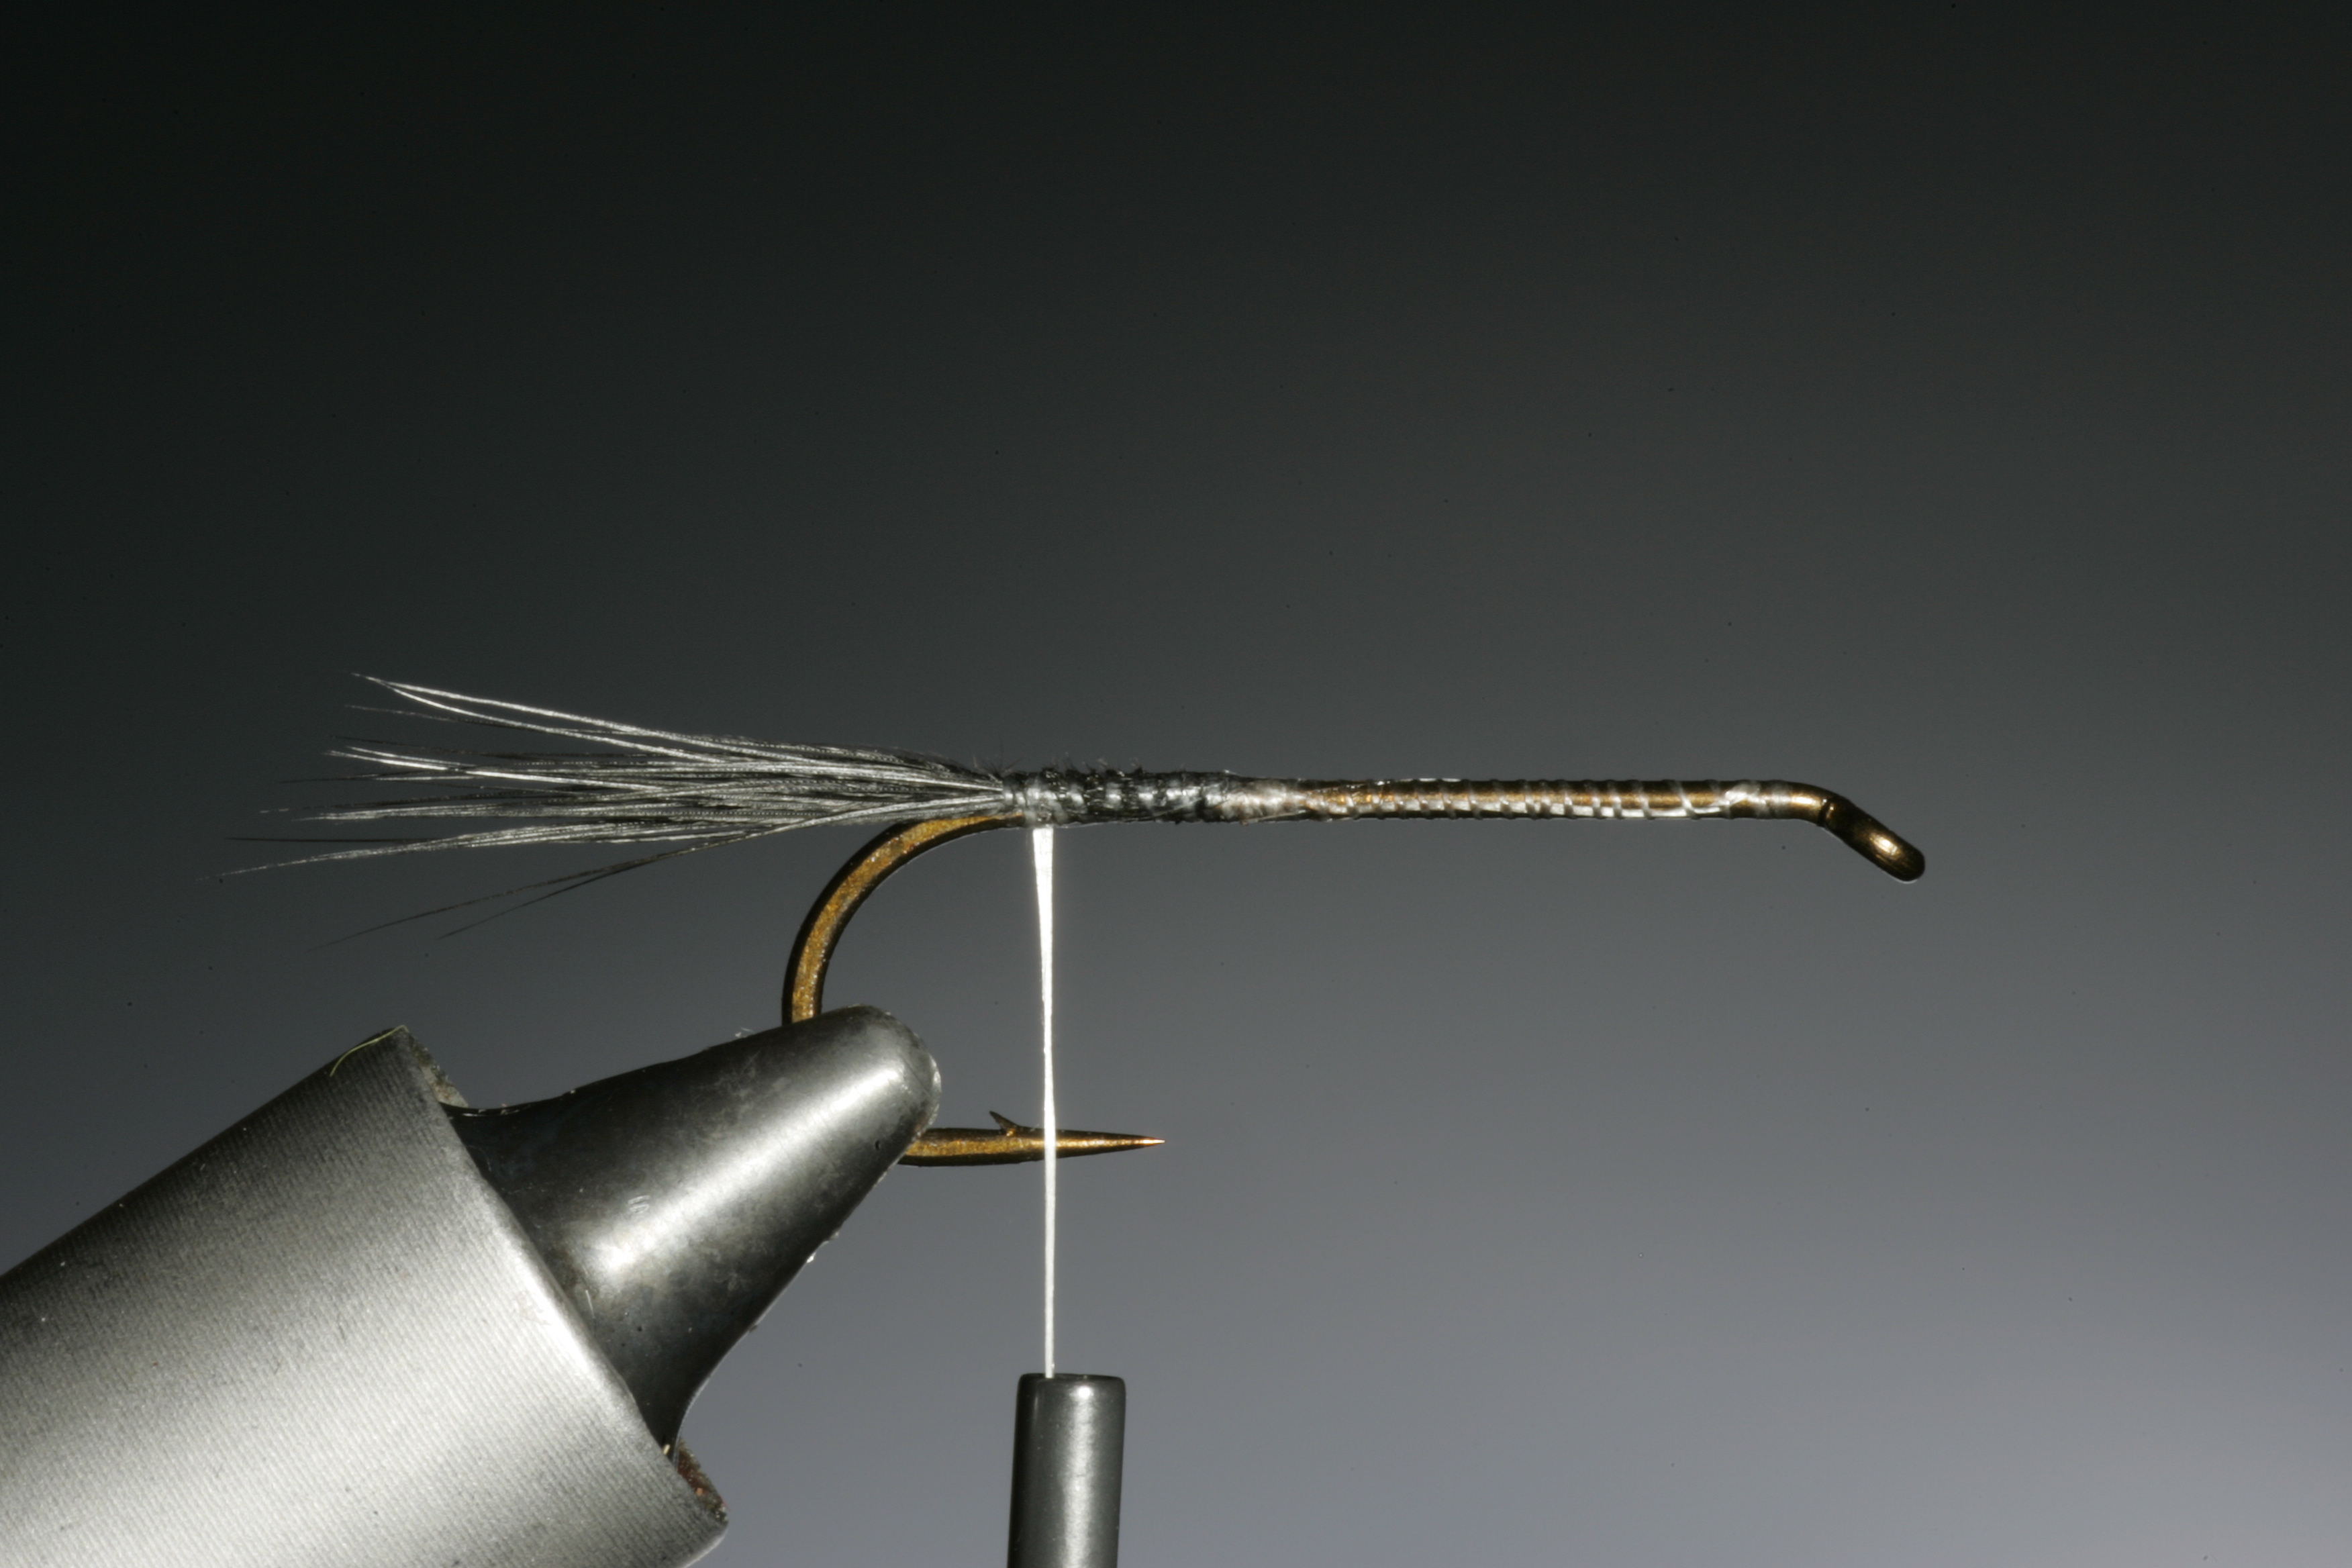
After you have secured your hook in the vice and attached your tying thread strip a small bunch of long hackle fibers from a black cock hackle. Tie these in for the tail of the nymph, at a position just before the hook bends so they stand straight out. They should be about 2/3 of the hook shaft length.

2
Cut a short length of lead wire and warp it tightly around the thorax a few mm behind the hook eye as shown. Cover it in tying thread and then wind your tying thread back to the tail base.
3
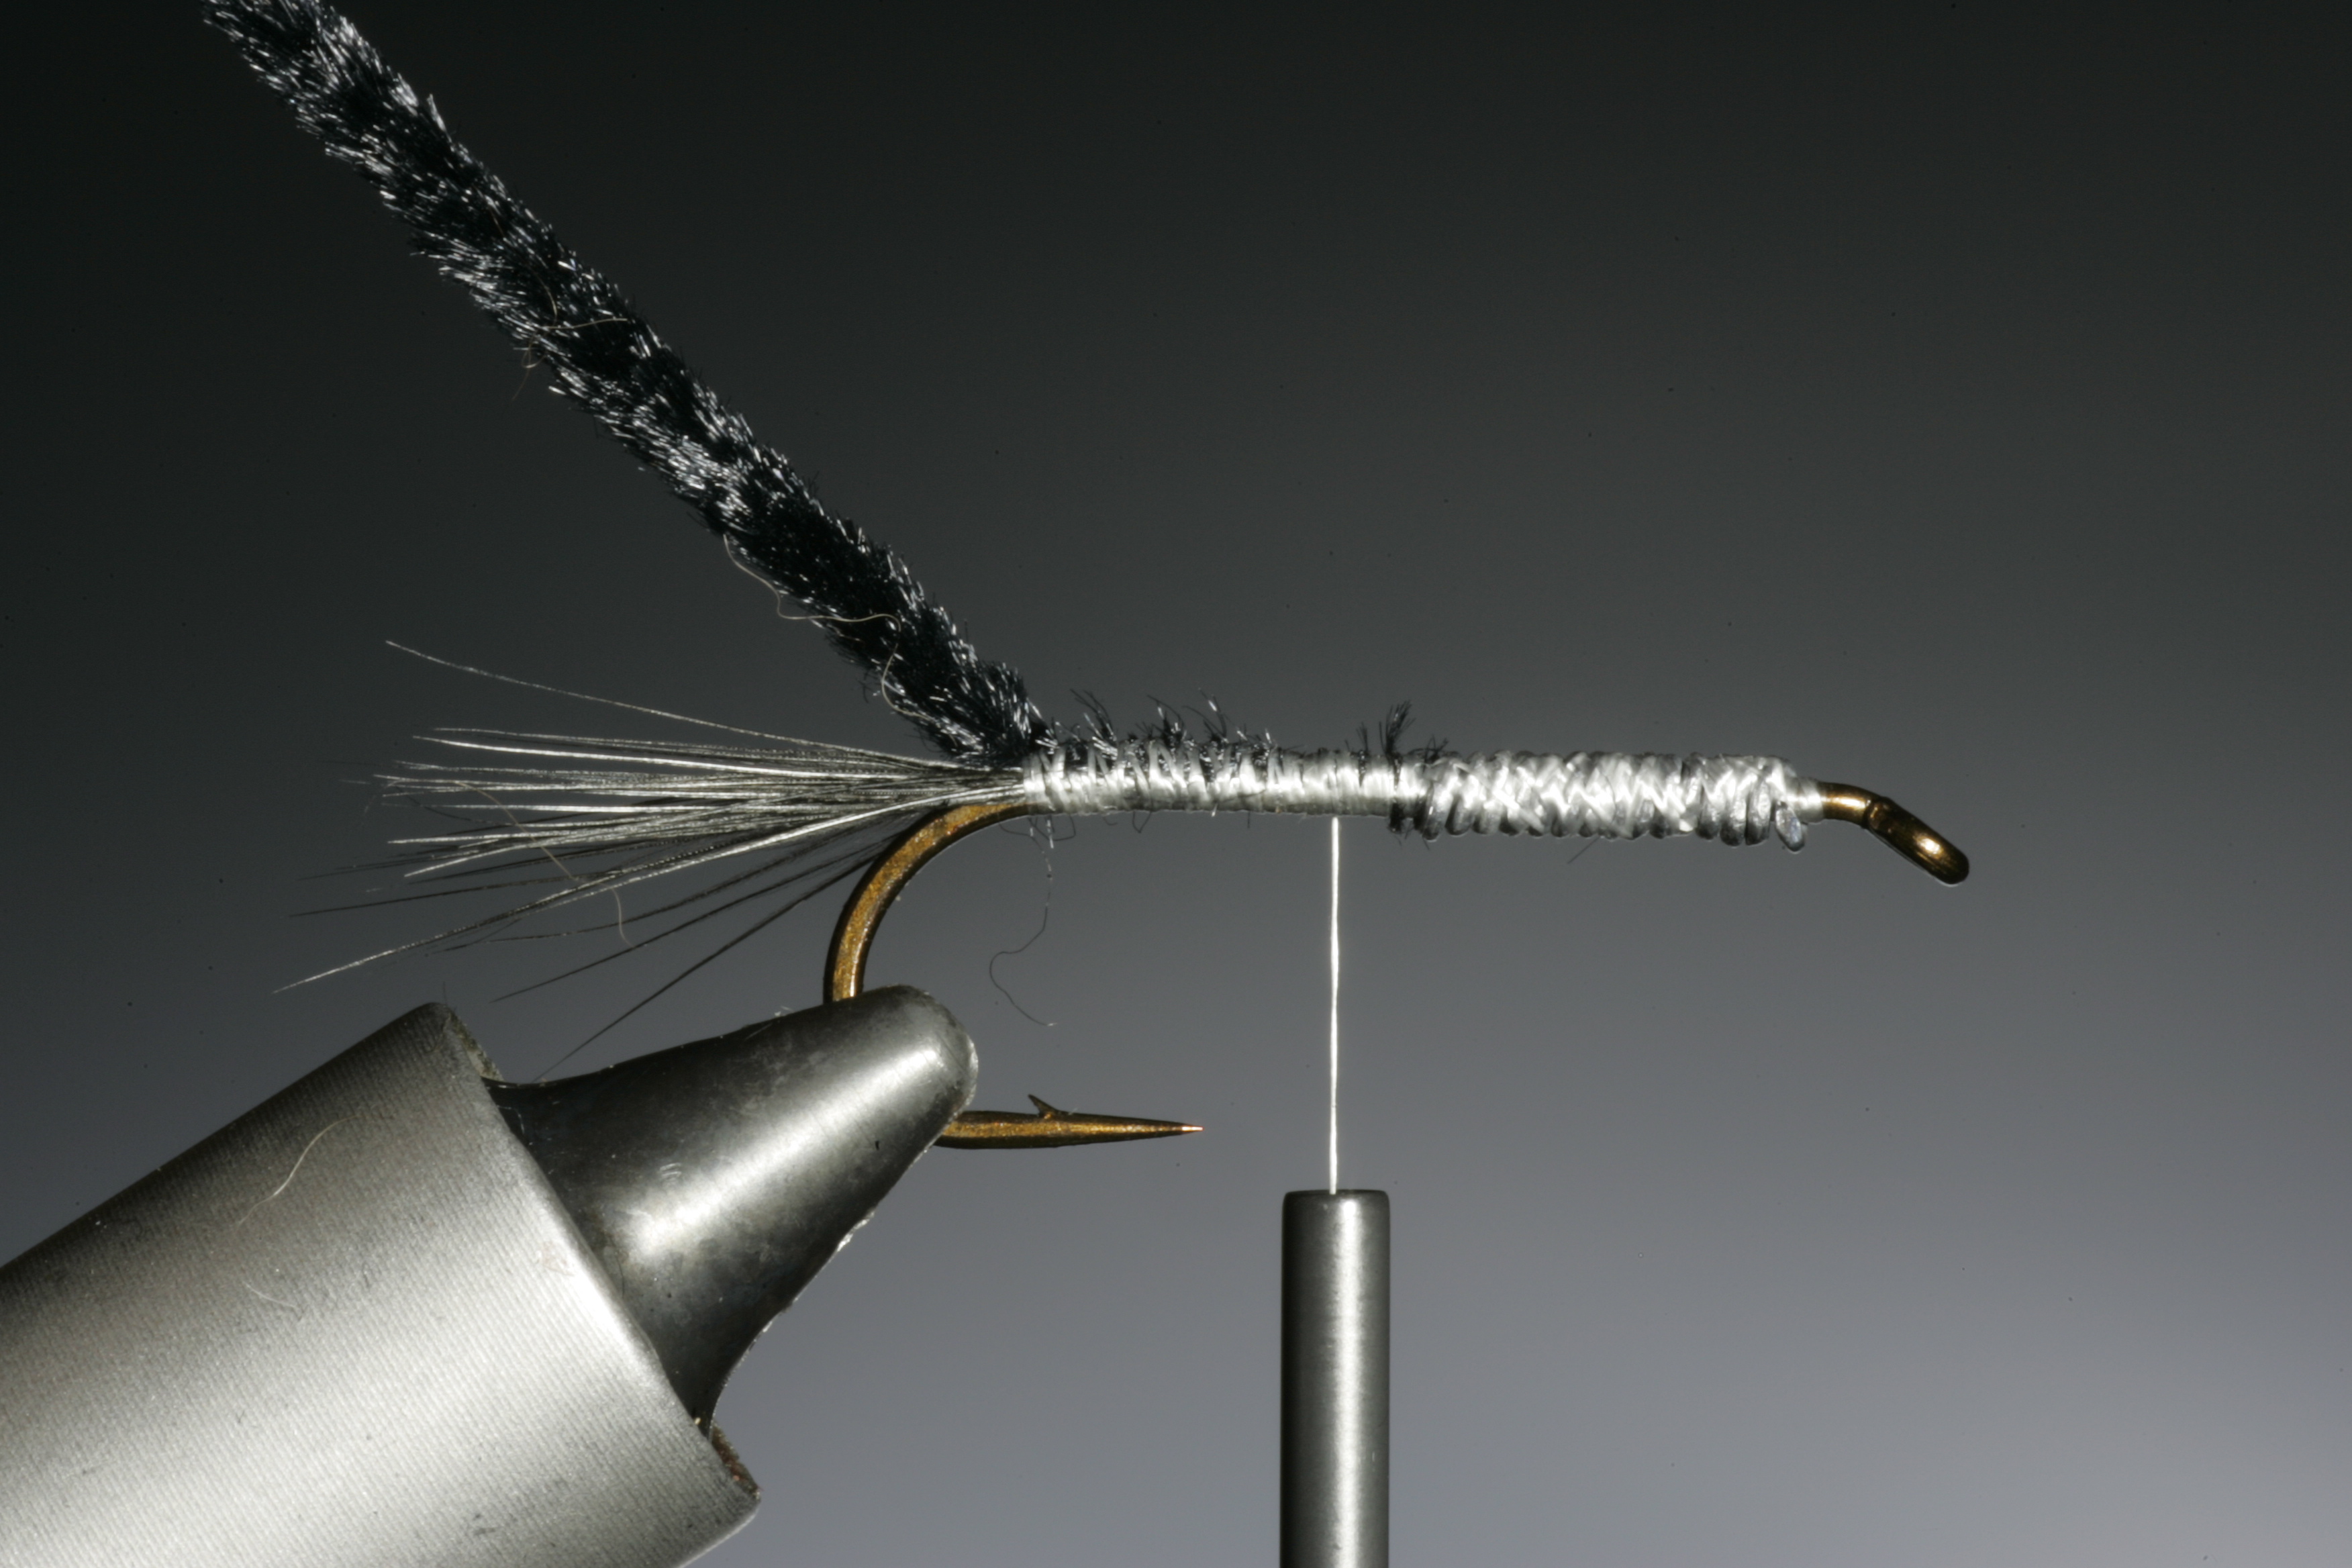
Cut a 10 cm length or a little longer if its easier for your to handle and tie this in along the hook shank from the lead wire to the tail base.
4
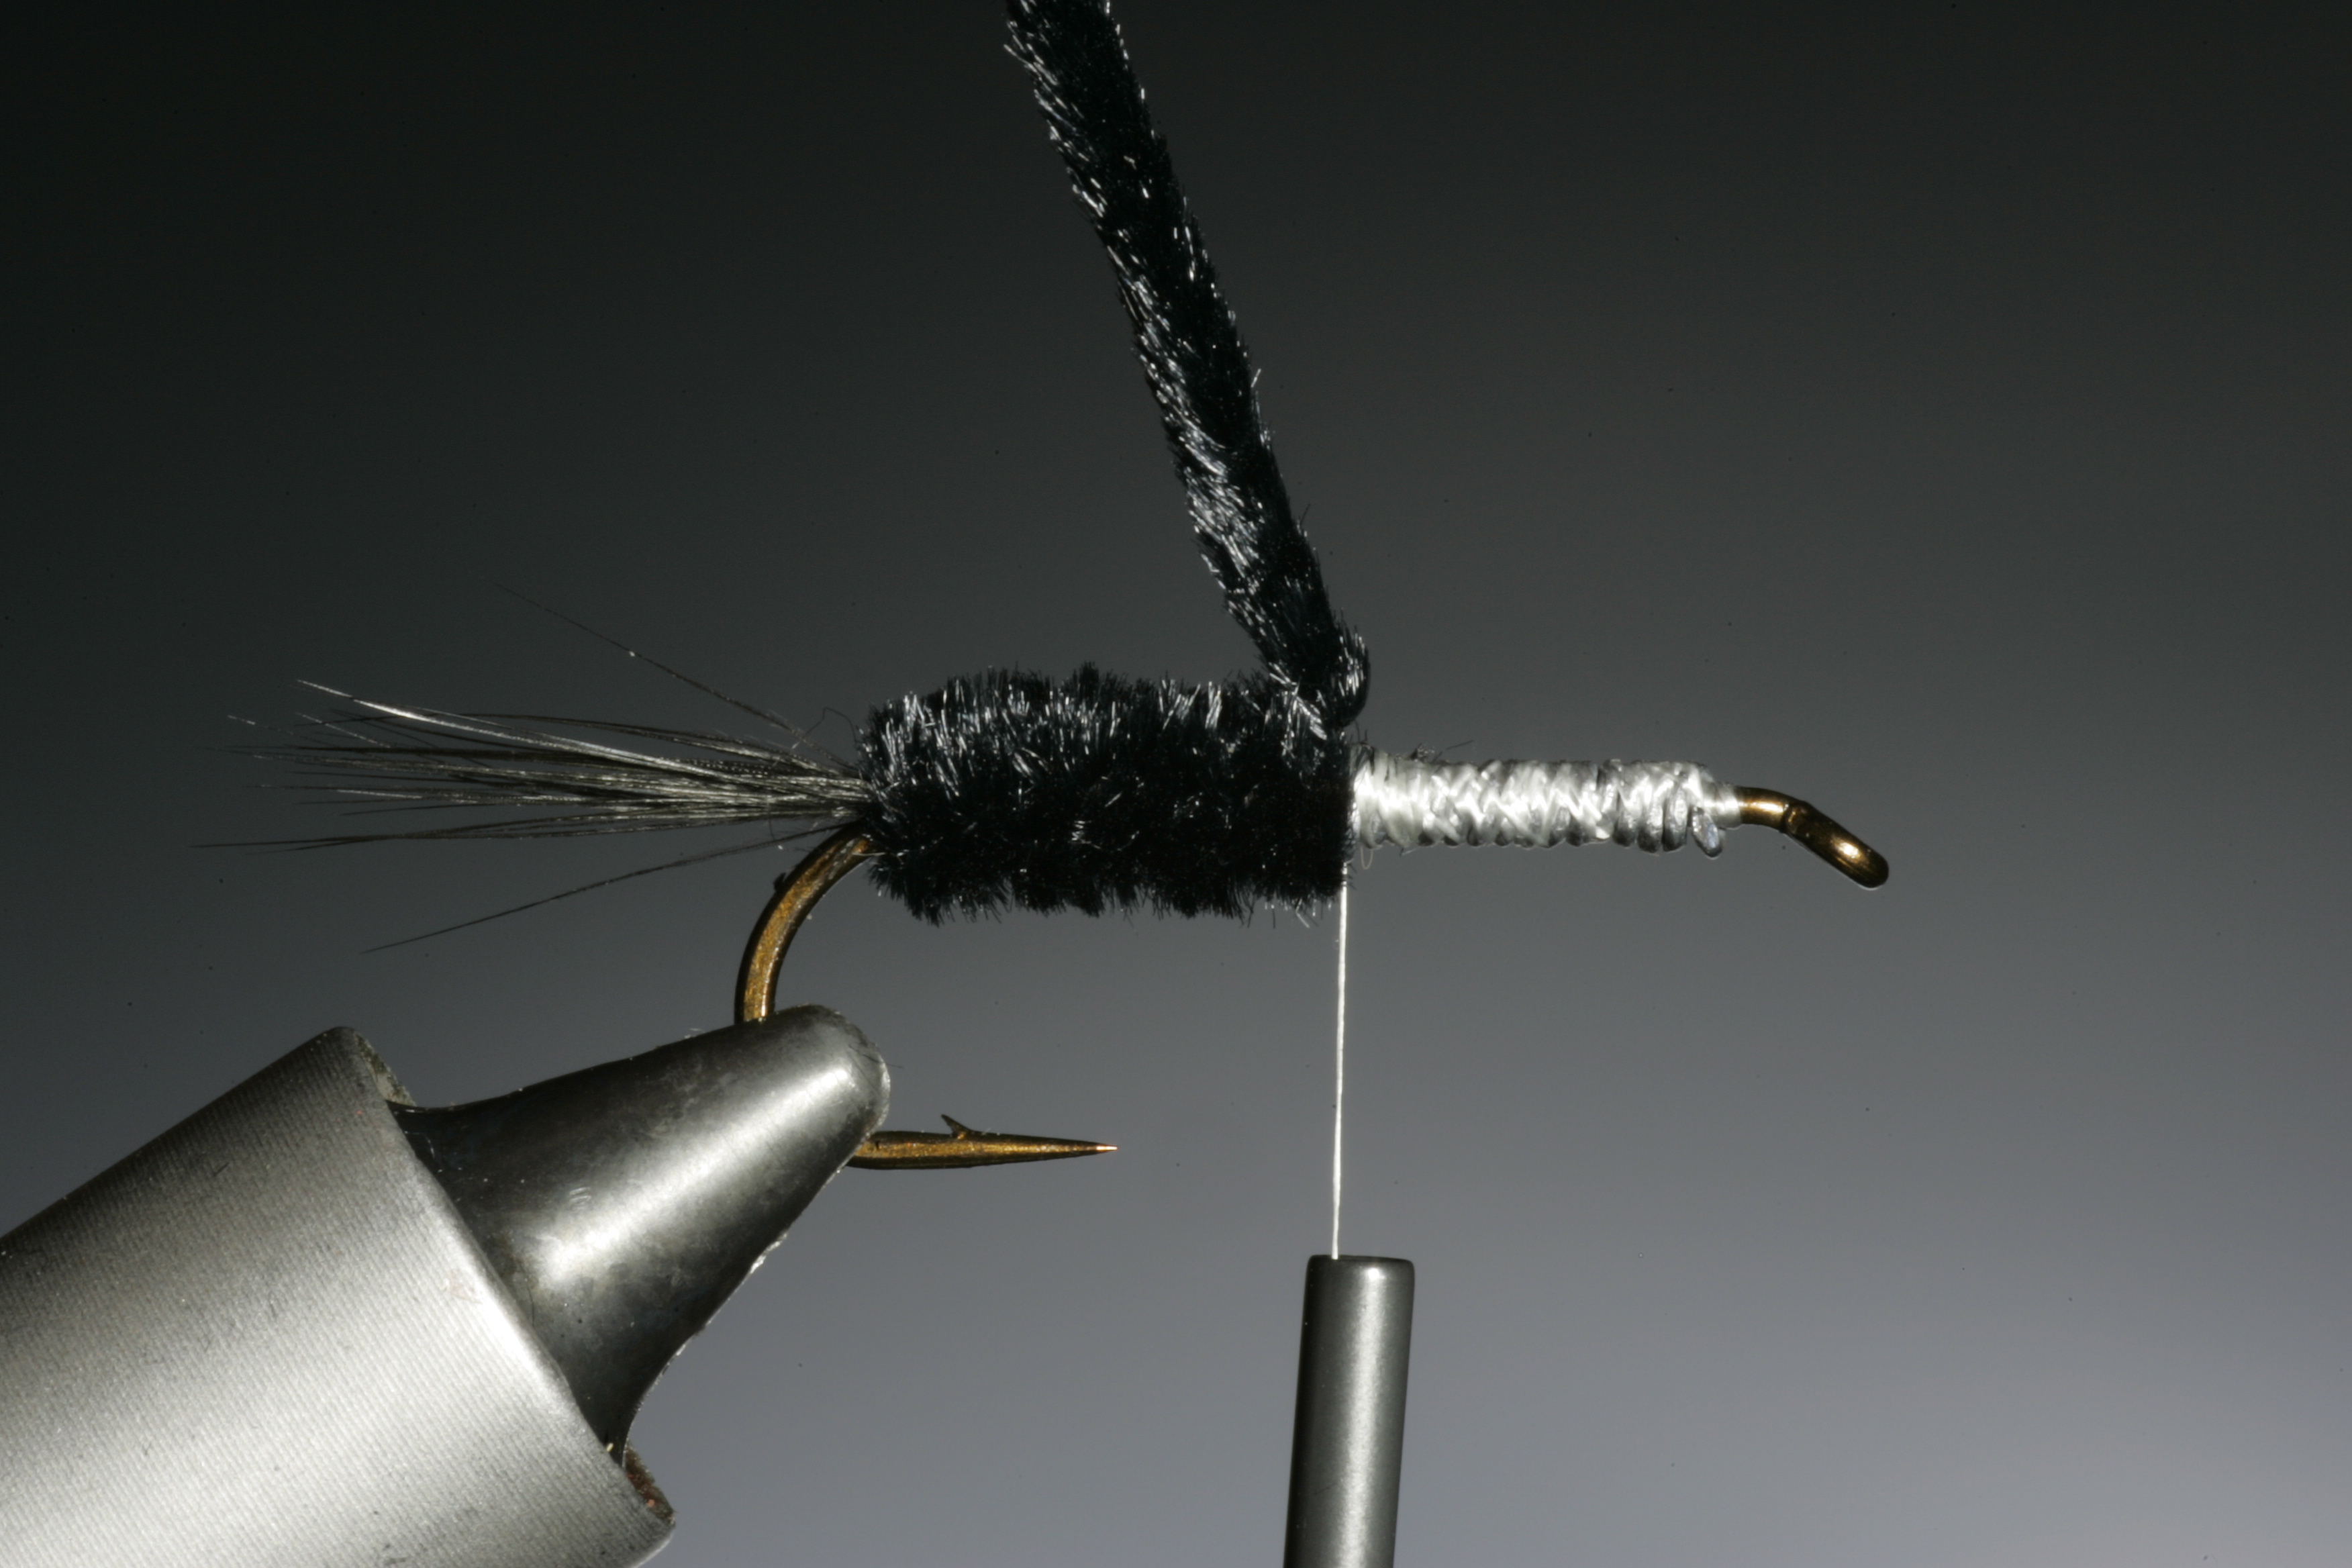
Now wind on the chenille, about 5 or 6 tight even turns until you cover half the hook shank. Then tie down the chenille with 2 or 3 turns of tying thread.
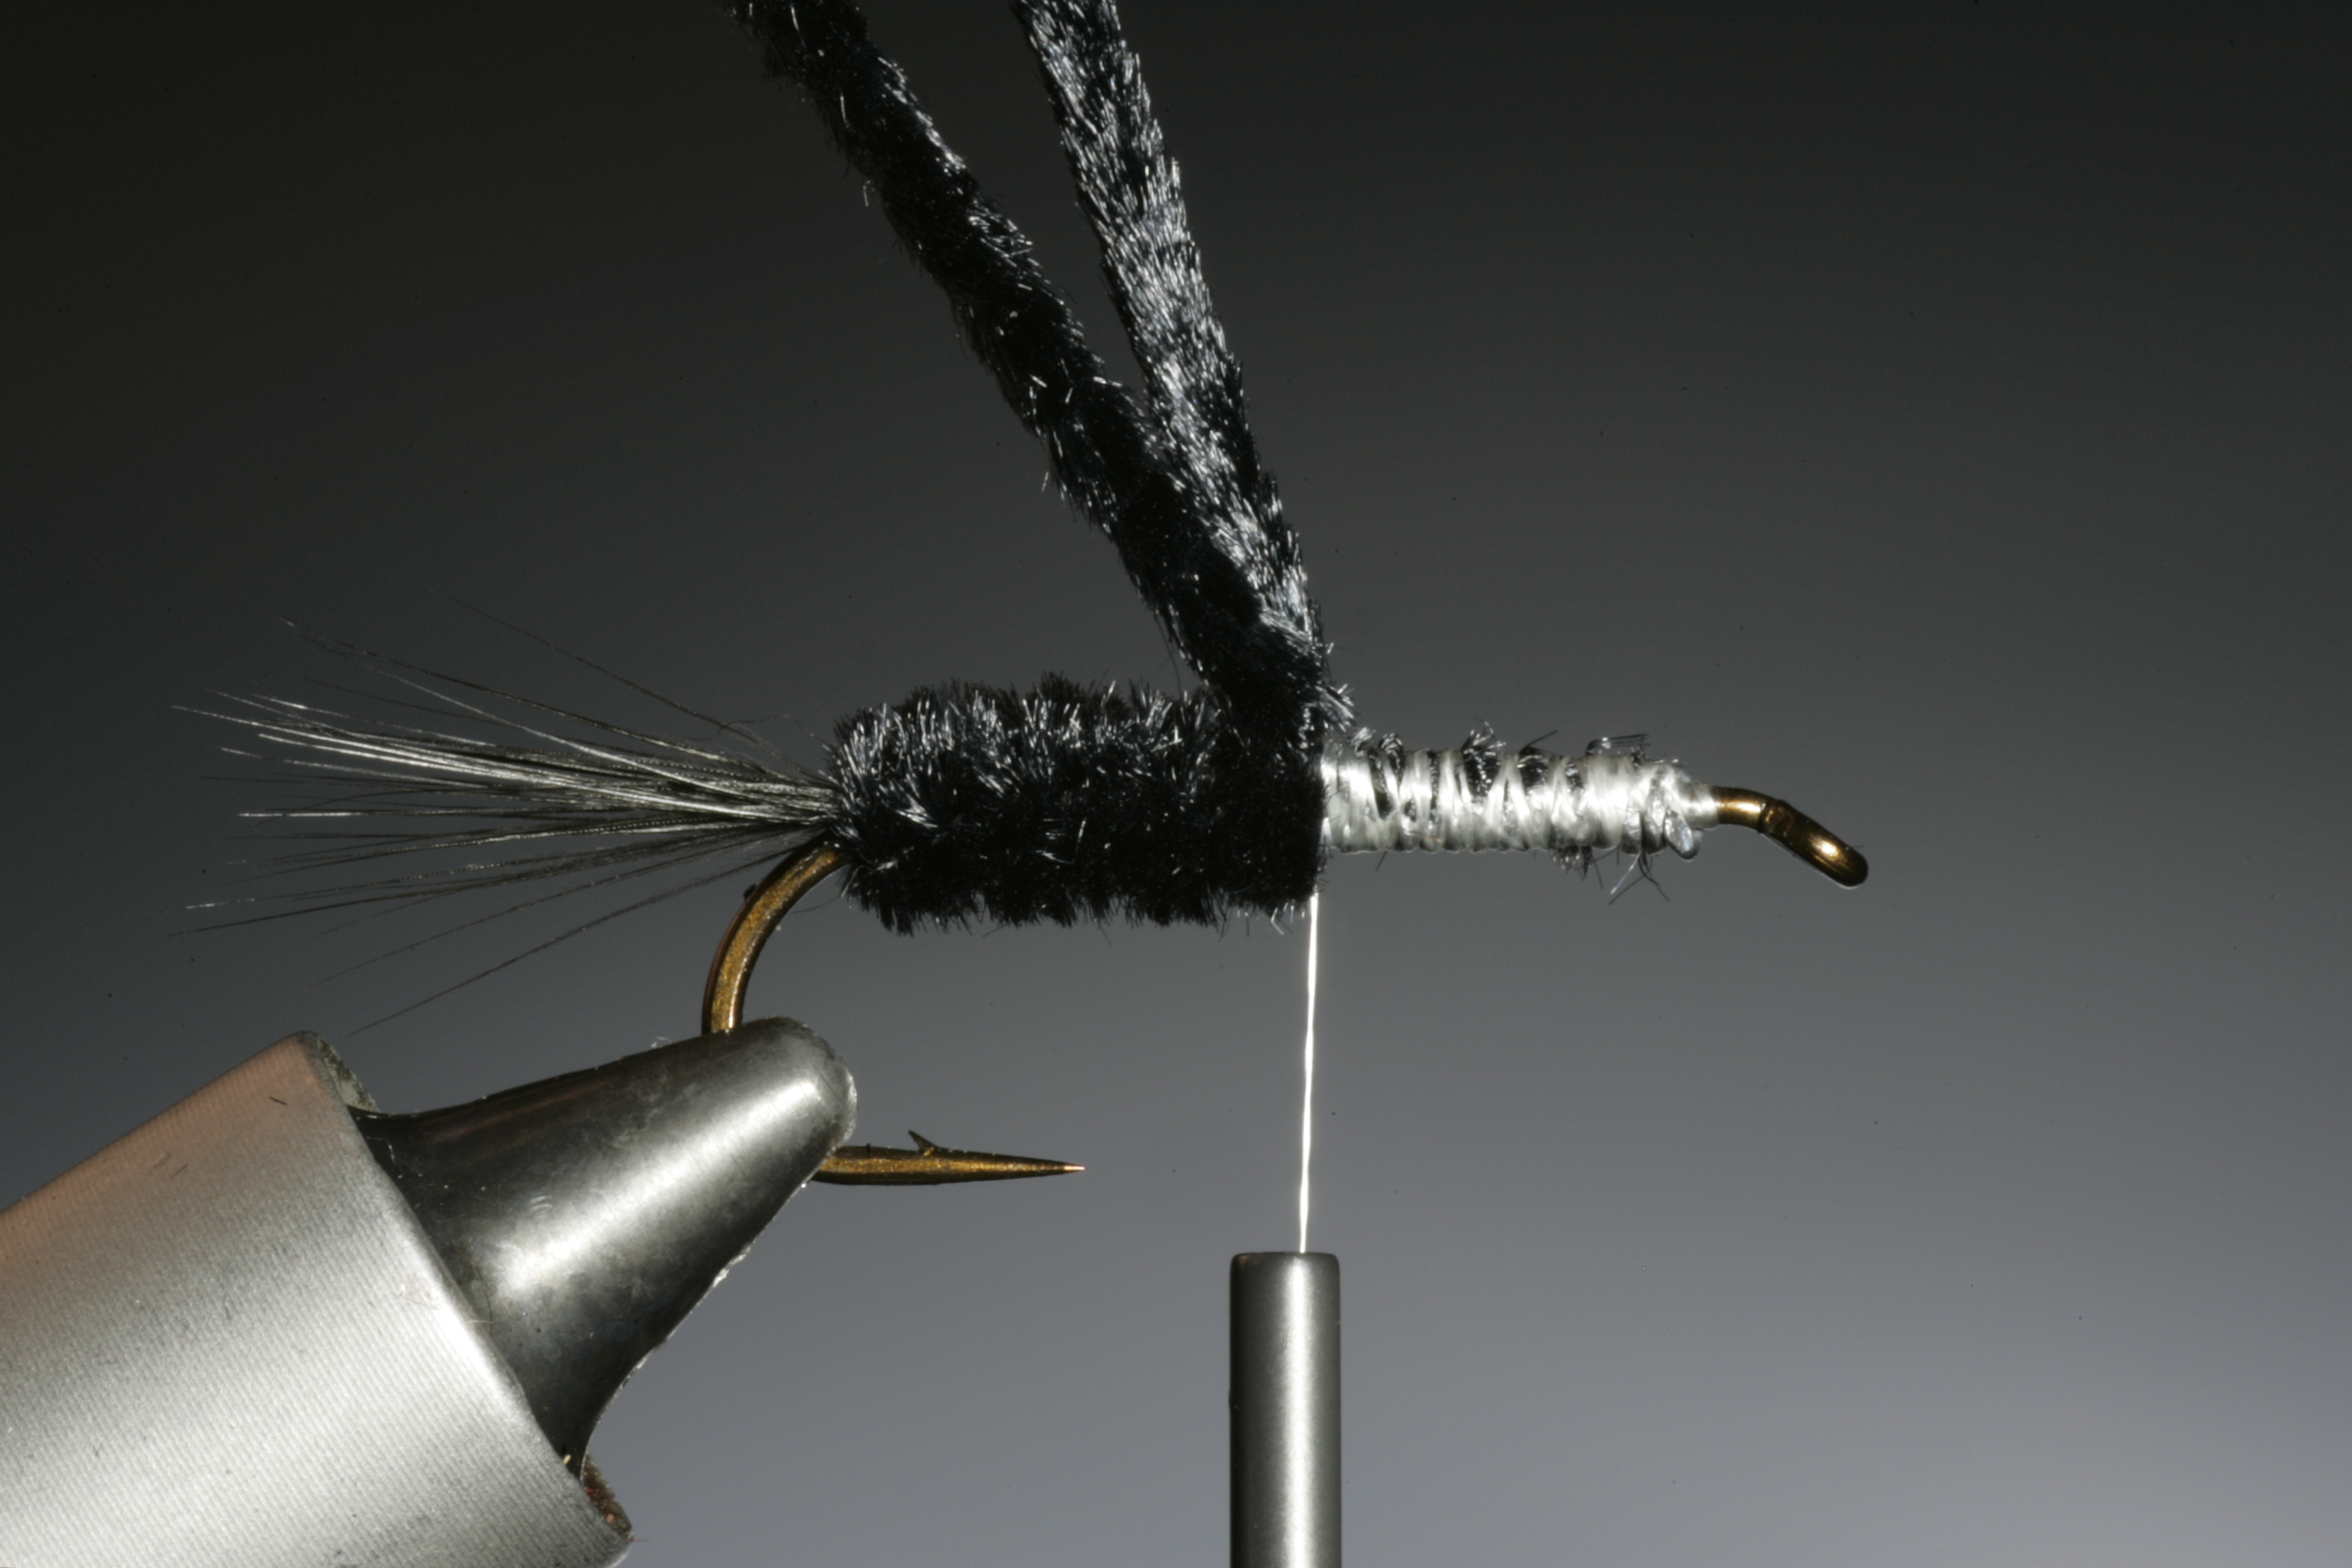
5
Dont cut off the length of chenille remaining. Take the loose end and tie it down tight into the other end of the chenille on top of the hook shank. Dont worry if the loop of chenille is large, it will be trimmed later,
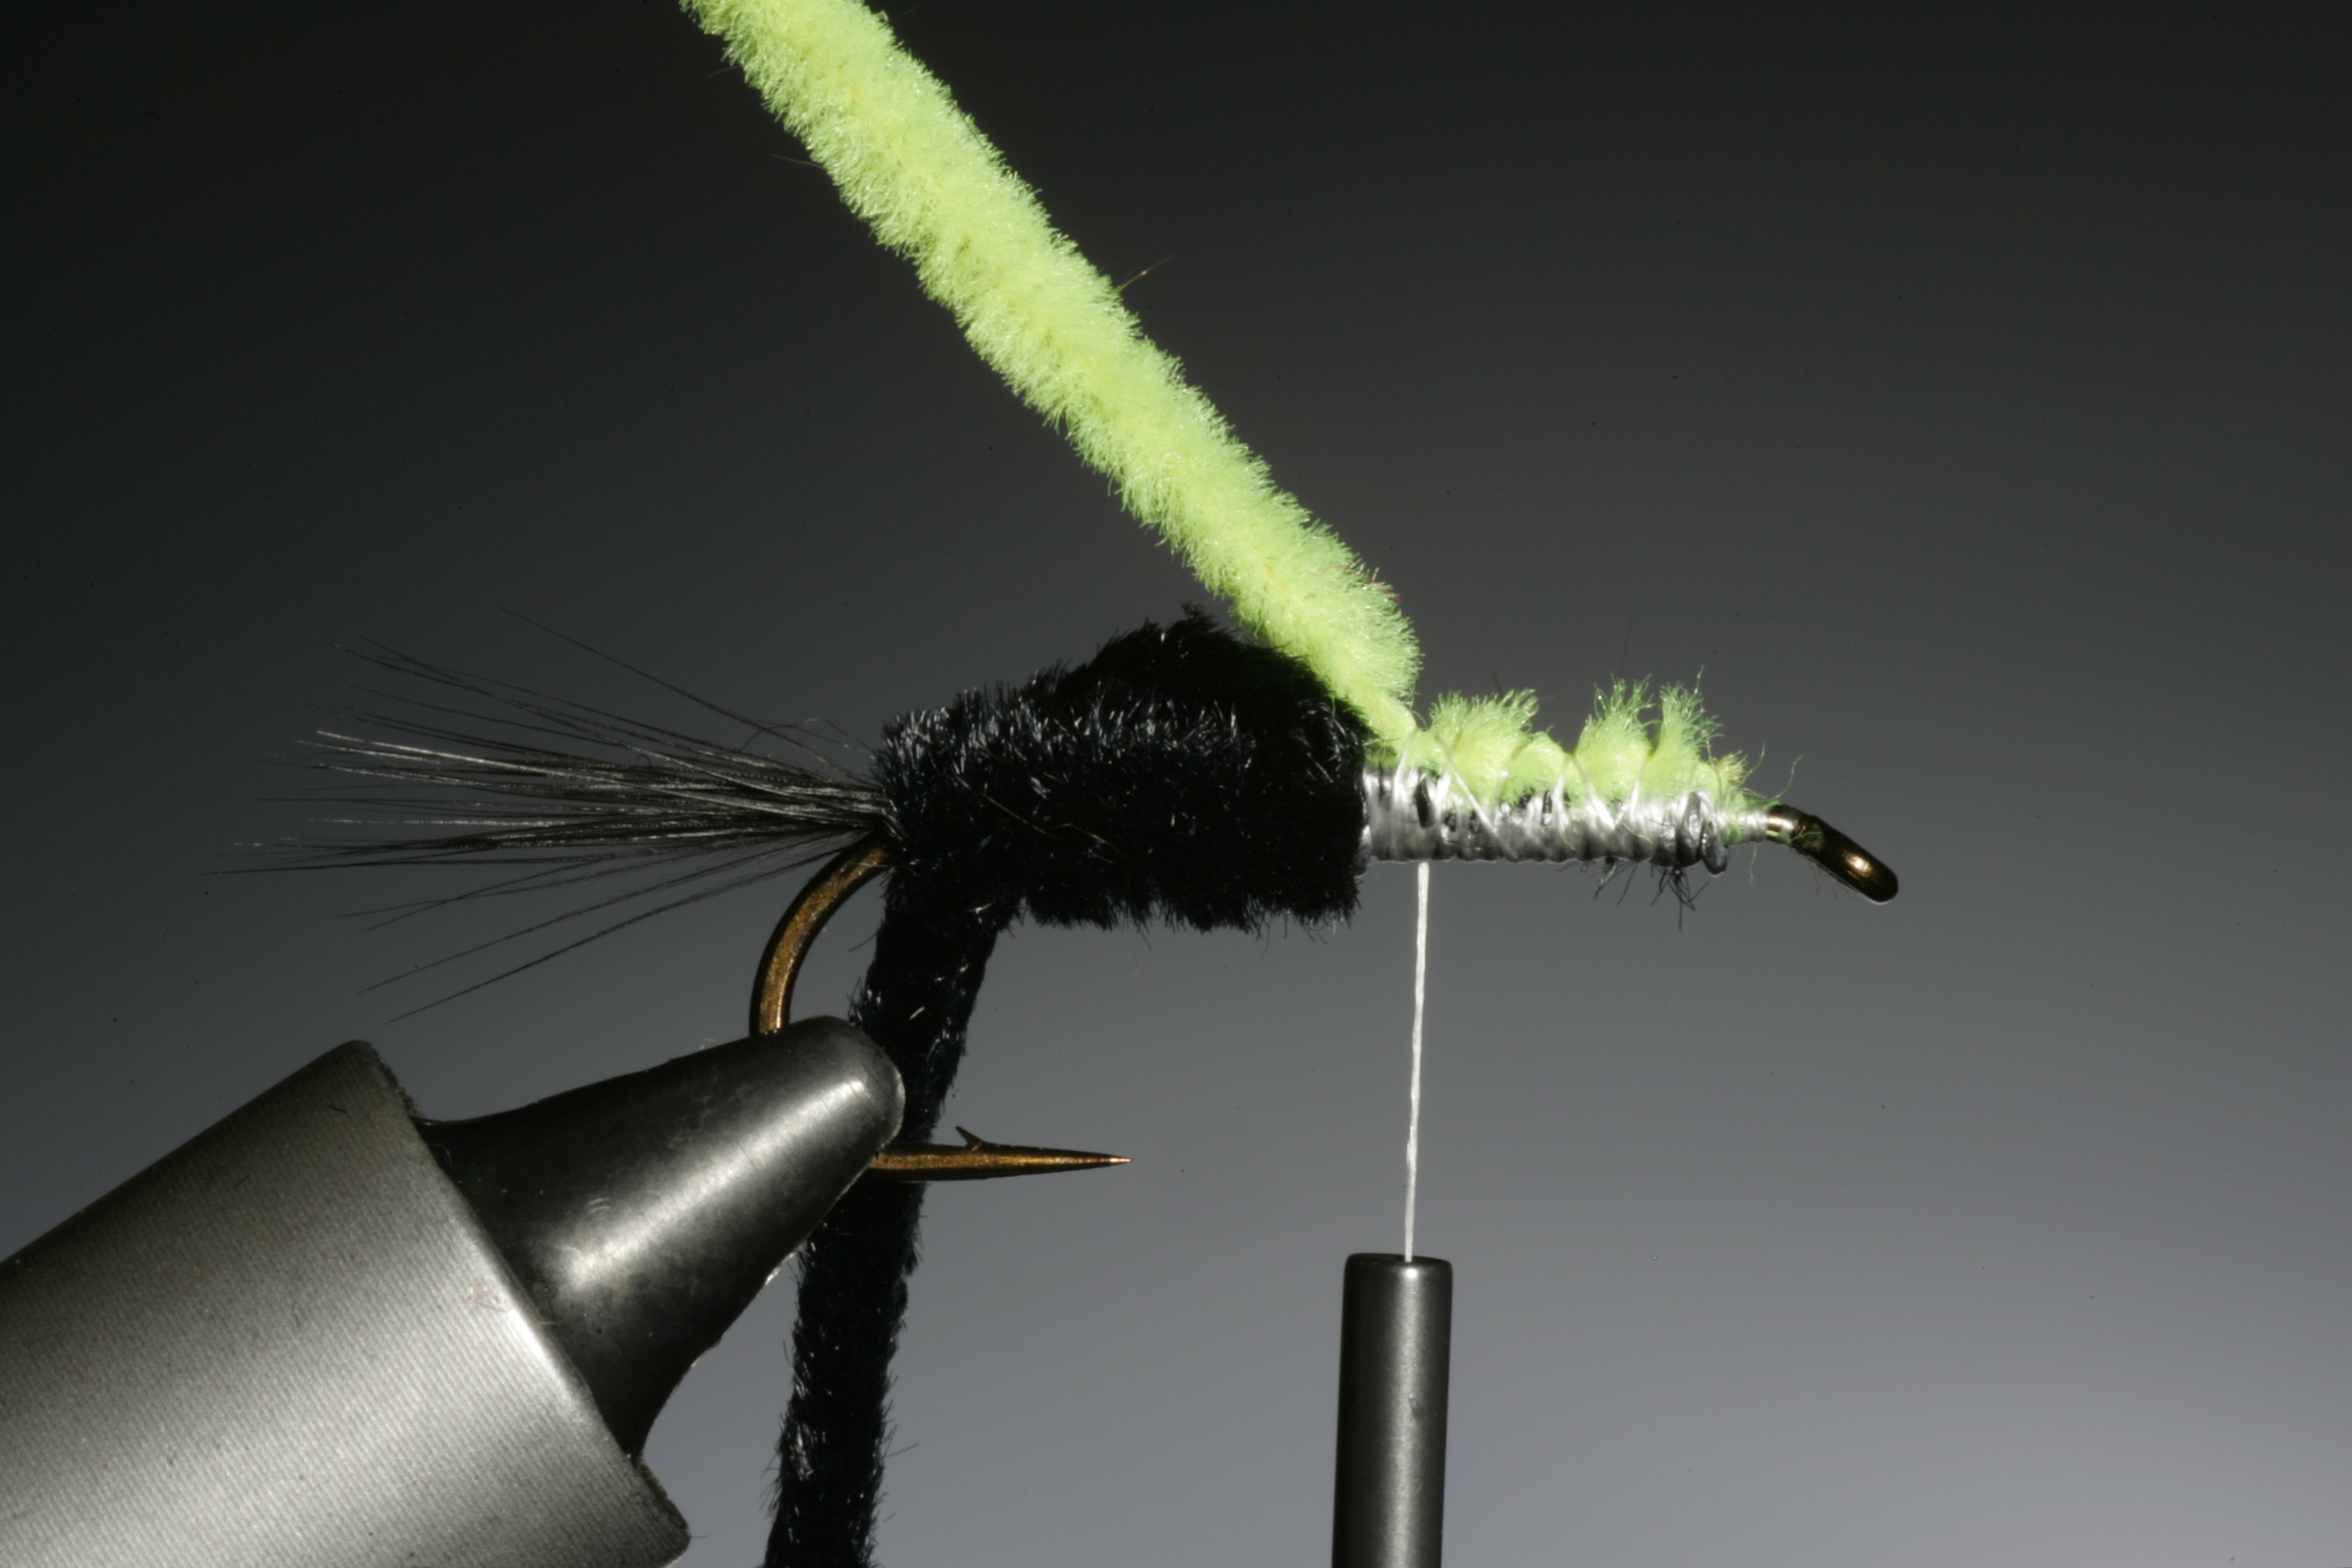
6
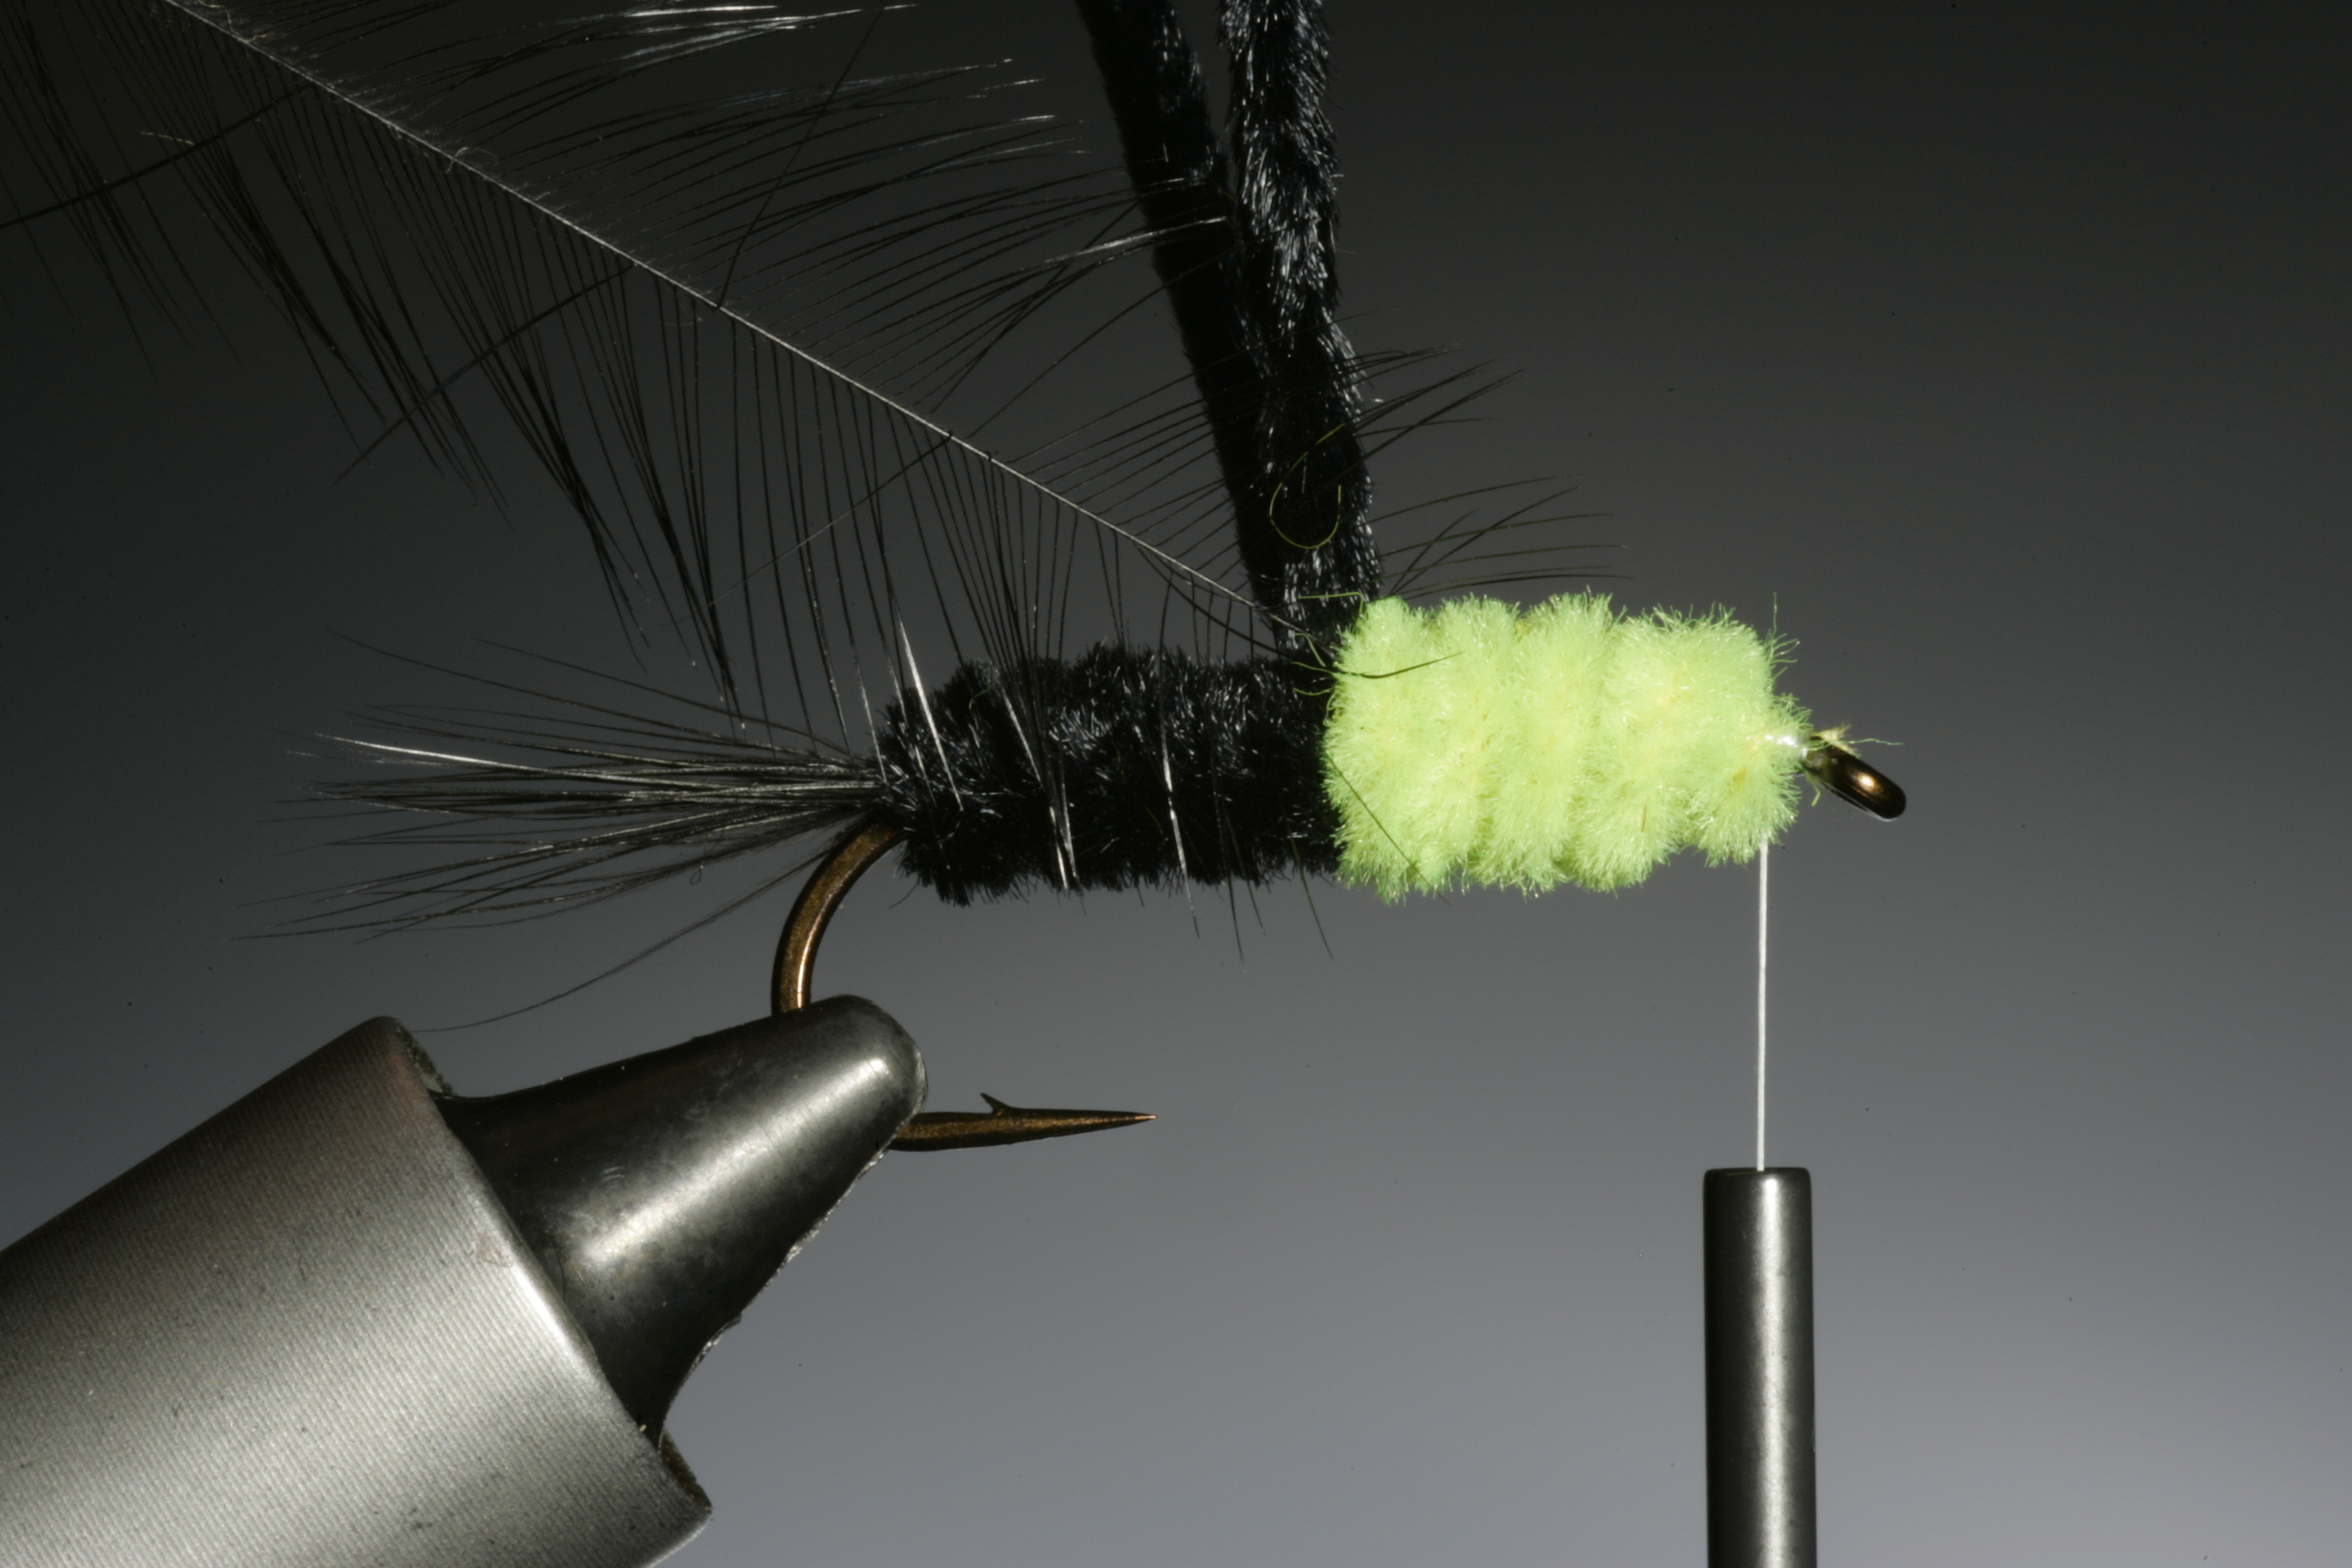
Cut a short length of green chenille and tie this in on top of the lead wire. Finishing close into the black chenille.
7
Before you start winding the chenille tie in a cock hackle by the point again over the lead.
8
Now wind on the green chenille in tight even turns towards the hook eye.
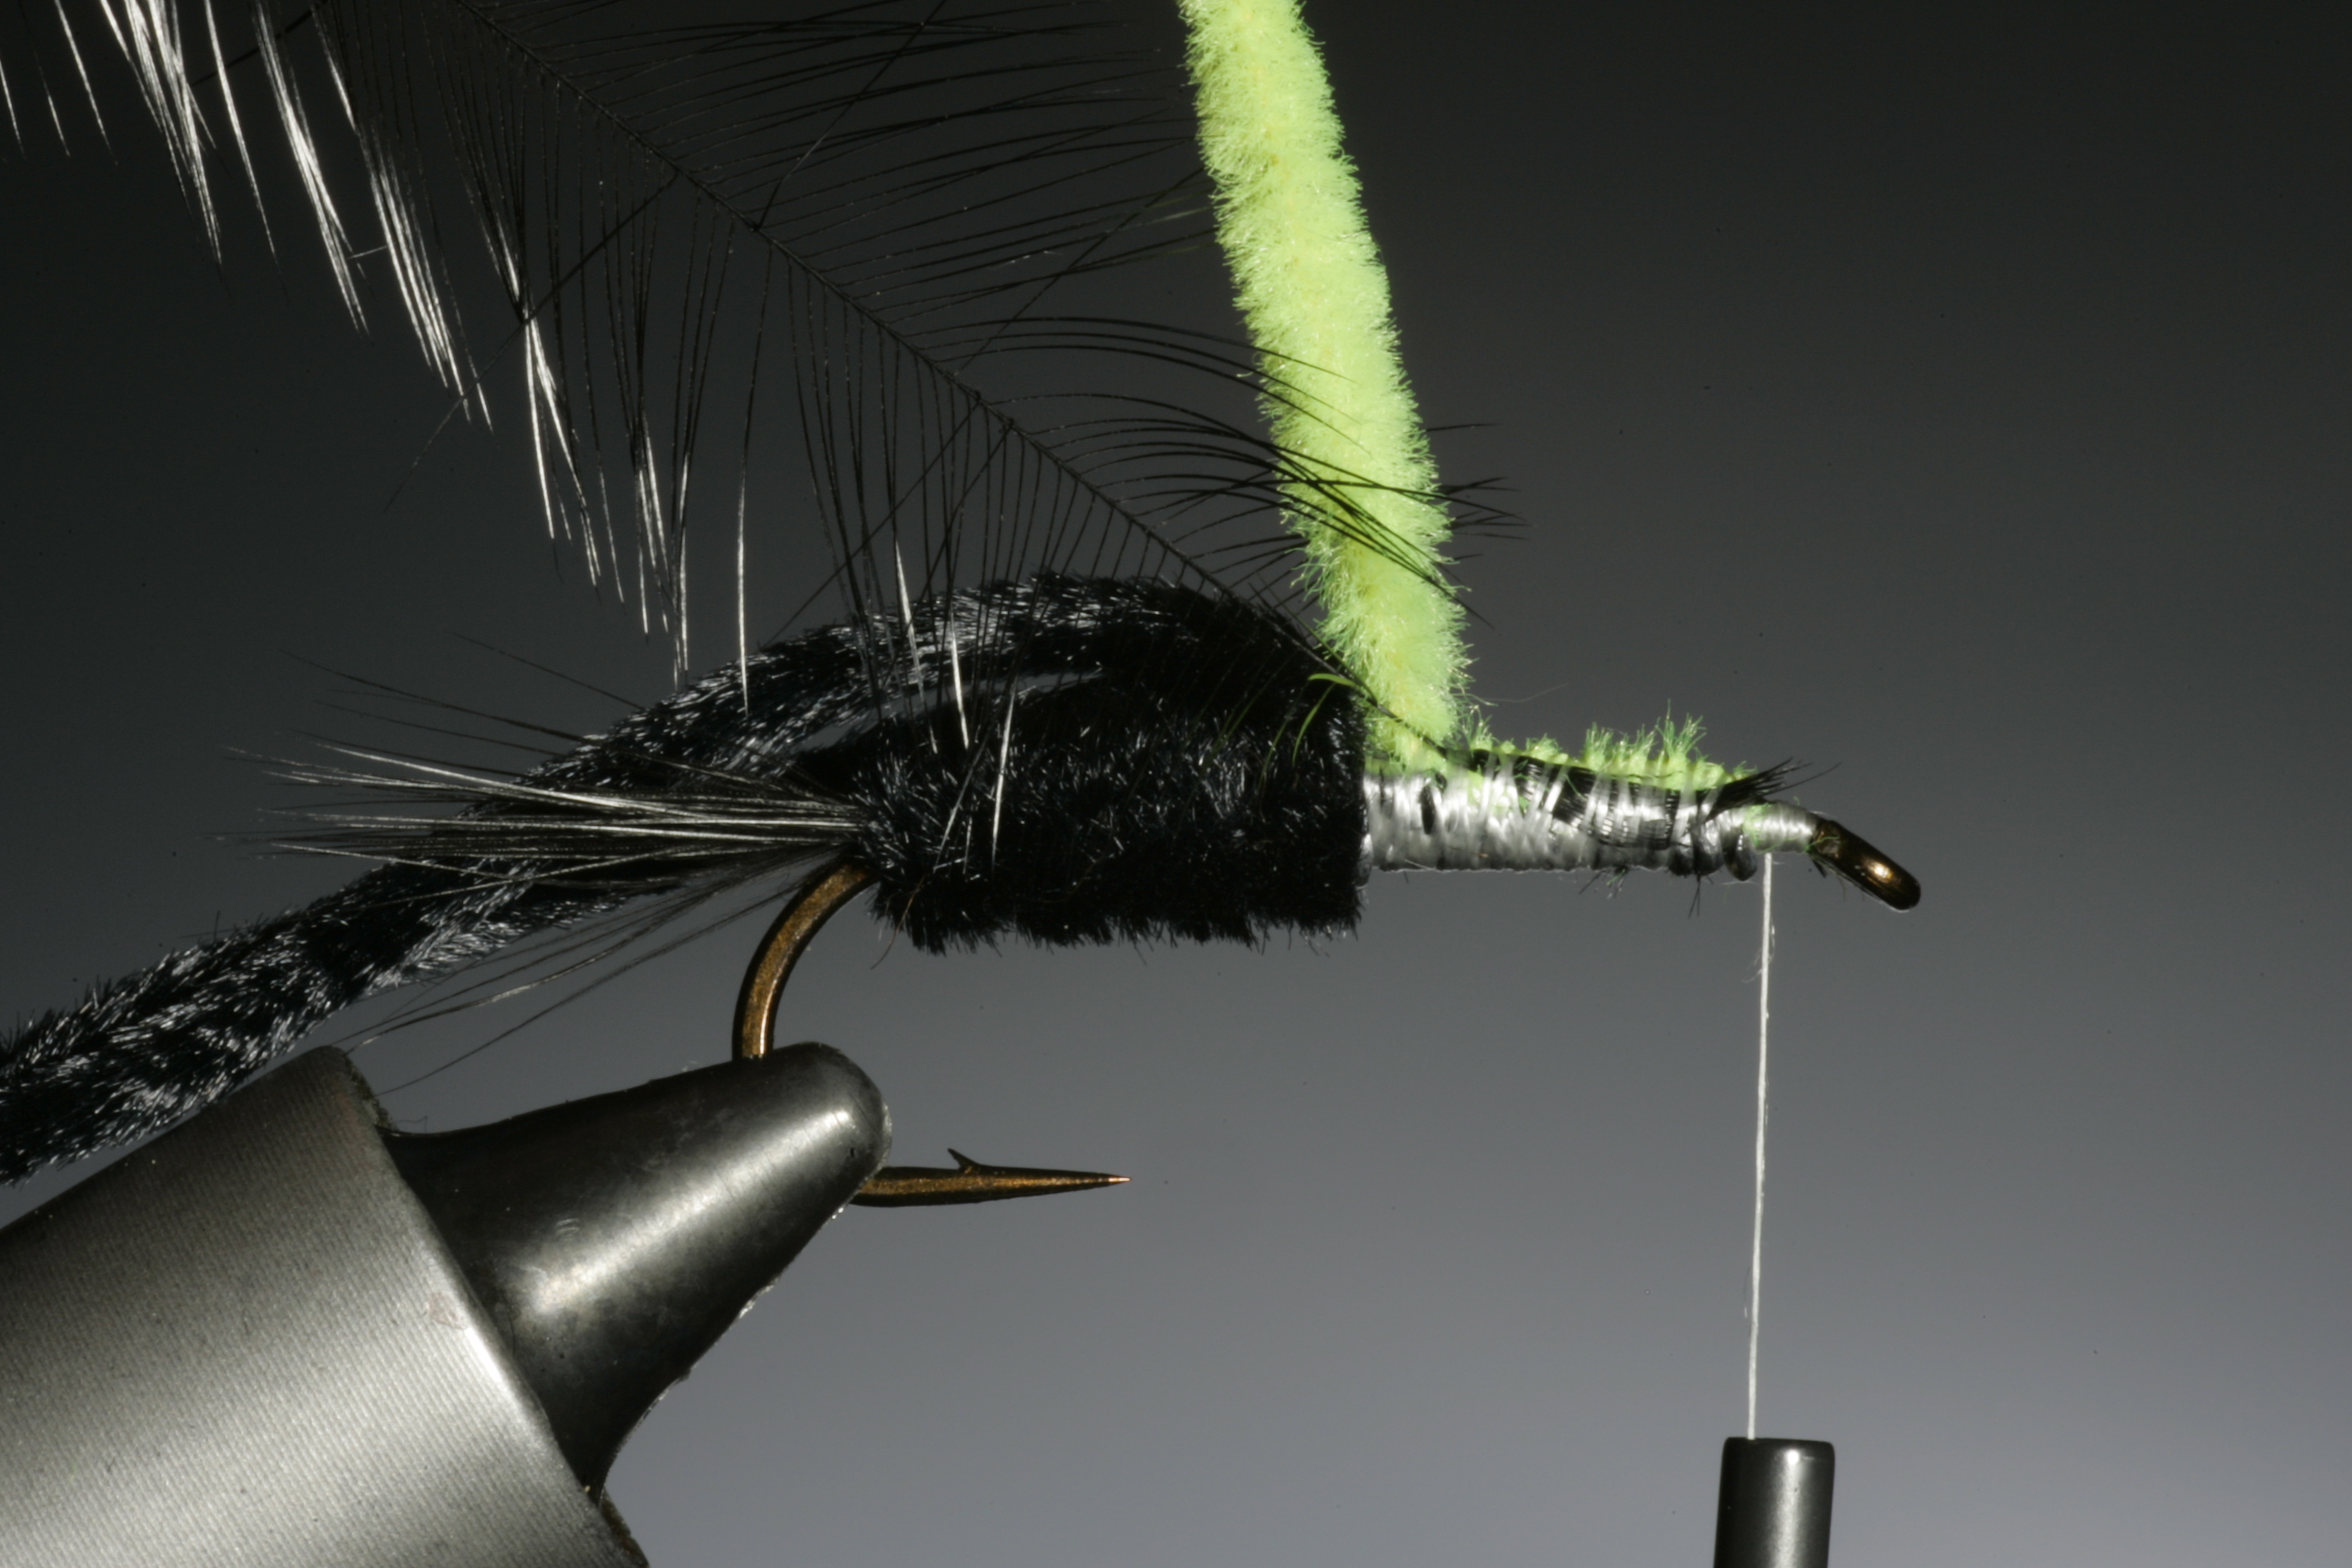
9
Wind on the chenille and tie off, but leave enough room behind the hook eye to finish the fly.

10
Once you have tied off the chenille take the hackle and attach a hackle plier and wind it in between the turns of green chenille. Make sure that the hackle fibers are pointing backwards. If done correctly you will see that it falls perfectly in place with each turn.
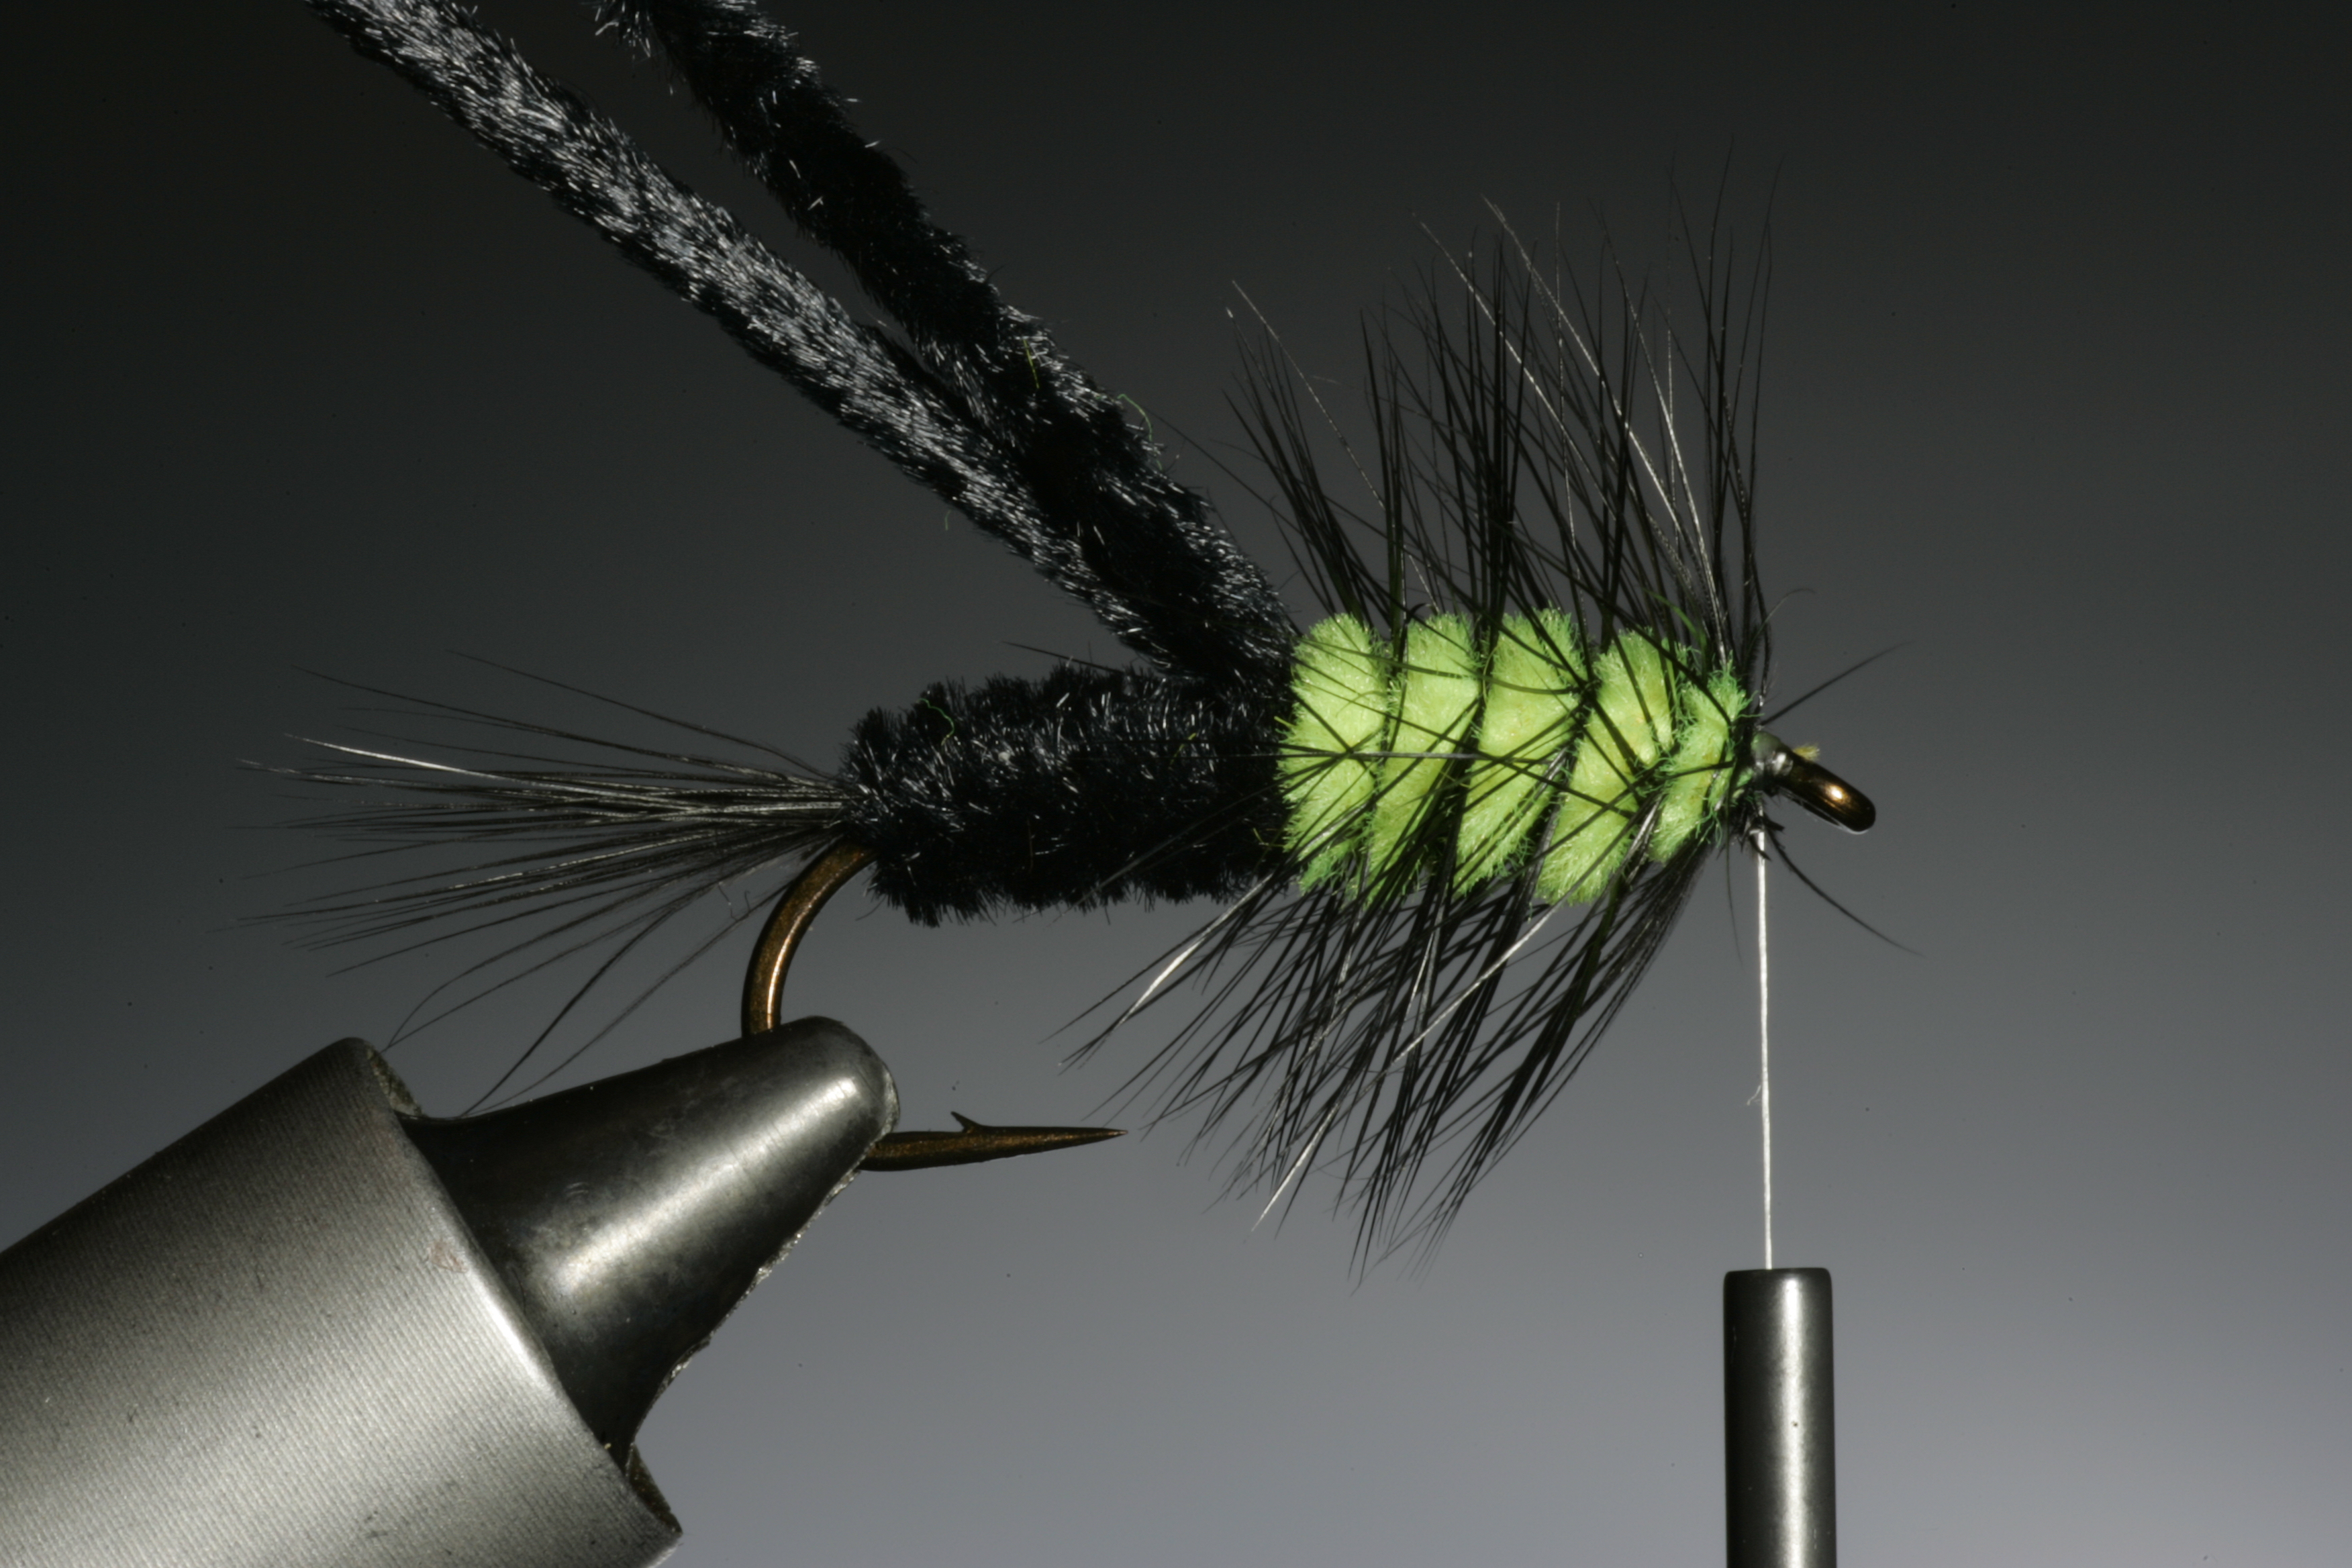
11
When you come to the hook eye, tie off the hackle and cut off the excess.
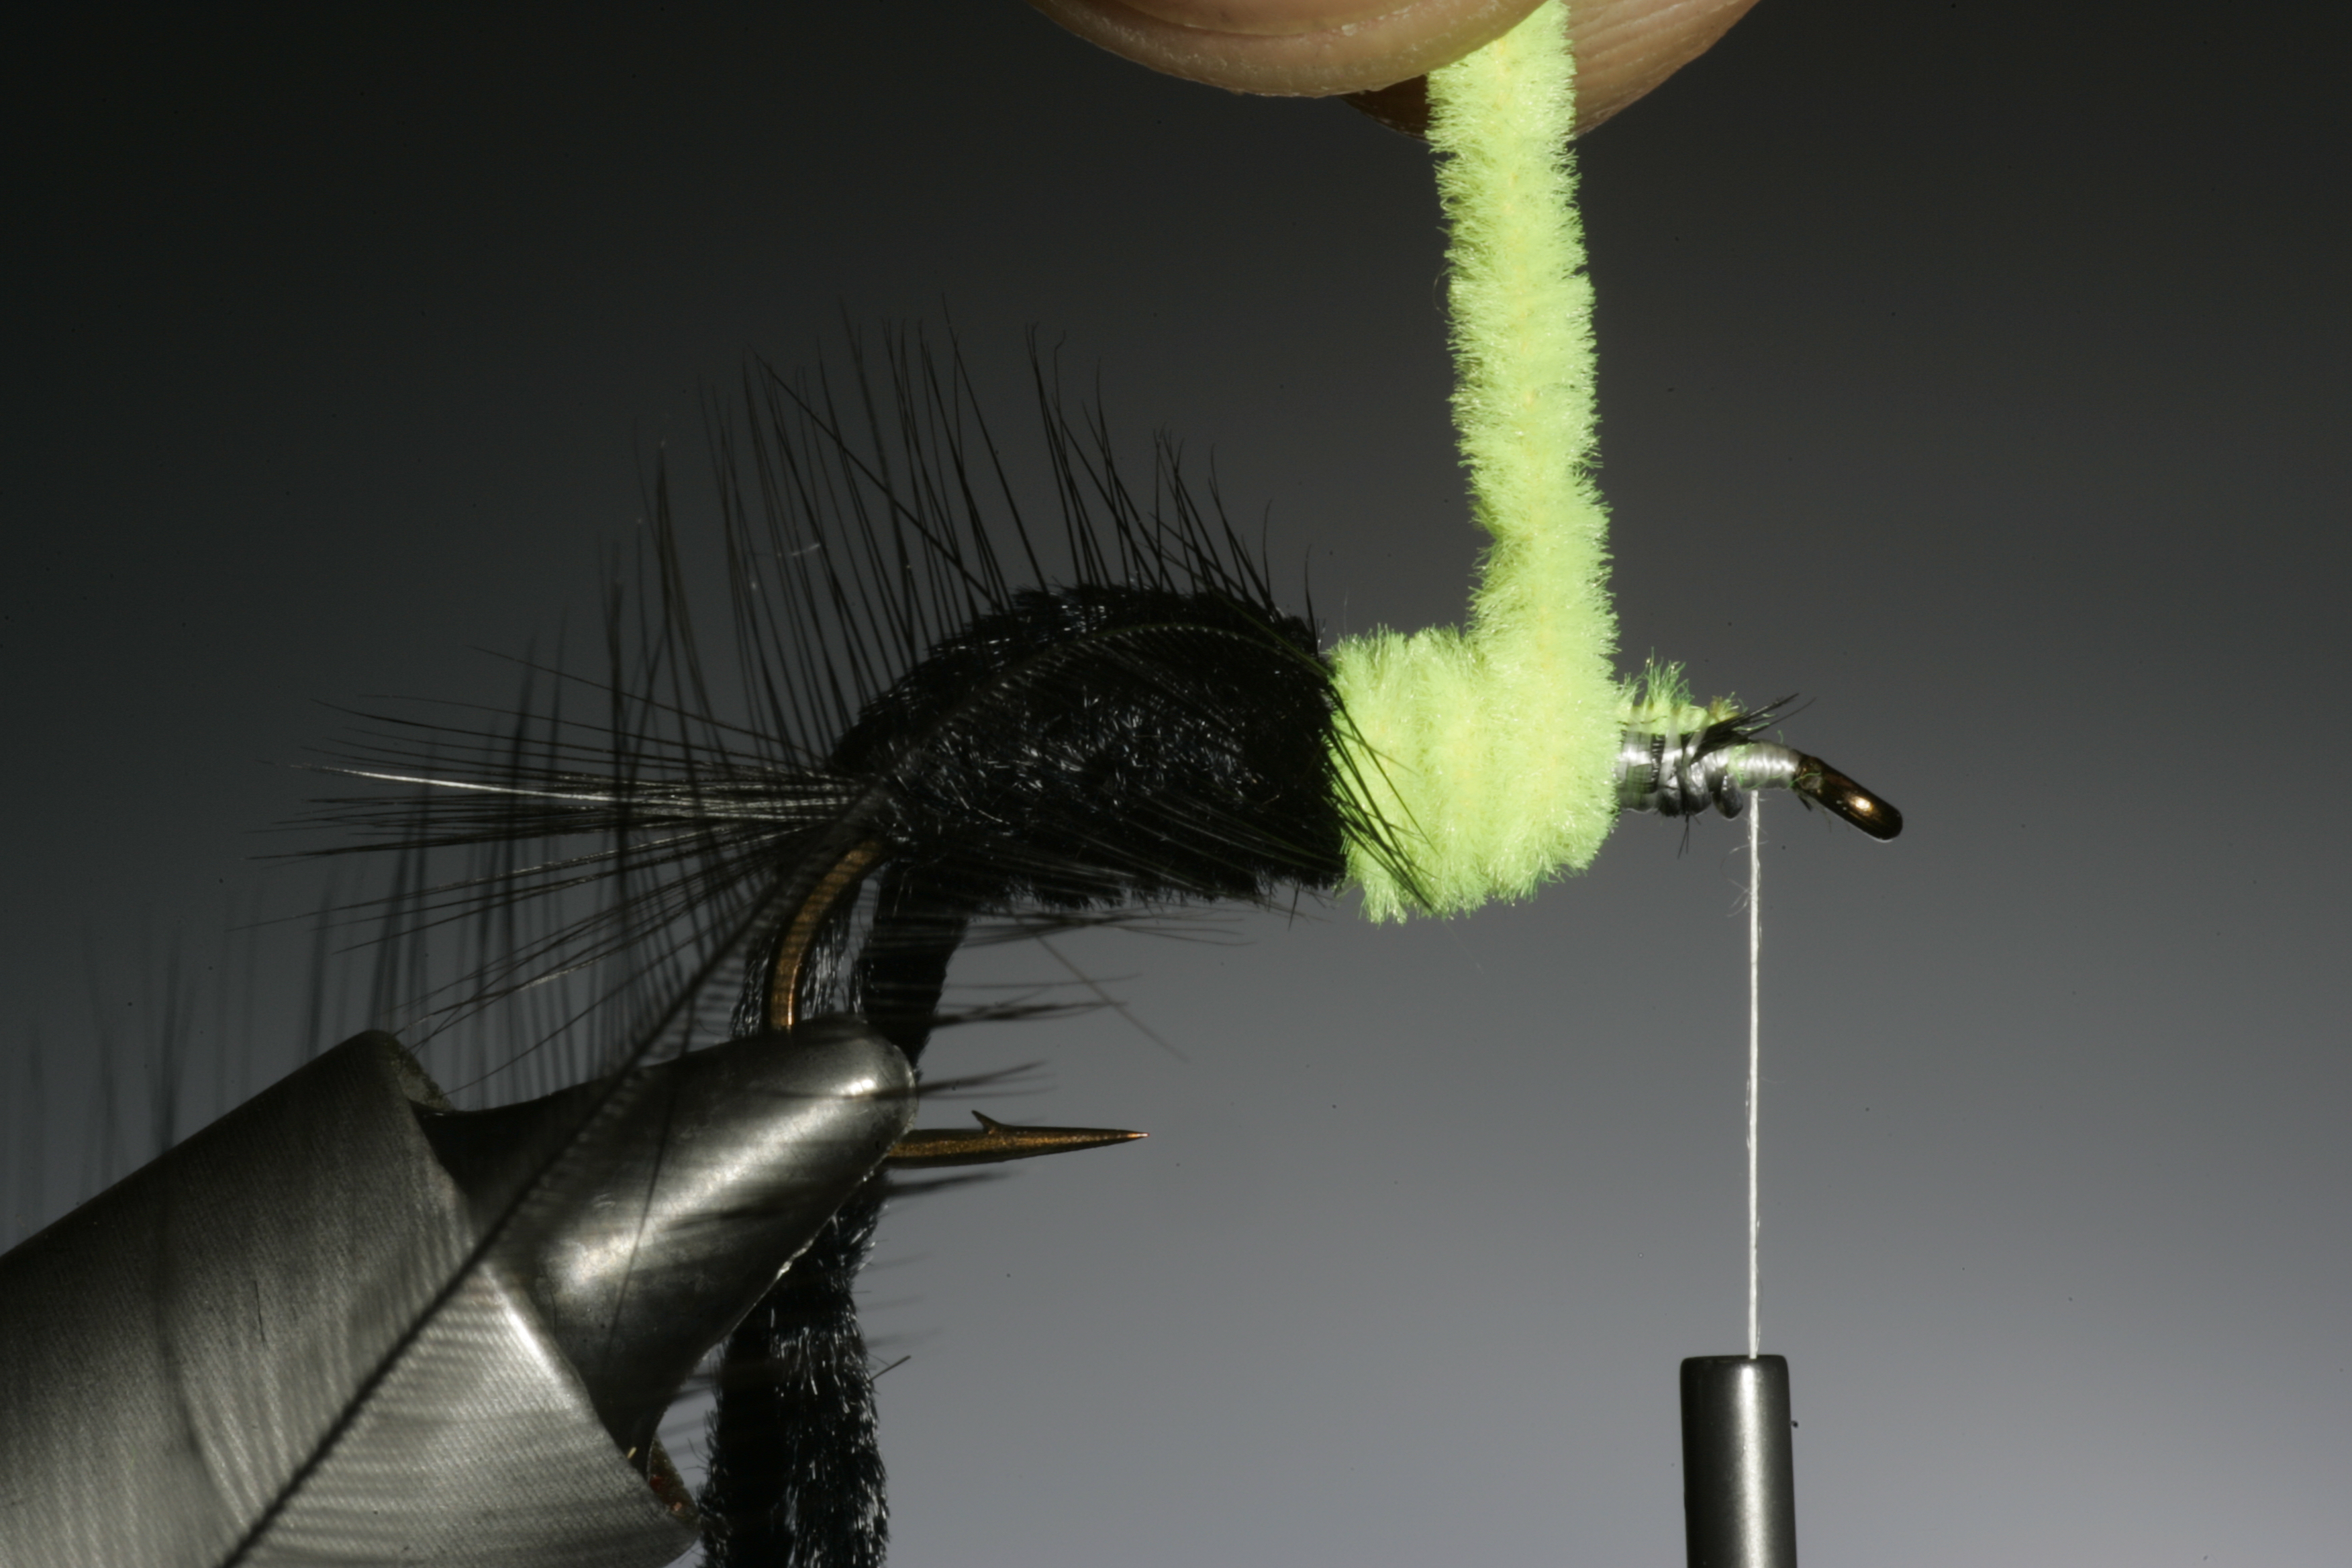
12
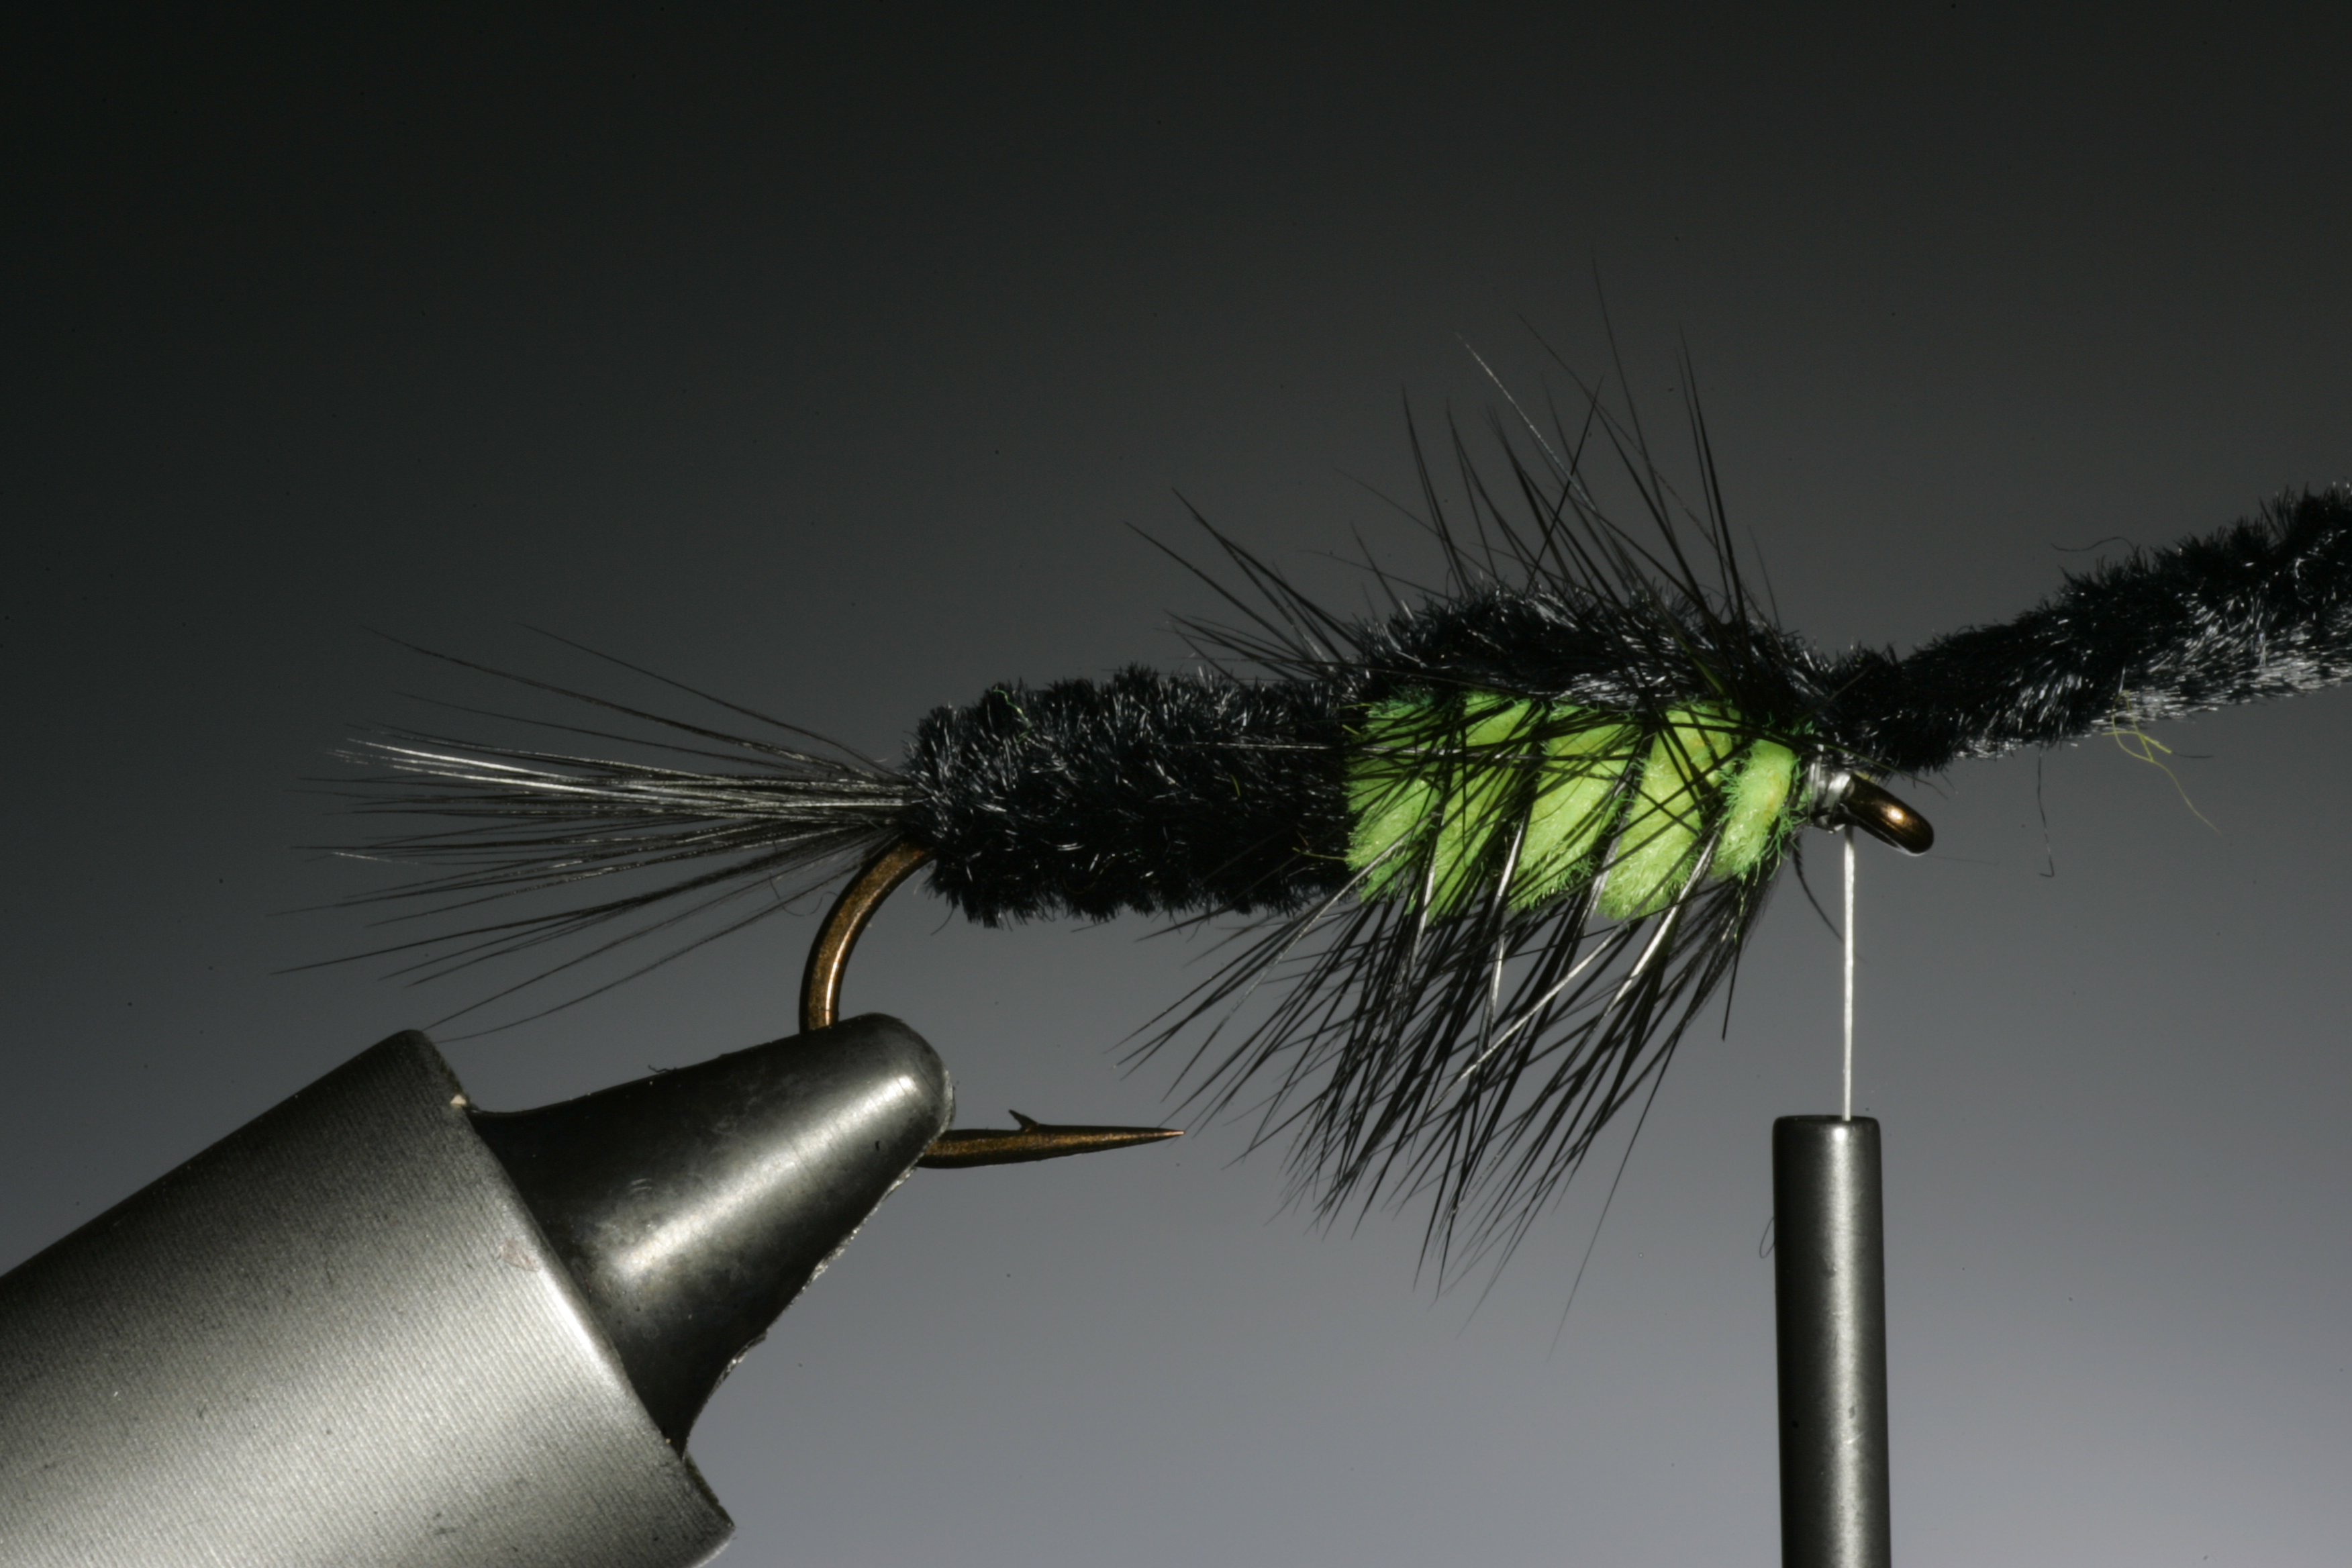
Now to the black chenille loop. Take the loop in your right hand and pull it over the thorax of the nymph to form the wing case. Tie down with 2 or 3 turns of tying thread, as close to the green chenille as possible.
13
Carefully trim off the excess chenille and whip finish. Try and make the head of the nymph not to large. Finish with a drop of varnish.
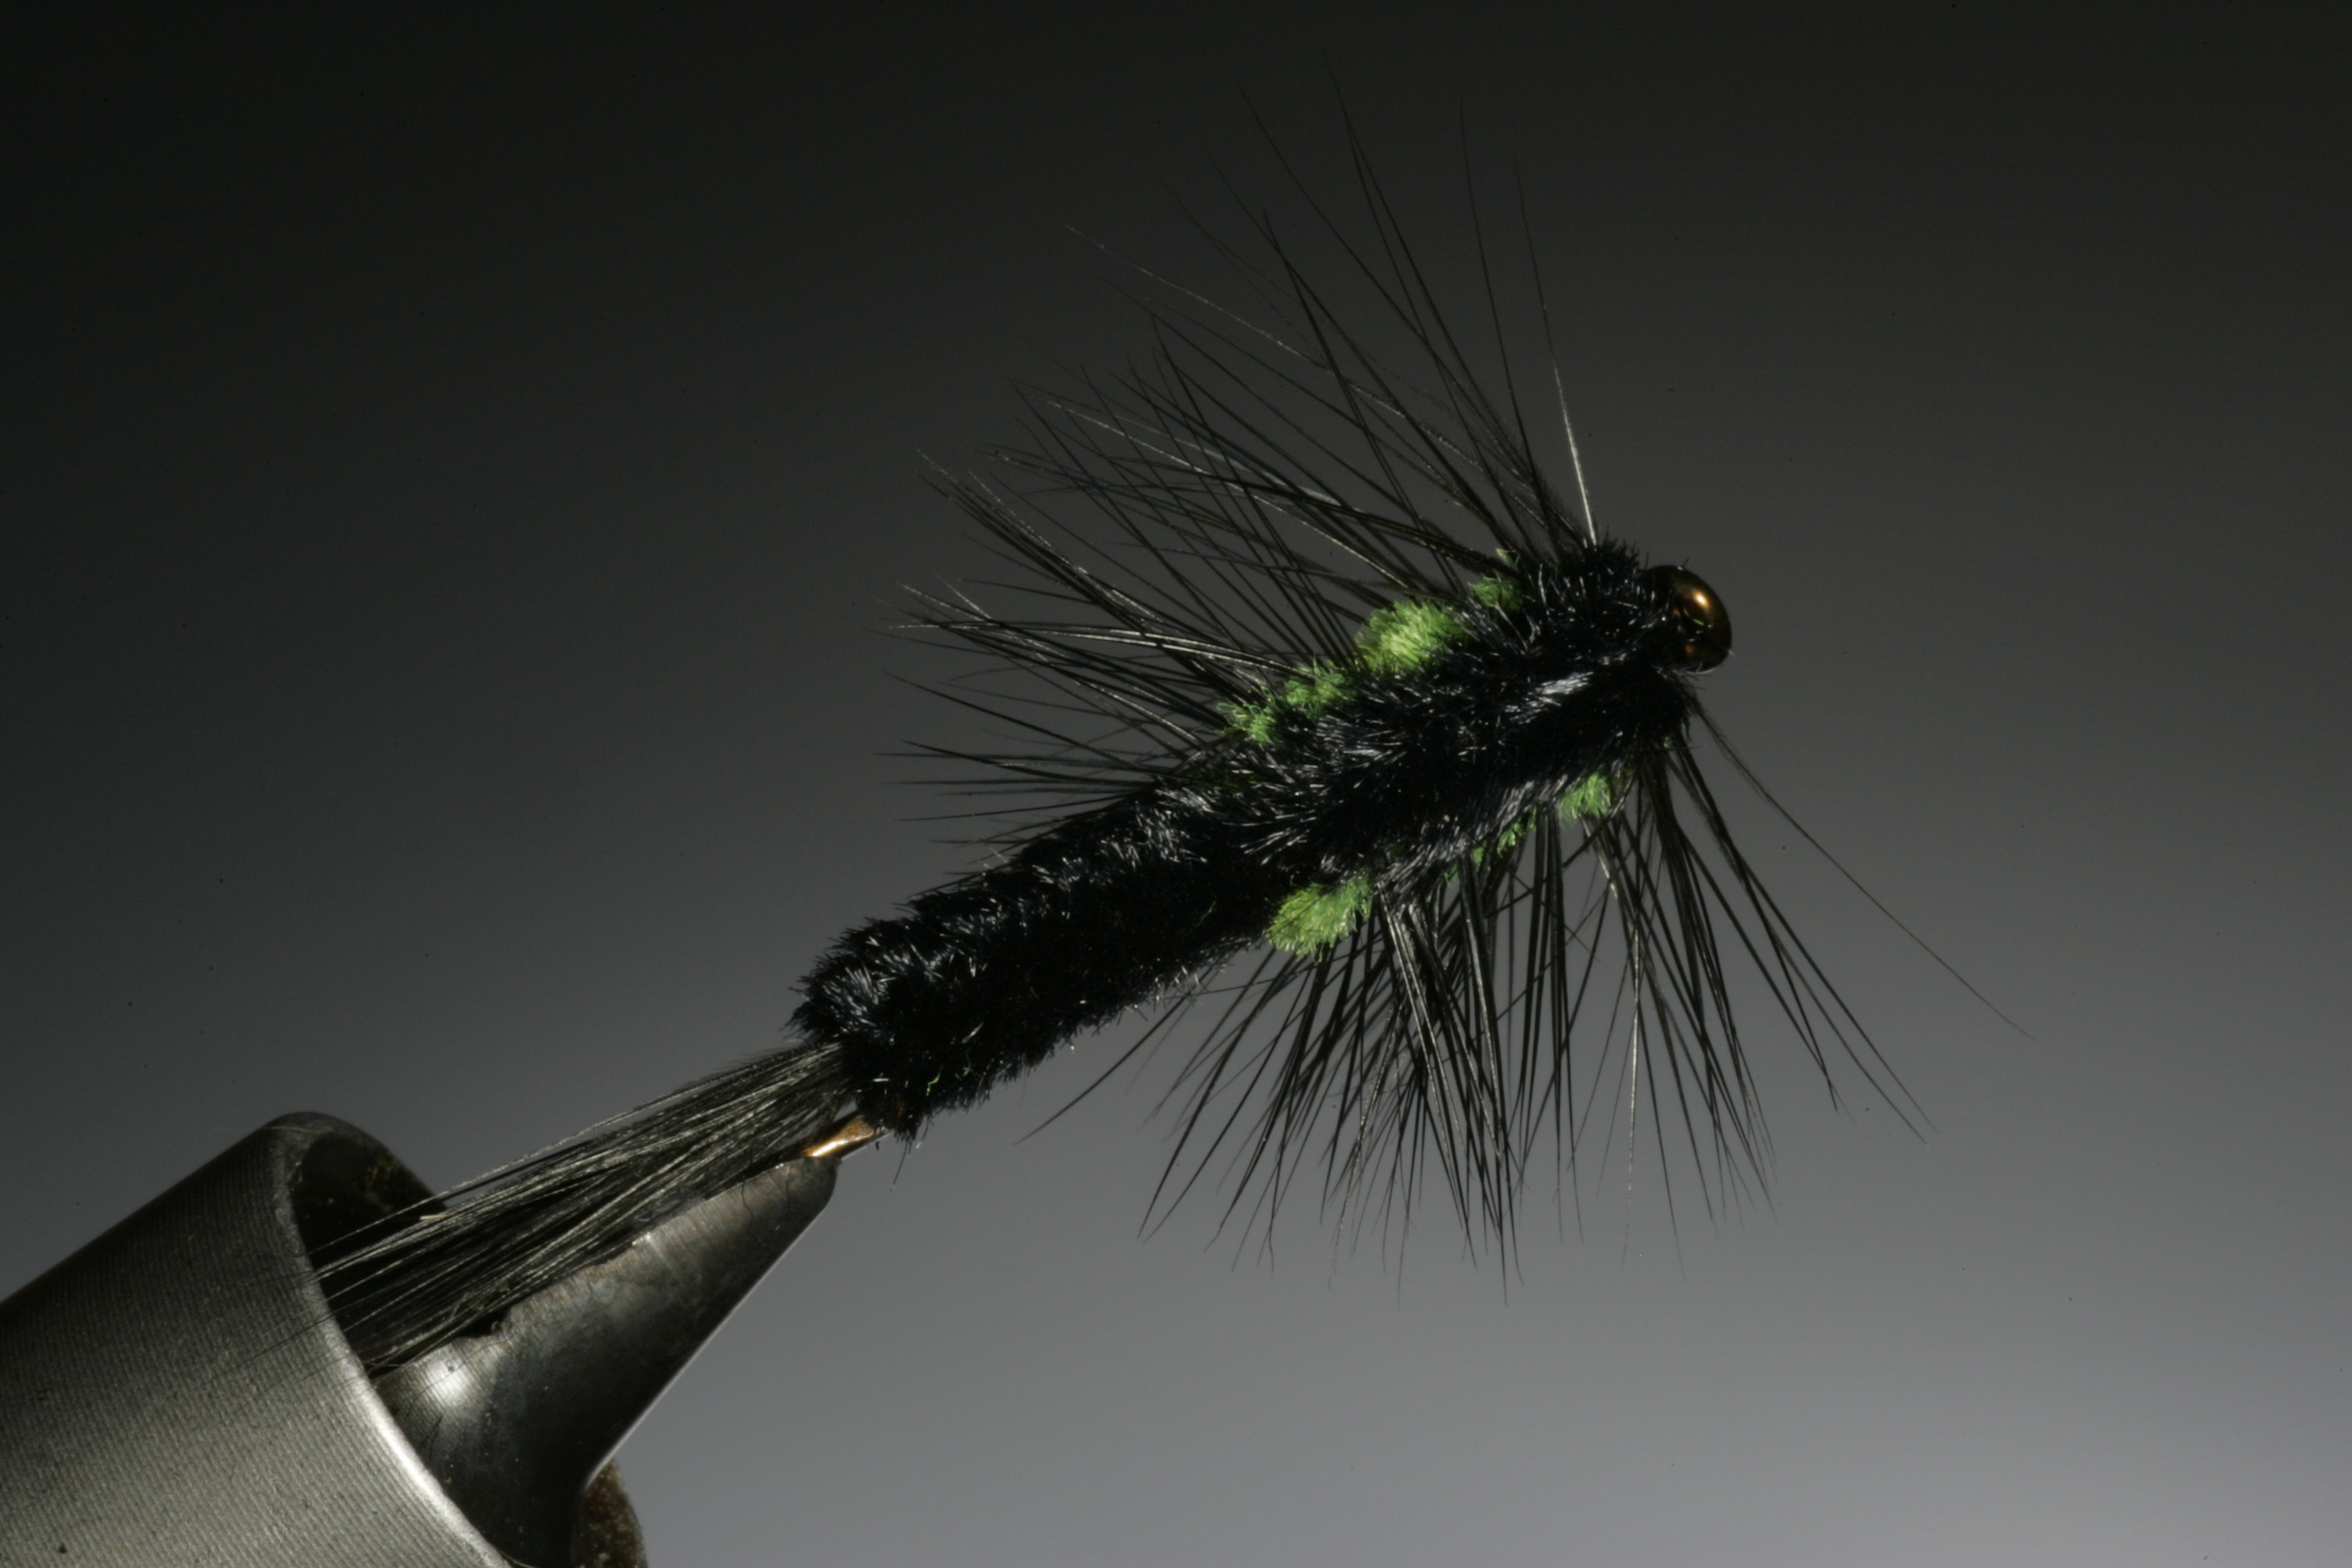
14
Heres an arial view of the Montana nymph. Check the proportions of the tail, body, thorax and hackle and compare with your own before attempting to tie the next.
Order My new book


Rod Calbrade Photography Tel: 01706 842890 Mob: 07749917667 On Flickr: Rod Calbrade Photostream
Thanks for posting this. I get so wrapped up in the newest, latest and greatest that I forget about how effective and easy this one is to tie. This one in Chartreuse and Orange will be getting added to my winter tie list.