
This is just to show you the correct way to prepare and mount a traditional dry fly hackle. Firstly a little about hackles.

Dont forget! If you have any questions please dont hesitate to ask. Just post your question at the foot of this page.
If you would like to receive a message when the next stage of the course is published, just add your e mail address at the top right of this page. Thanks, The feather bender.
Dry fly hackle prepare and traditional dry fly
Generally speaking the more money you spend on hackle the better they are! But dont go rushing right away down to the bank for a second mortgage, you can also get excellent hackle without buying the absolute most expensive. The first thing to consider is the most common size of hooks you use for your dry flies. A good dry fly hackle is recognized after time using them and tying. They should be straight, long and slim with a good glossy shine and the barbs should not be webby but slim, stiff and of equal length along the ‘sweet spot’ of the hackle (the usable dry fly portion)

This you can test by holding a hackle at its point and with your other hand draw back the fibers by pulling down the stem a couple of times. The sweet spot is where all the hackle fiber points are of equal length.
The other main point to consider with hackles is the colour. Even hackle from the most reputable breeders vary in colour. Because hackle is a natural material its all about the condition of the bird, no two hackles or capes are alike! So when buying hackle, lets say its a grizzle cape your after, look at all the grizzle capes in the shop, ask the shop owner if you can remove the cape from its packaging and bend it gently to examine each size and quantity of hackle on the cape. Look for the colour that best suites you or the patterns you intend to tie. With grizzle hackles the chevron markings can vary tremendously from bird to bird. So the key here is take your time and and buy wisely.
Here is link to Whiting farms grading system:
Here is link to buy WHITING hackle

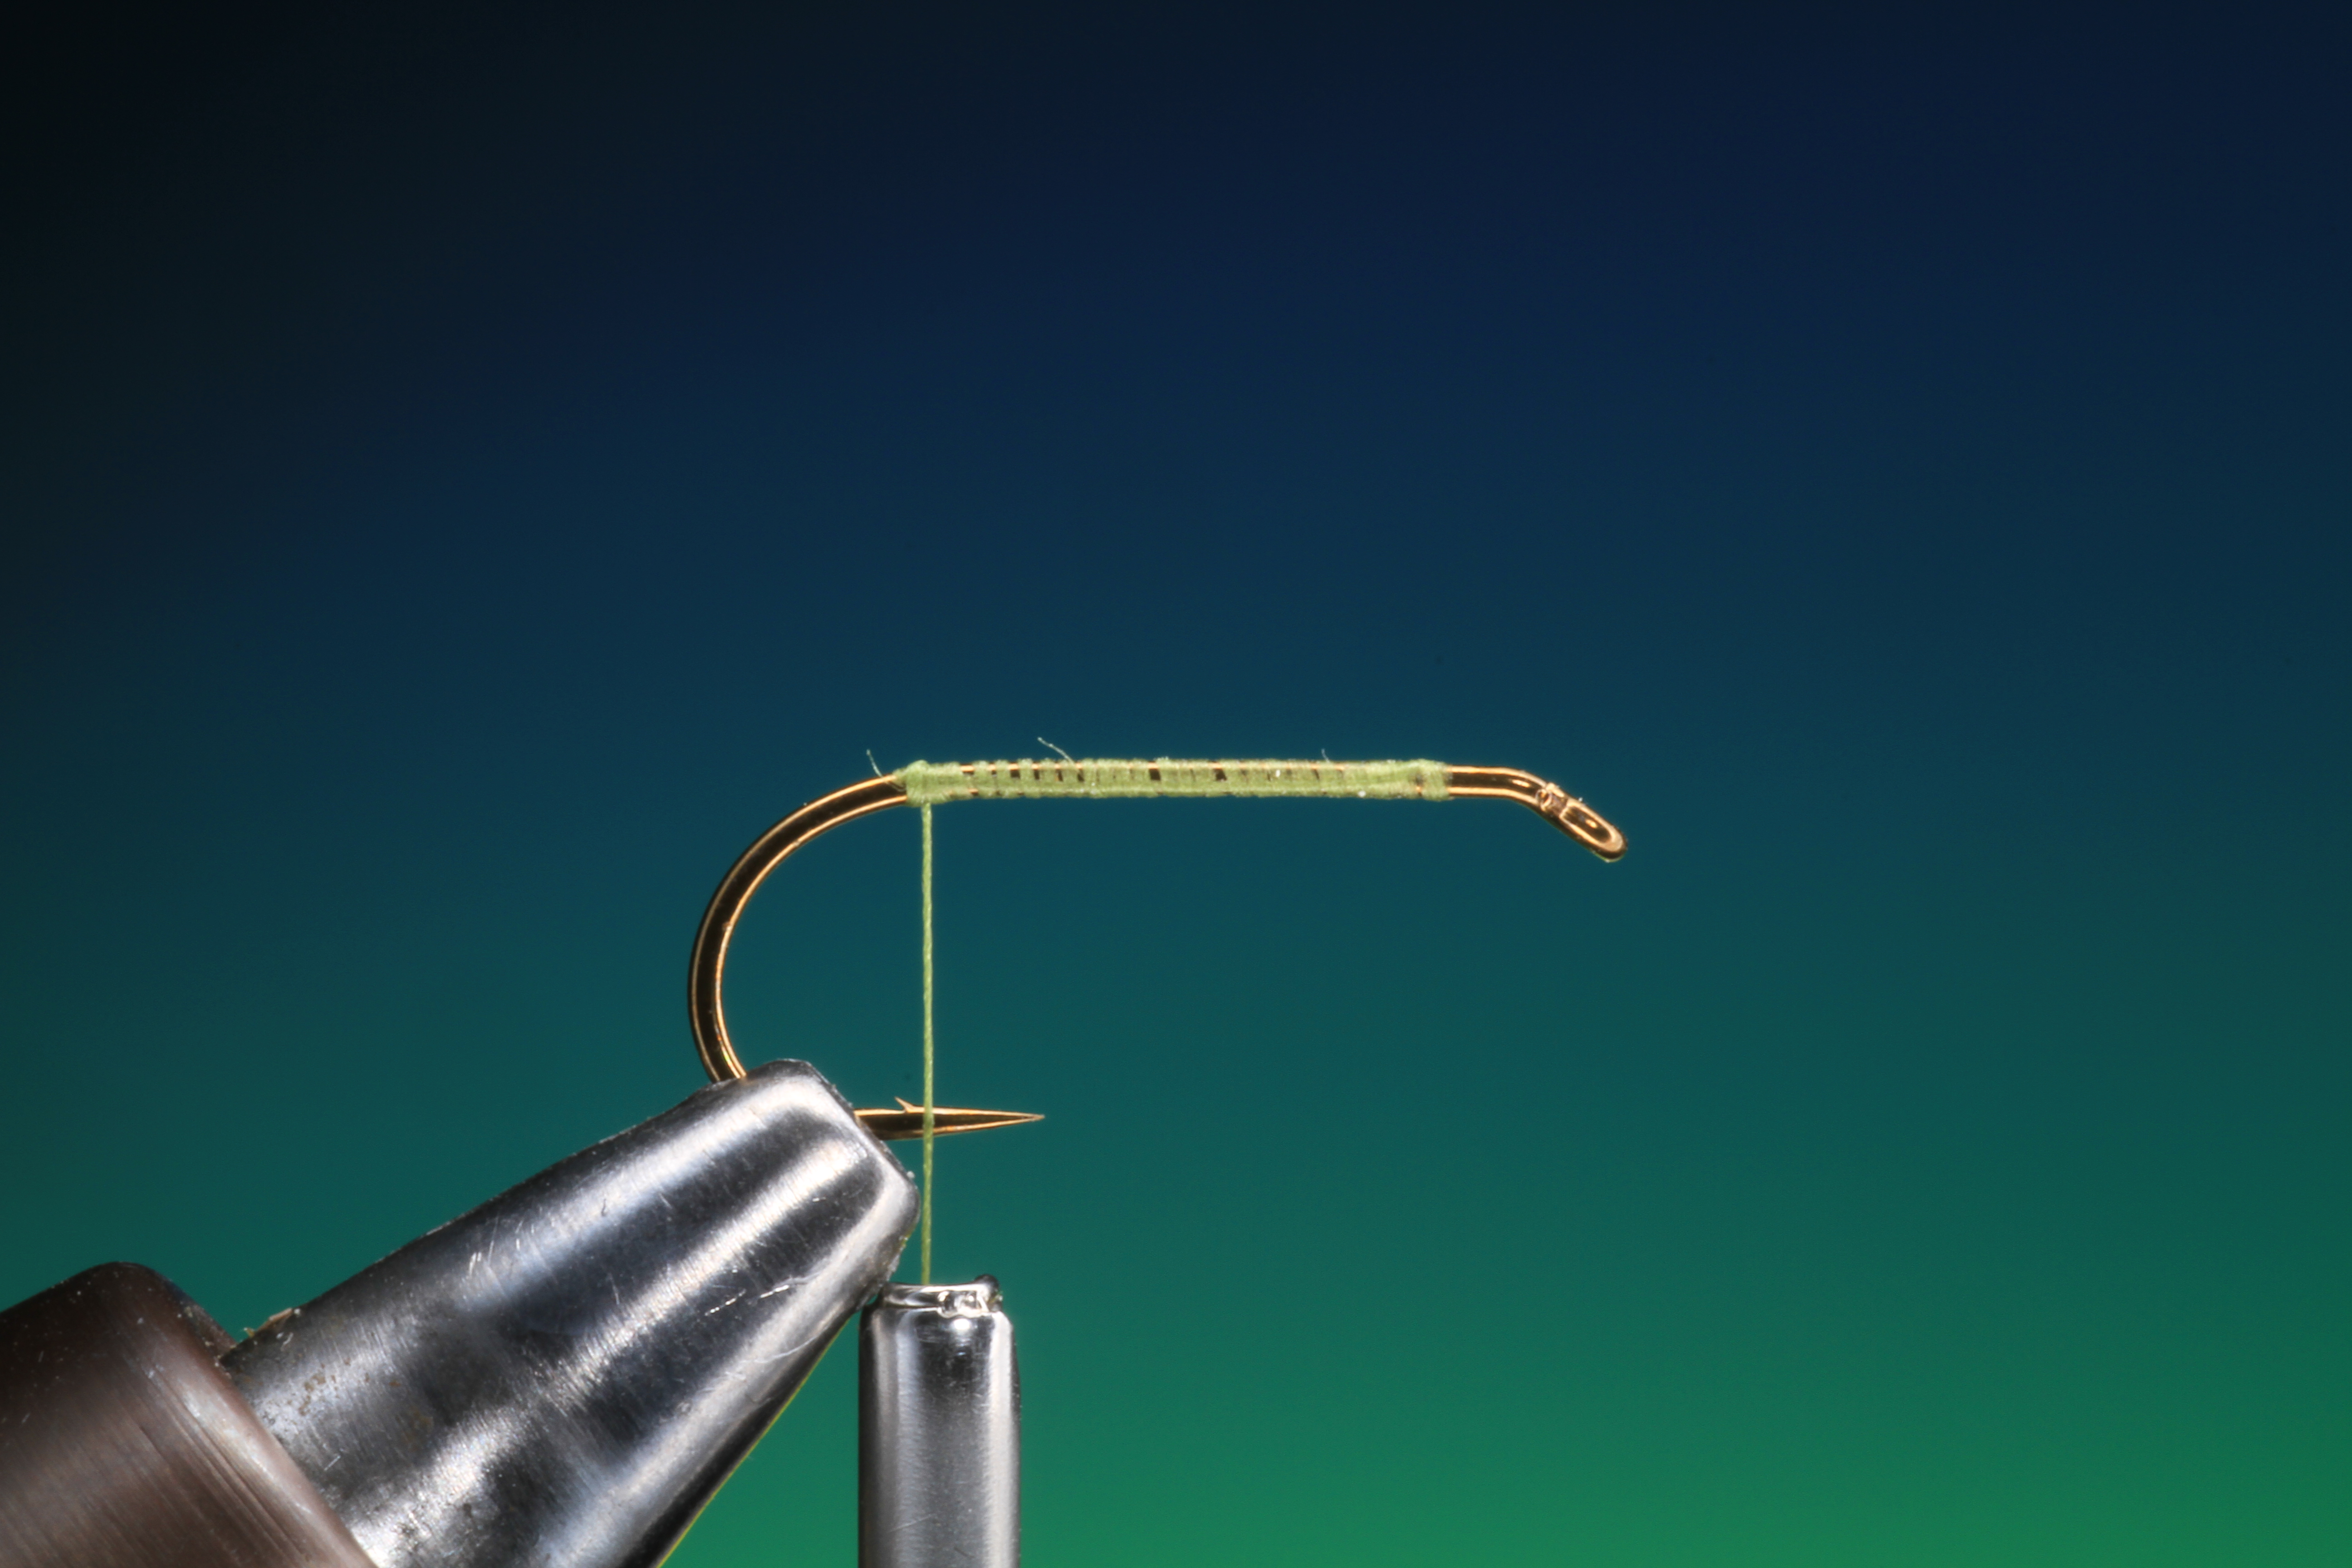
1
Secure your hook in the vice, with the hook shank horizontal.

2
Attach your tying thread and make a foundation for the hackle so it doesn’t slip-

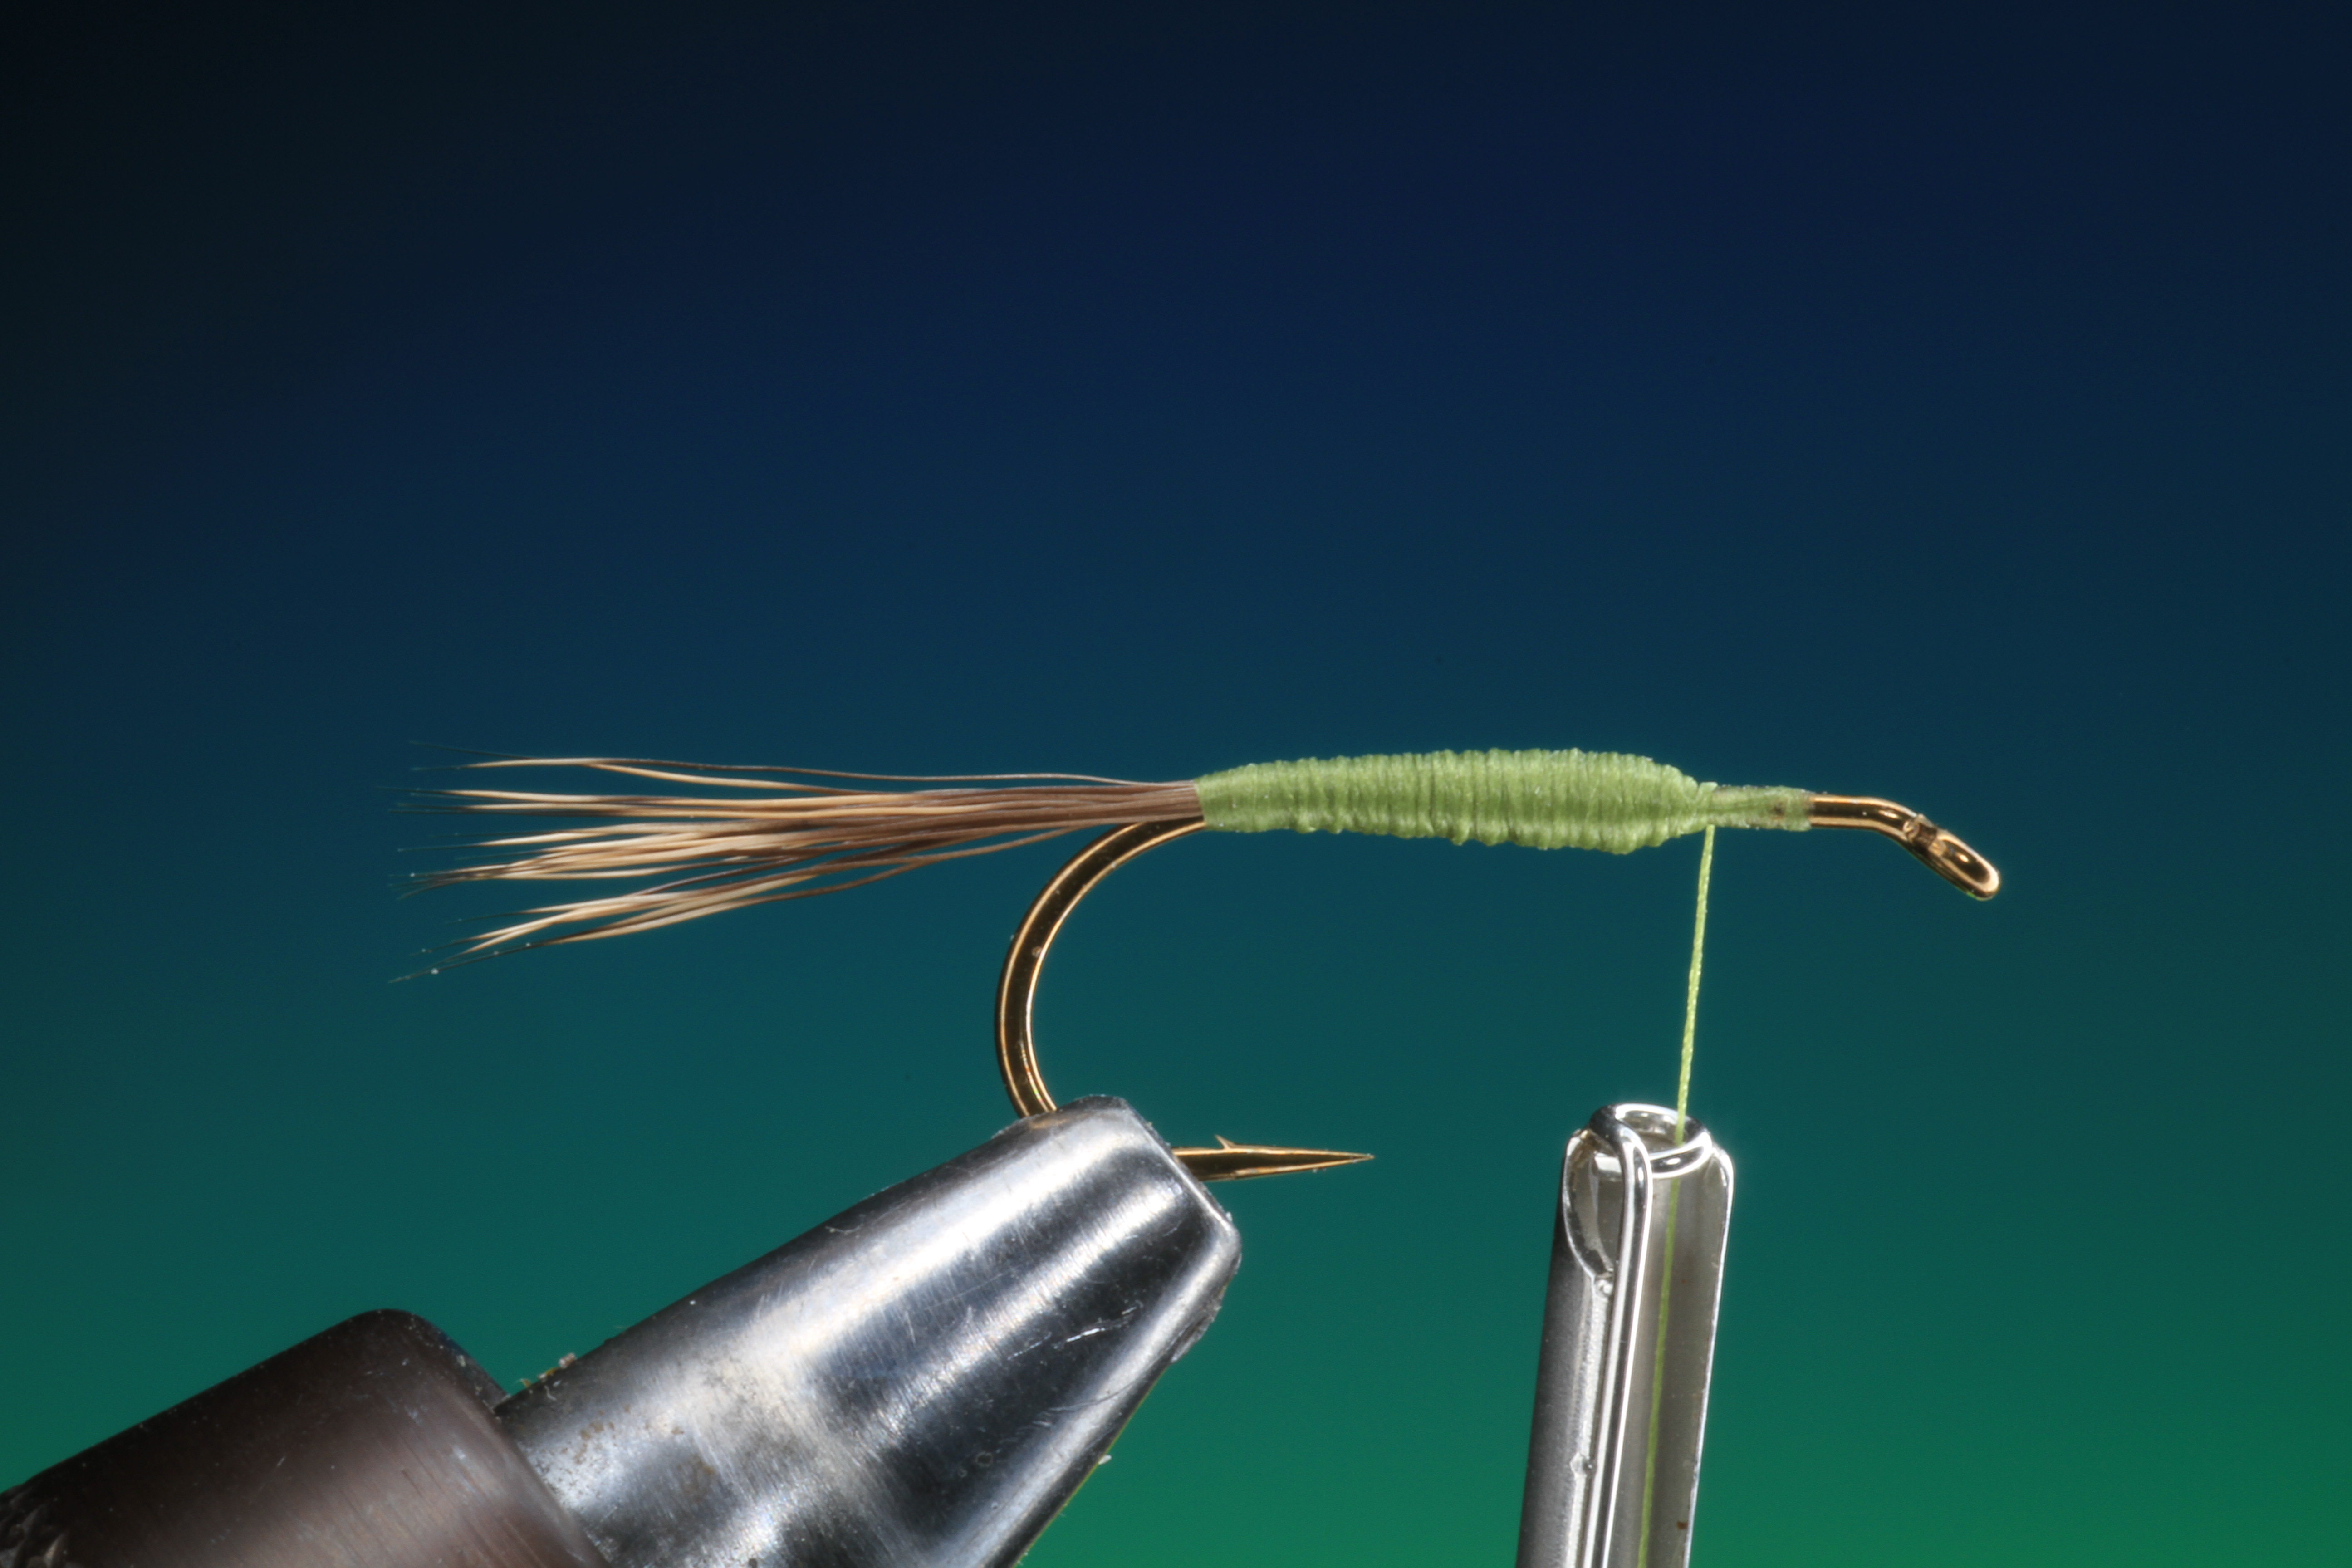
3
Strip off the webby base fibers from the hackle stem and offer the hackle up to the tying point, at an angle.

4
Now make one wrap of tying thread as shown diagonally across the hackle stem.

5
Make a second wrap around the hackle stem in the opposite direction forming an X of tying thread.

6
Once you have your X over the hackle stem move your tying thread behind the hackle stem on the back side of the hook shaft.

7
Now wrap the remaining hackle stem to the hook shaft behind the hook eye.

8
Attach a hackle plier to the hackle point.

9
Hackle pliers tend to slip away from the hackle when wrapping. To minimize this I glue to small patches of extra fine sand paper to the inside of the jaws of the pliers. When these are worn I simply remove them and replace with new patches.

11
Wind on your hackle. Make sure that each turn of hackle is tight into the previous but not overlapping, so the hackle fibers point 90 degrees from the hook shank. Also when winding on the hackle make sure it doesn’t twist, you have to correct this with every turn!

12
Once the hackle is wound forward to the hook eye, tie off and remove the excess hackle. Whip finish and remove the tying thread.

This is a general purpose mayfly pattern that gives a standard mayfly footprint on the water, tail, body, wings, legs… If follow this pattern and just change the hook size, colour and materials tied in proportionally you will have a good adult (dun) mayfly pattern for most situations.
1
Secure your hook in the vice and cover the whole hook shank with a foundation of tying thread. Make two extra turns of tying thread at the tail base, to form a little ‘bump’ this will hold the tail better in place.
2
Cut a small bunch of fine deer hair and even the points in a hair stacker, so all the tail fiber point are even. Tie the tail in as shown about 2/3 the body length. Run your tying thread over the hook shank and build up a slightly tapered body again about 2/3 the hook shank length.

3
Cut a 10 cm length of polypropylene yarn and place this around your tying thread. Holding both ends of the yarn lift it up.

4
Release your grip on the yarn and the weight of your bobbin will hold it in place on top of the hook shank. Tie in the wings with a figure of eight wrapping of the tying thread, going over and in between the wings with each turn.

5
Prepare and tie in your hackle as shown earlier just behind the wings.
6
Wrap your hackle firstly behind and the forward of the wings. Tie off, remove the excess hackle and whip finish.
Order My new book


Very informative,procedures explained very well easy to understand.
Thanks Martin, your welcome! I will be posting the next part of the course in the next couple of days-
Thanks!
Brilliant. Thanks!
Absolutely great tips! Thanks a lot, greetings from Finland!
Takke Jukka!
Hi Barry, I agree with comments made previously. Your breakdown of this fly is good. However, for me, you have missed out the most critical part and that is actually tying in the hackle once you have made the turns. Can you please expand on the method that should be used?
I am having problems actually finishing off tying in the hackle. I take a couple of turns behind and a turn in front, maybe do that twice, then cut off the bit of the hackle I don’t need and often the hackle just is like a spring in a clock, it just unwinds. What am I doing wrong?
You can also find all this info if you search my older posts Phil.
Barry