
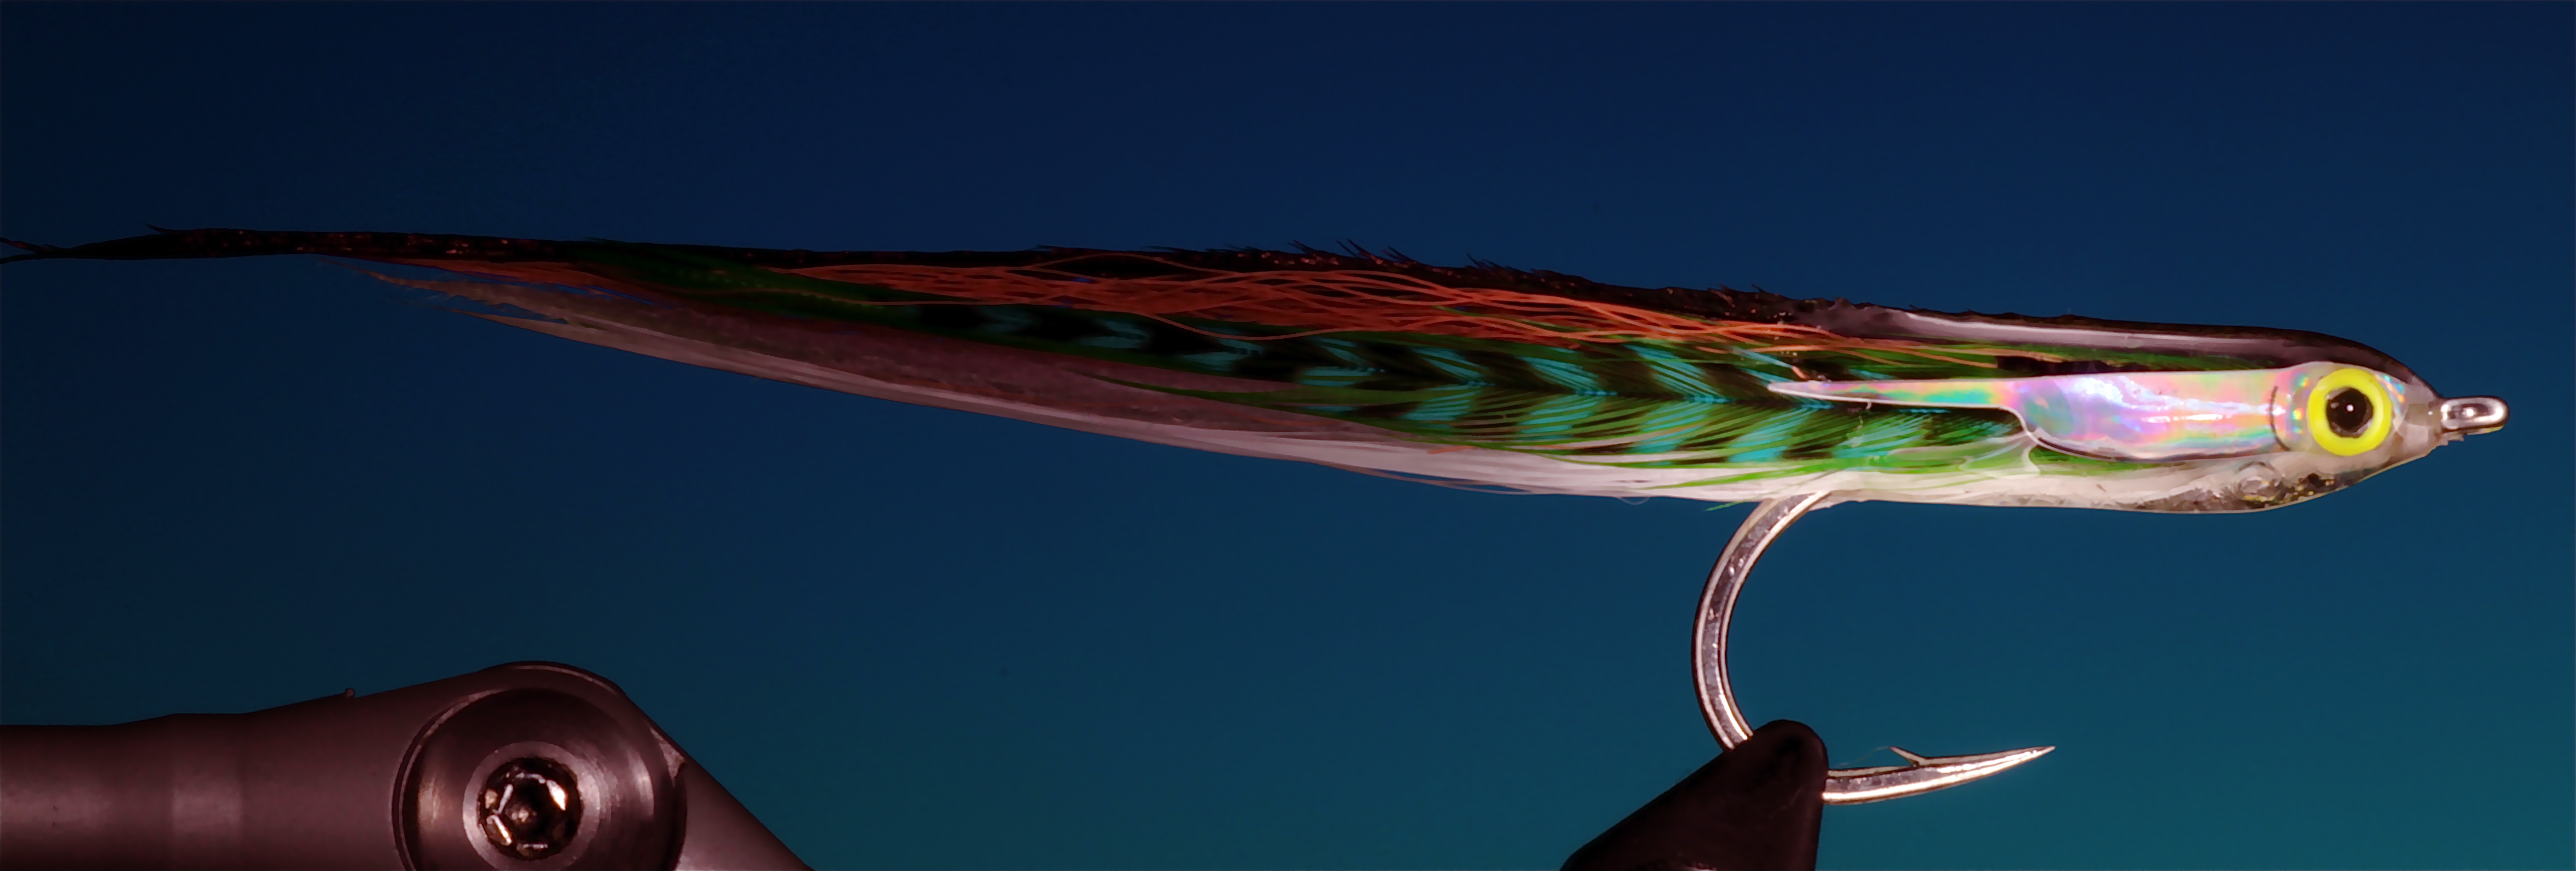
Keeping on the salt water theme for sea trout, heres another sand eel pattern that mixes the new with the old.
When designing bait fish patterns, a few things I consider are the shape and silhouette of the fish to be imitated. This is important as you never know if the fish will see it, when fished, in a reflected or backlight situation. The size and colour, and last but not least movement. All these can be achieved with a careful selection of materials. I sometimes also like to give the patterns a three dimensional effect. I achieve this through building layers. This is made much easier with Bug Bond.
Observe the bait fish that you wish to imitate, take a close look at it, there are many great websites that have fantastic photography, illustrations and films of these bait fish. Try and decide the most distinguishing features and characteristics of them. Once you have done this choose materials that best represent these features in colour and movement. After a while you better understand the materials you work with and the choices become easier.
Hook Mustad Big Game light # 6-4
Thread Dyneema
Underbody Craft fur
Body Buck tail topped with peacock herl
Sides Green and blue grizzle cock hackles
Cheeks Fleye foils
Head tube E-Z Body
Head Bug Bond
Eyes Tape eyes
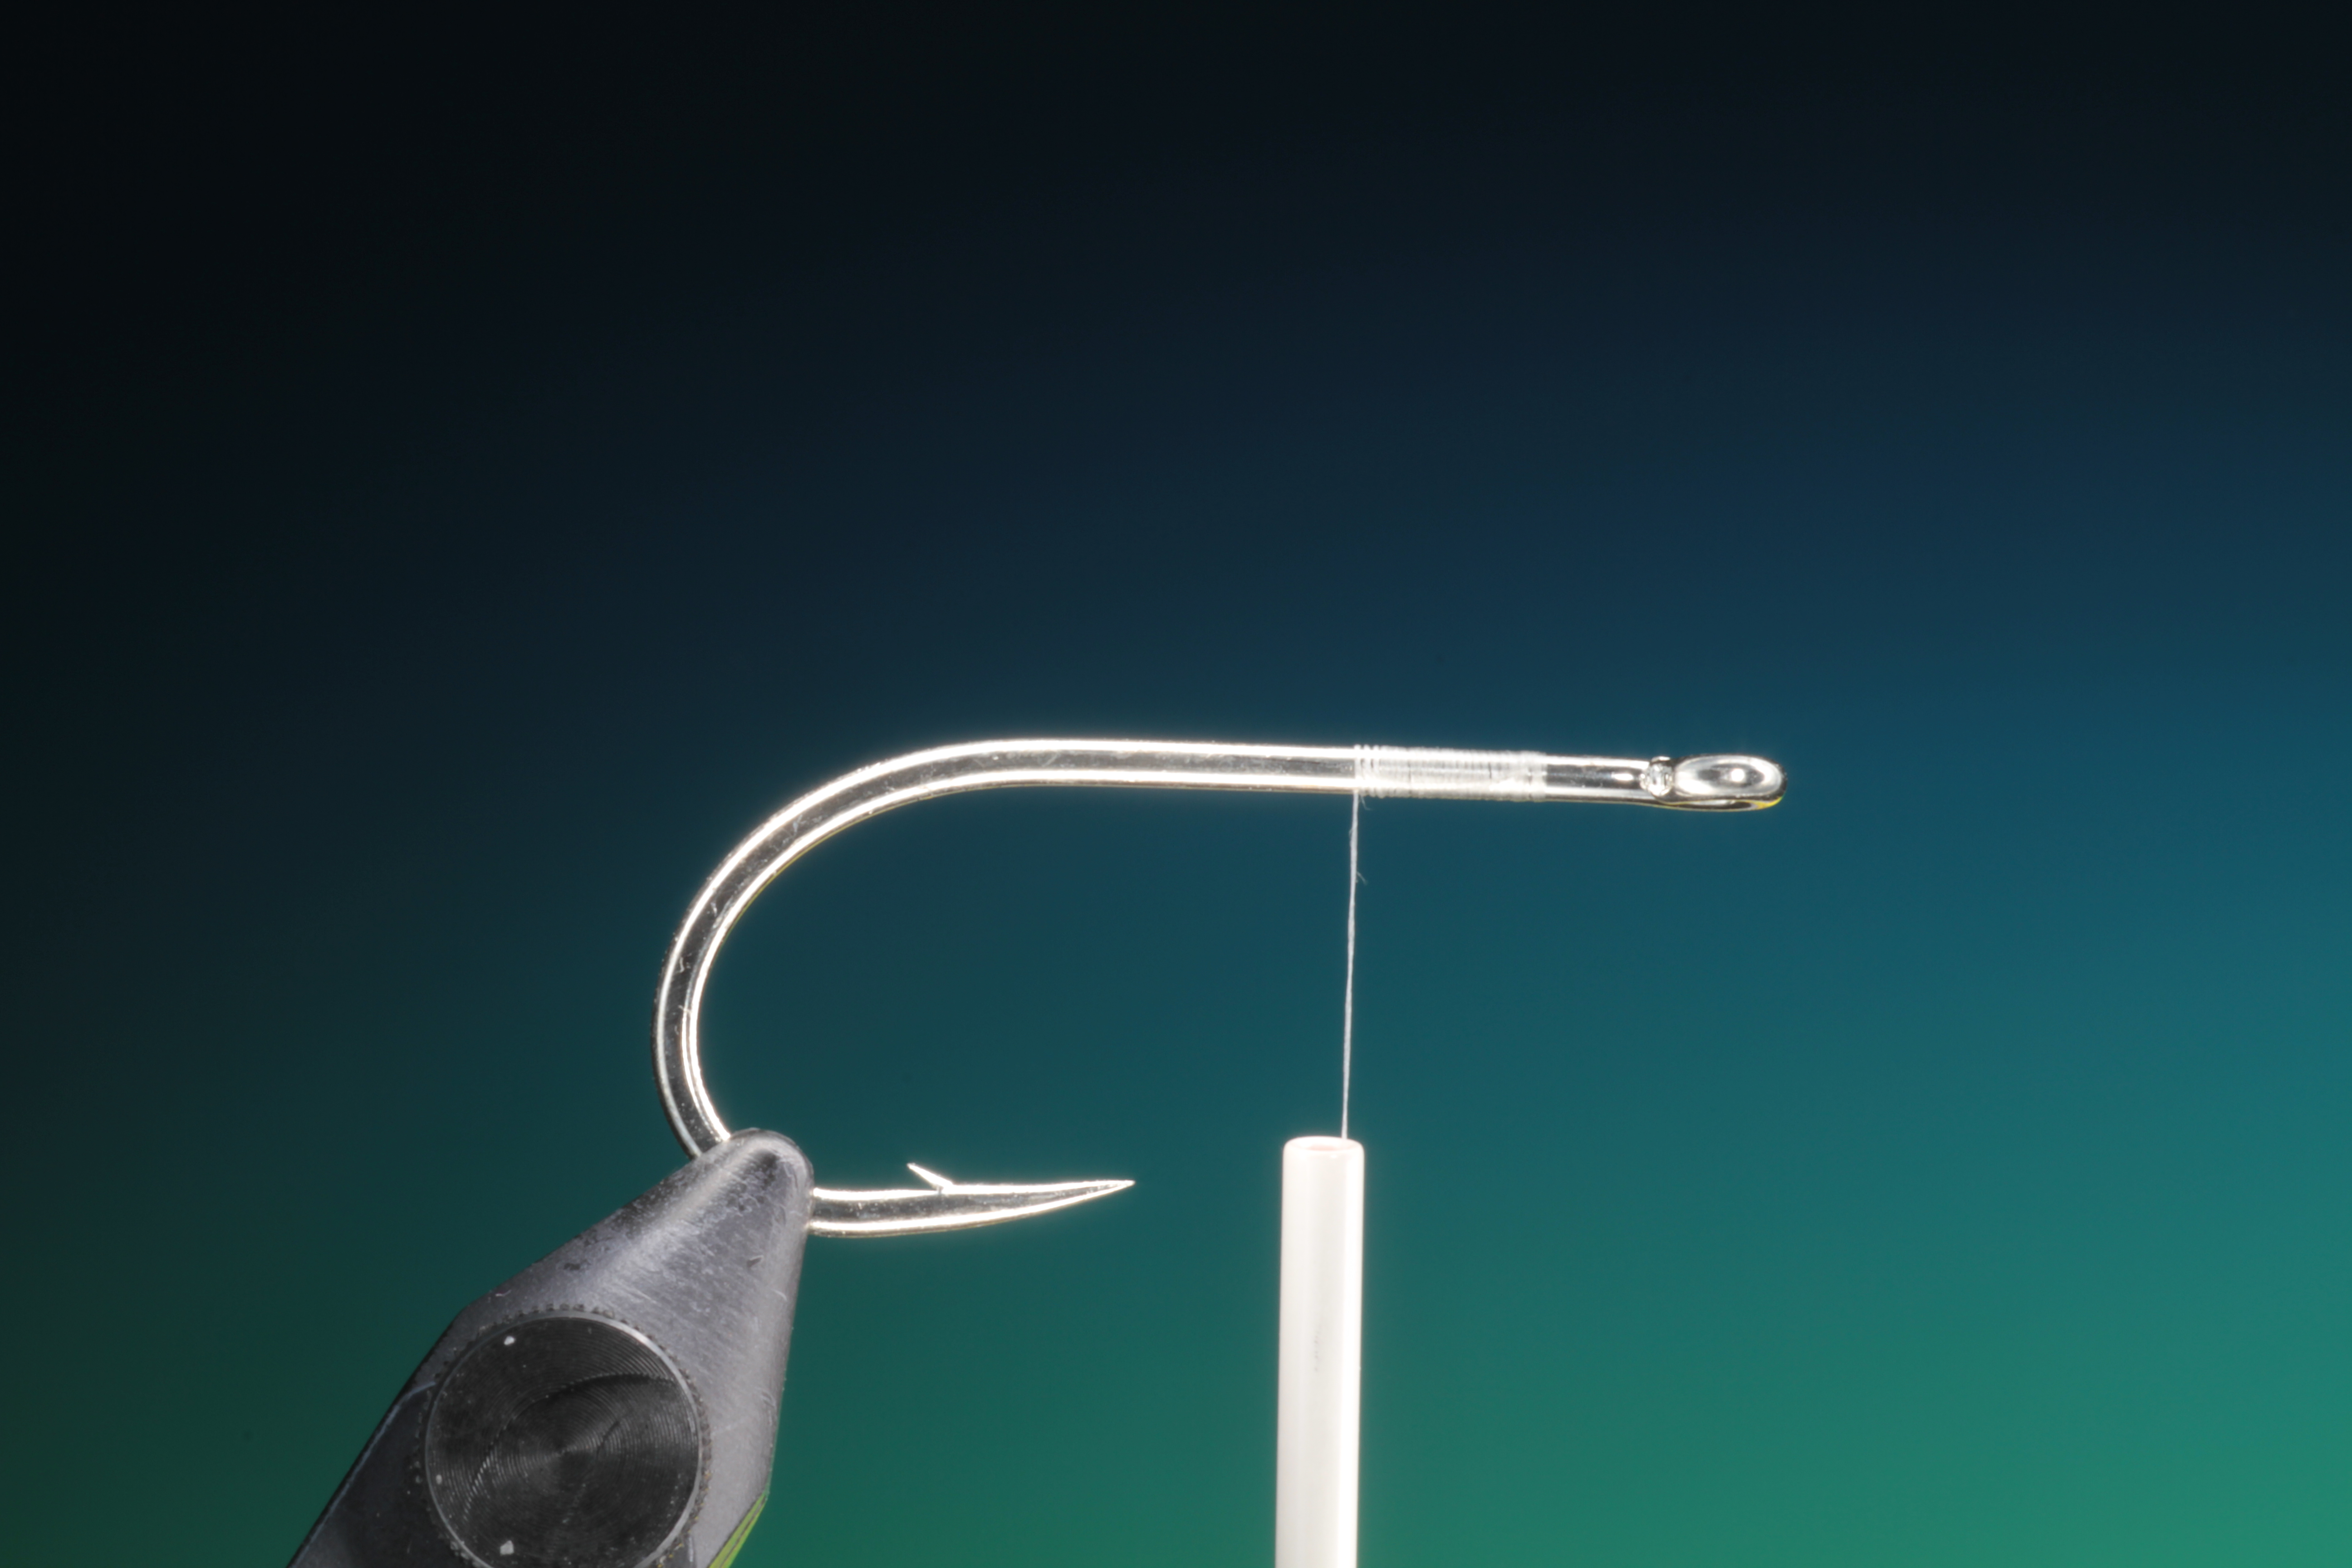
 1
1
Place you Big Game light hook in the vice, keeping the hook shank horizontal.
 2
2
Attach you tying thread to the front third of the hook shank.
 3
3
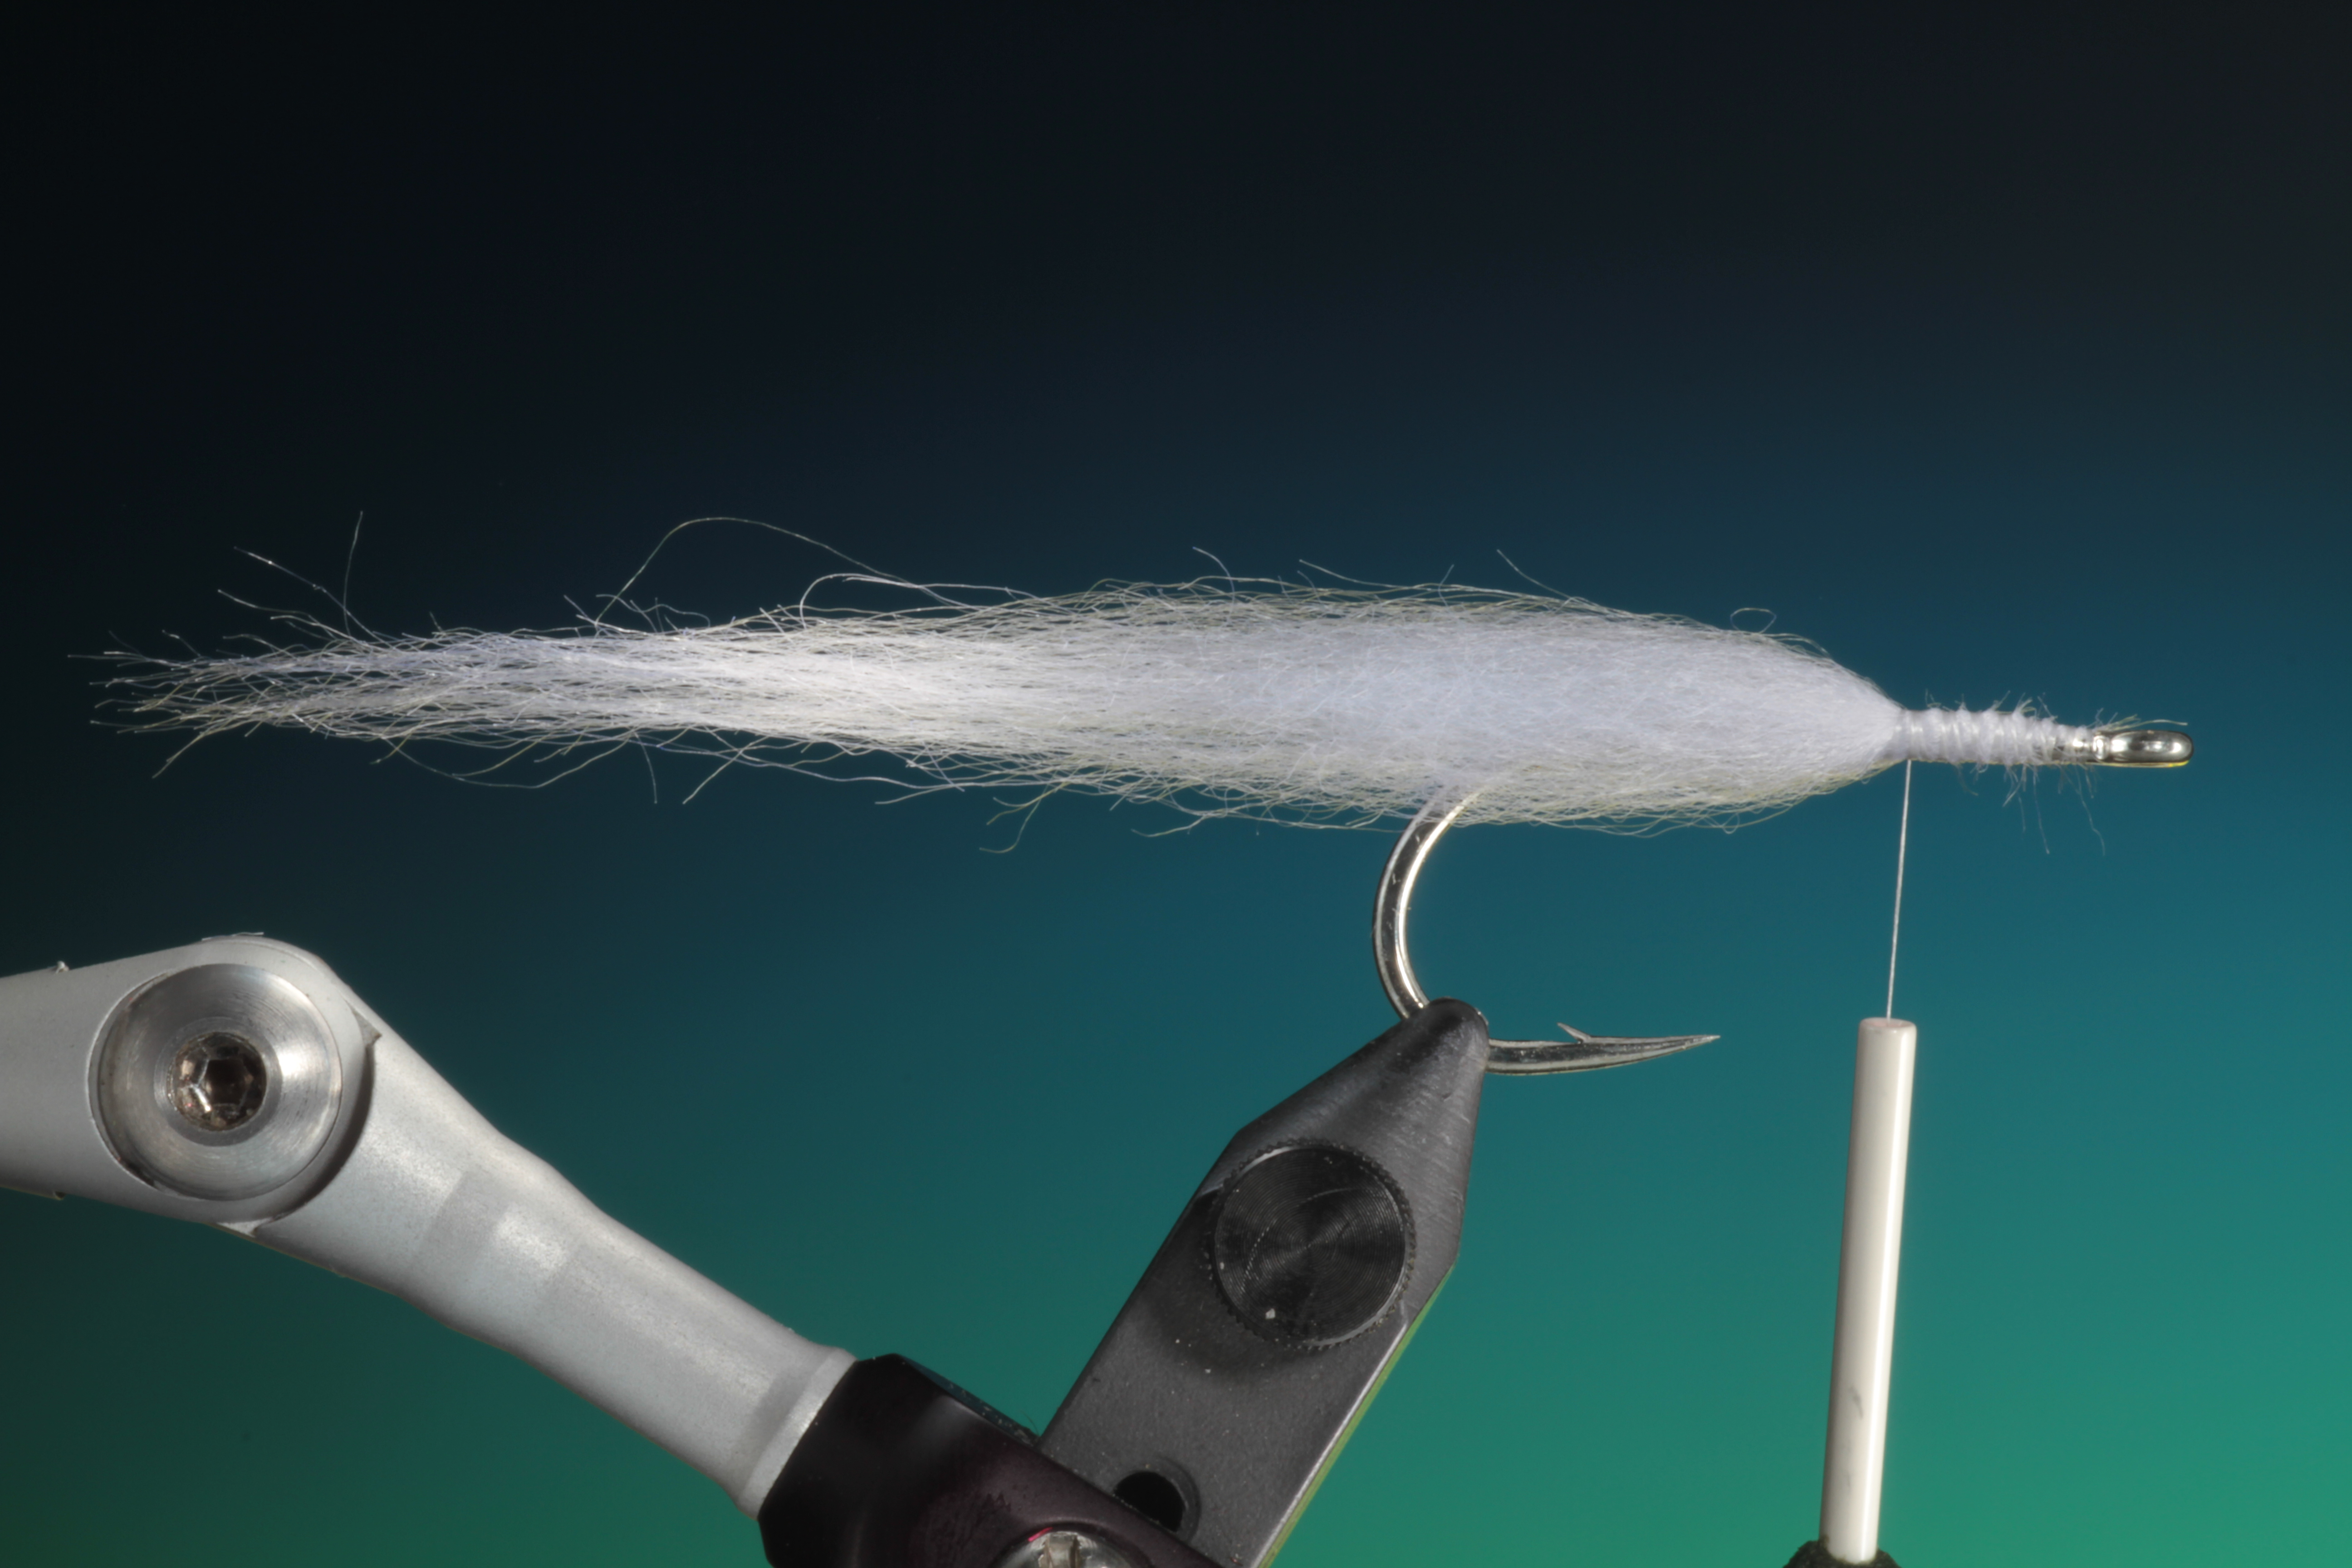
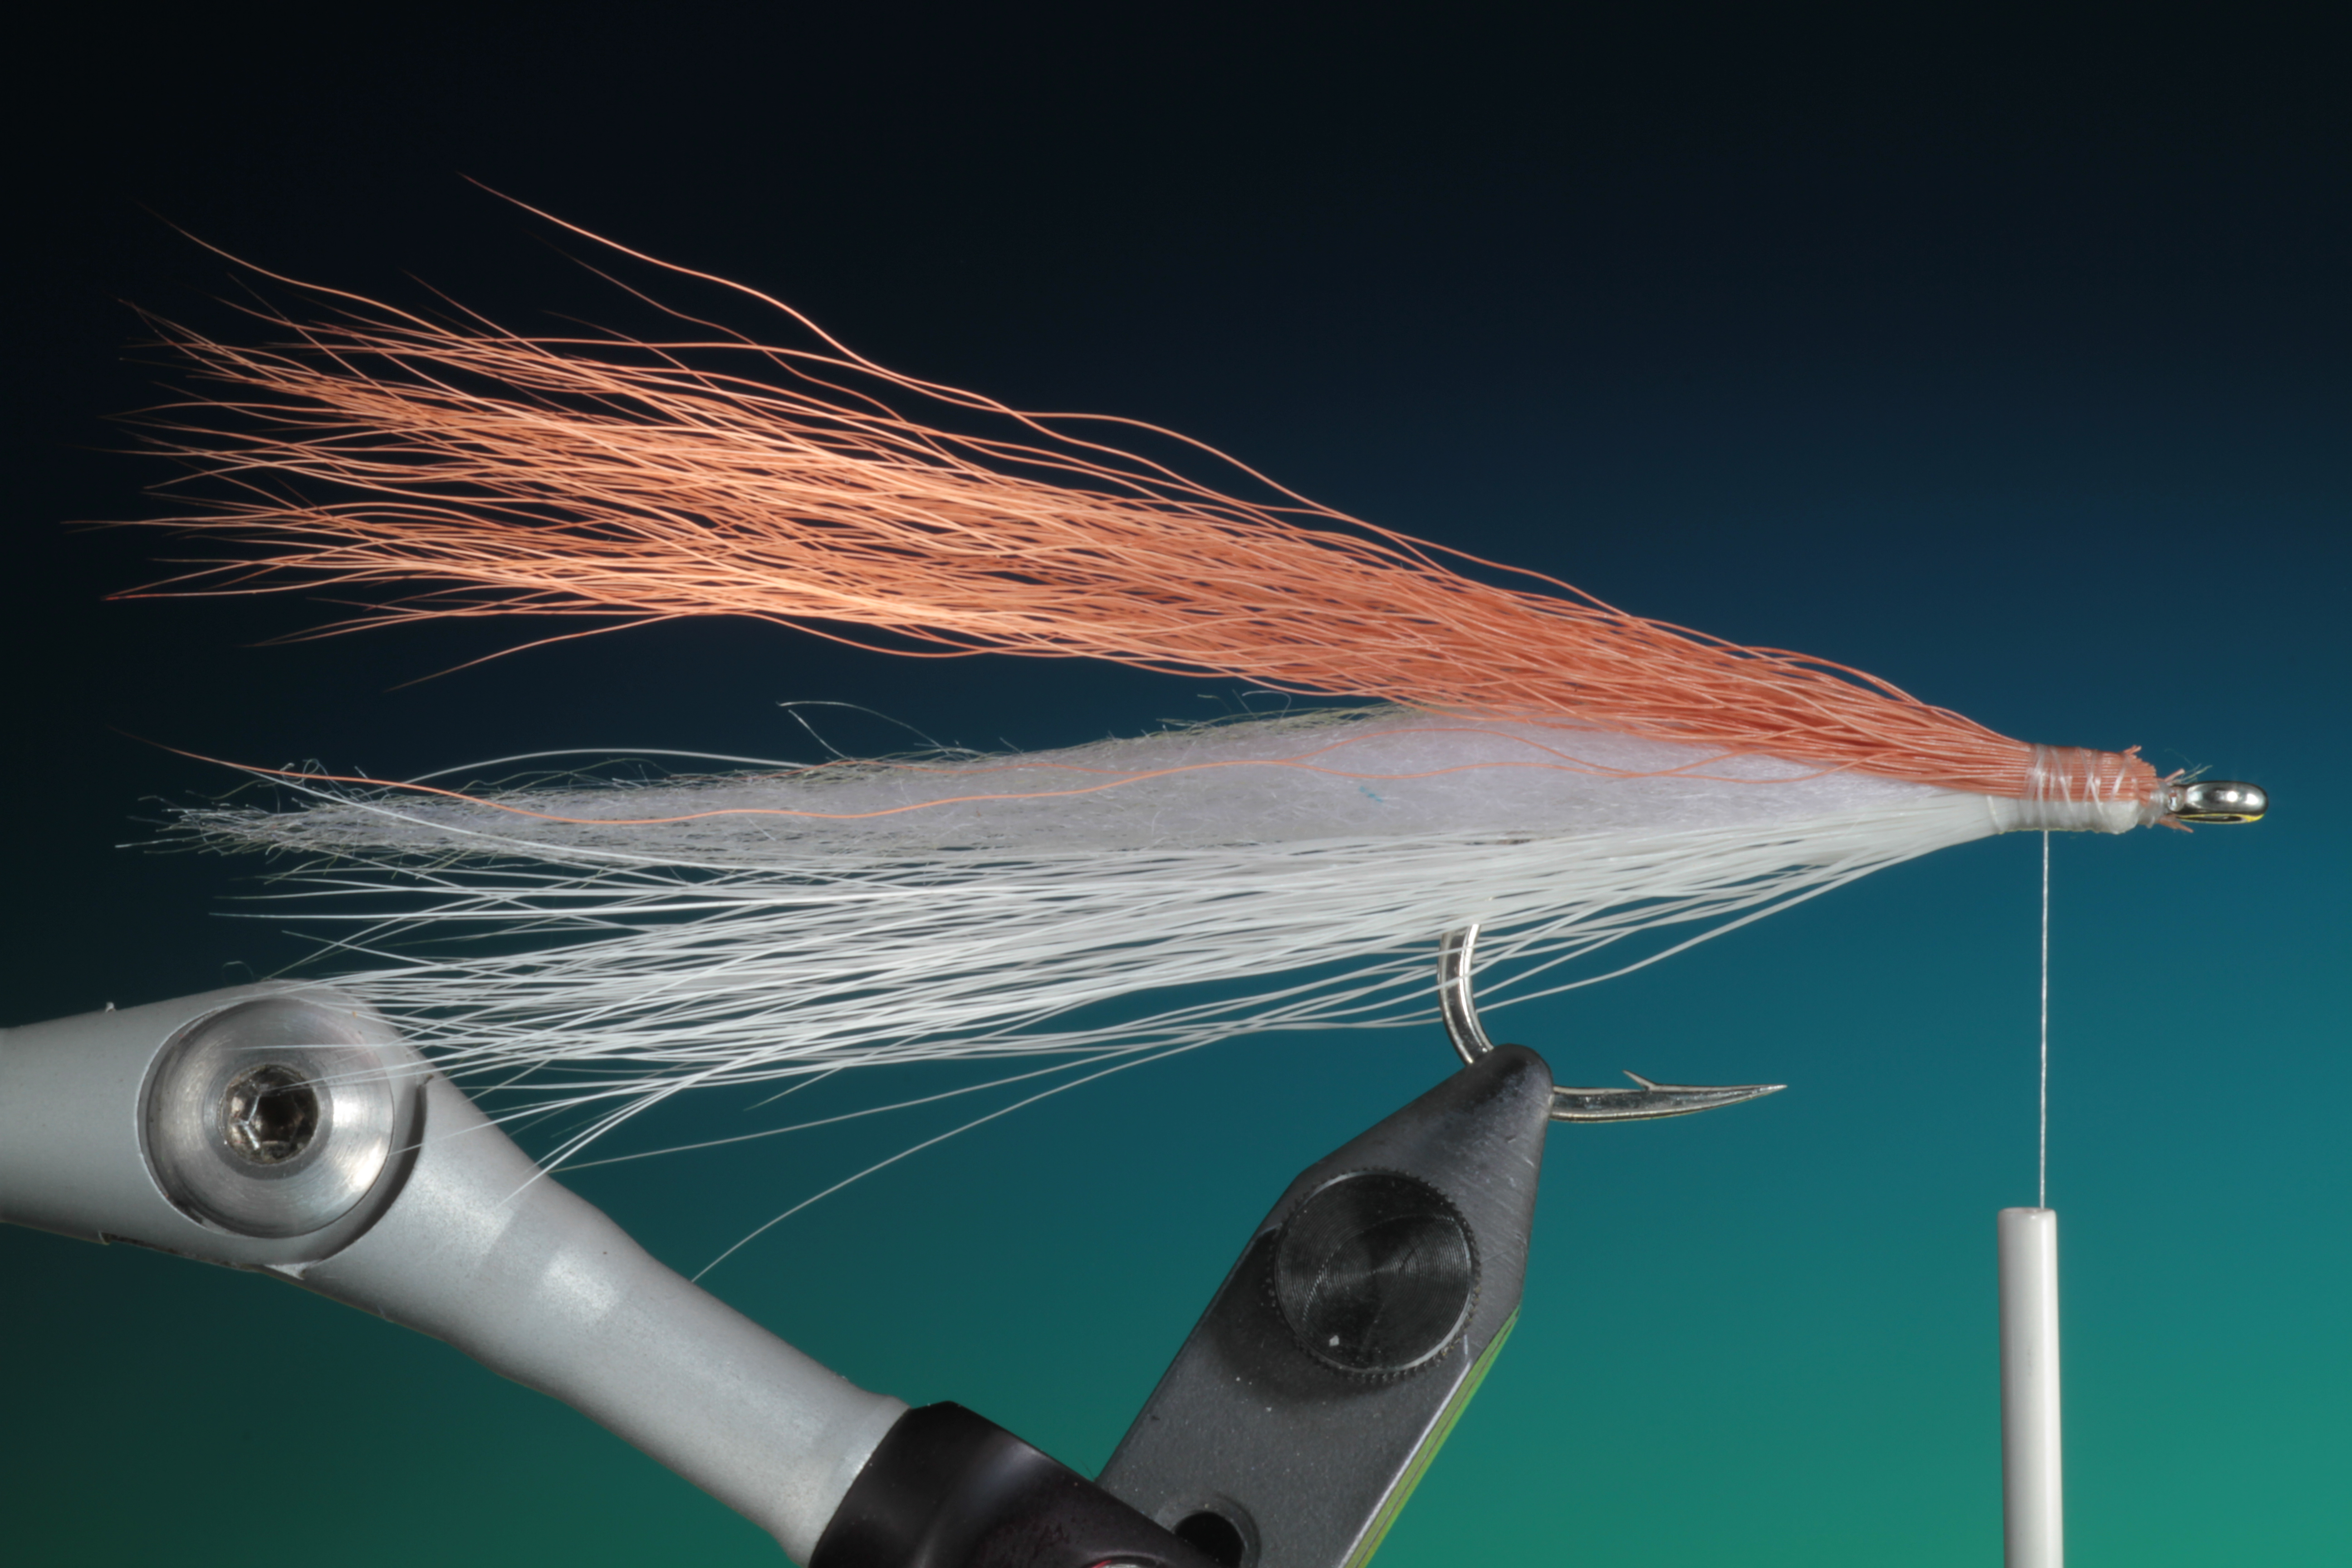
Tie in a length of tapered craft fur. Its important that you brush out the fibers of the craft fur before you tie it in. The craft fur will give a little movement to the body of the fly when fished.
 4
4
Now a nice bunch of straight whit buck tail under the craft fur. The generic name for deer tails has become ‘buck tails’ even if they have come from a doe deer which generally have a little shorter fibers, so be sure when buying buck tail choose the ones with nice long straight hair. The buck tail tied in this way will help support the craft fur and keep it in position.
 5
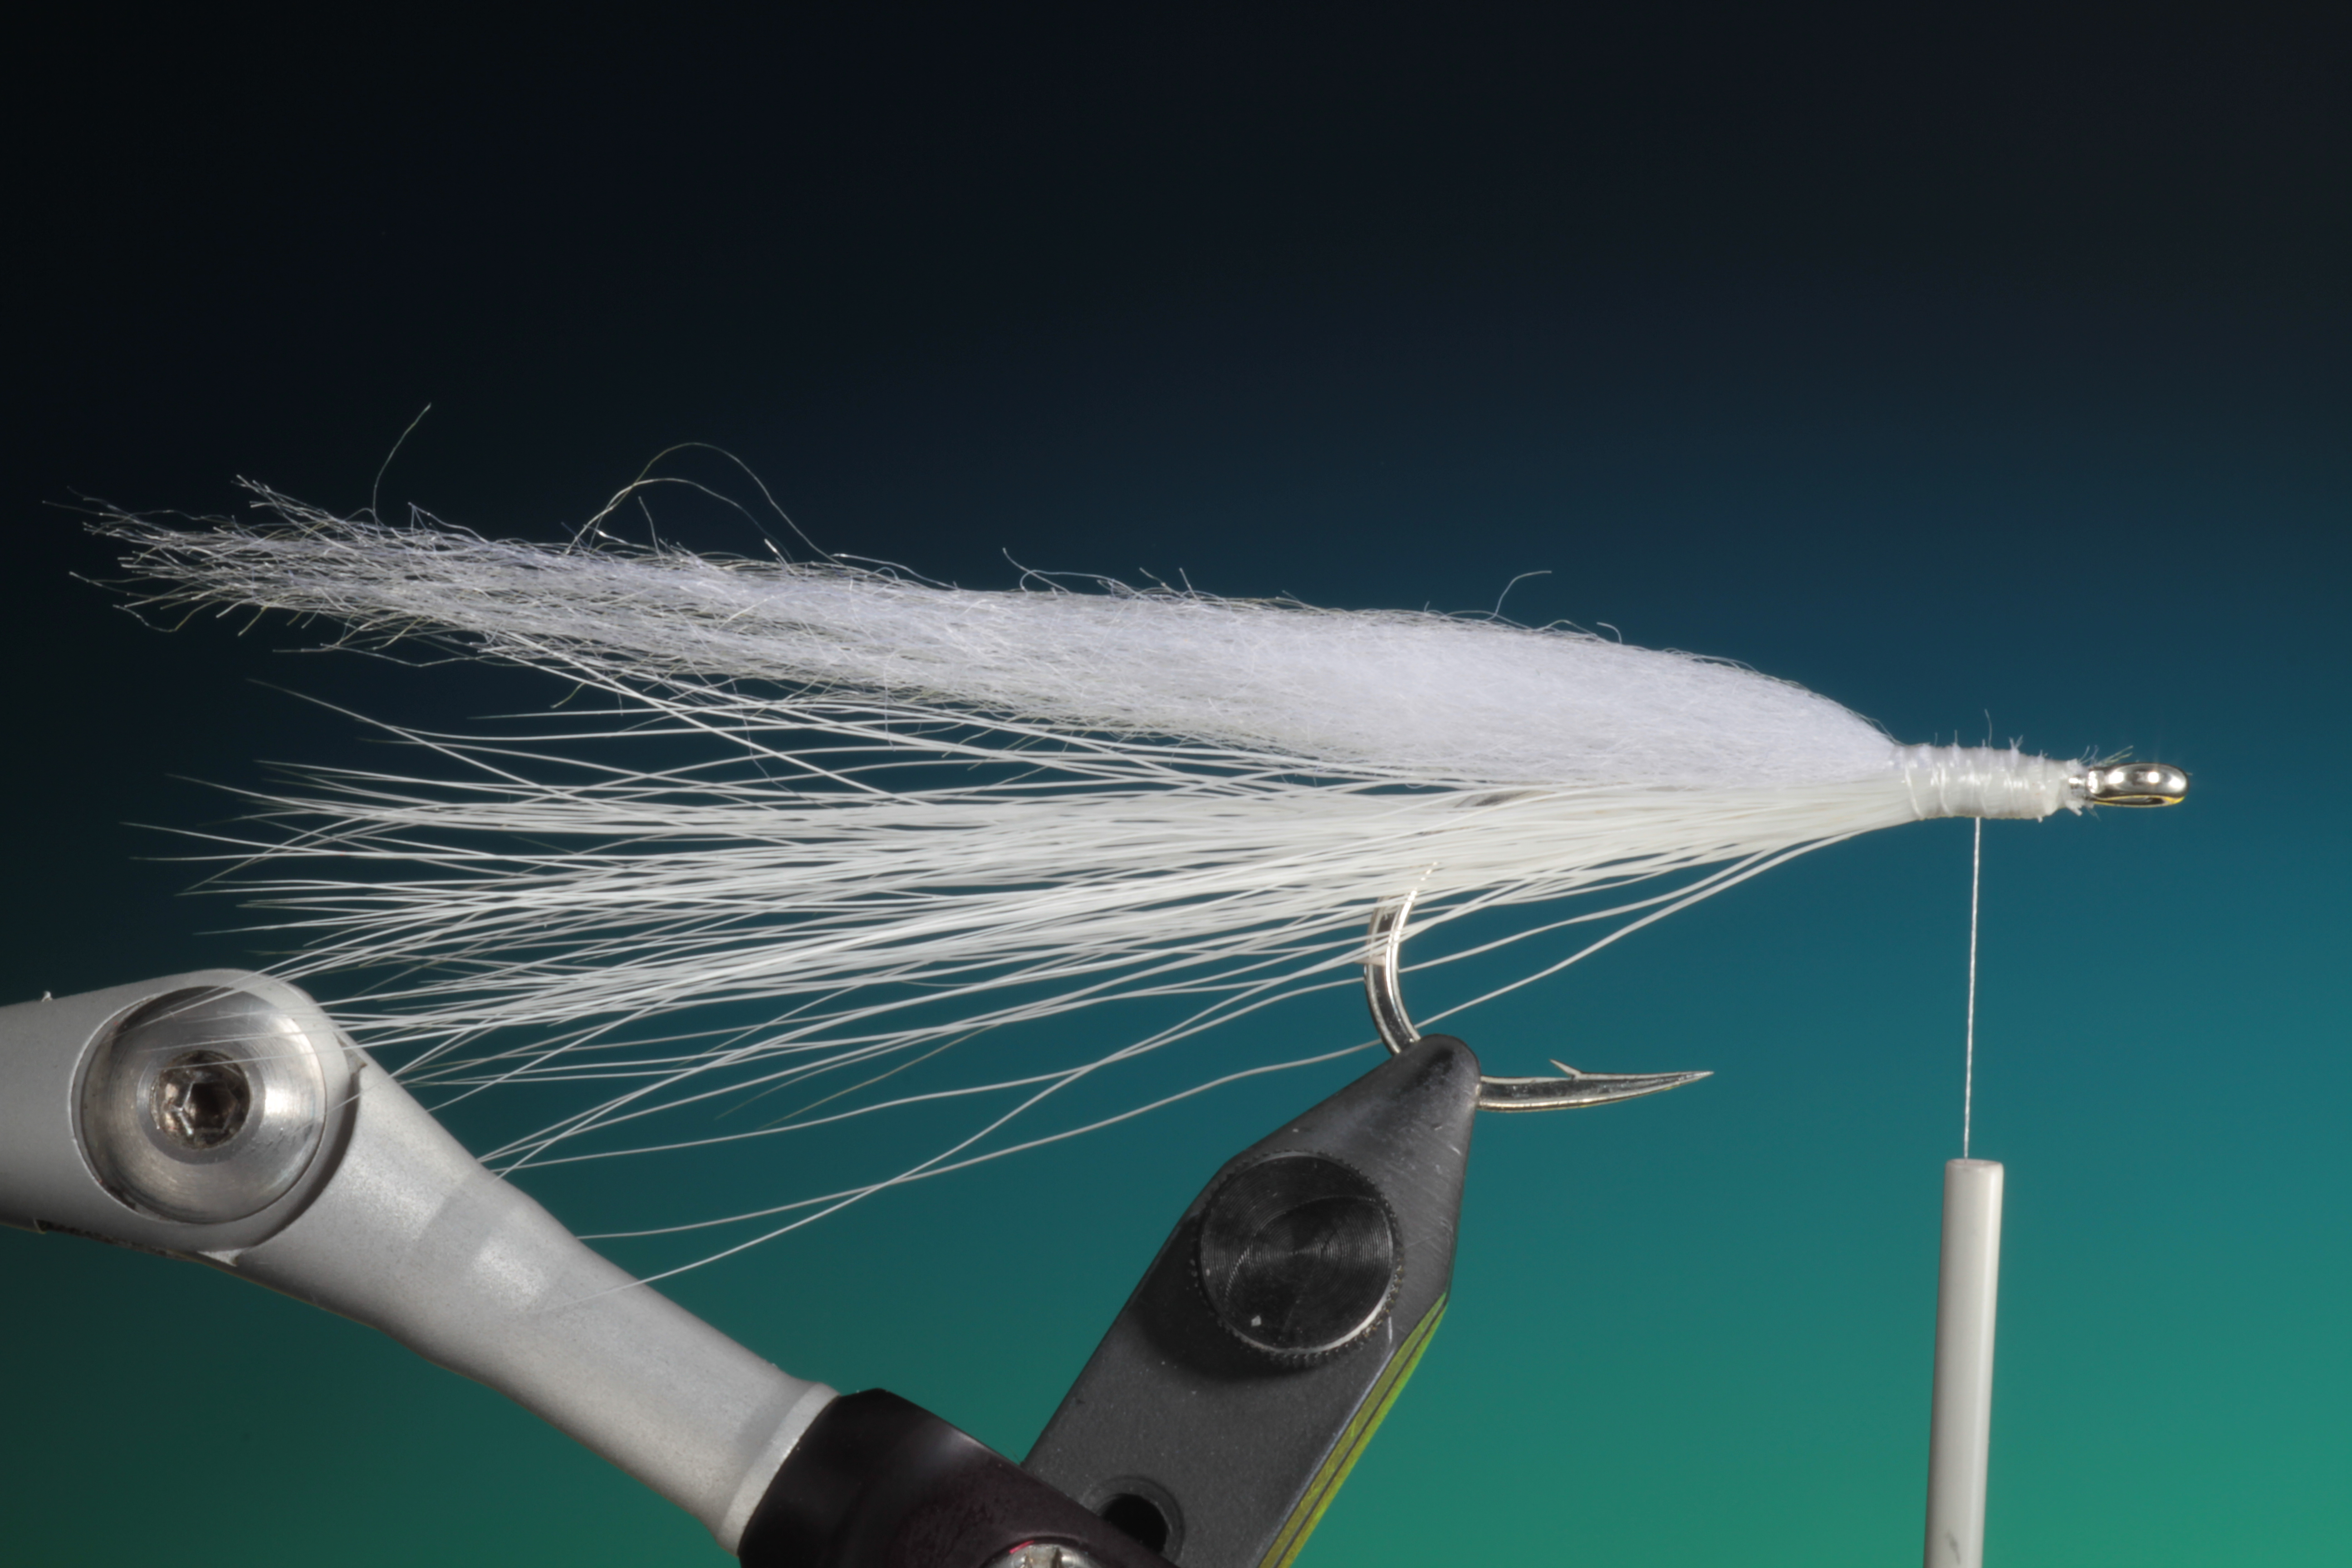
5
Now cover the craft fur with a bunch of brown buck tail. Once this is done you can place a drop of varnish on the whippings just to strengthen them.
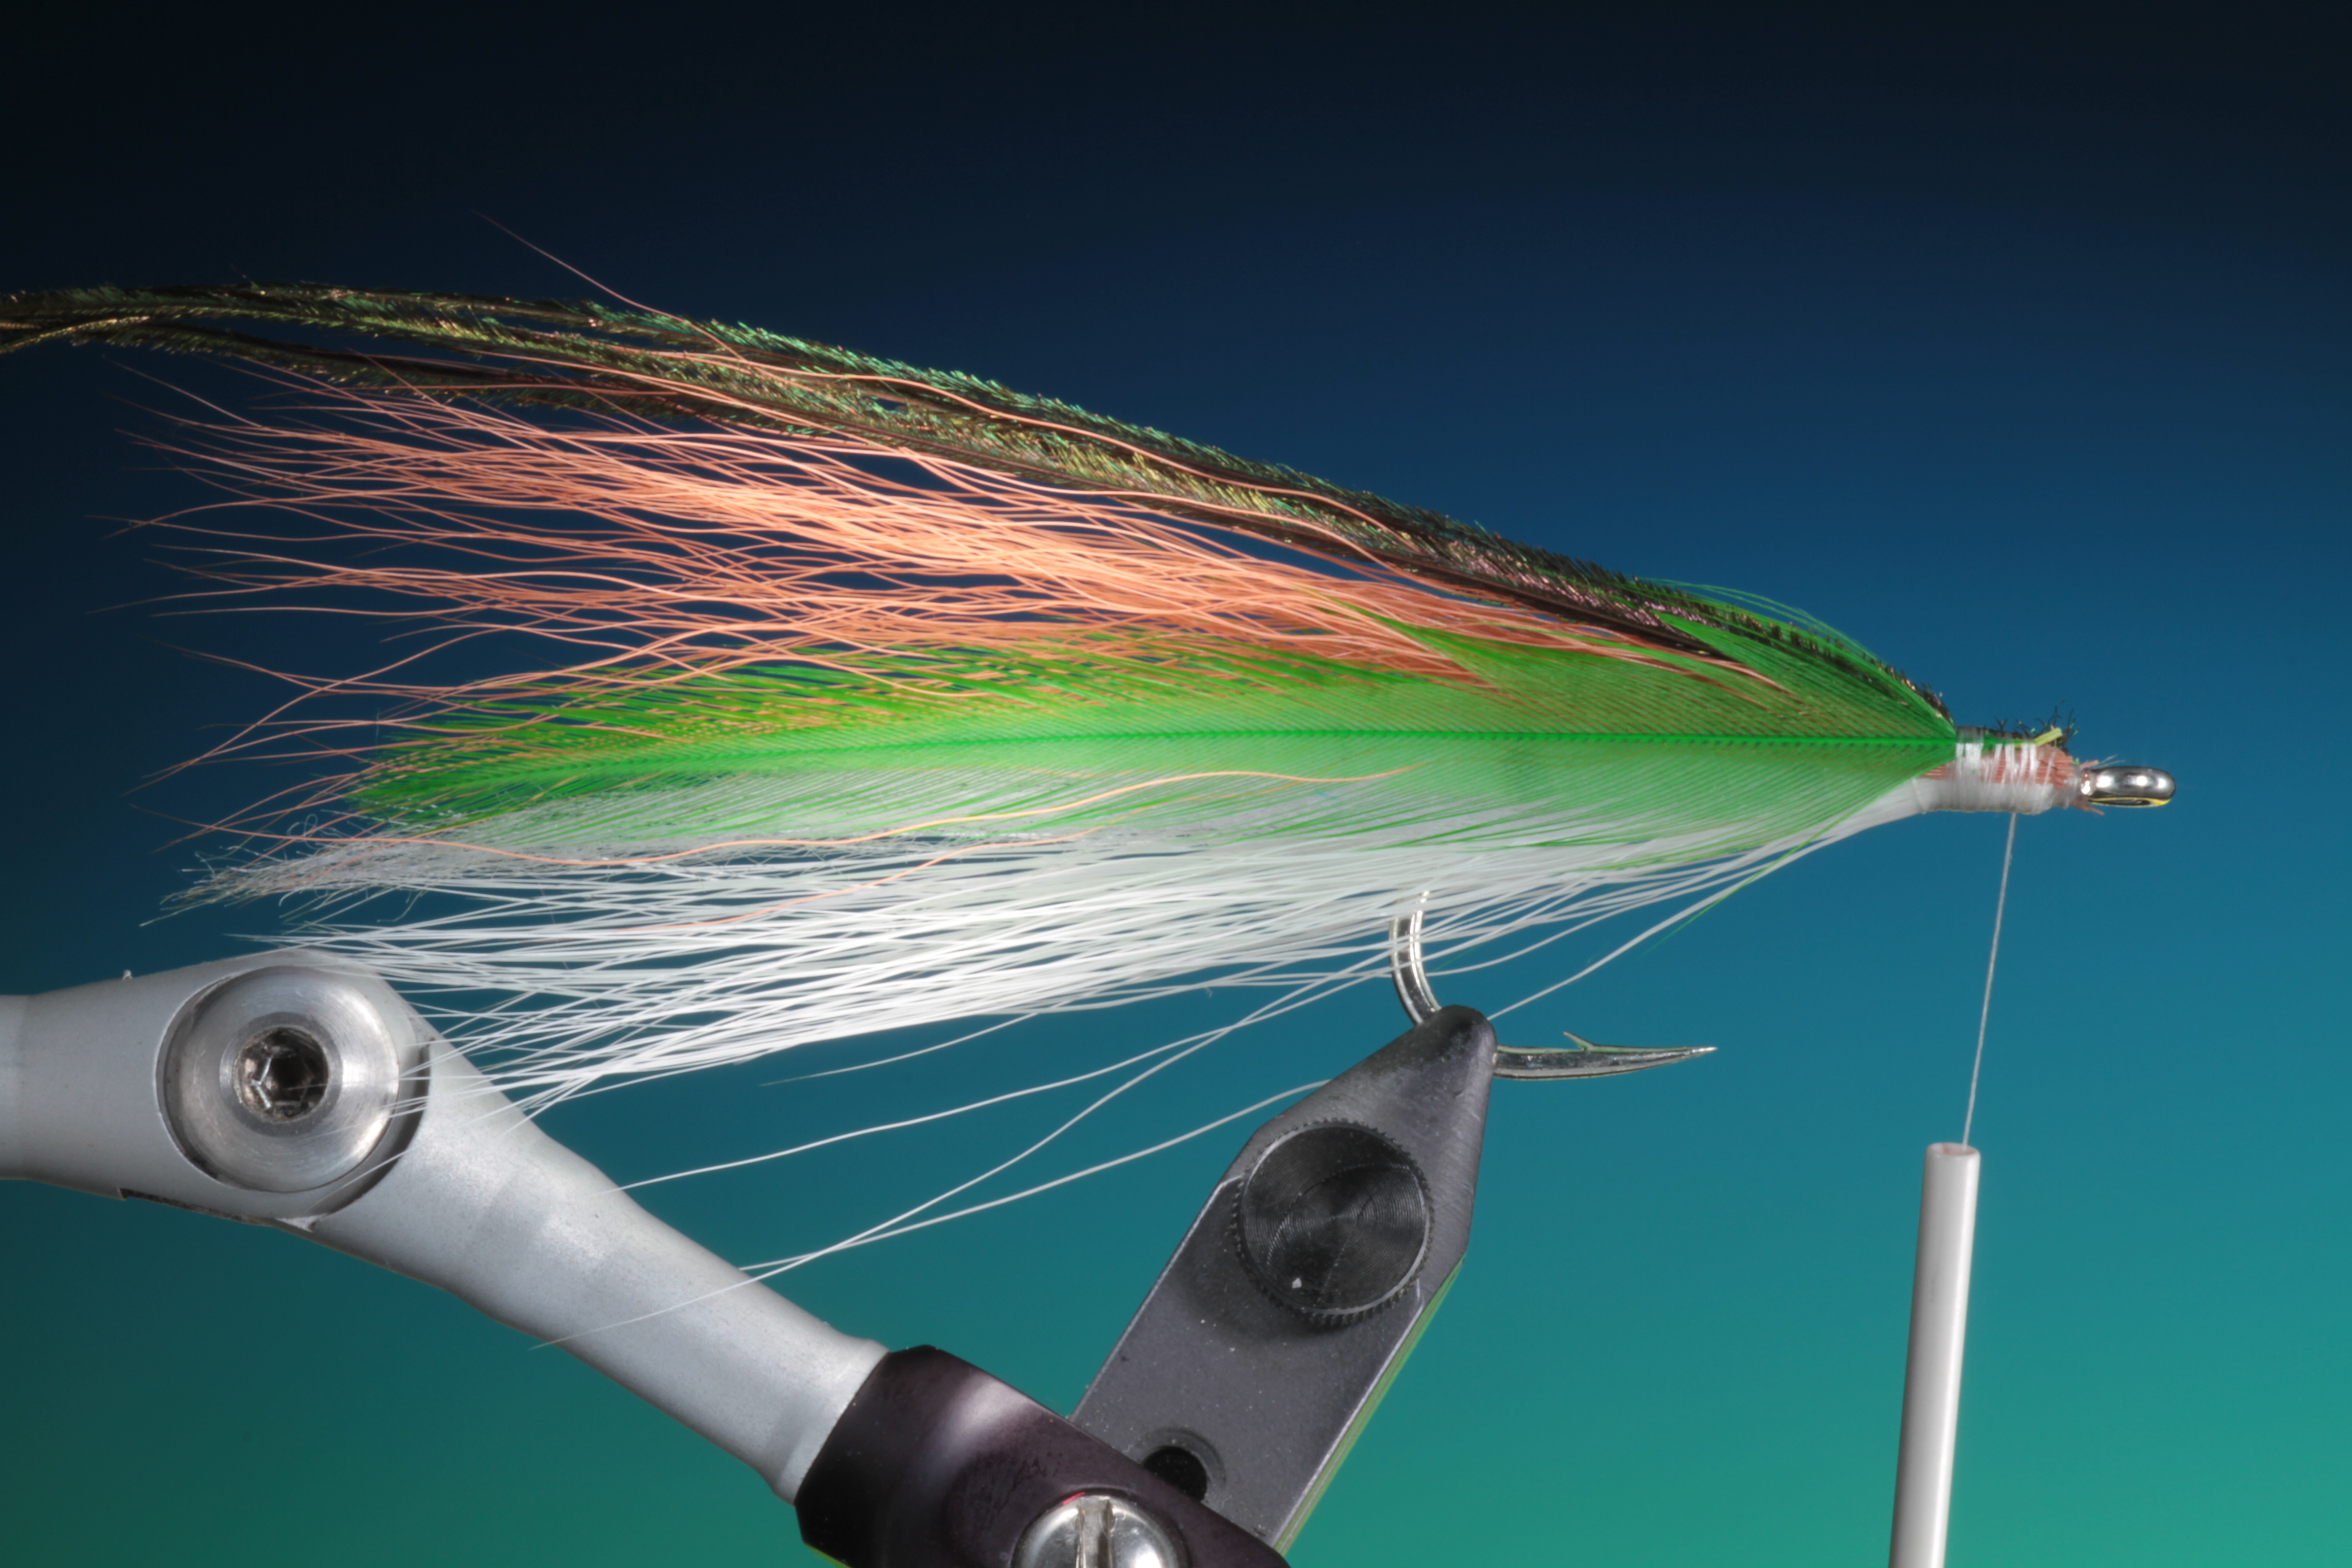
On top of the buck tail tie in four or five lengths of peacock herl. The best herl for this is found just under the eye of the peacock tail feather. Make these a little longer than the buck tail.
7
Select two green cock hackles and tie in on the sides.
 8
8
Vail the green hackles with two blue dyed grizzle hackles a little shorter than the the green ones.
 9
9
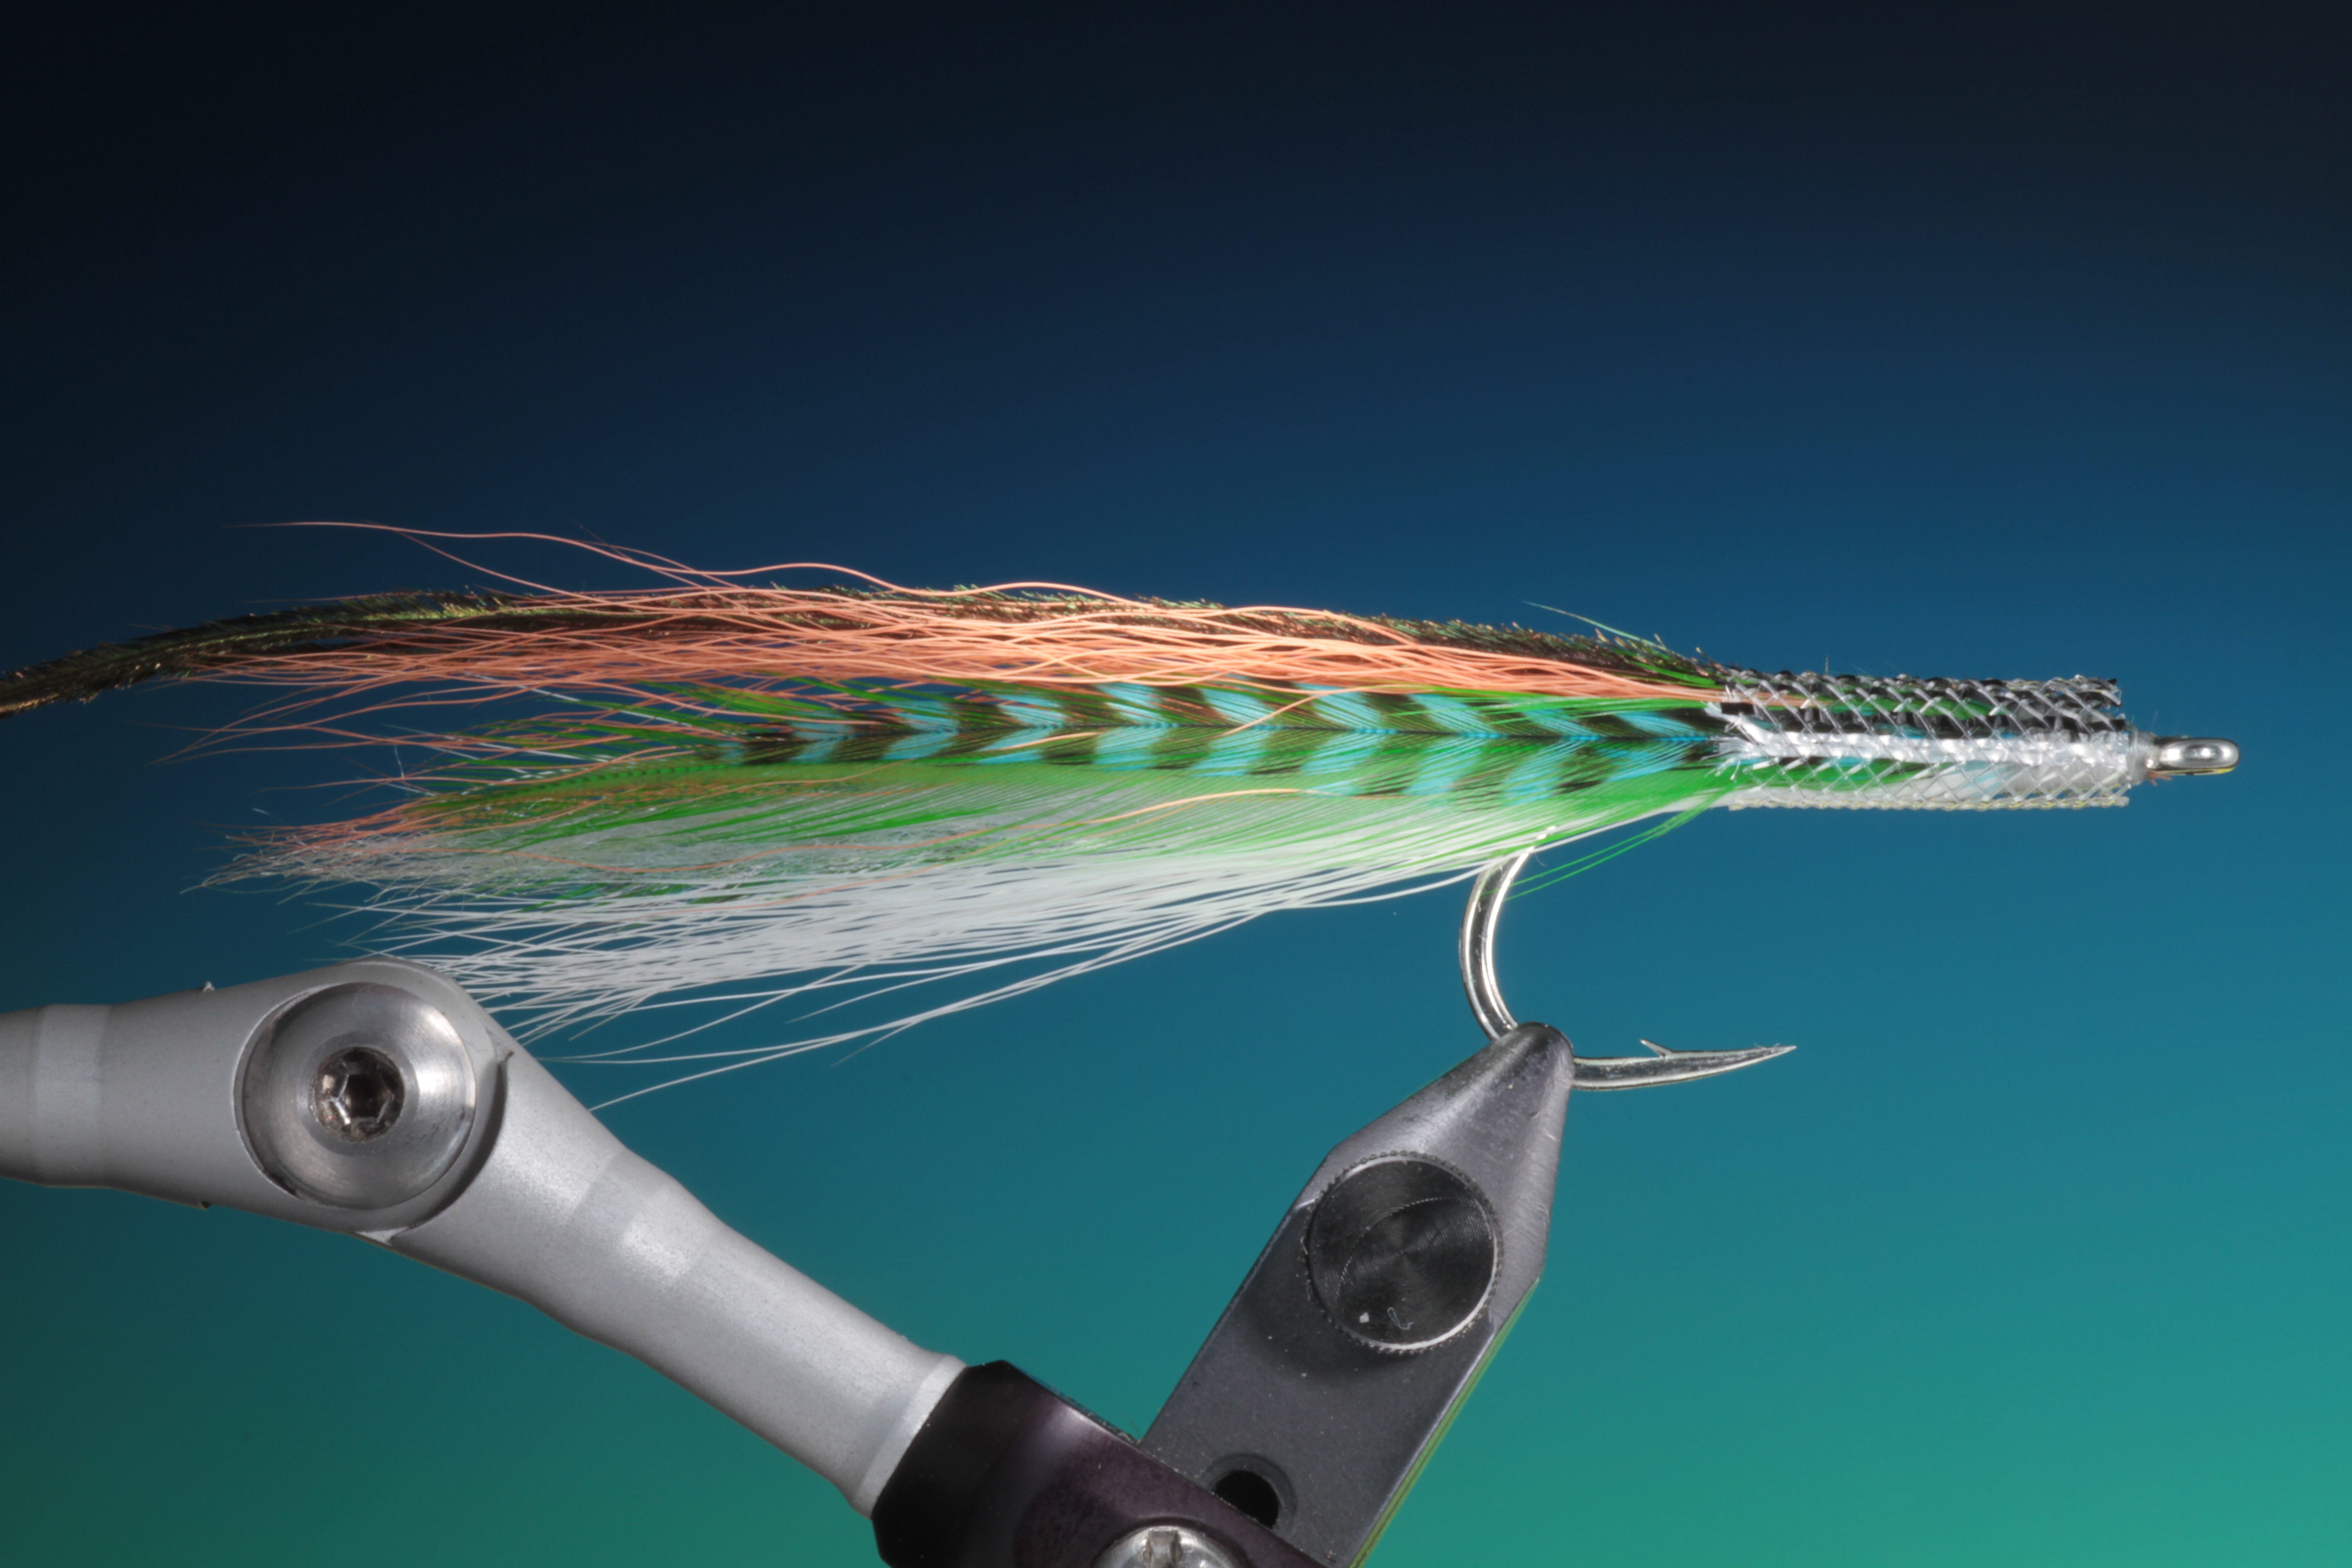
Whip finish and remove your tying thread. Take a short length of E-Z Body and thread this over the head of the fly.
 10
10
Re attach your tying thread and tie down the E-Z Body behind the hook eye.
 11
11
Take another three or four strands of peacock herl and tie in for the topping.
 12
12
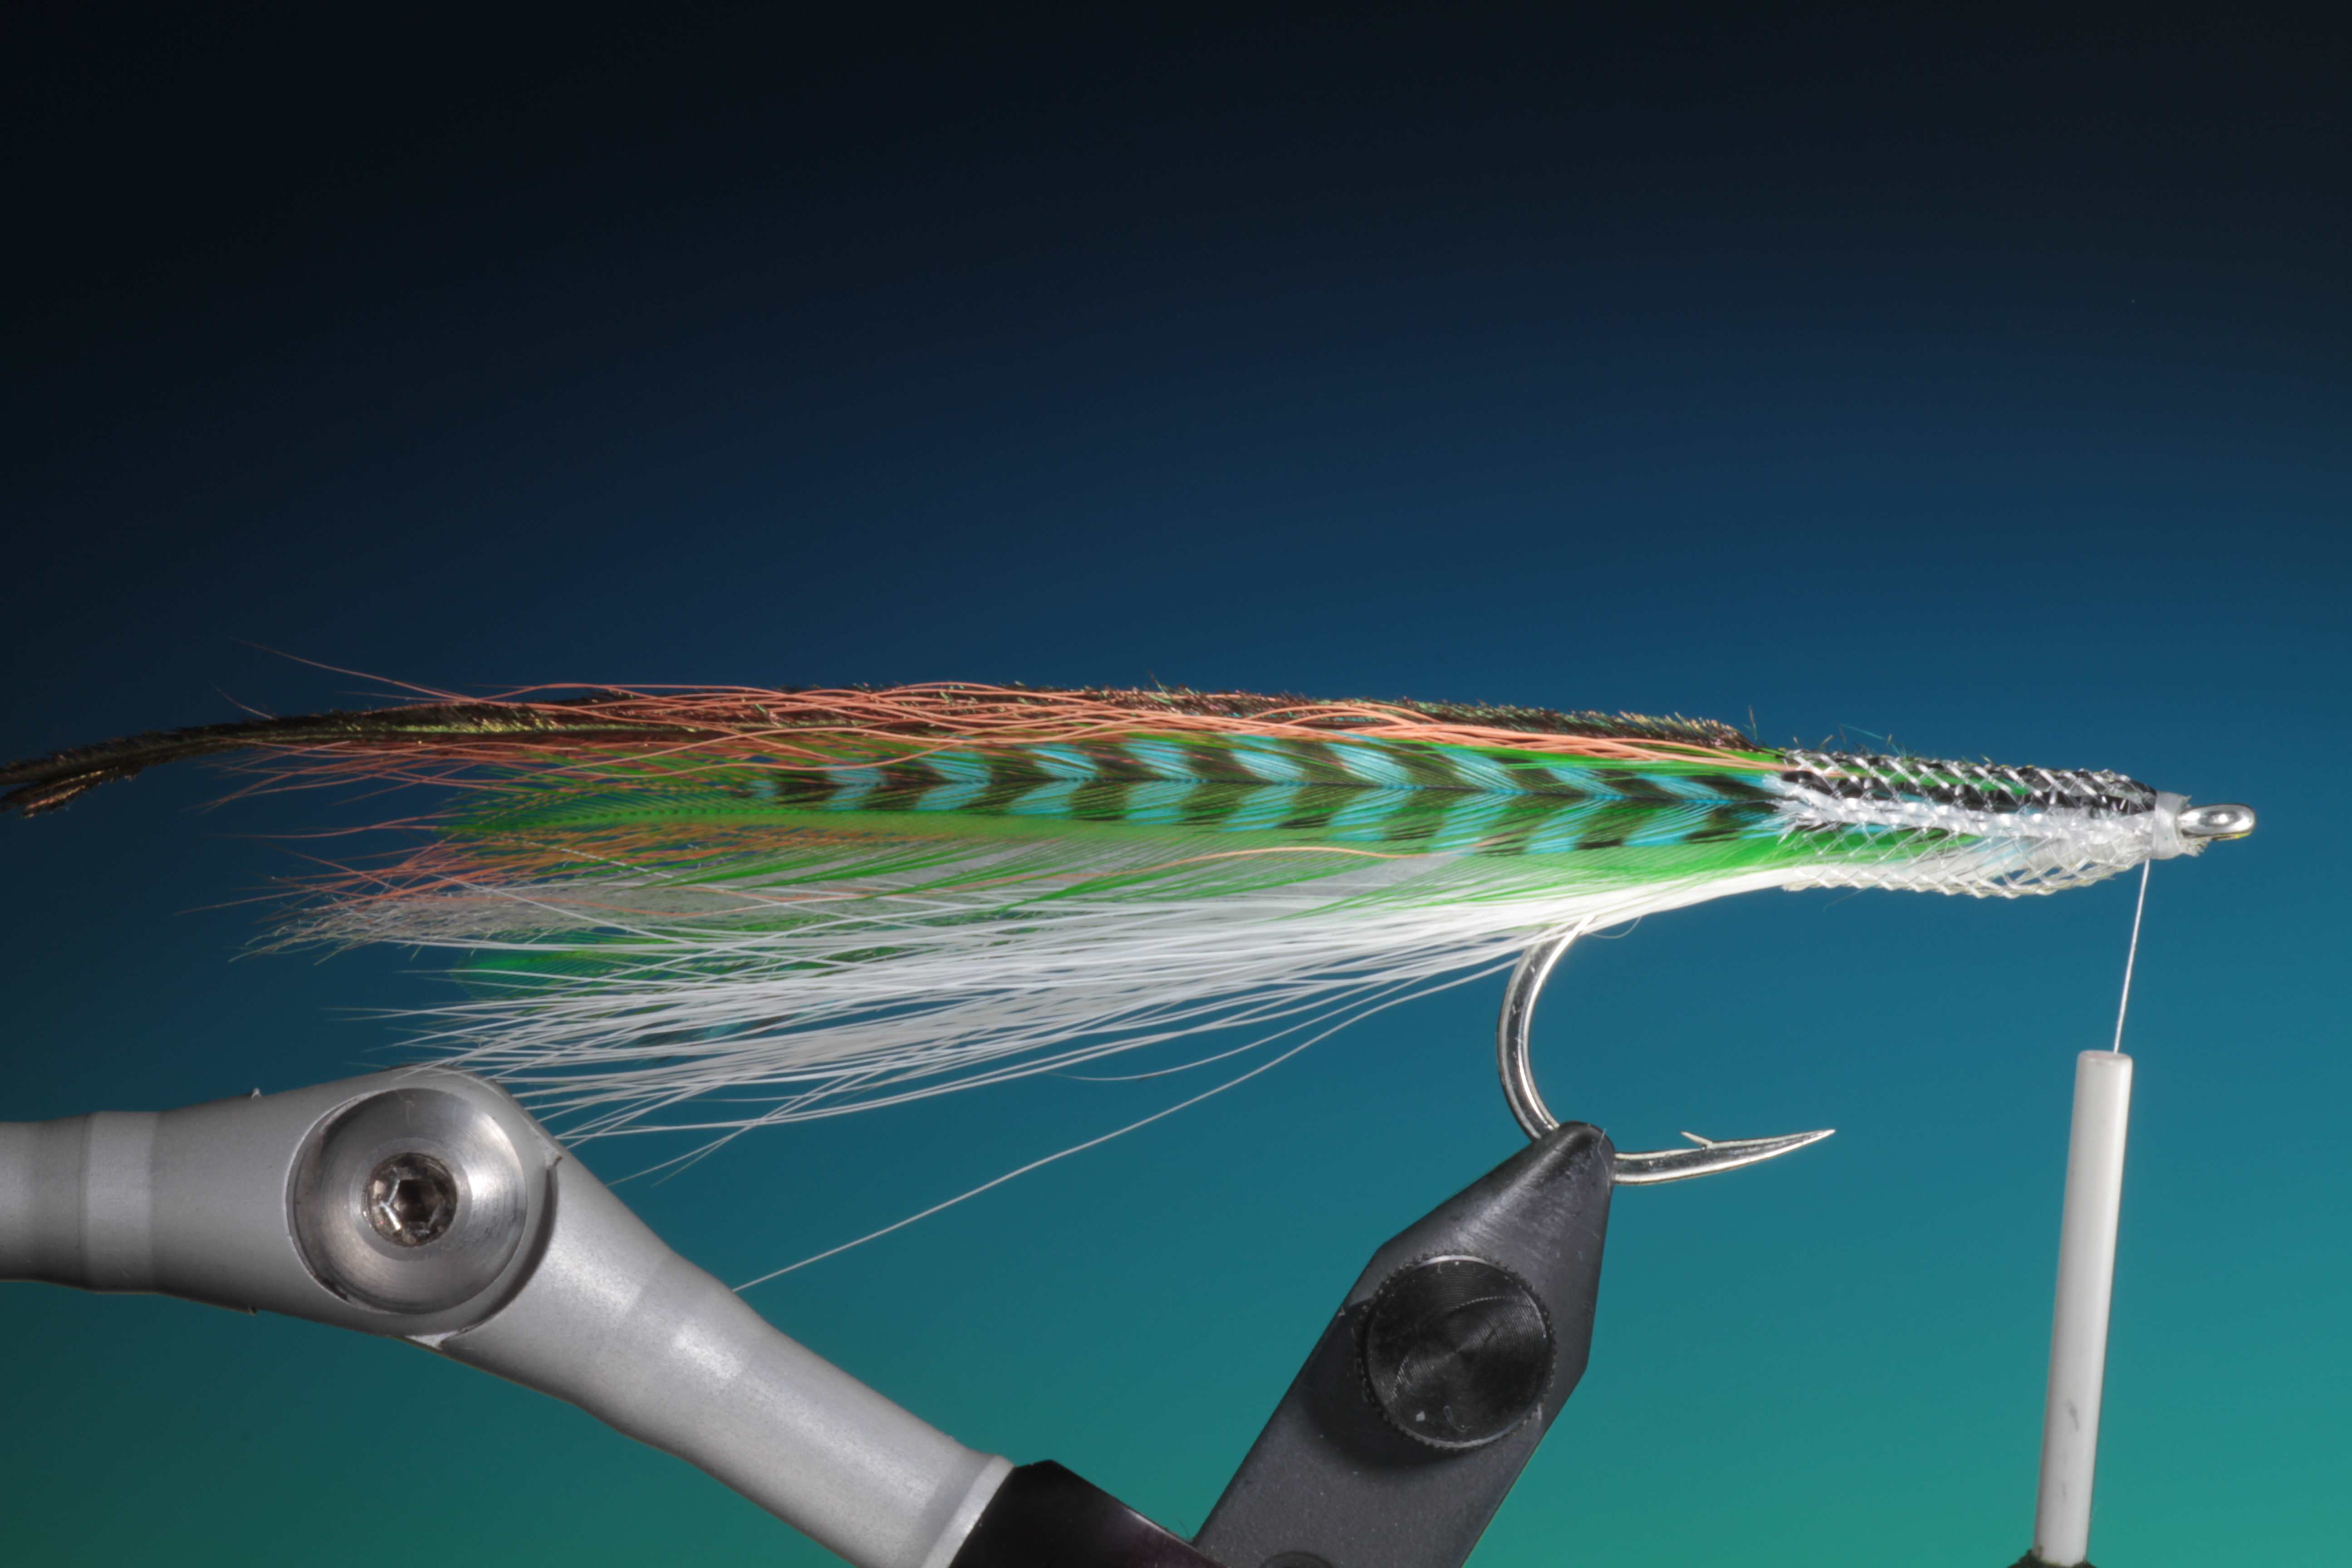
Select the correct size of Fleye foil for the hook size.
 13
13
Using the short tab on the foil, tie them in, one each side.
 14
14
Whip finish and remove the tying thread. Holding down the peacock herl topping apply a little bug bond to the head.
 15
15
Cure the Bug Bond with the UV light. You can then build a few thin layers of Bug Bond over the whole head until you achieve the correct size and shape.
16
Apply the tape eyes and give one last coat of Bug Bond. Once the fly is finished, wet your fingers and soak the wing, while stroking it backwards. This will hold the wing in the correct shape and dry this way ready for use.
Order My new book


WOW! That’s absolutely amazing! So beautiful, and you simplified the instructions so well! Thank you! Please keep it up.
– Justin Aldrich.
Hi Justin, Thanks for the comment. I will be posting pore soon.
Cheers
Barry
Wonderful..again..!!
Thanks Amando.
Great looking fly!!!!
All the best Chris
Thanks Chris, Maybe i will see you at BFFI next year? I will be tying on the Veniard stand.
Cheers
Barry