

My apologies to everyone doing the fly tying course, but the last few days have been busy making step by steps for magazines, but now I’m all done and ready to post a patterns for the the tyer that is a little more advanced, but of course you can always give this one a go even if you are a beginner. The original Ammonite nymph, if I am not mistaken, comes from the vice of UK tyer and photographer Steve Thonrton. Getting this great looking nymph right is all about proportions! So if you are going to give this a go be precise. Although I couldn’t find Steve’s original recipe for Ammonite, I have improvised and used materials I thought would work well.
Dont forget! If you have any questions please dont hesitate to ask. Just post your question at the foot of this page.
If you would like to receive a message when the next stage of the course is published, just add your e mail address at the top right of this page. Thanks, The feather bender.
Hook: Czech Nymph # 12-4
Tying thread: Dyneema
Underbody: Dubbing
Body: Nymph Skin http://www.virtual-nymph.com/
Thorax: Dubbing
Wing case: Flexibody http://www.virtual-nymph.com/
Legs: Muskrat dubbing brush and an Indian Dark badger hackle

1.
Secure your hook in the vise so you have access to the lower bend with the tying thread.

2.
Attach your tying thread and run all the way down into the bend as shown.

3.
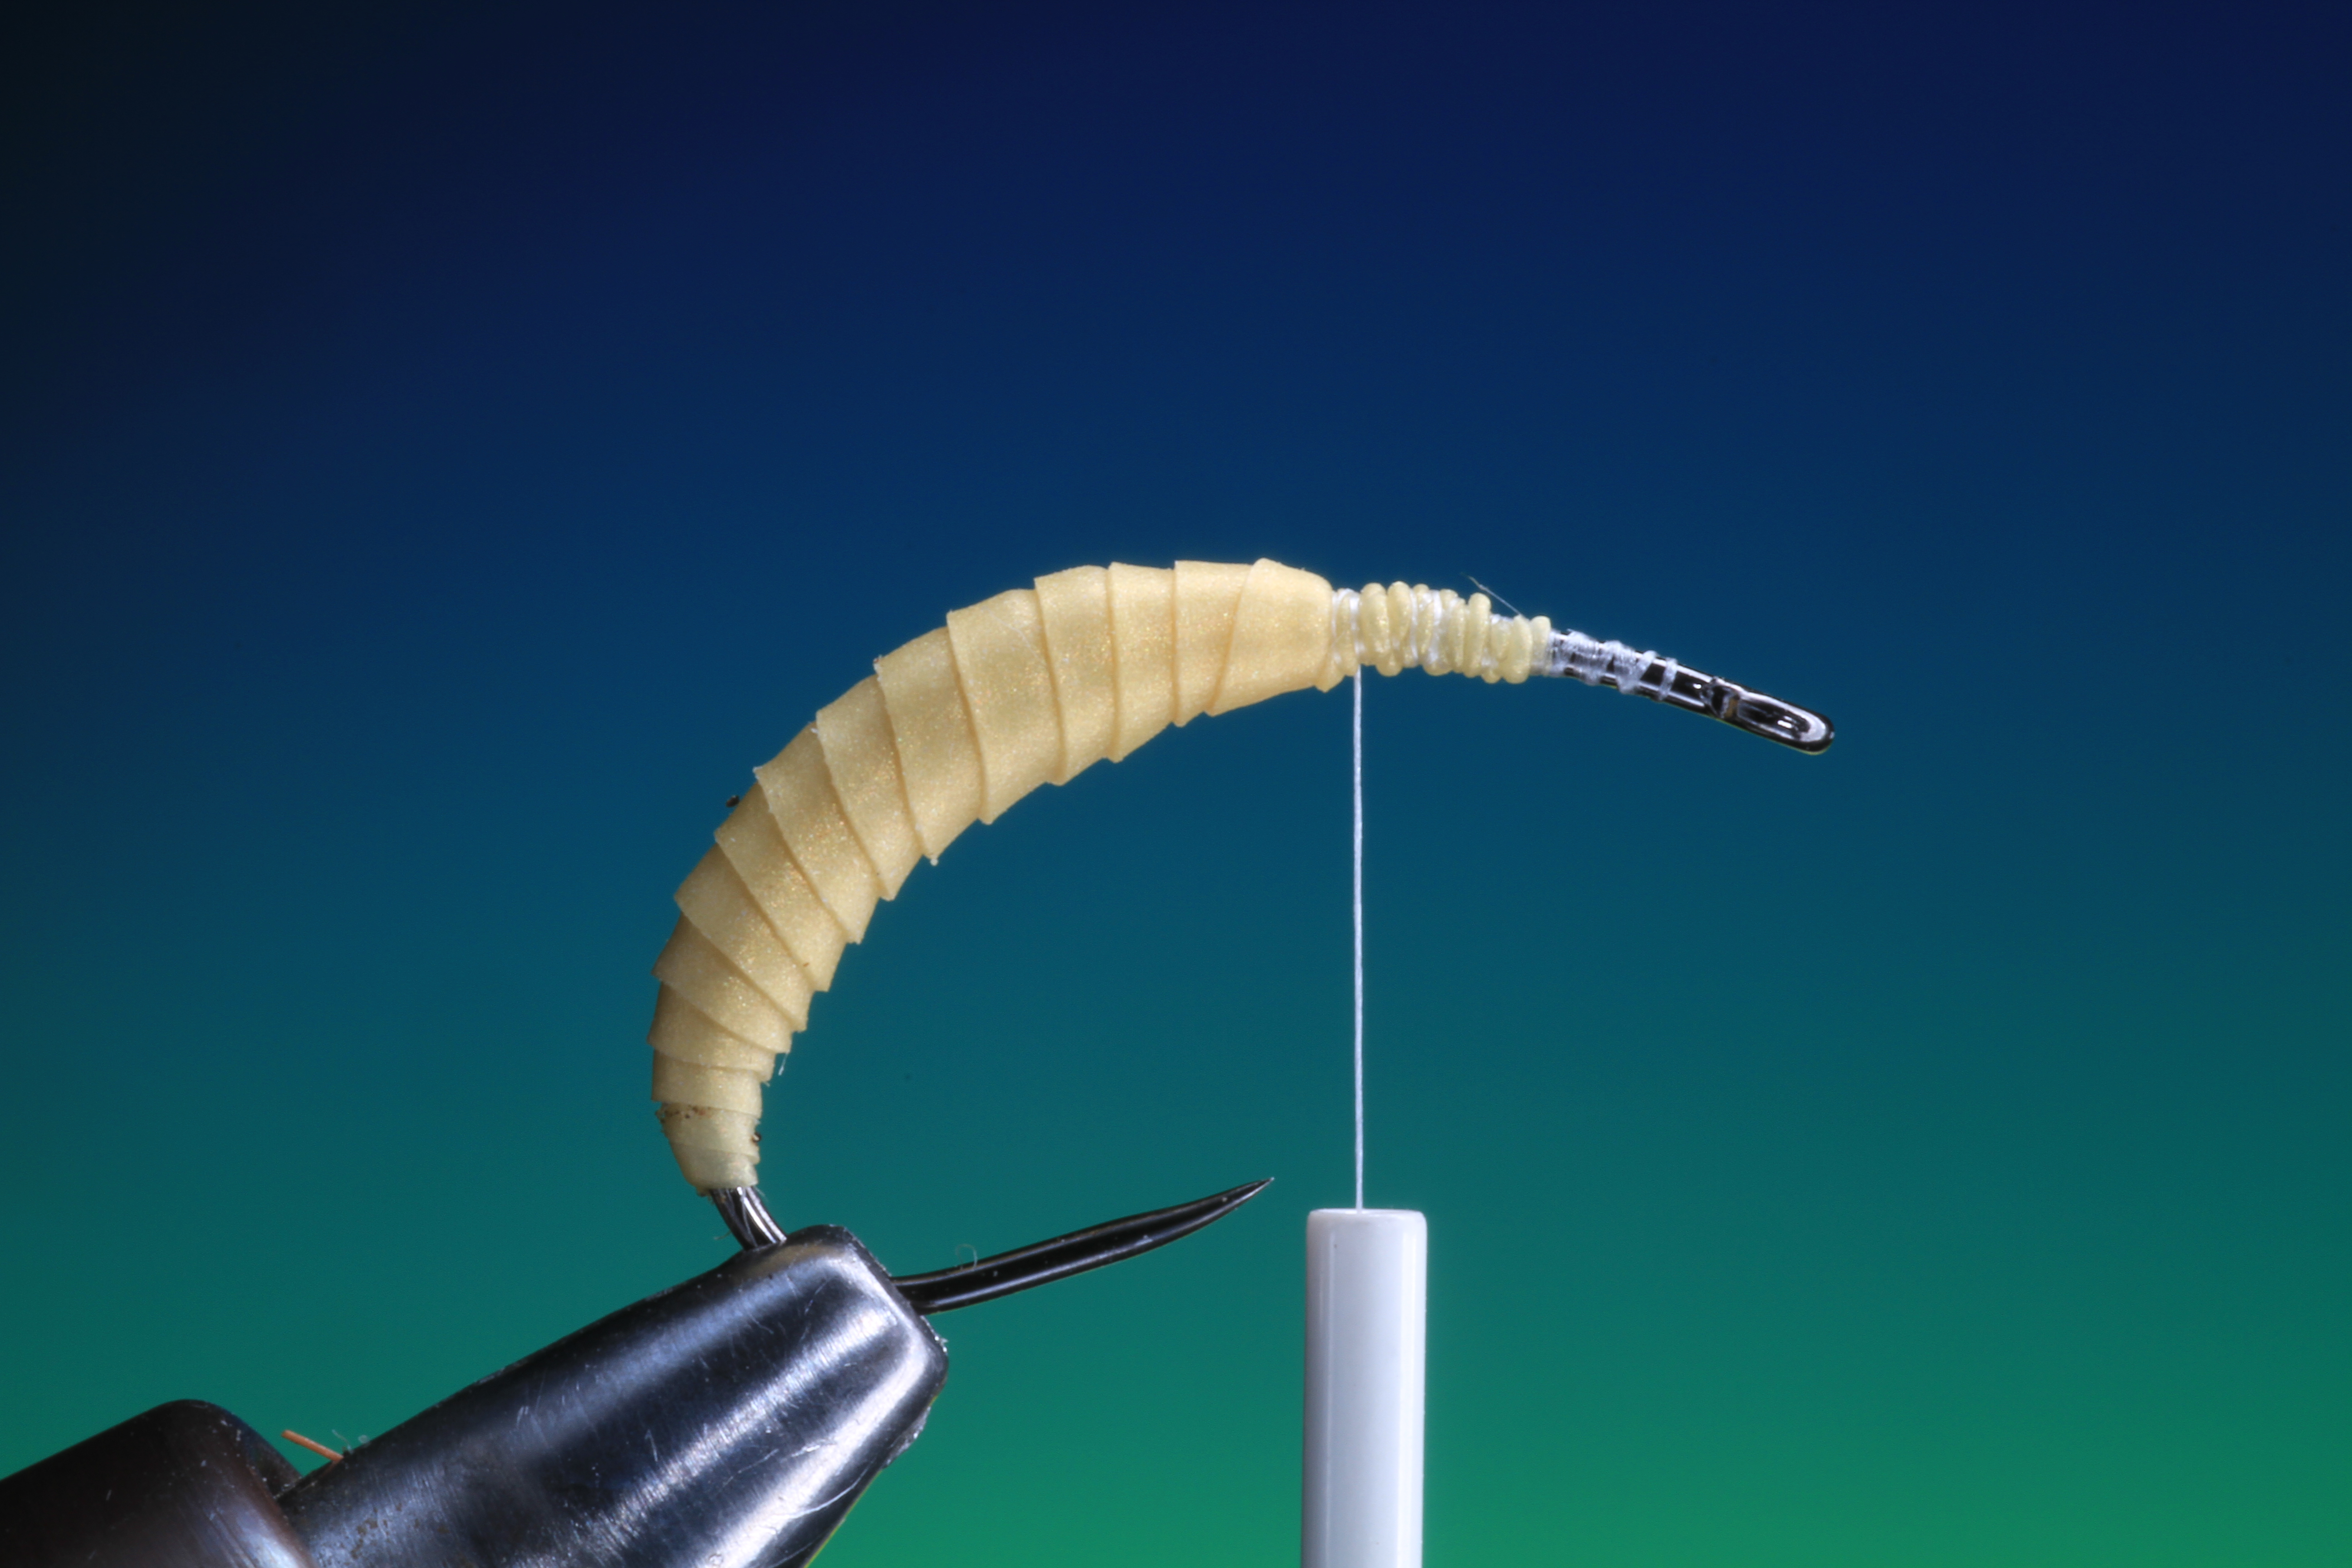
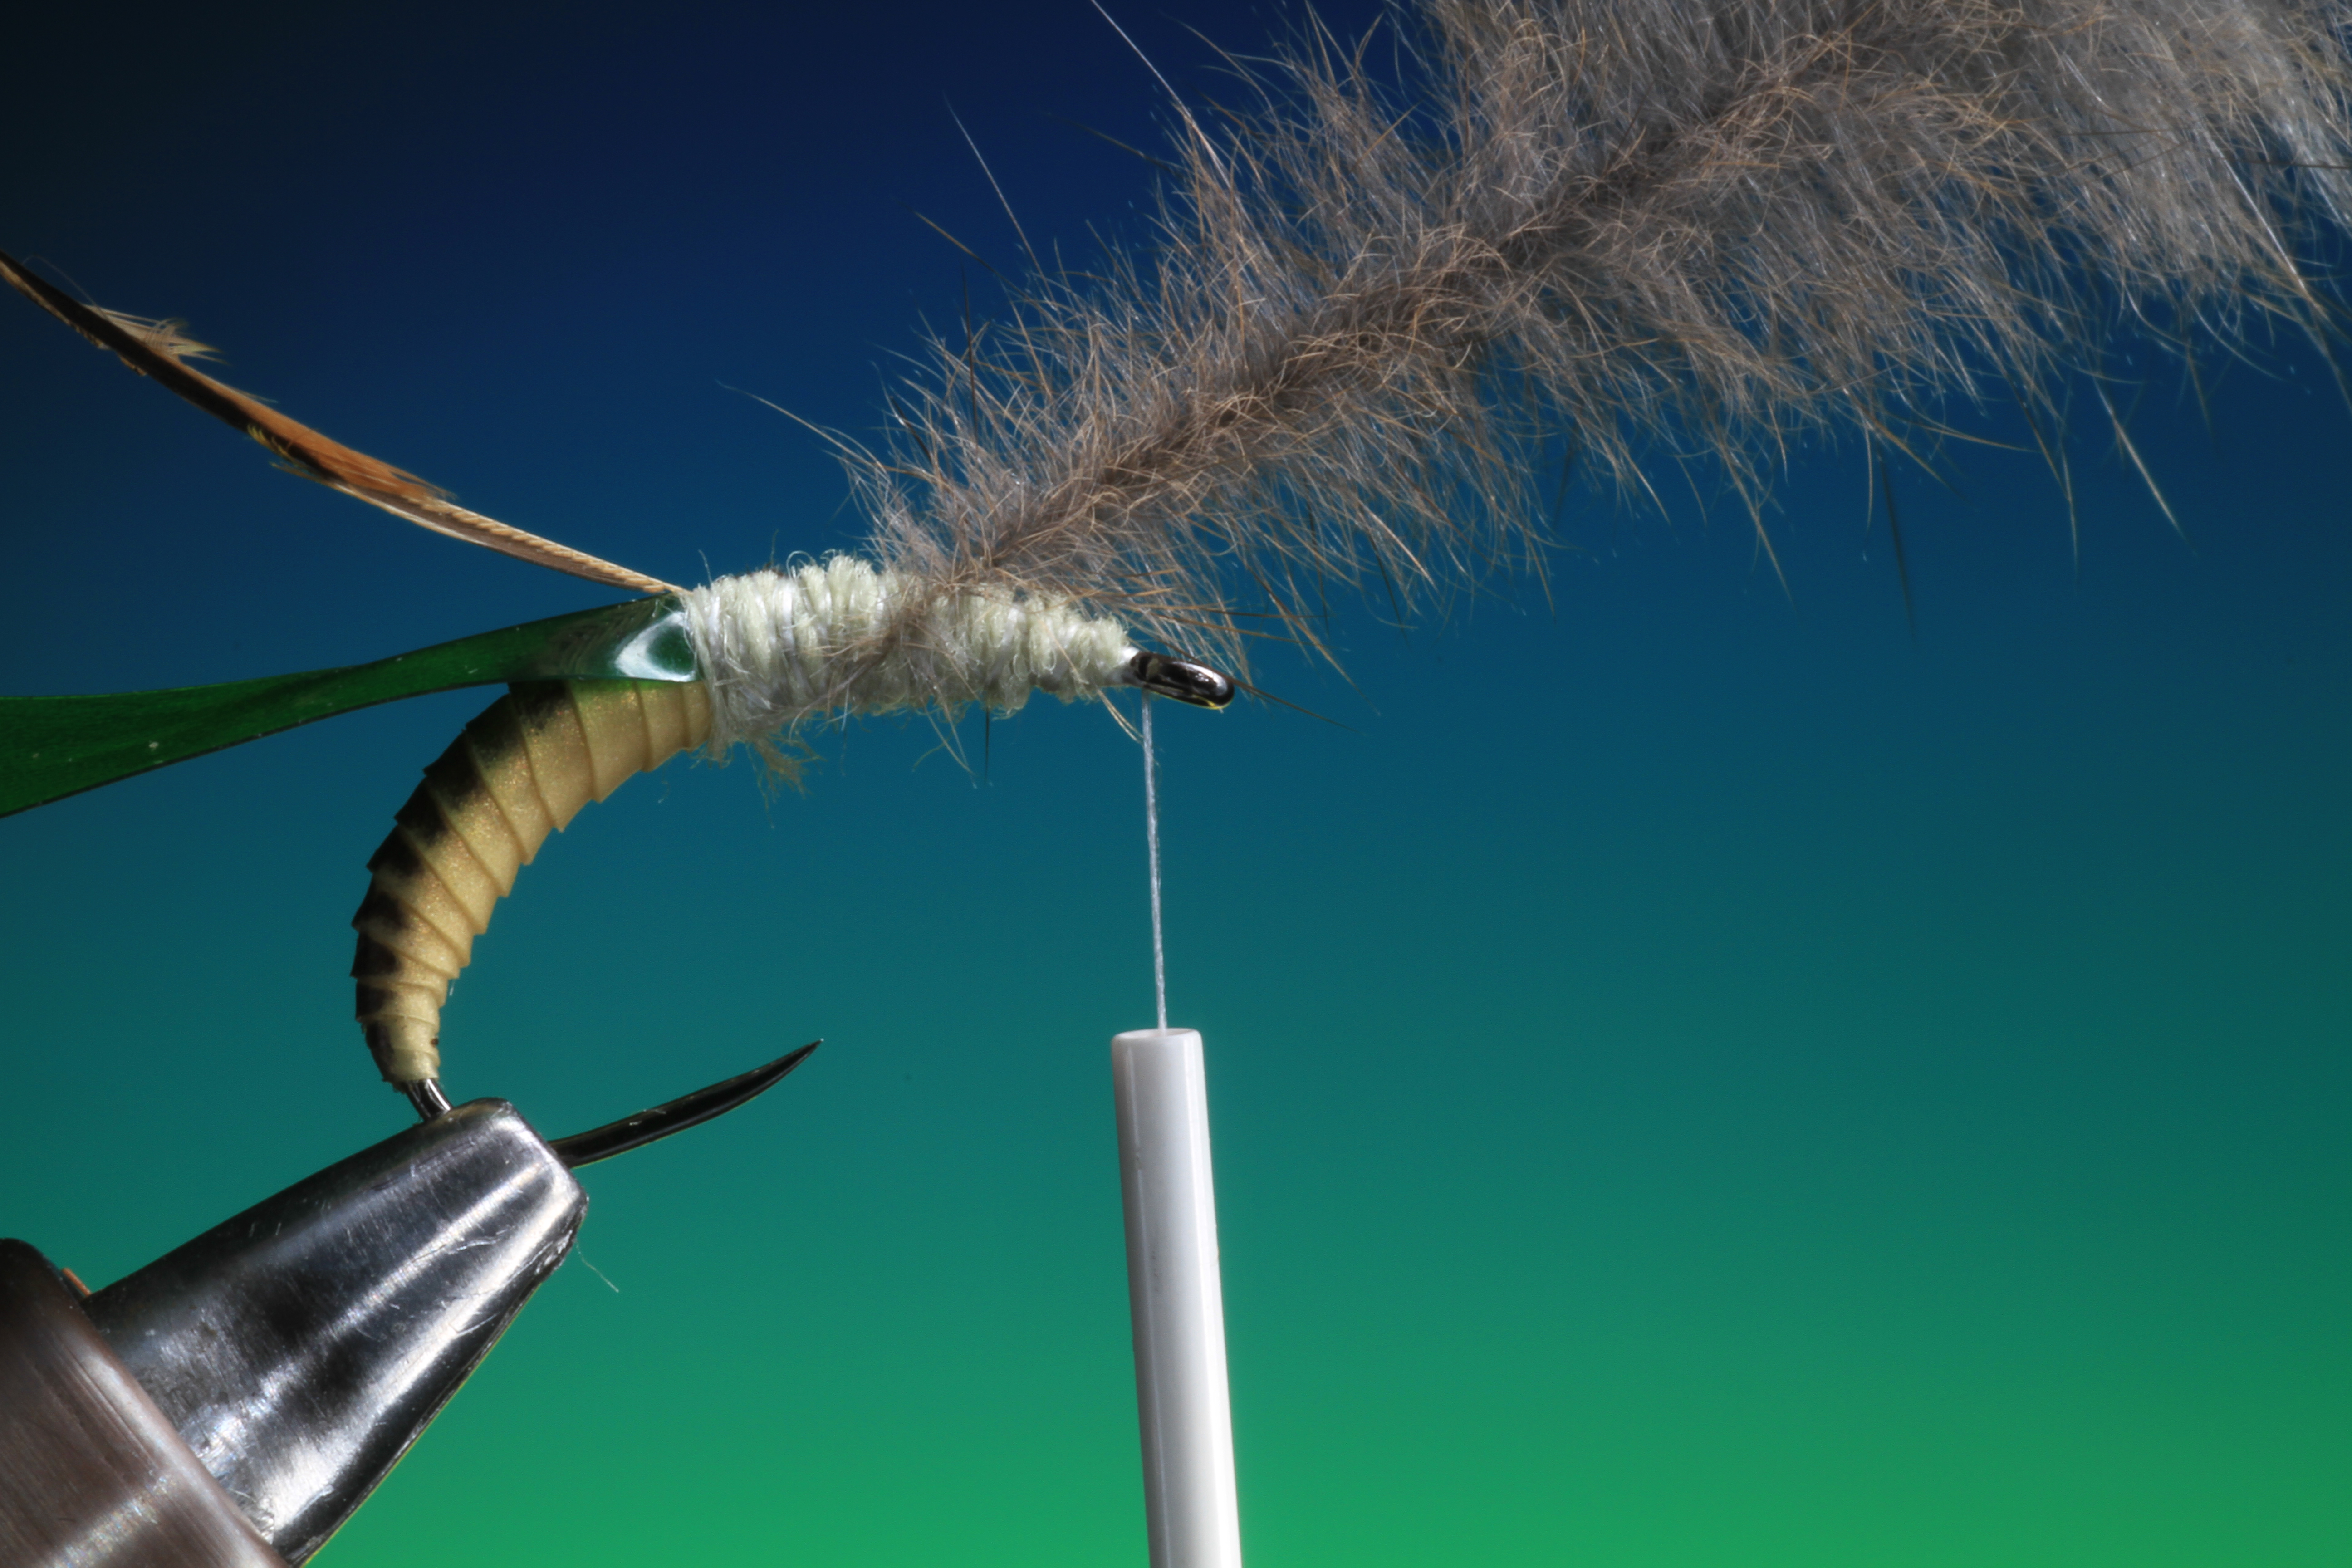
Select your chosen colour of nymph skin and cut a 10 cm length.

4.
Cut the end of the nymph skin strip at an angle. The more acute the cut the more slim the start of the body.

5.
Tie in the nymph skin.

6.
Dubb the rear part of the body so that you have a fine taper and finish about half way along the hook shank.
7.
Wrap the nymph skin over the dubbed body, each time covering about half the previous wrap. Tie off.

8.
You can now colour the body with a waterproof felt pen.

9.
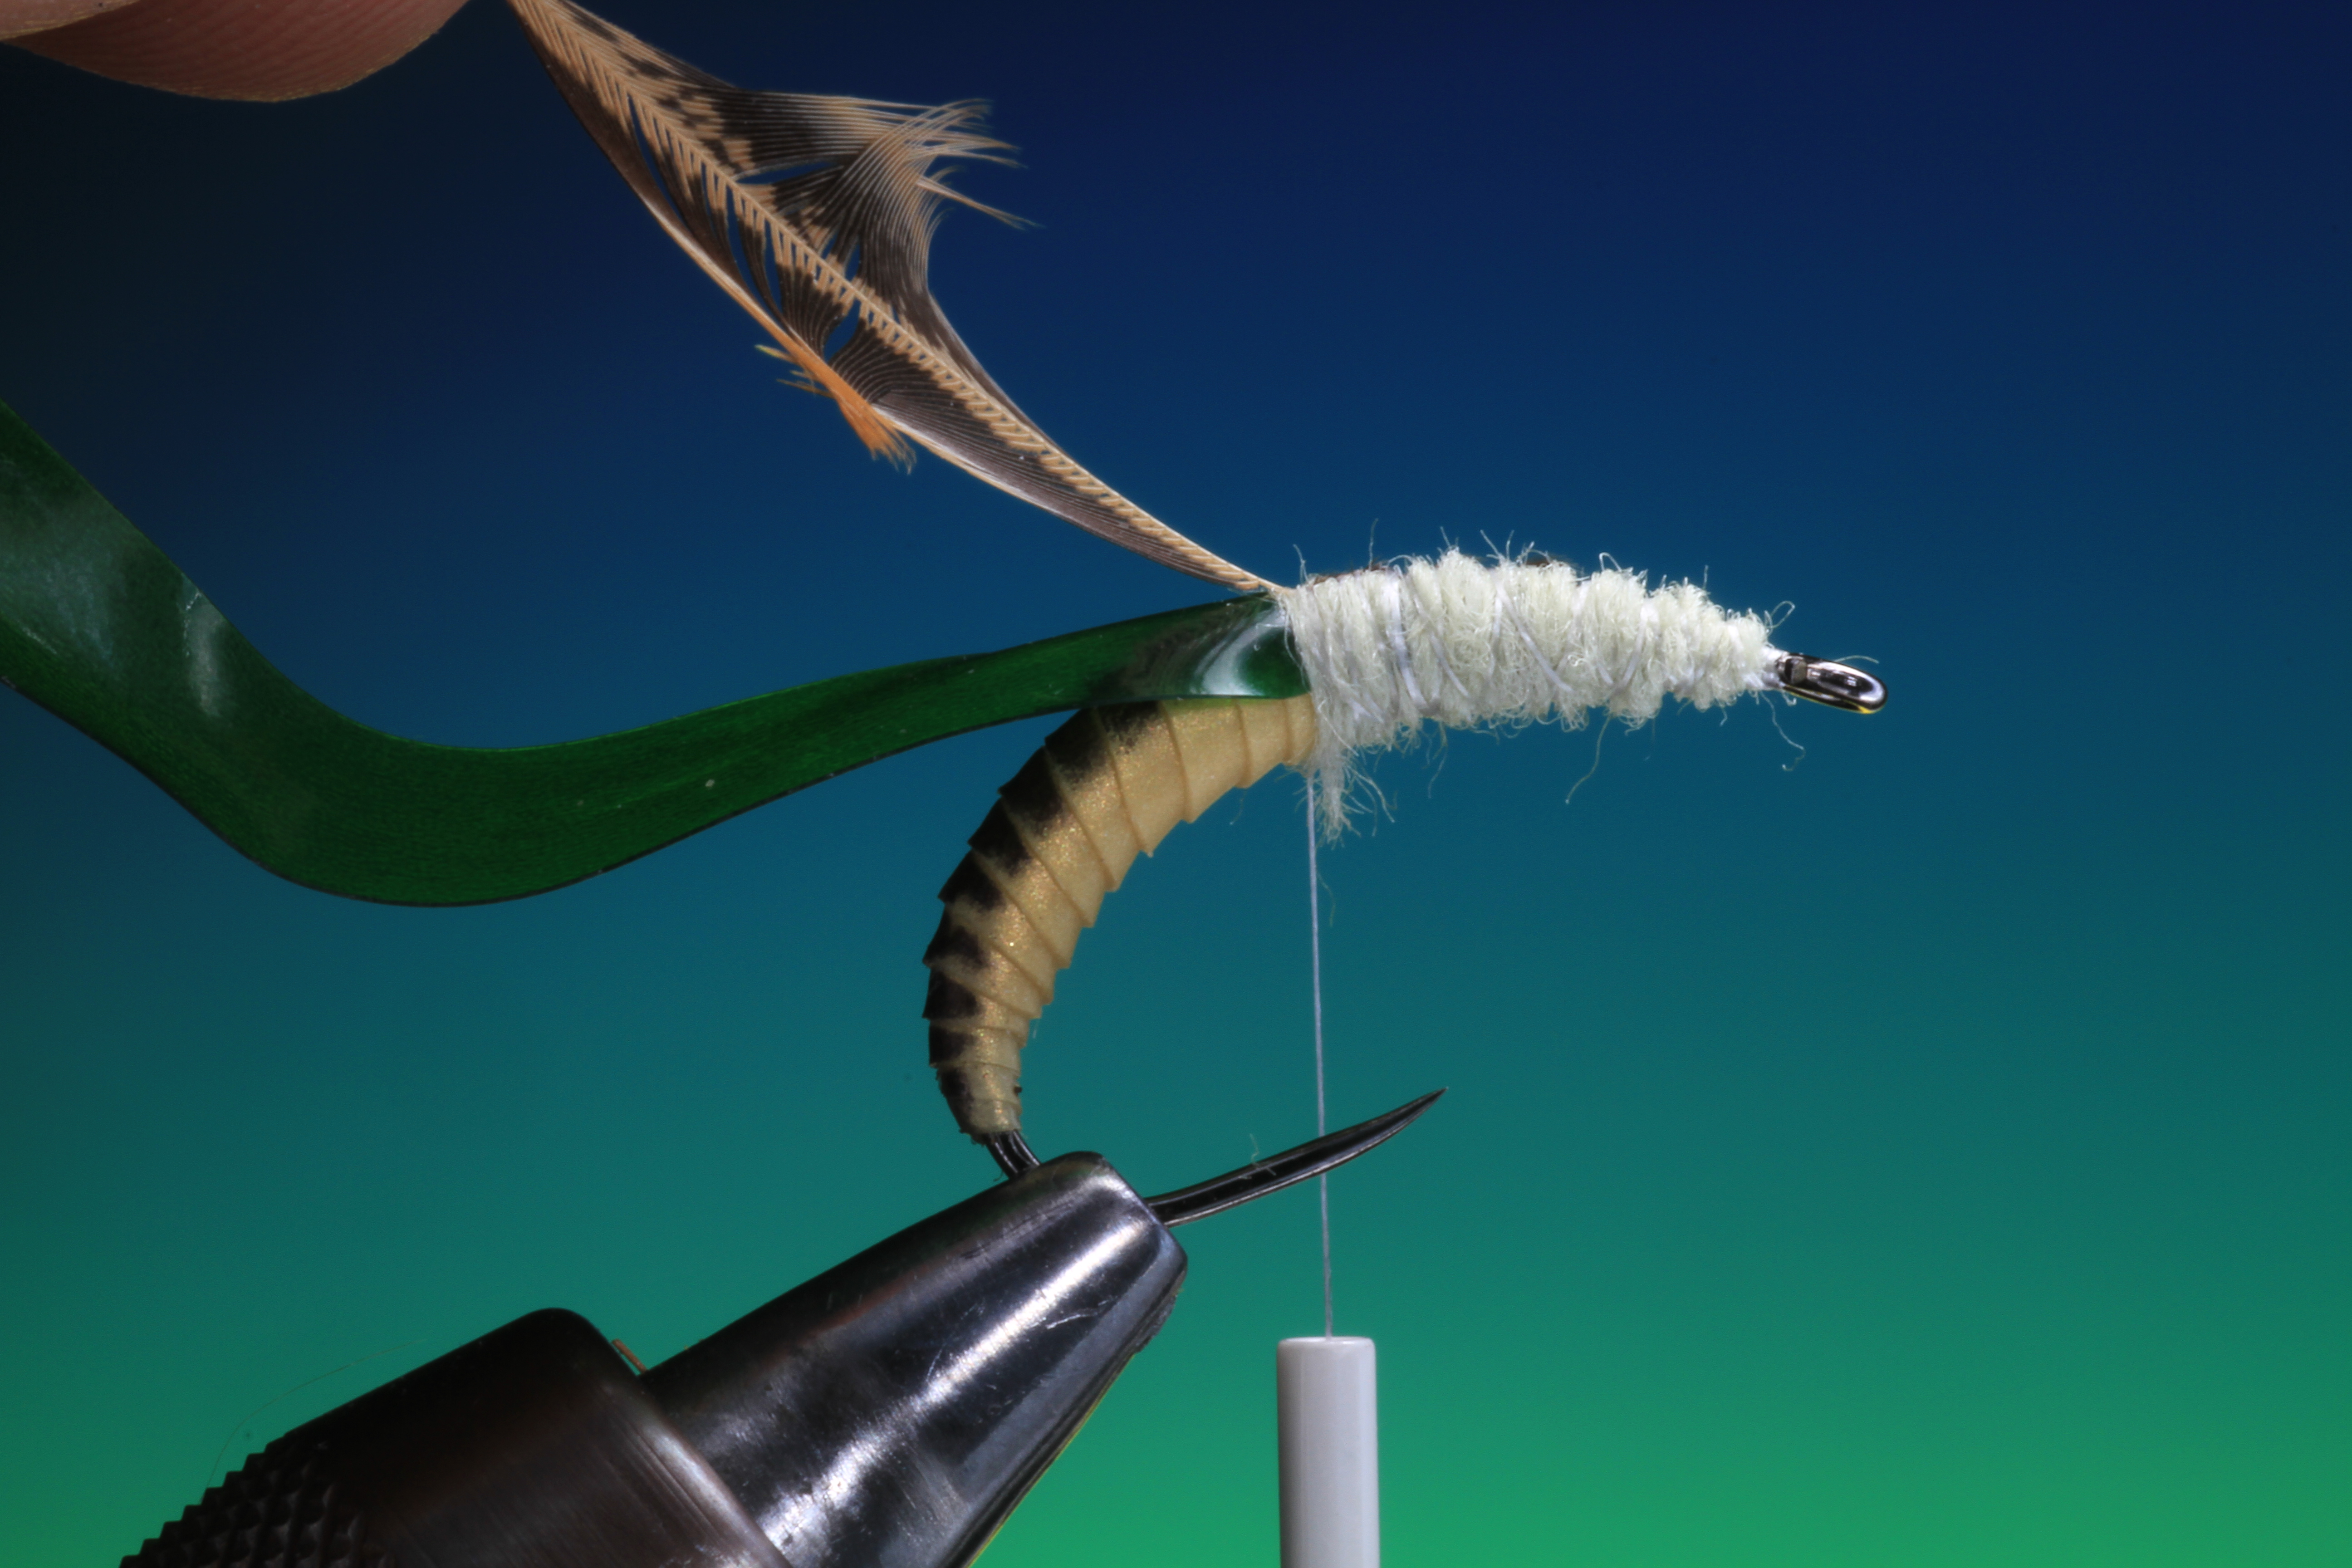
Choose your chosen colour of Flexibody and cut a thin strip. Depending on the size of hook you are using, adjust the width of the strip.

10.
Run your tying thread back over the nymph skin body to about mid hook shank and tie in the flexibody on top of the hook shank.

11.
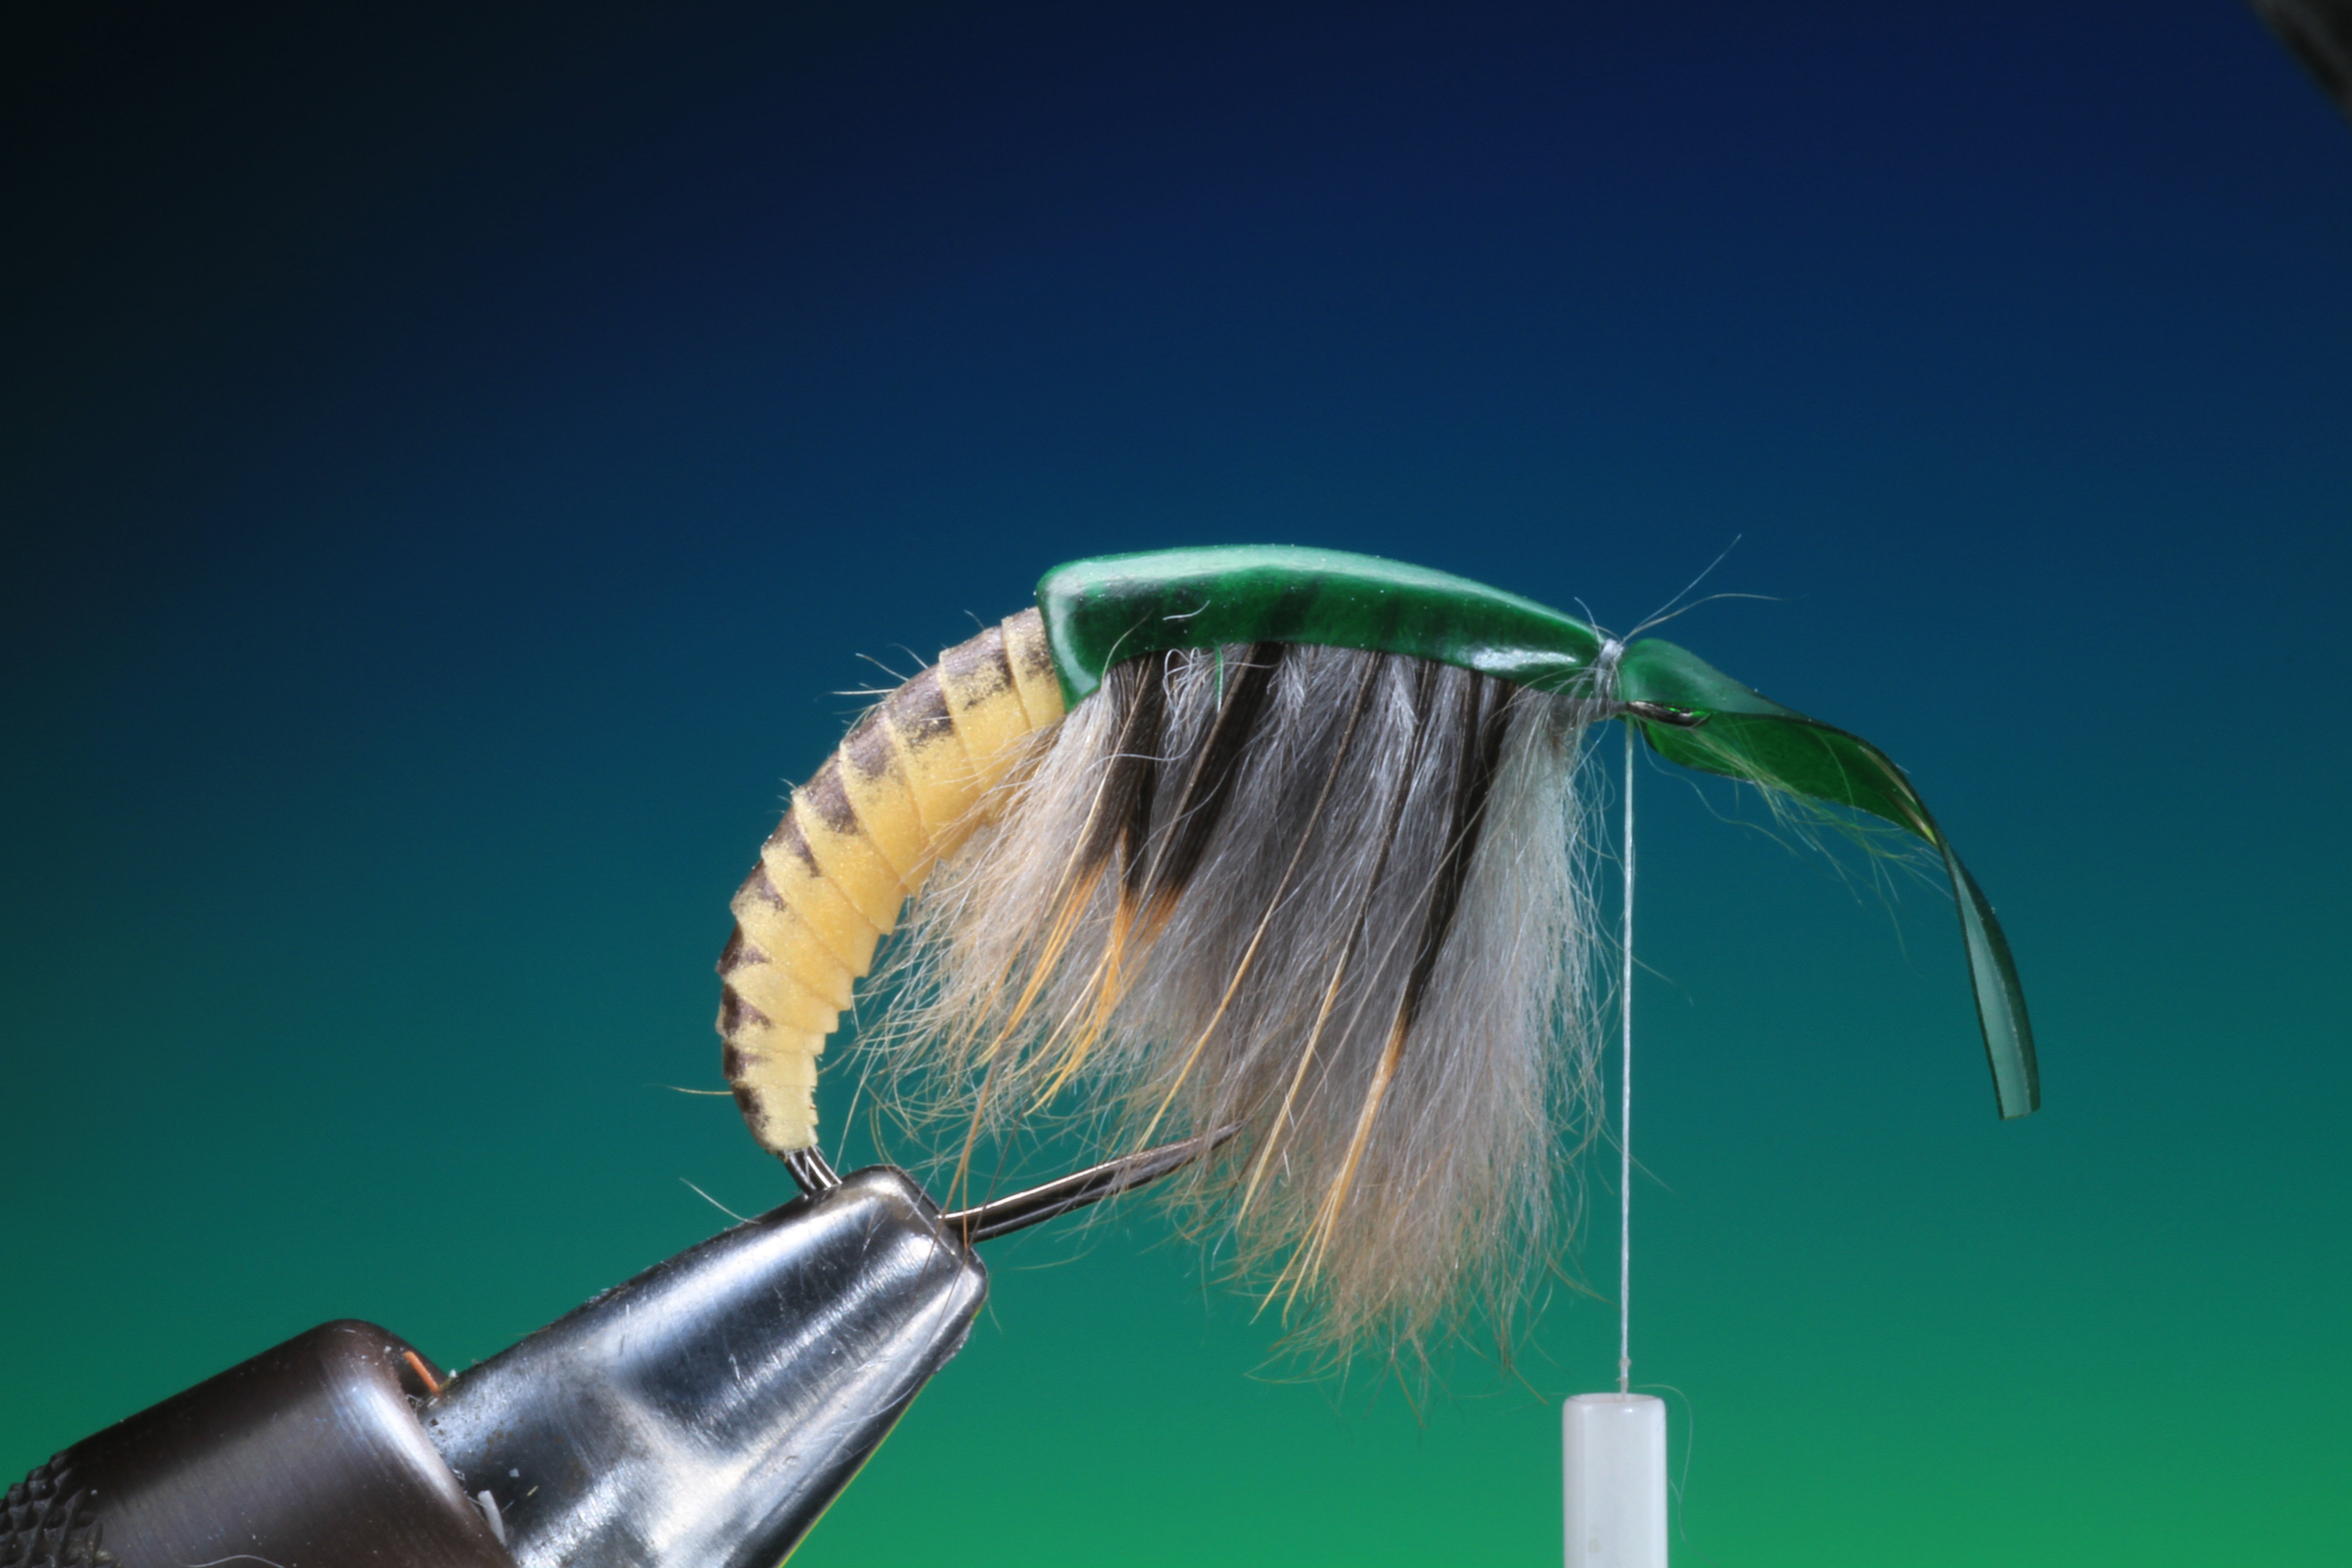
Now dubb the thorax to a taper towards the hook eye.

12.
Now prepare a hackle as shown here ready to tie in. This is an indian badger hackle but you could use any other short webby well marked hackle such as partridge.
13.
Tie in the hackle by the point concave out on top of the thorax.
14.
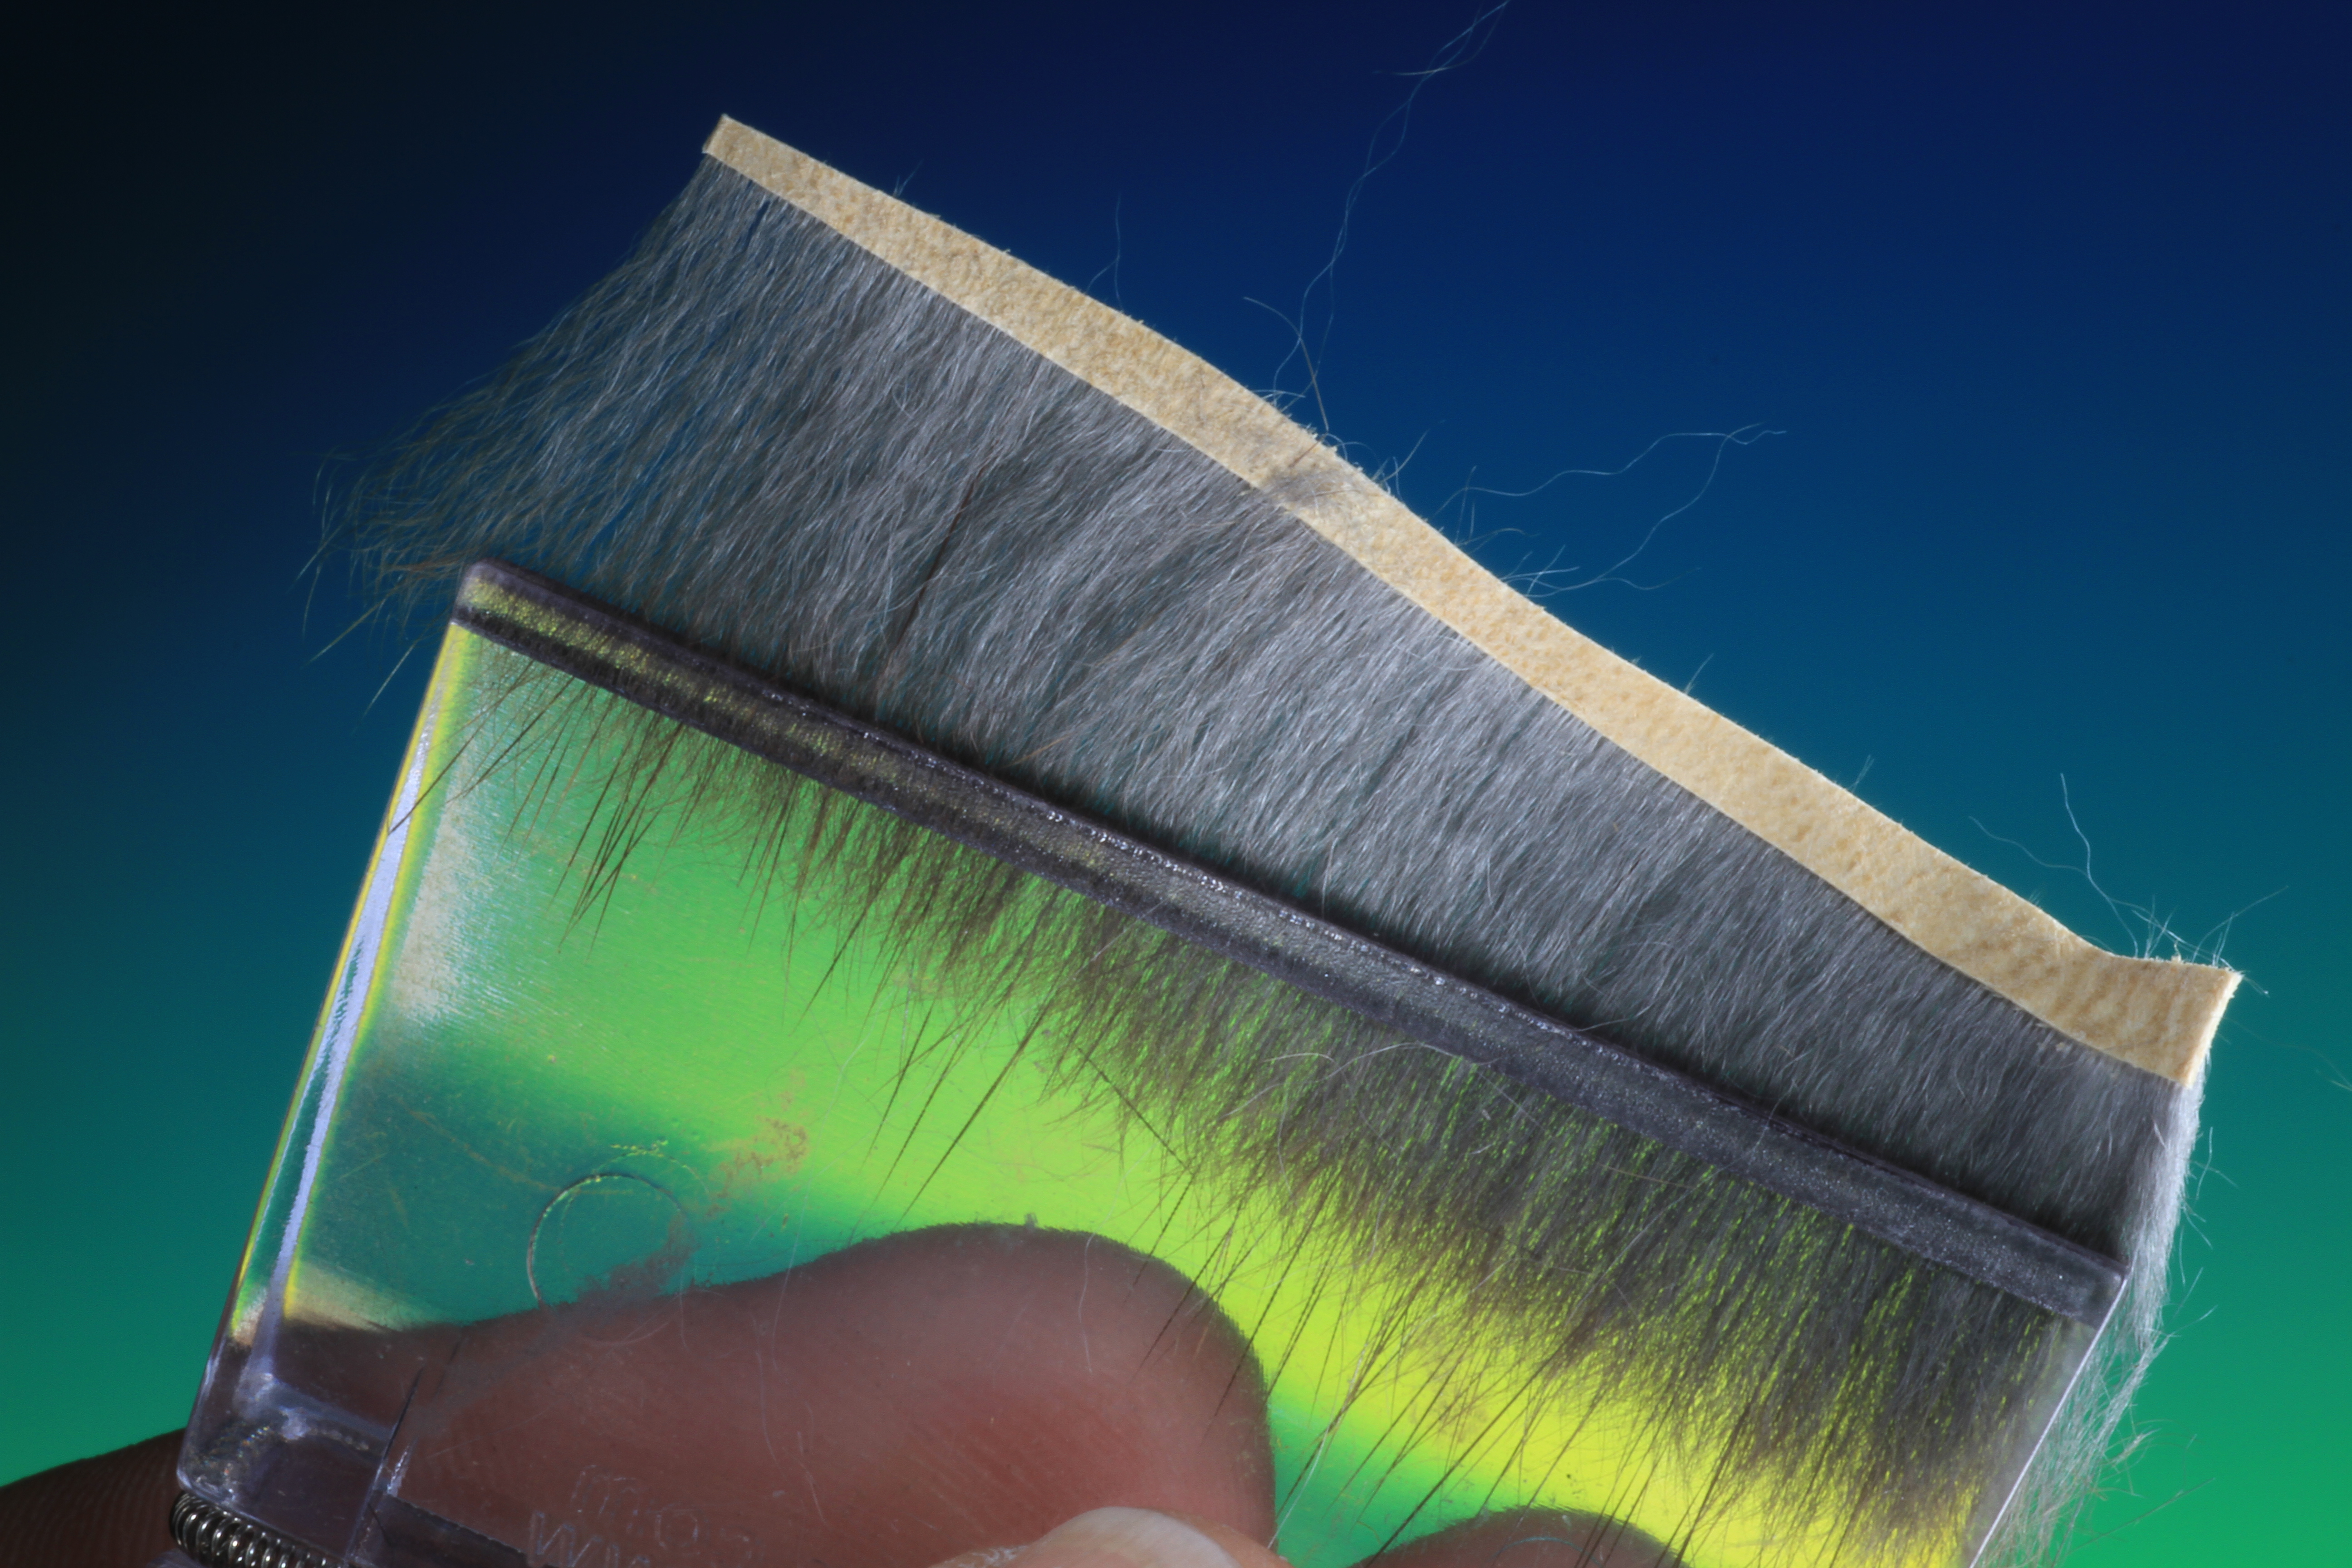
Take a thin strip of muskrat and place in a magic tool or a bulldog paper clip at an angle as shown. Placing it at an angle makes the dubbing fibers loop shorter at one end. This will make the legs of the nymph go from shorter to longer as they approach the hook eye.

15.
Trim off the skin from the hair.

16.
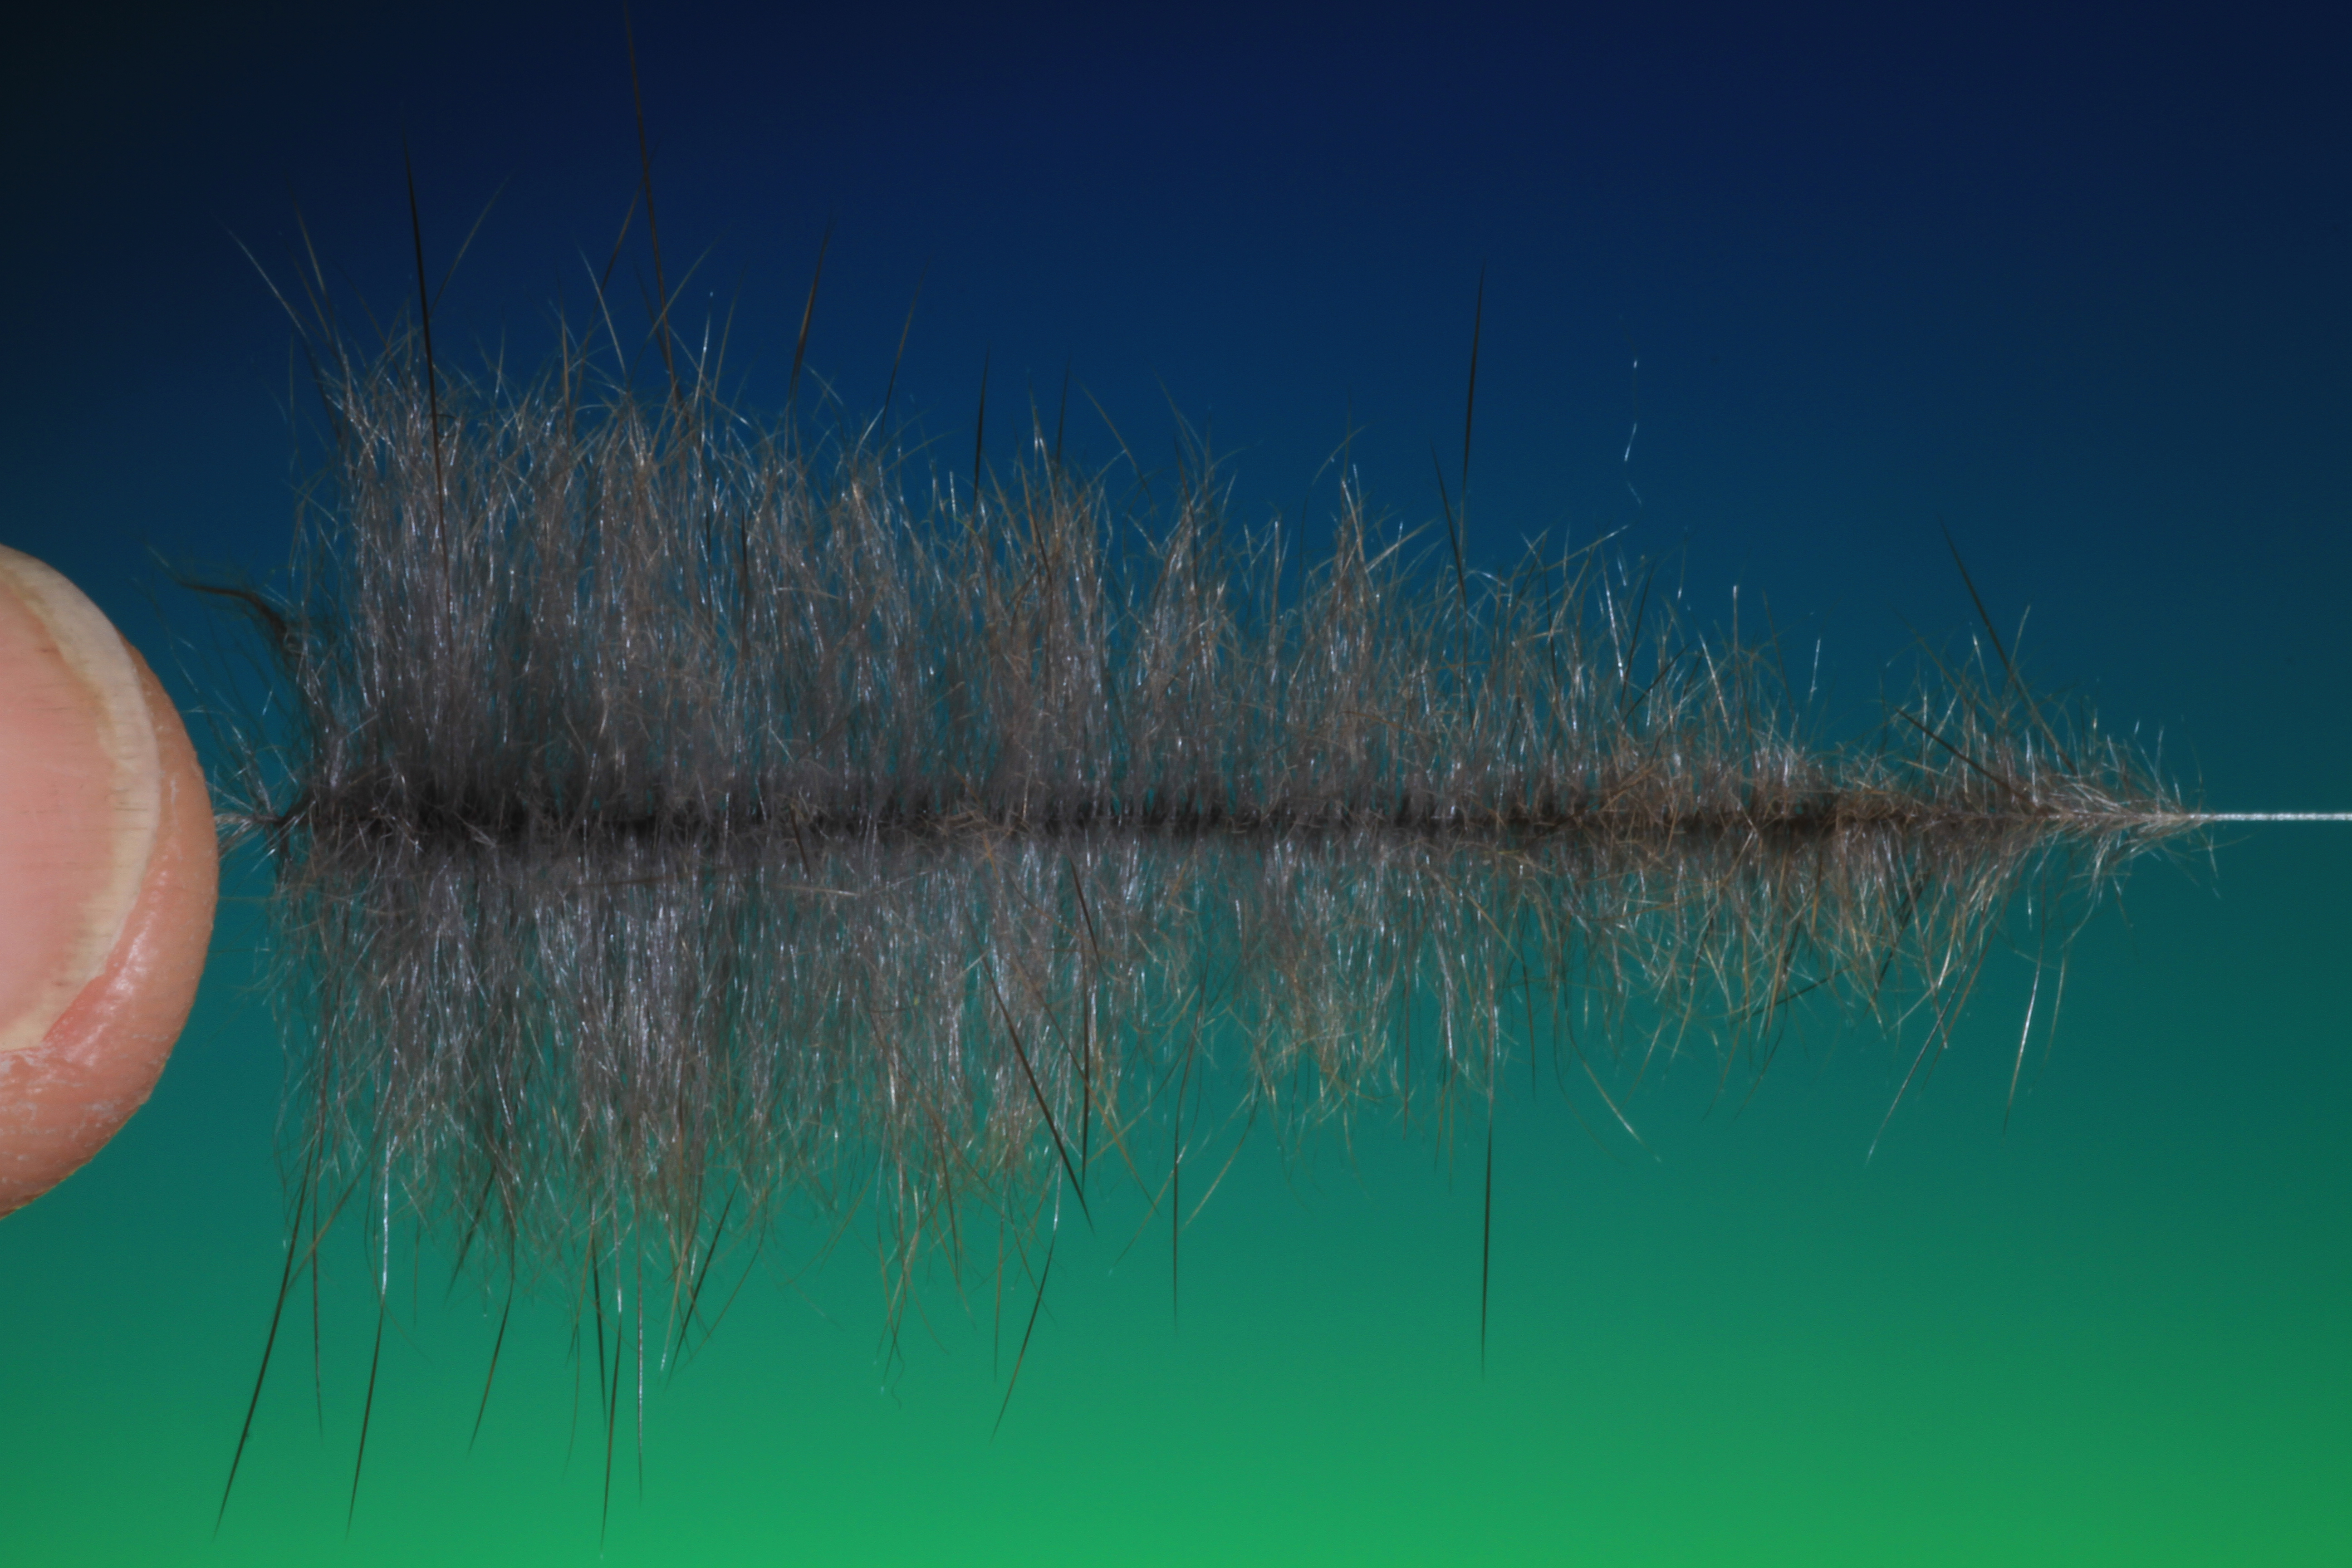
Make a dubbing loop at the rear of the thorax and wind your tying thread forward again.
17.
Spin your dubbing loop. If you are un familiar with this technique take a look at my earlier post of spinning deer hair. You can see the gradual taper in the dubbing brush.
18.
Start to wind in your dubbing brush taking care to brush back the fibers with each turn, so as not to tie them down with the next turn.

19.
Once you have wound the whole dubbing brush forward tie off behind the hook eye.

20.
Fold over your hackle for the legs and tie off behind the hook eye. Make sure that it is tight into the thorax and the hackle is evenly spaced each side.
21.
Trim away the hackle stem and pull over the flexibody strip. Tie this down with a few turns of tying thread.

22.
Trim off the excess flexibody and whip finish into a small head. Varnish the head.

23.
Now you can give the nymph another colouring with the felt pen if needed. If you wet the legs and stroke them back they will be perfect when they dry.

24.
If you would like a glossy finish to the body and wing case give them a fine coat of Bug Bond and cure with the UV light.
Table of Contents
My new book

Discover more from HOW TO TIE FLIES | THEFEATHERBENDER
Subscribe to get the latest posts sent to your email.


Excellent techniques! Thank you for sharing this pattern – kind regards – metiefly