
It’s been a while, but I am back, and posting more patterns after a busy season photographing and fishing, where I have been testing new patterns and materials that I will be writing about later. I have also visited some new destinations that I am sure, will blow your socks off! I will reveal more later. On arriving back from my travels, there is a mountain of new materials, tools and books waiting for me to review so keep tuned as I will be going through the best of these as and when I get time. Marc also extends the deer hair wing of this pattern and fishes it as a large stone fly .
For now, here is the Marc Petitjean CdC deer hair combo caddis that I promised you earlier this summer.
Table of Contents
CdC deer hair caddis pattern recipe
- MP CdC & Deer hair Caddis
- Hook: For smaller sizes 16, 14, 12 short shank dry fly hook for 10,8 long shank dry fly hook
- Thread: MP Split second thread
- Body: Three CdC hackles
- Wing: Deer hair
- Hackle: CdC
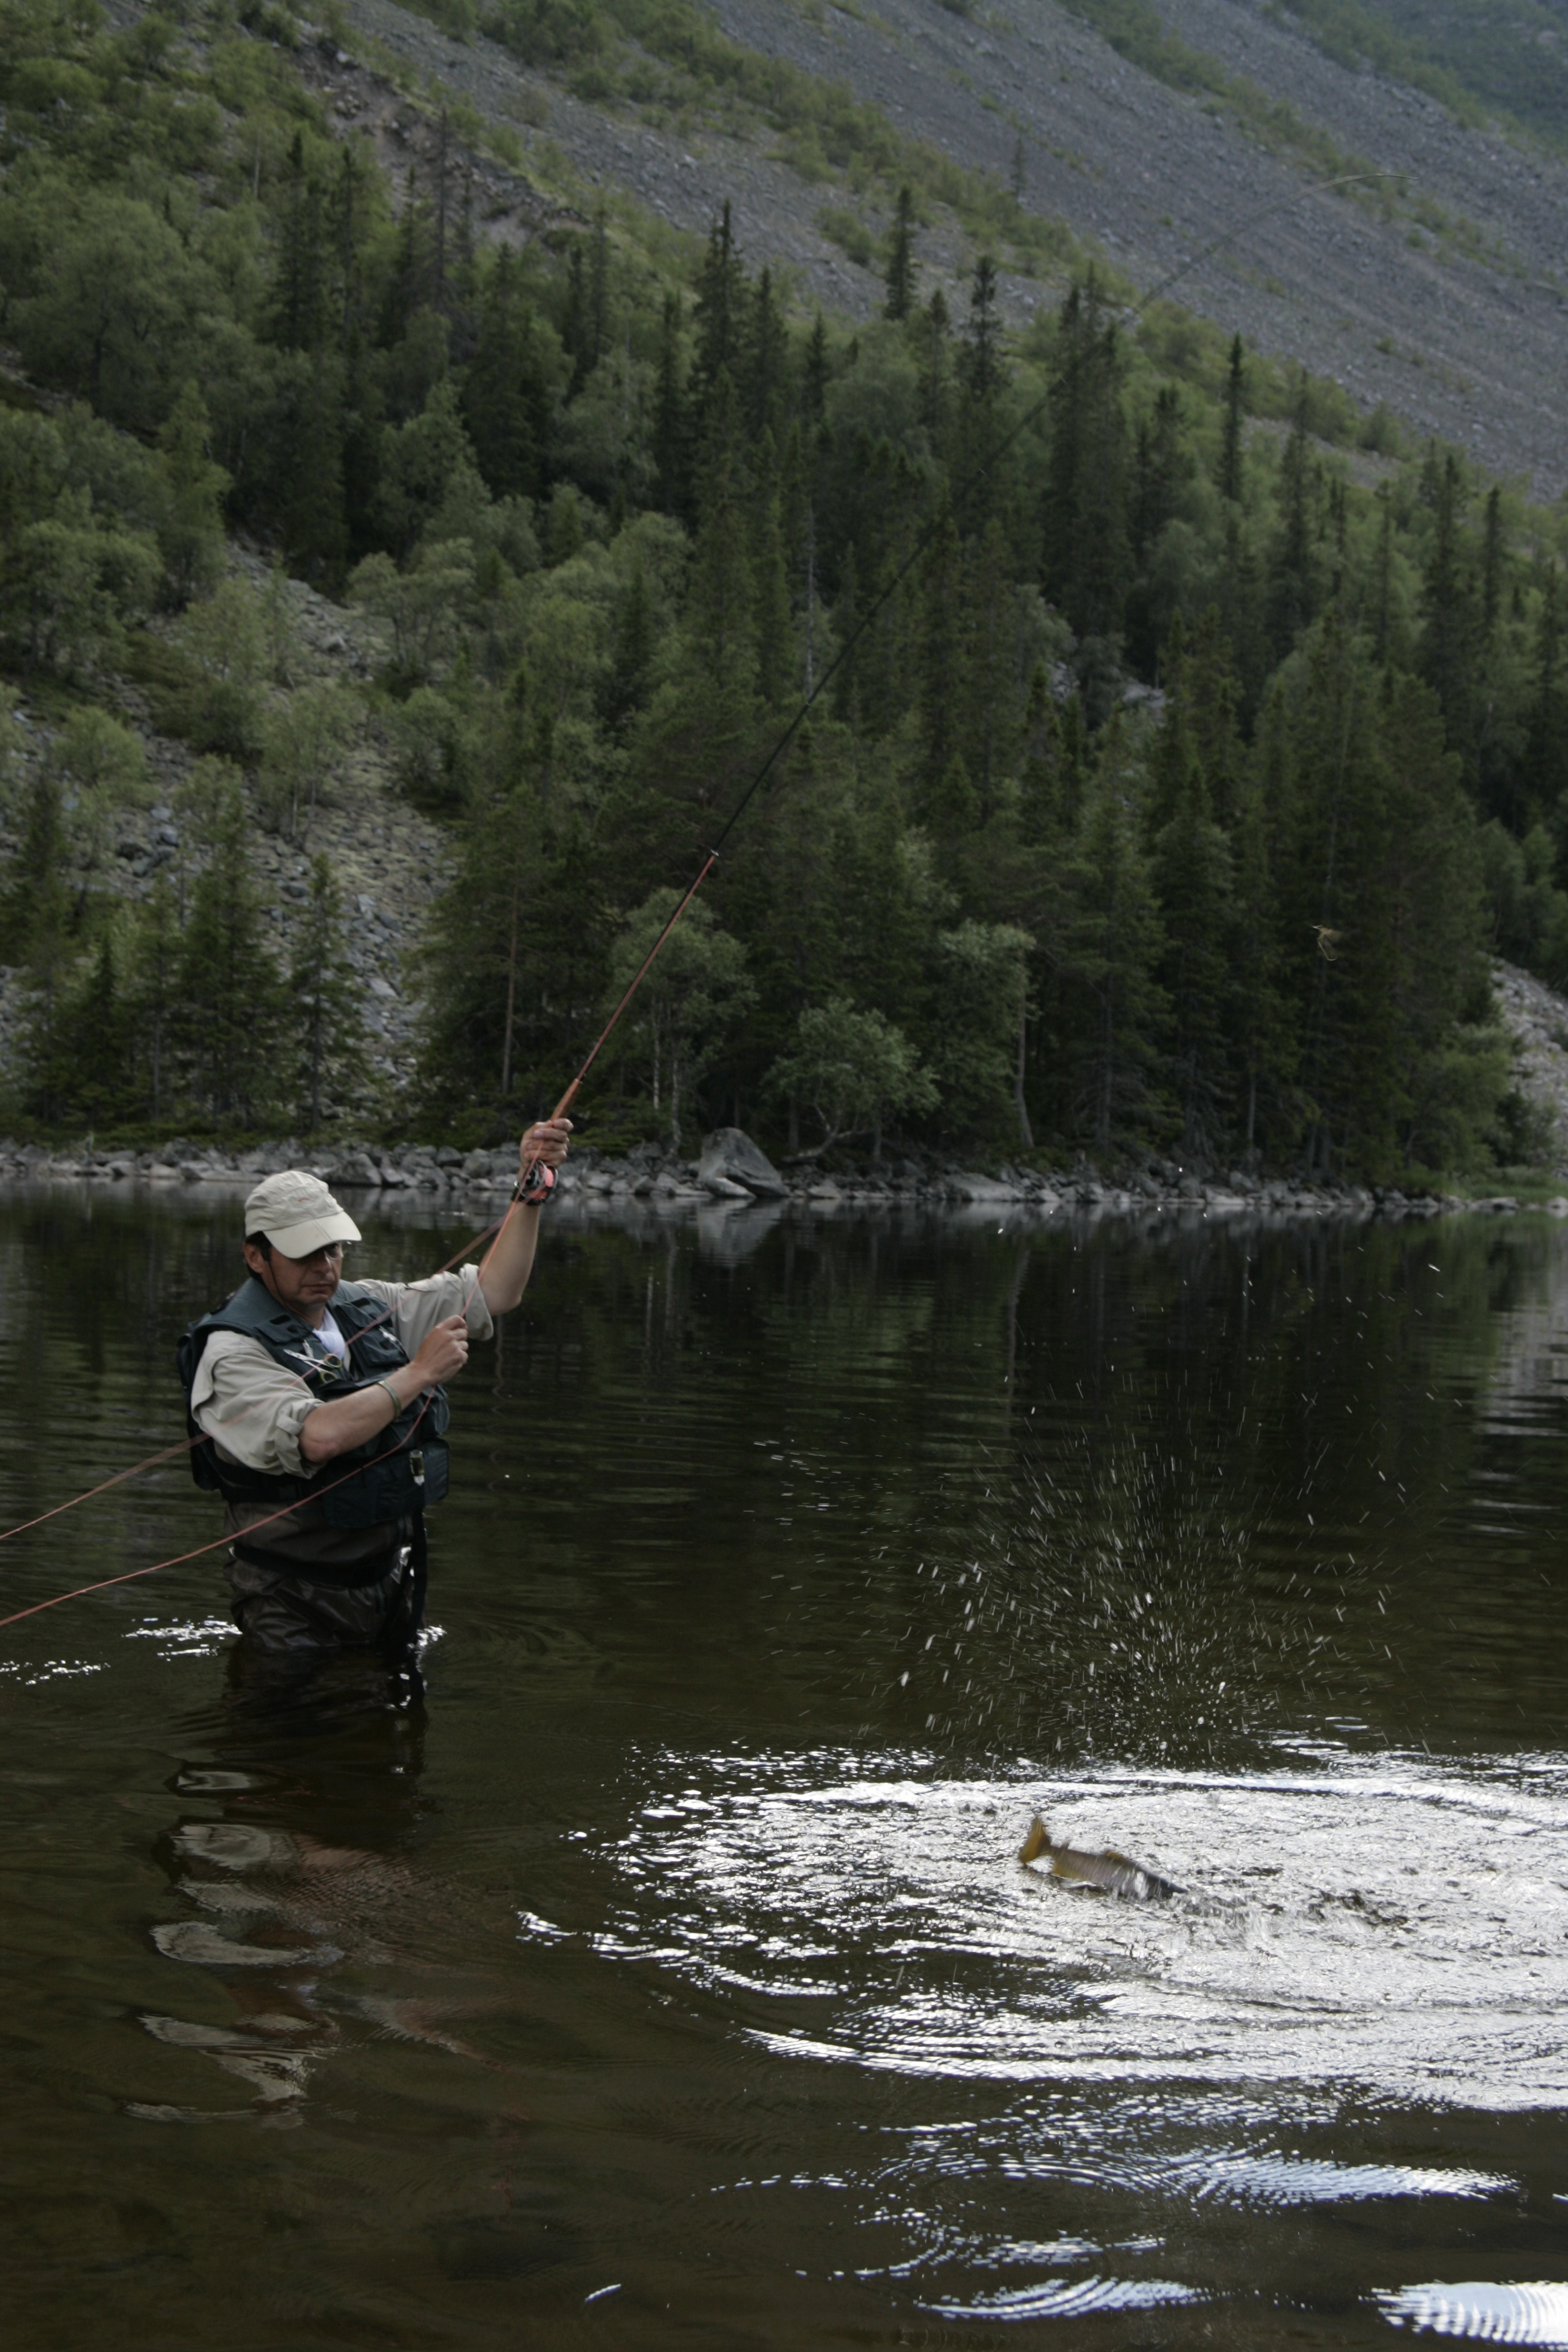
Marc playing a wild brown taken on his CdC Deer hair caddis.
How to tie CdC deer hair caddis
Marc developed this CdC deer hair caddis to imitate a adult skating caddis pattern that would float high and dry. I have often noticed that when fishing adult caddis patterns, trout tend to prefer the patterns that float extremely high on the water, almost not touching the surface. So if a pattern I am fishing becomes waterlogged and begins to fish heavier in the surface, I dry it off or change it! Marc’s idea behind this pattern was to combine the two best floating materials available (CdC and deer hair) to achieve long lasting float-ability and fishability.

1
Secure your hook in the vice with the hook shank horizontal-

2
Run the tying thread along the hook shank until it hangs vertical with the hook point.
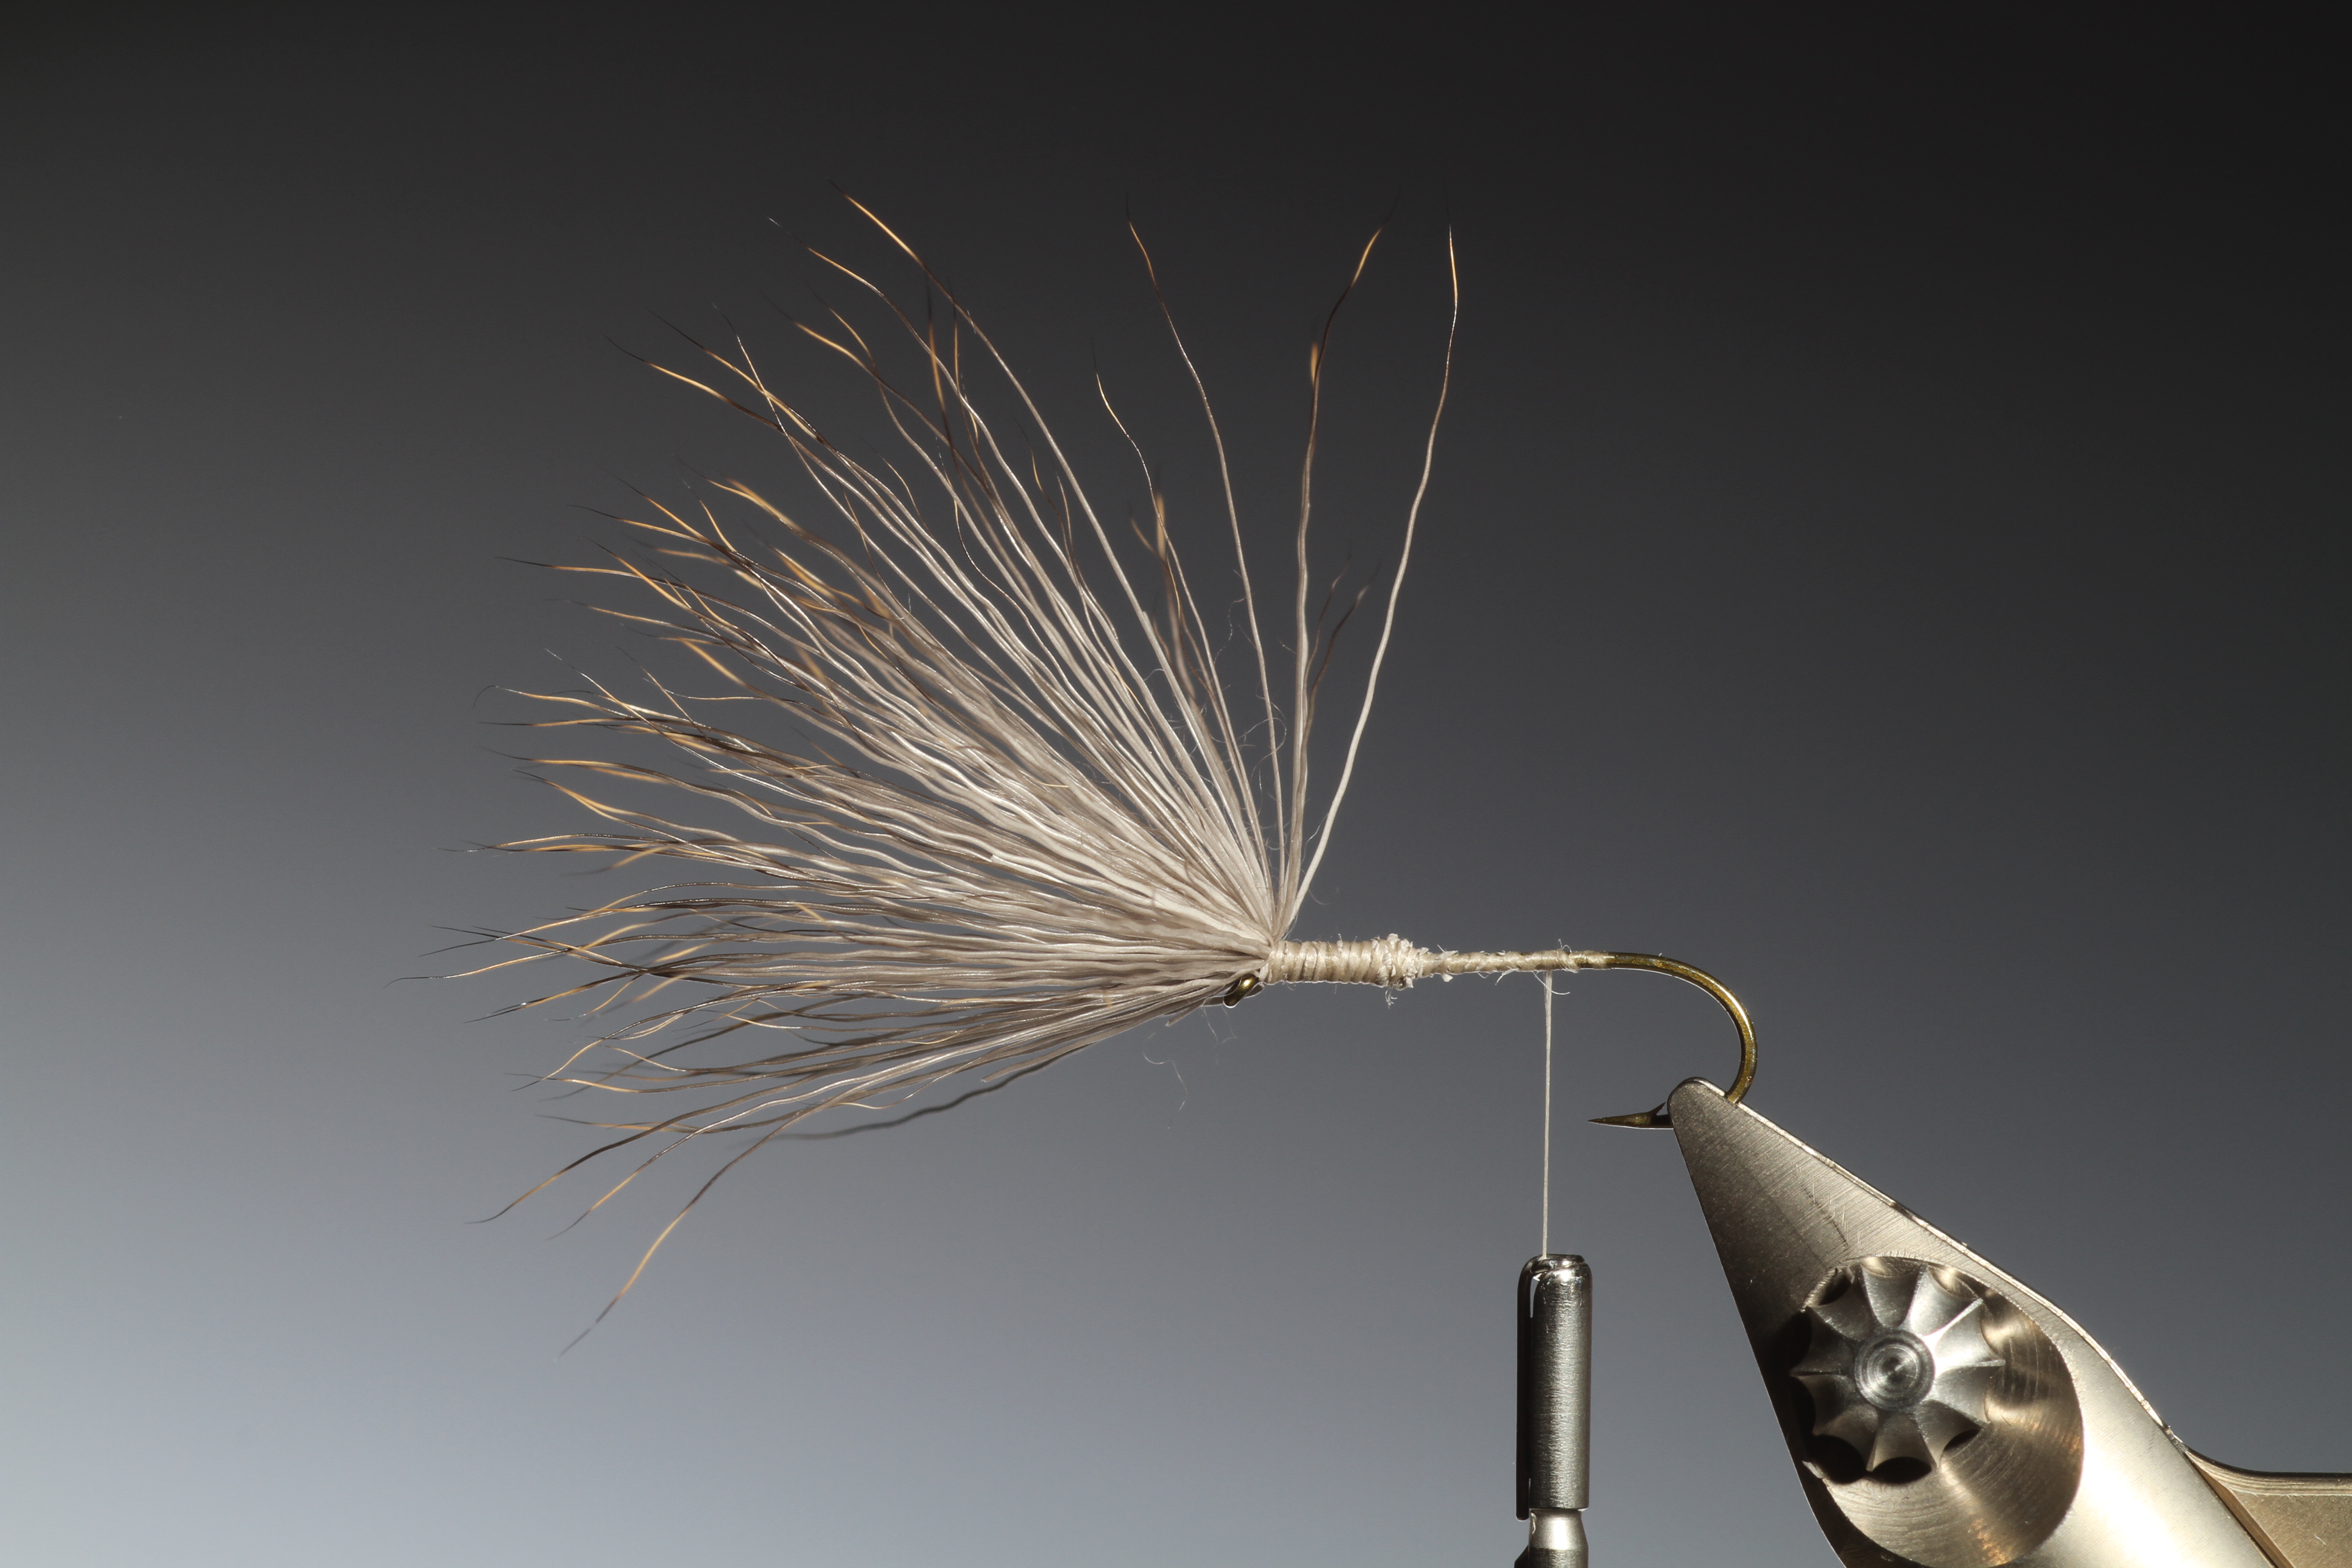
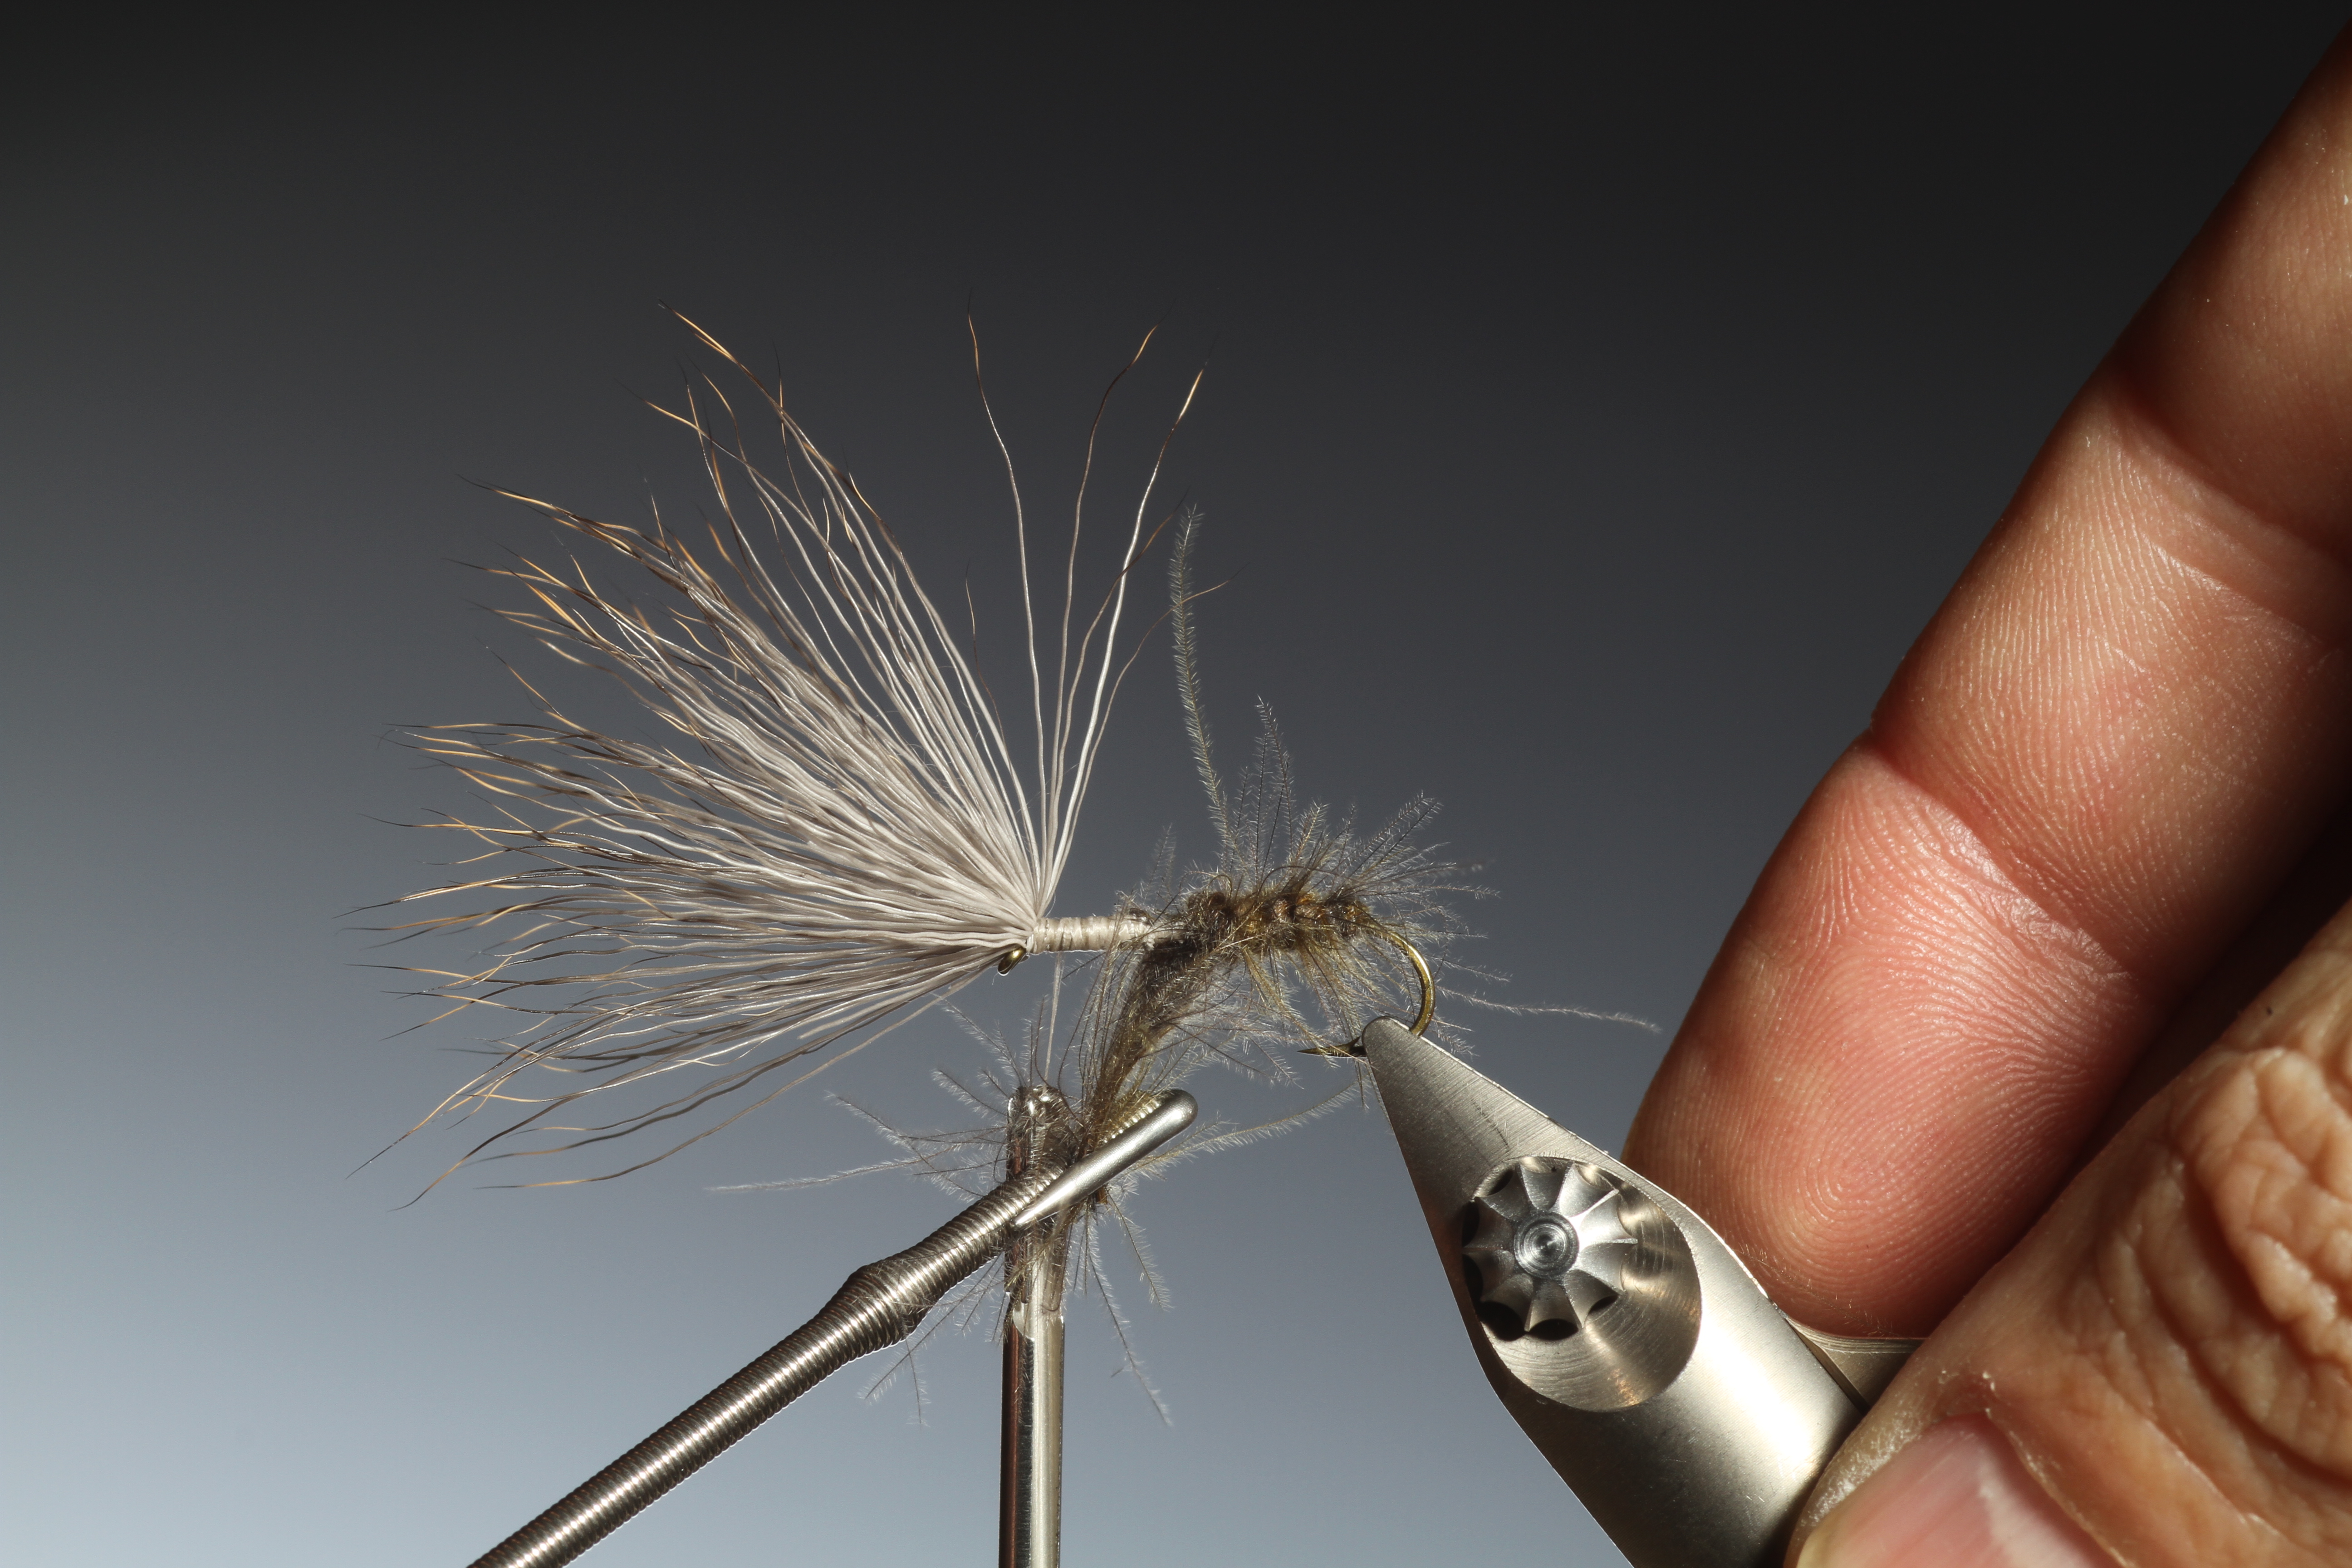
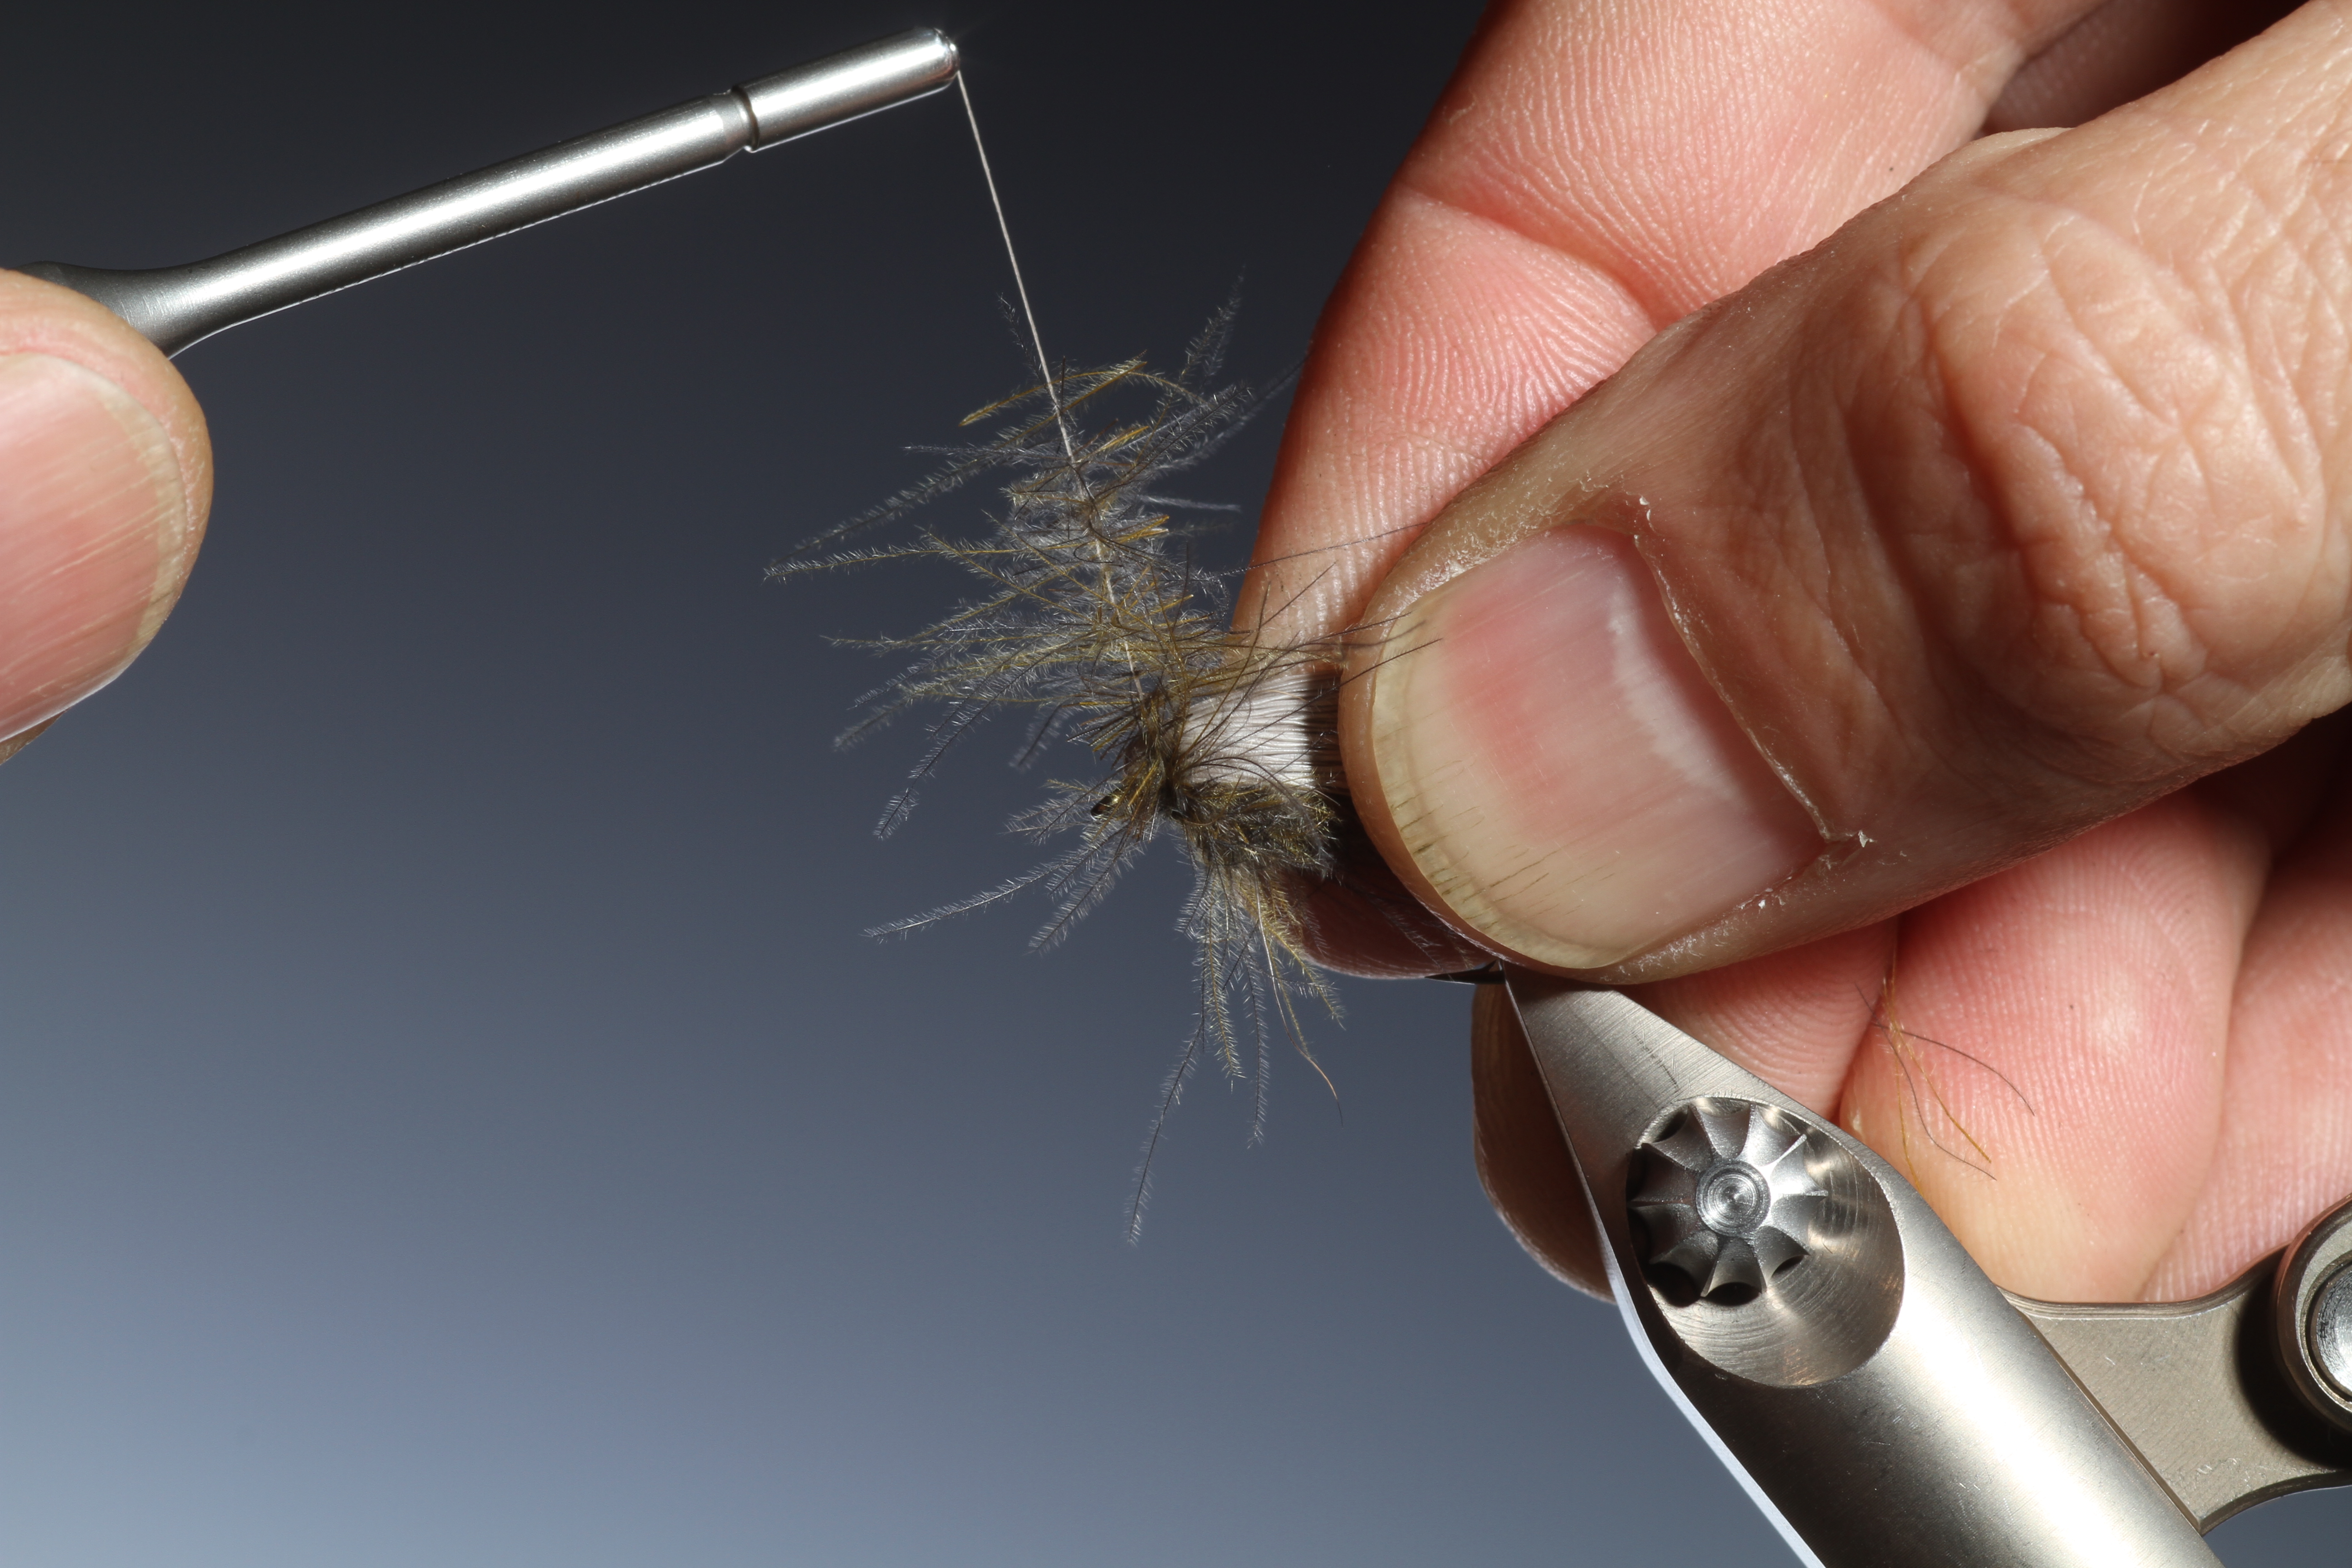
3
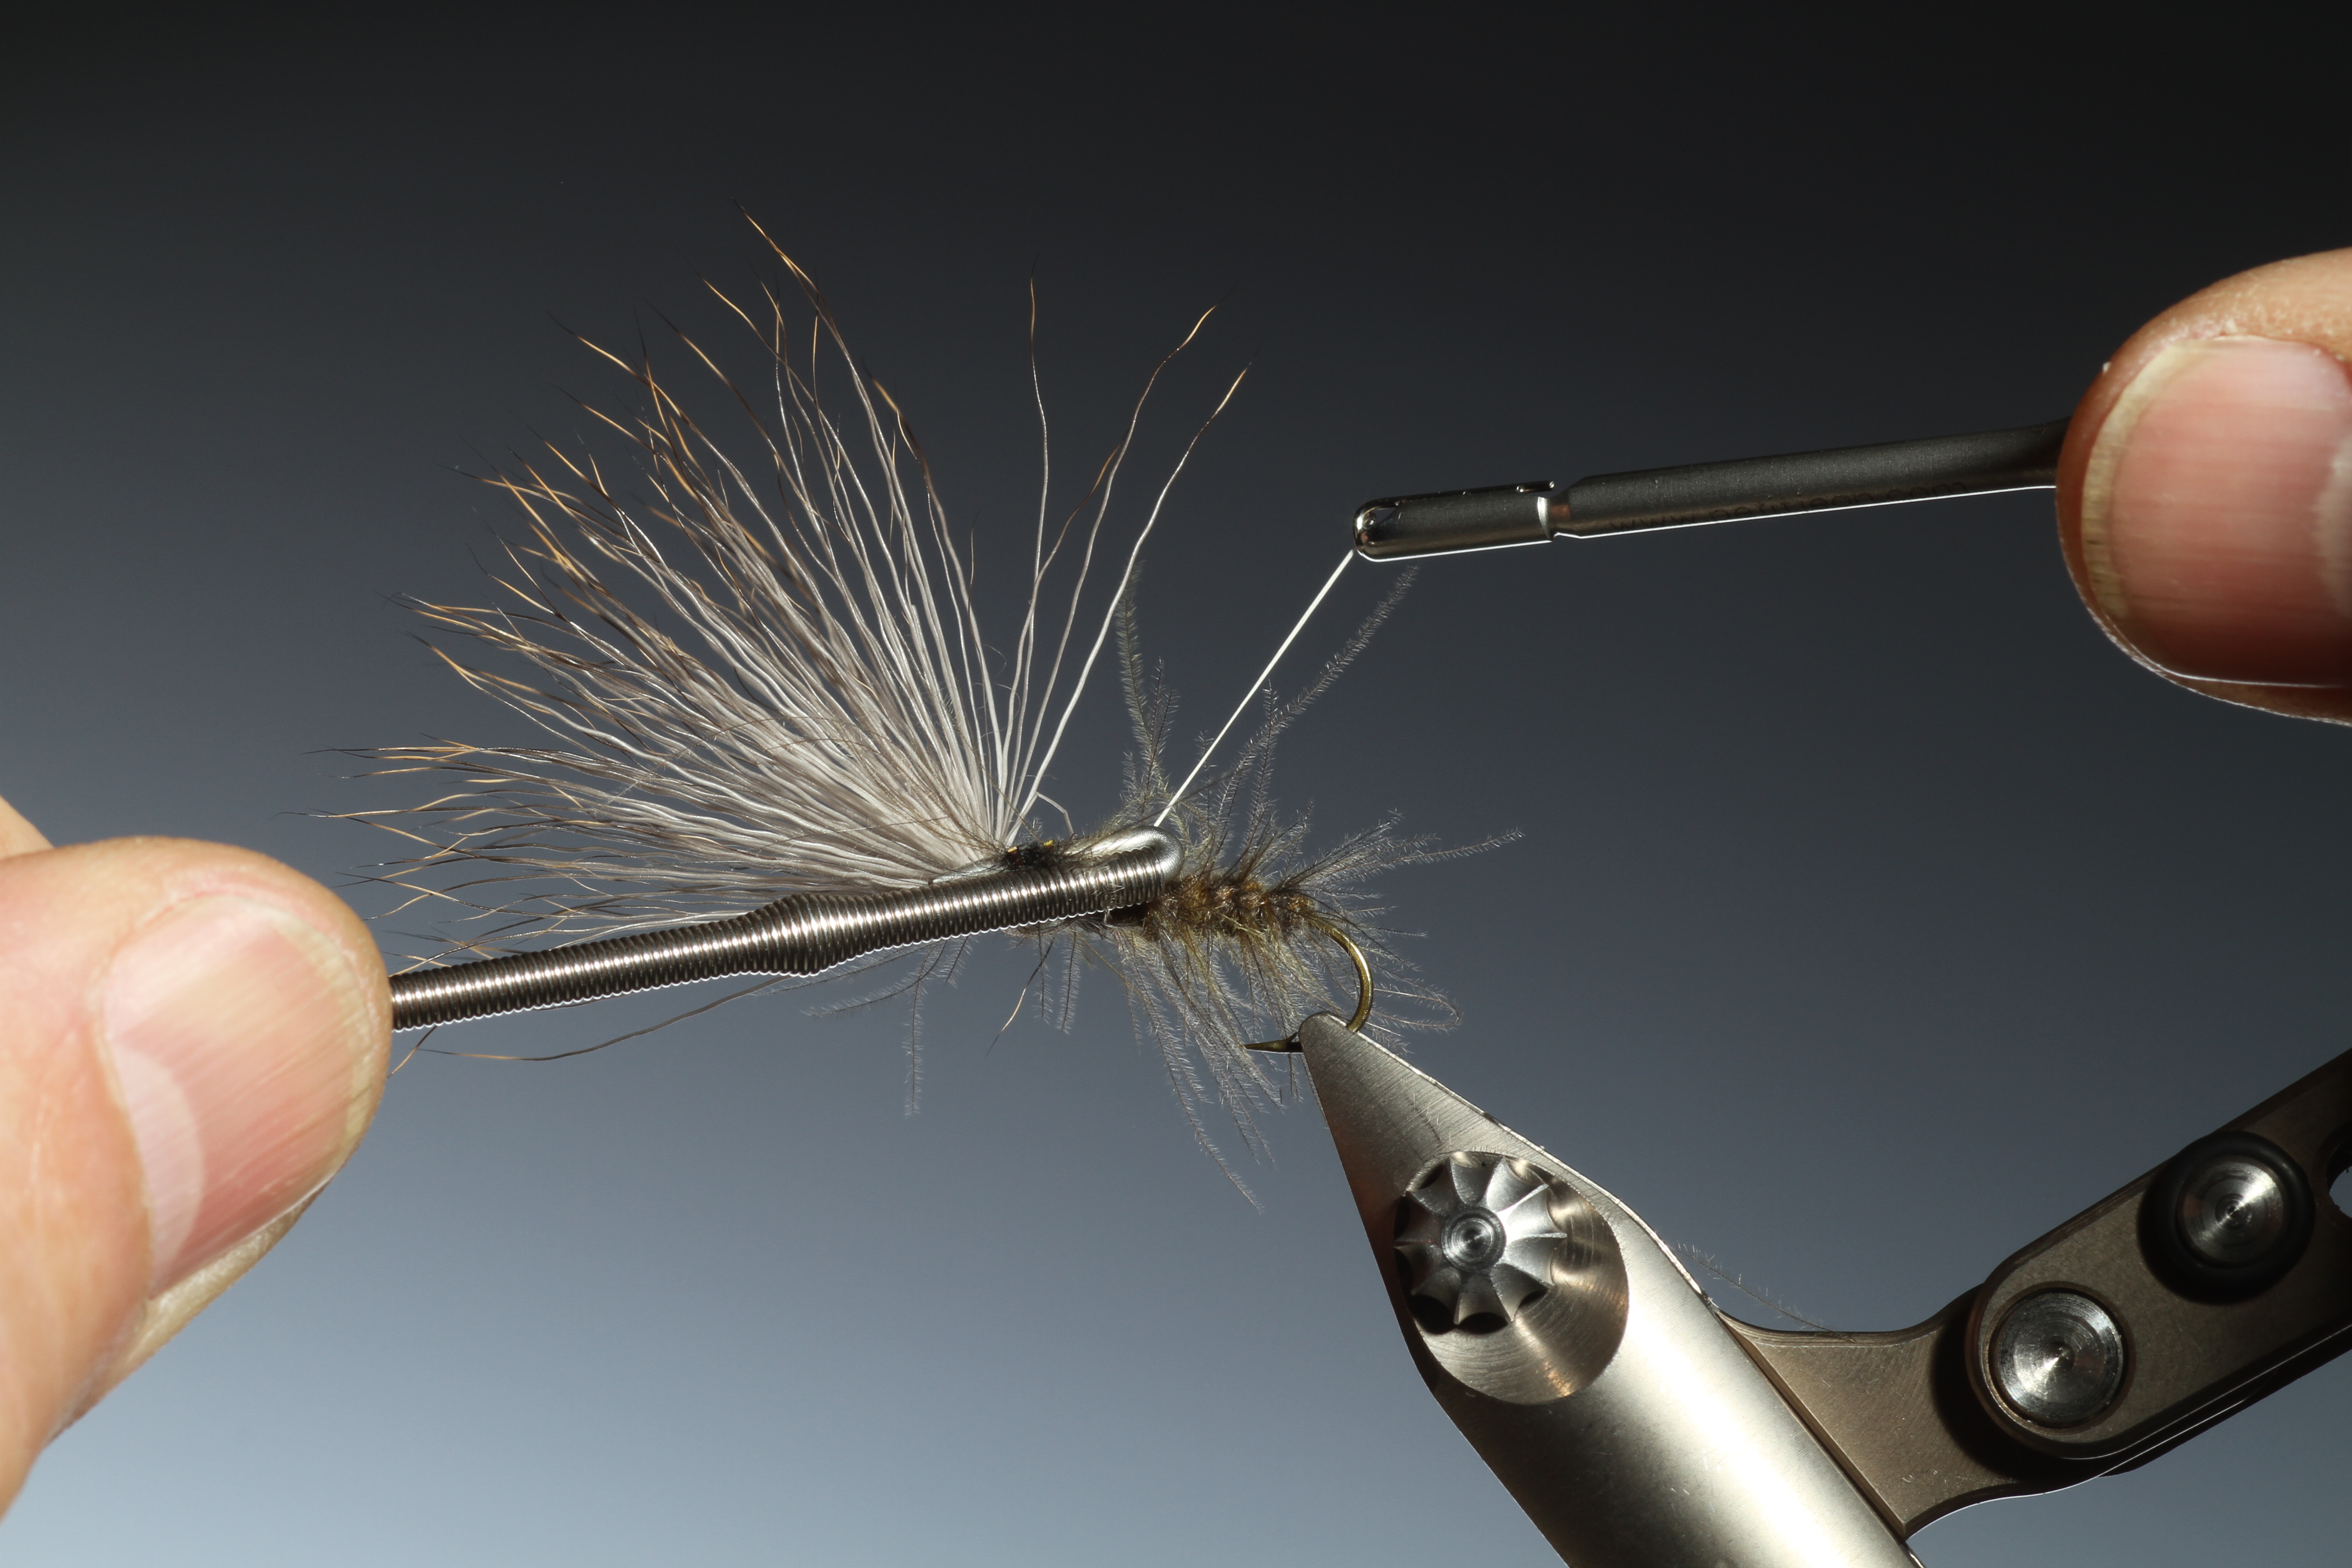
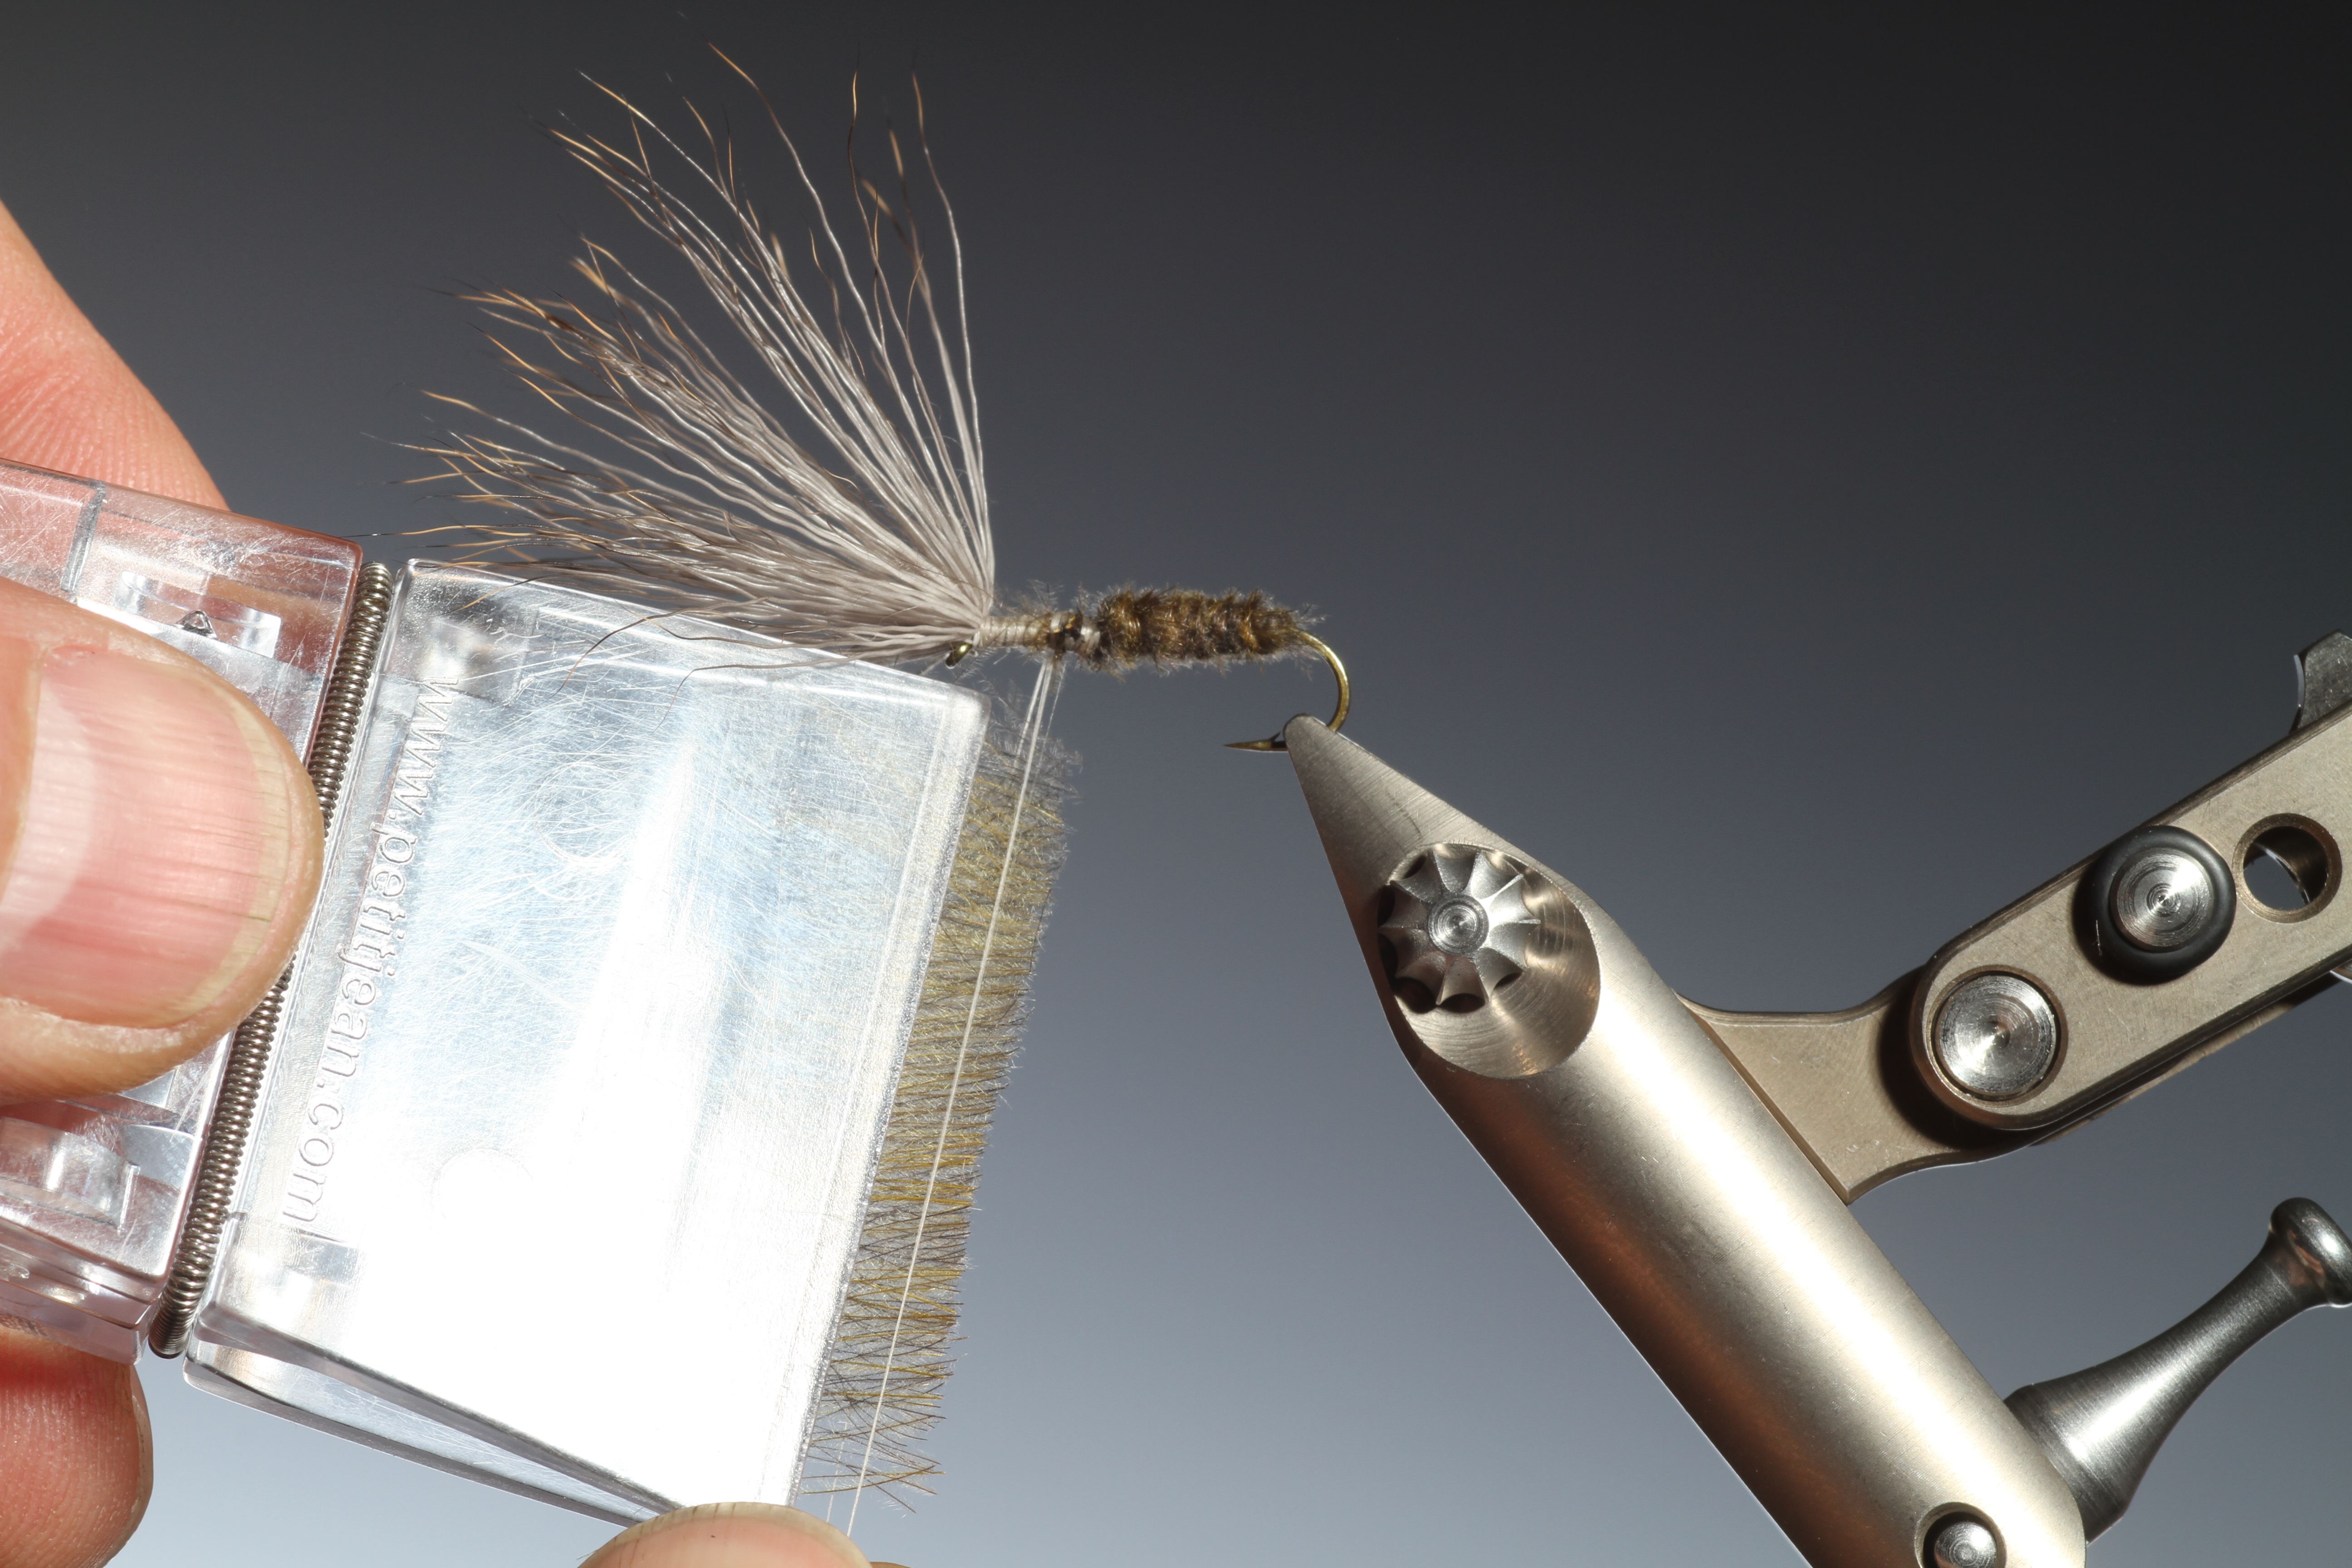
Cut a small bunch of deer hair from the winter coat and remove the under fur. Marc doesn’t stack his deer hair in a hair stacker but just holds the points as level as possible to save time. Tie in the deer hair as shown on top of the hook shank and tight into the rear of the hook eye.
4
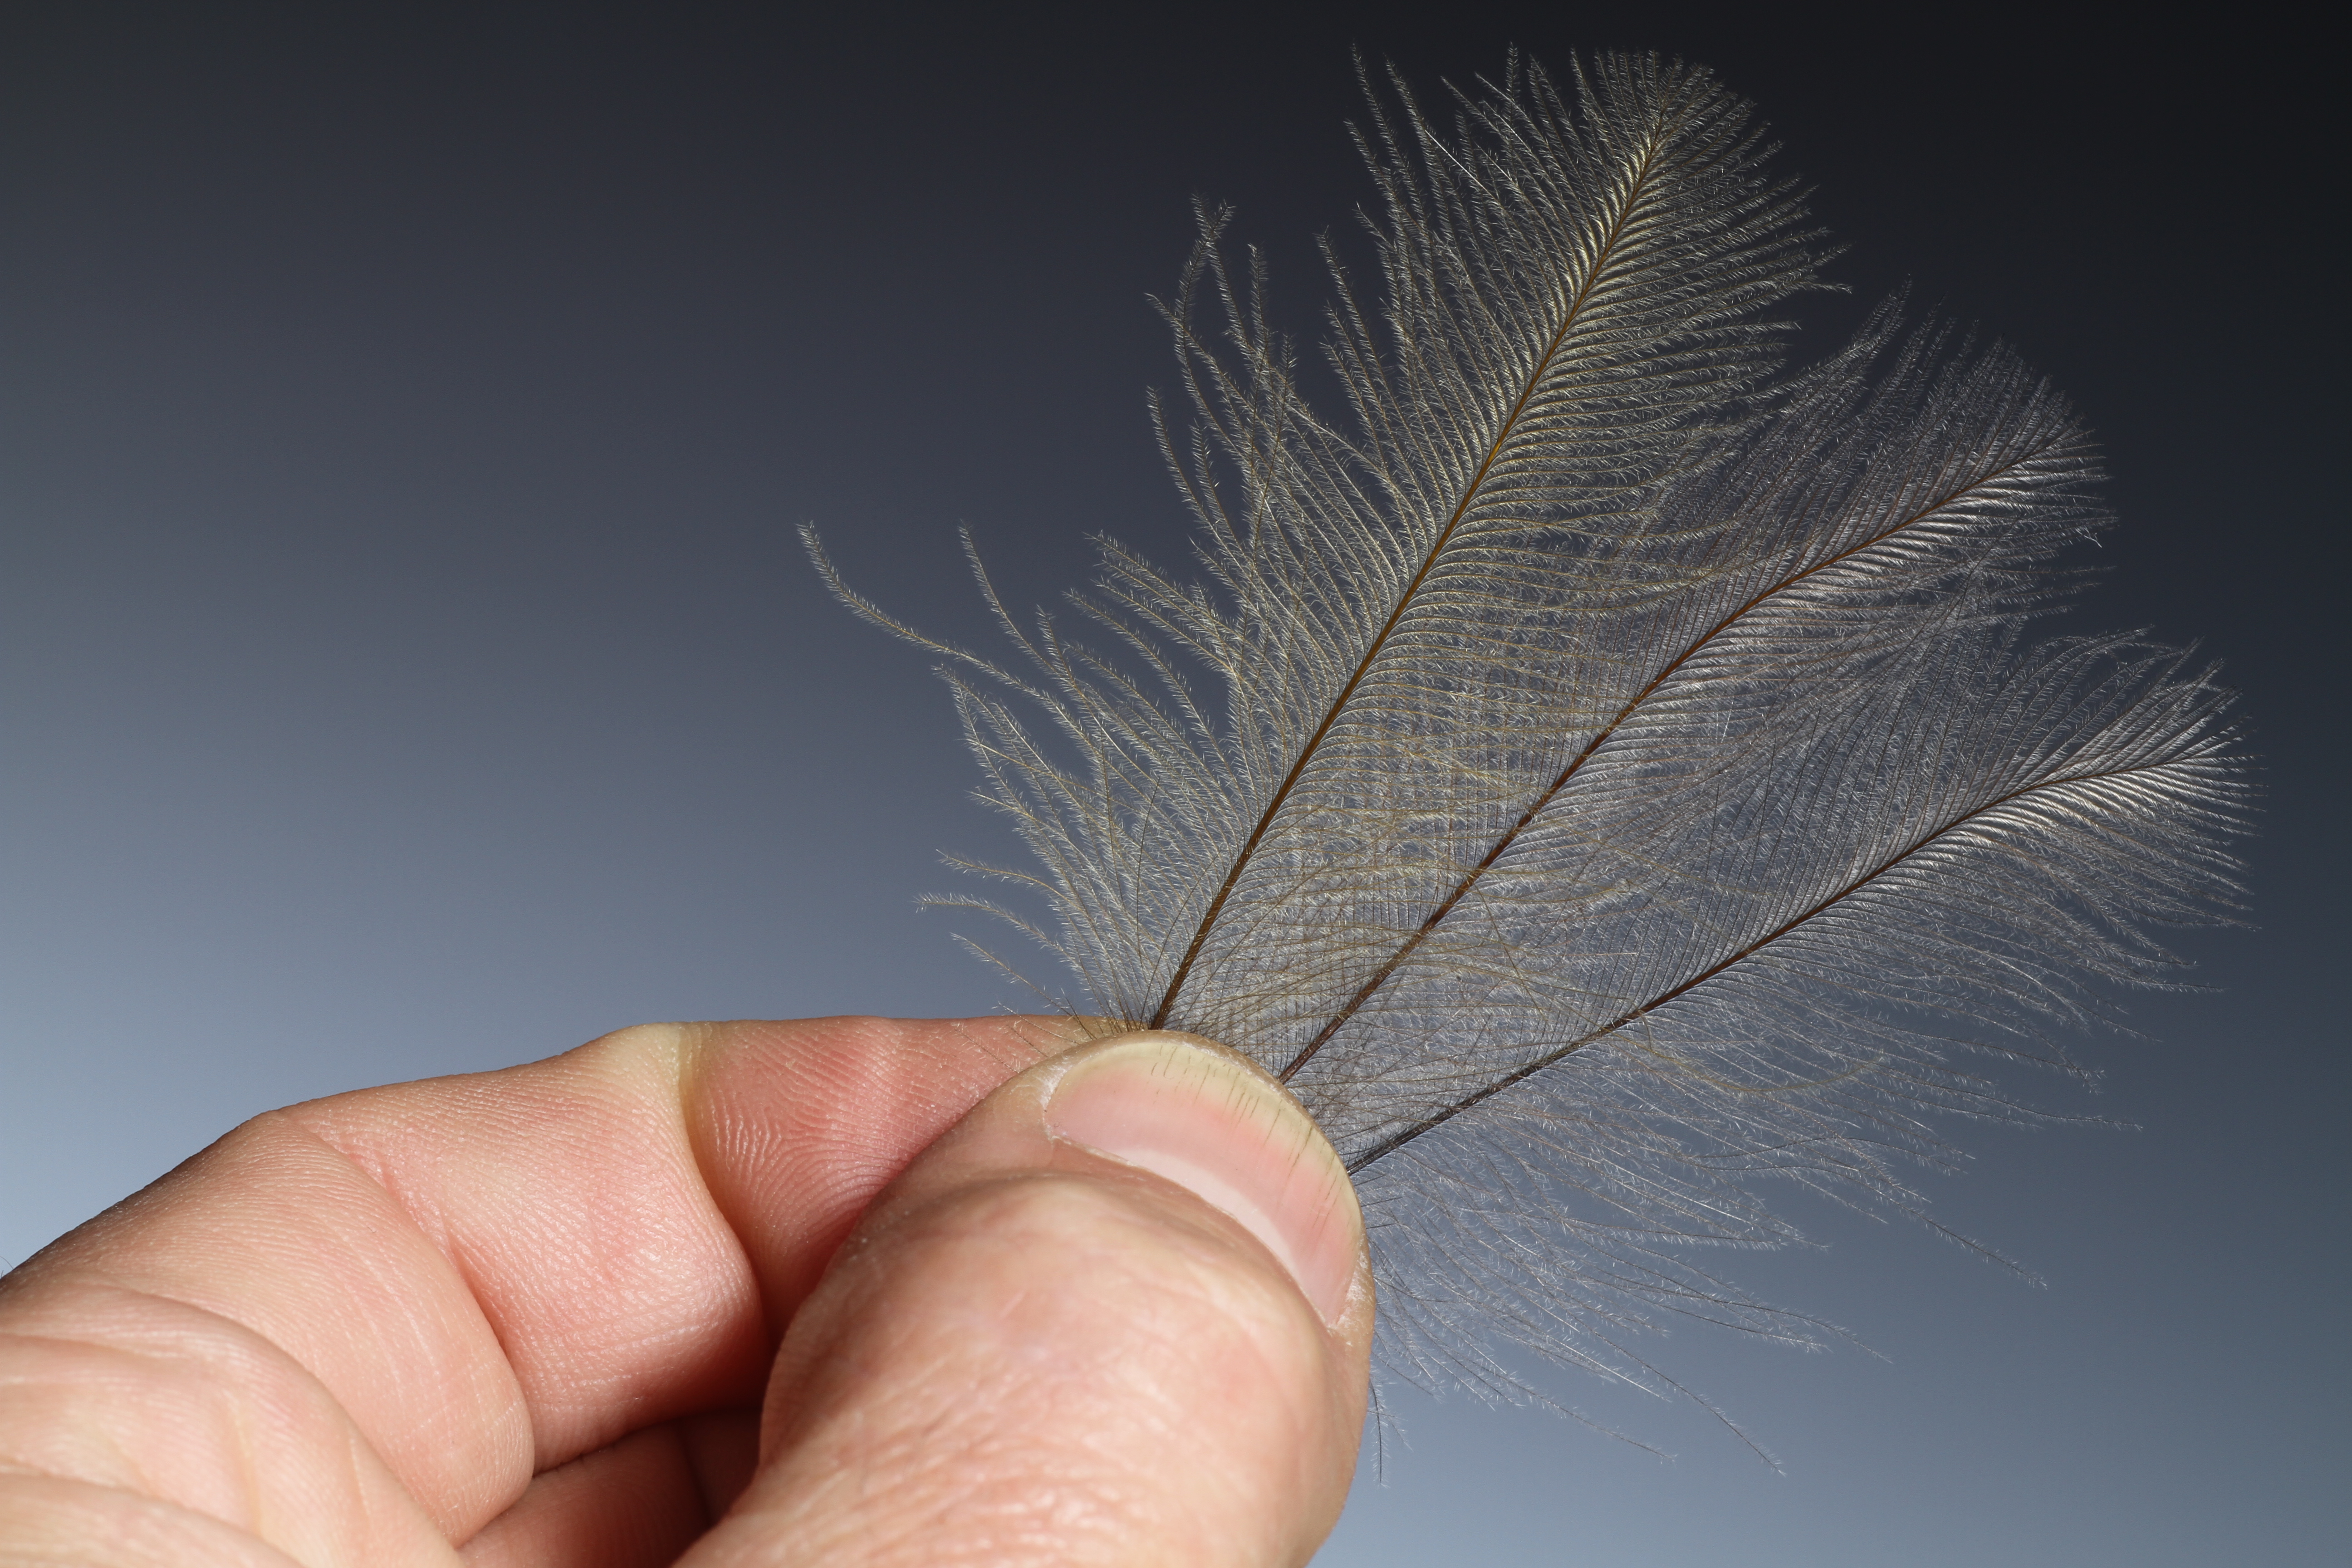
Select three similar sized CdC hackles, you decide the colour combination.
5
Tie all three in by the points at the rear of the hook shank. Attach a MP CdC hackle plier to all three.
6
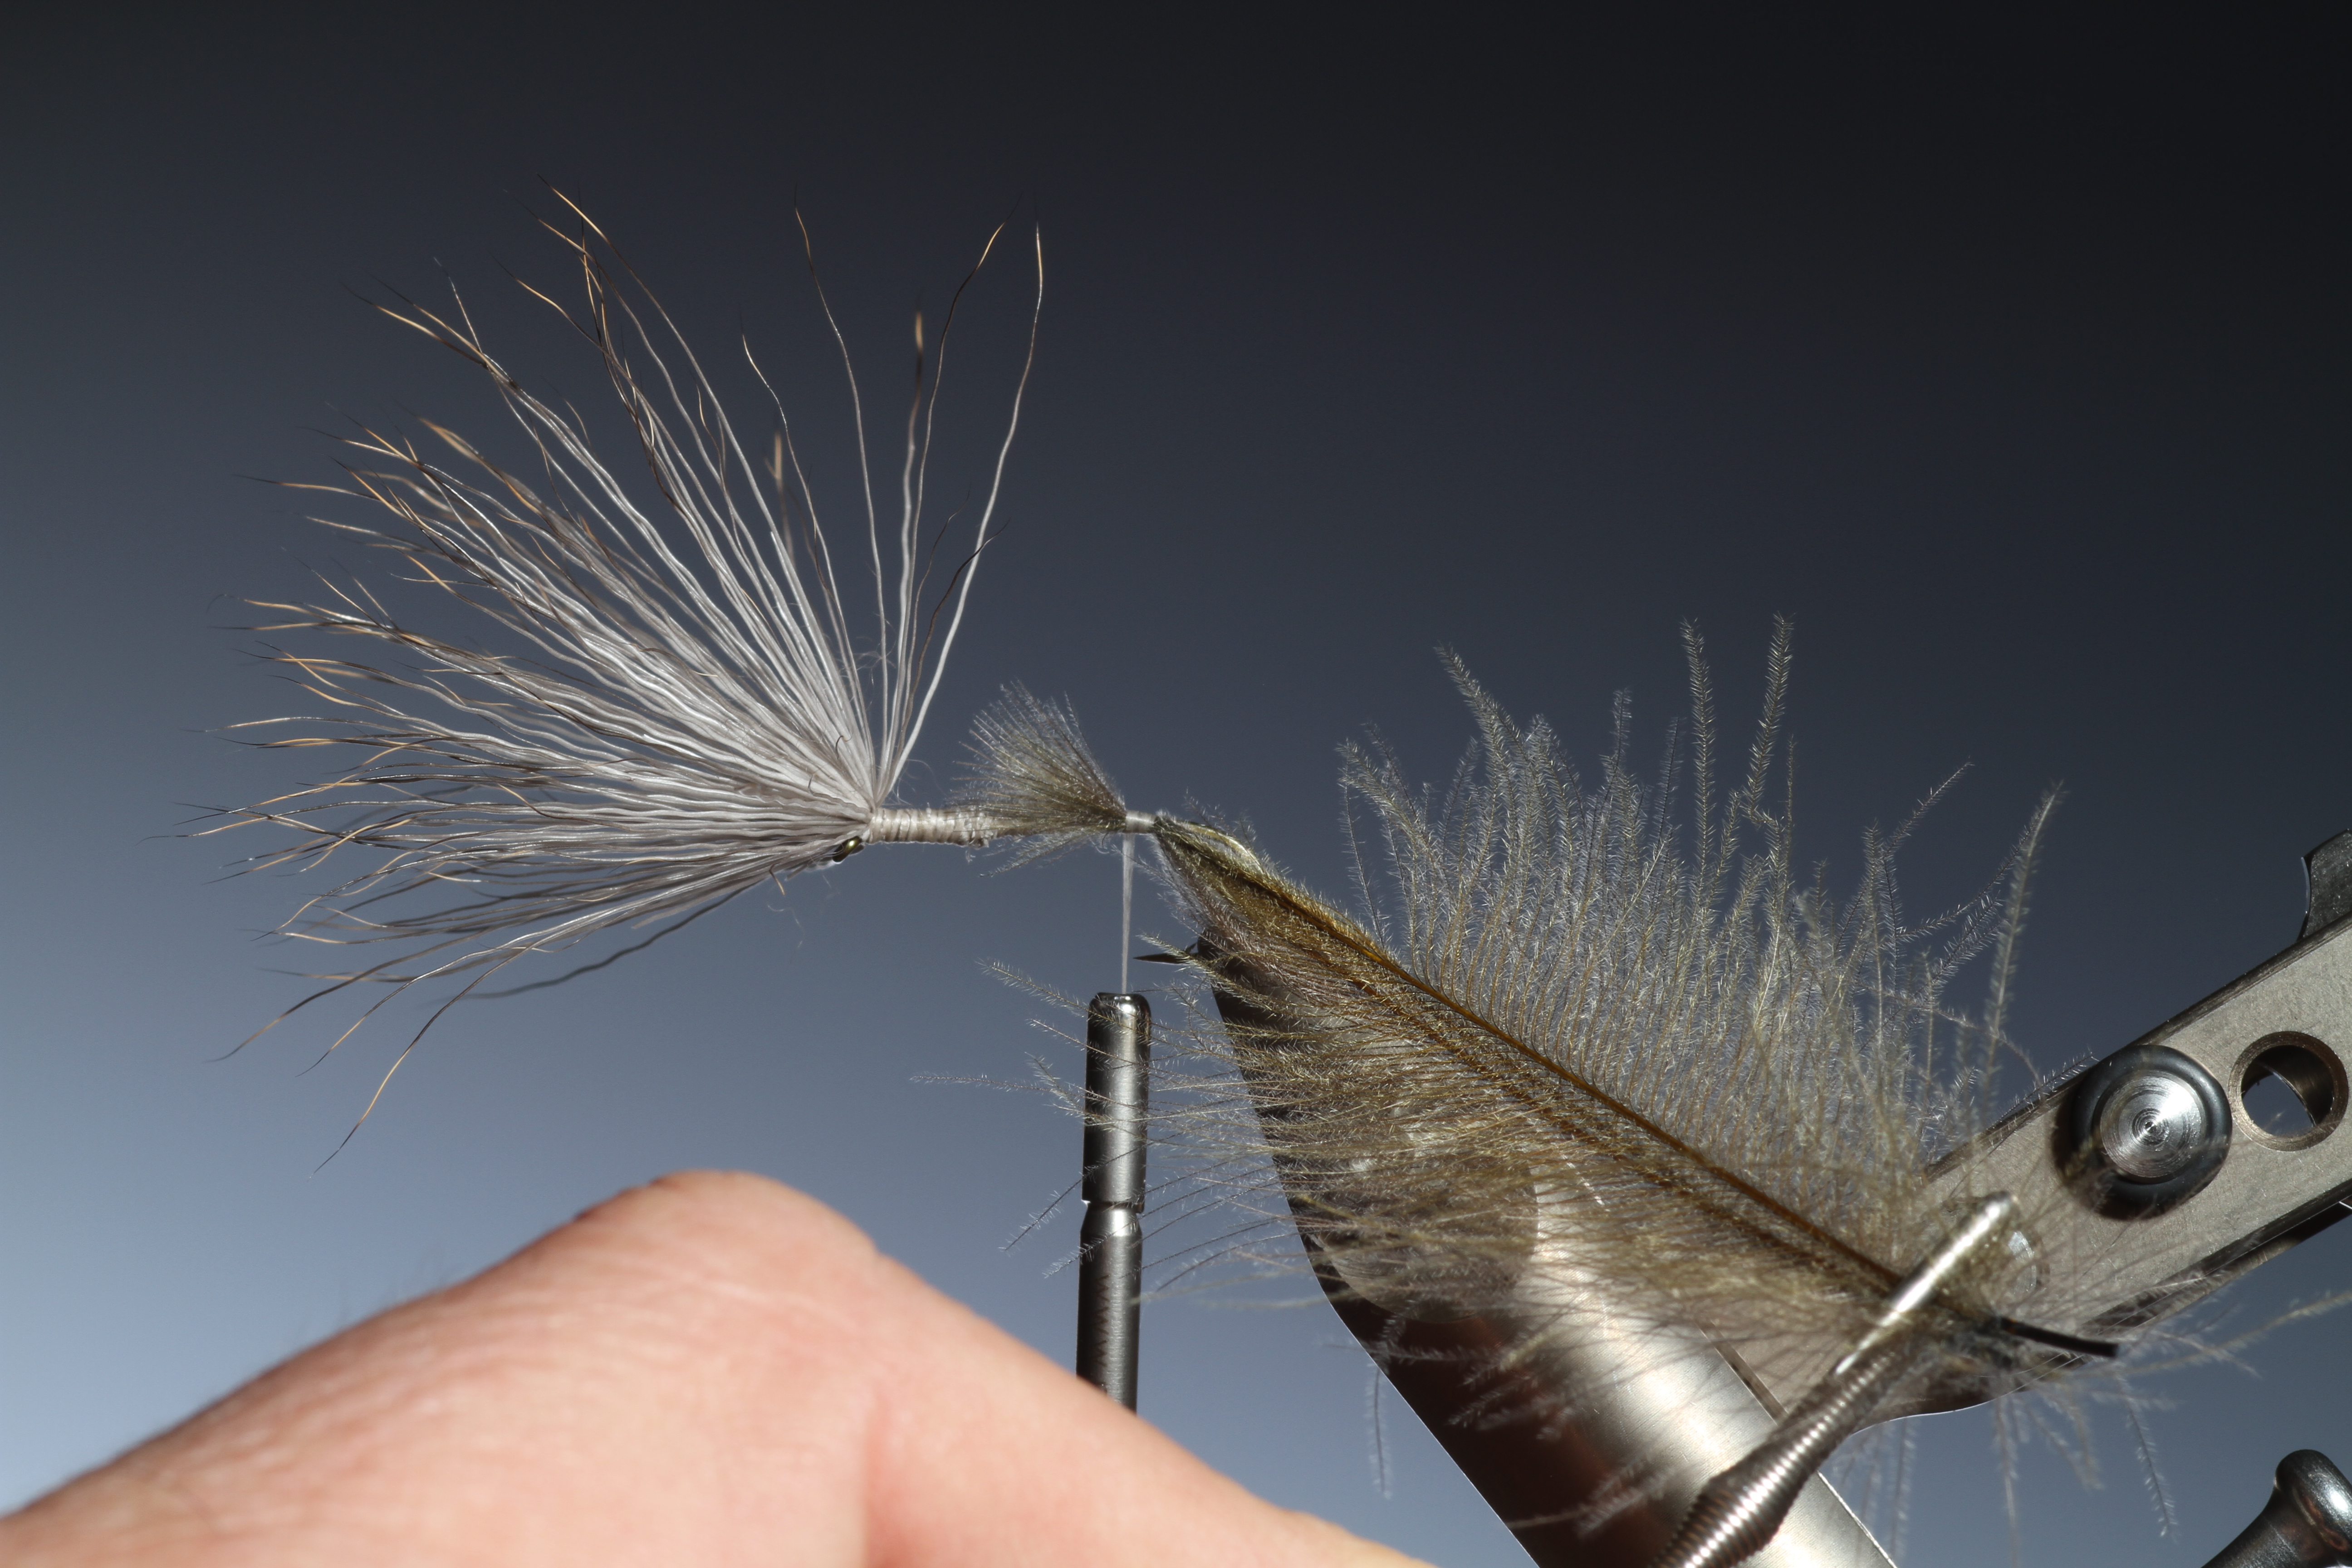
Trim off the ends of the hackles close into the hackle plier before winding.
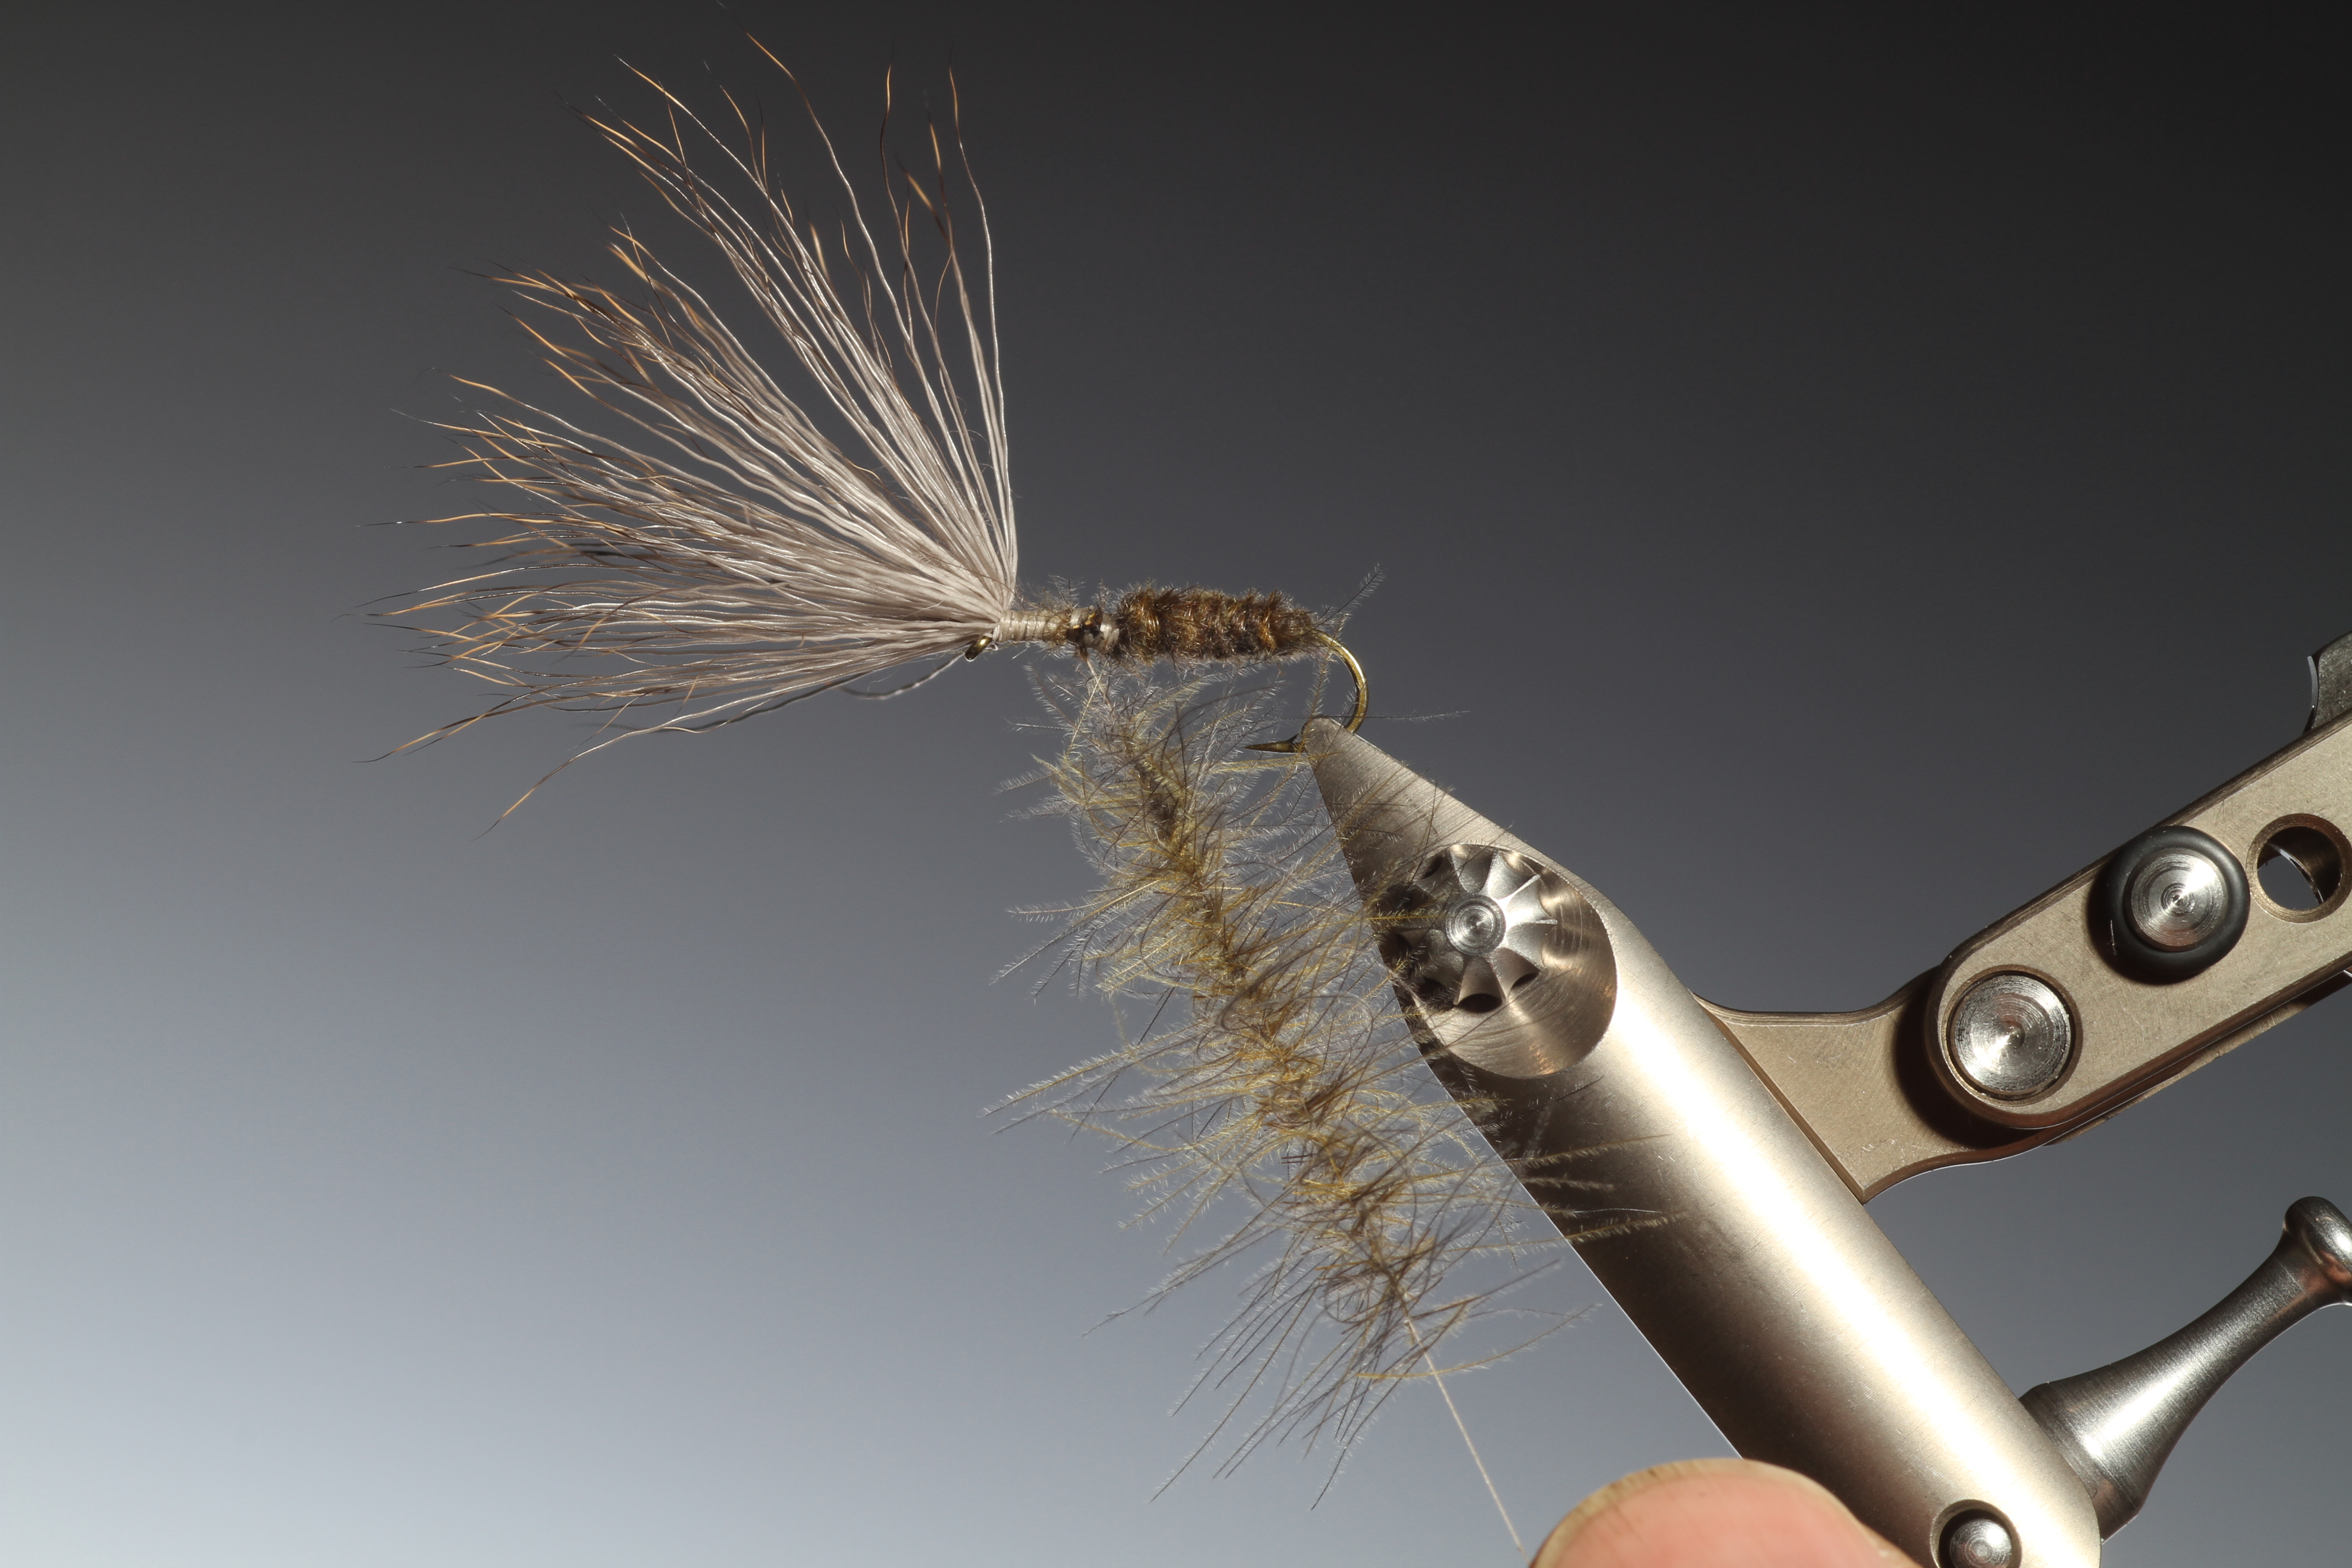
7
Now while holding the CdC hackle fibers in place with one hand make two twists only of the hackle plier to form the CdC dubbing rope. If you make more than two twists the hackles will break!
8
Now with each wrap of CdC dubbing rope make one twist of the hackle pliers by rolling it in your fingers. Marc calls this wrap and roll. Remember to hold each turn in-place on the hook shank.
9
Continue wrapping and rolling until the body is complete.
10
Once you have covered the whole body, carefully tie off the CdC hackles.

11
Once secure trim off the hackle buts.
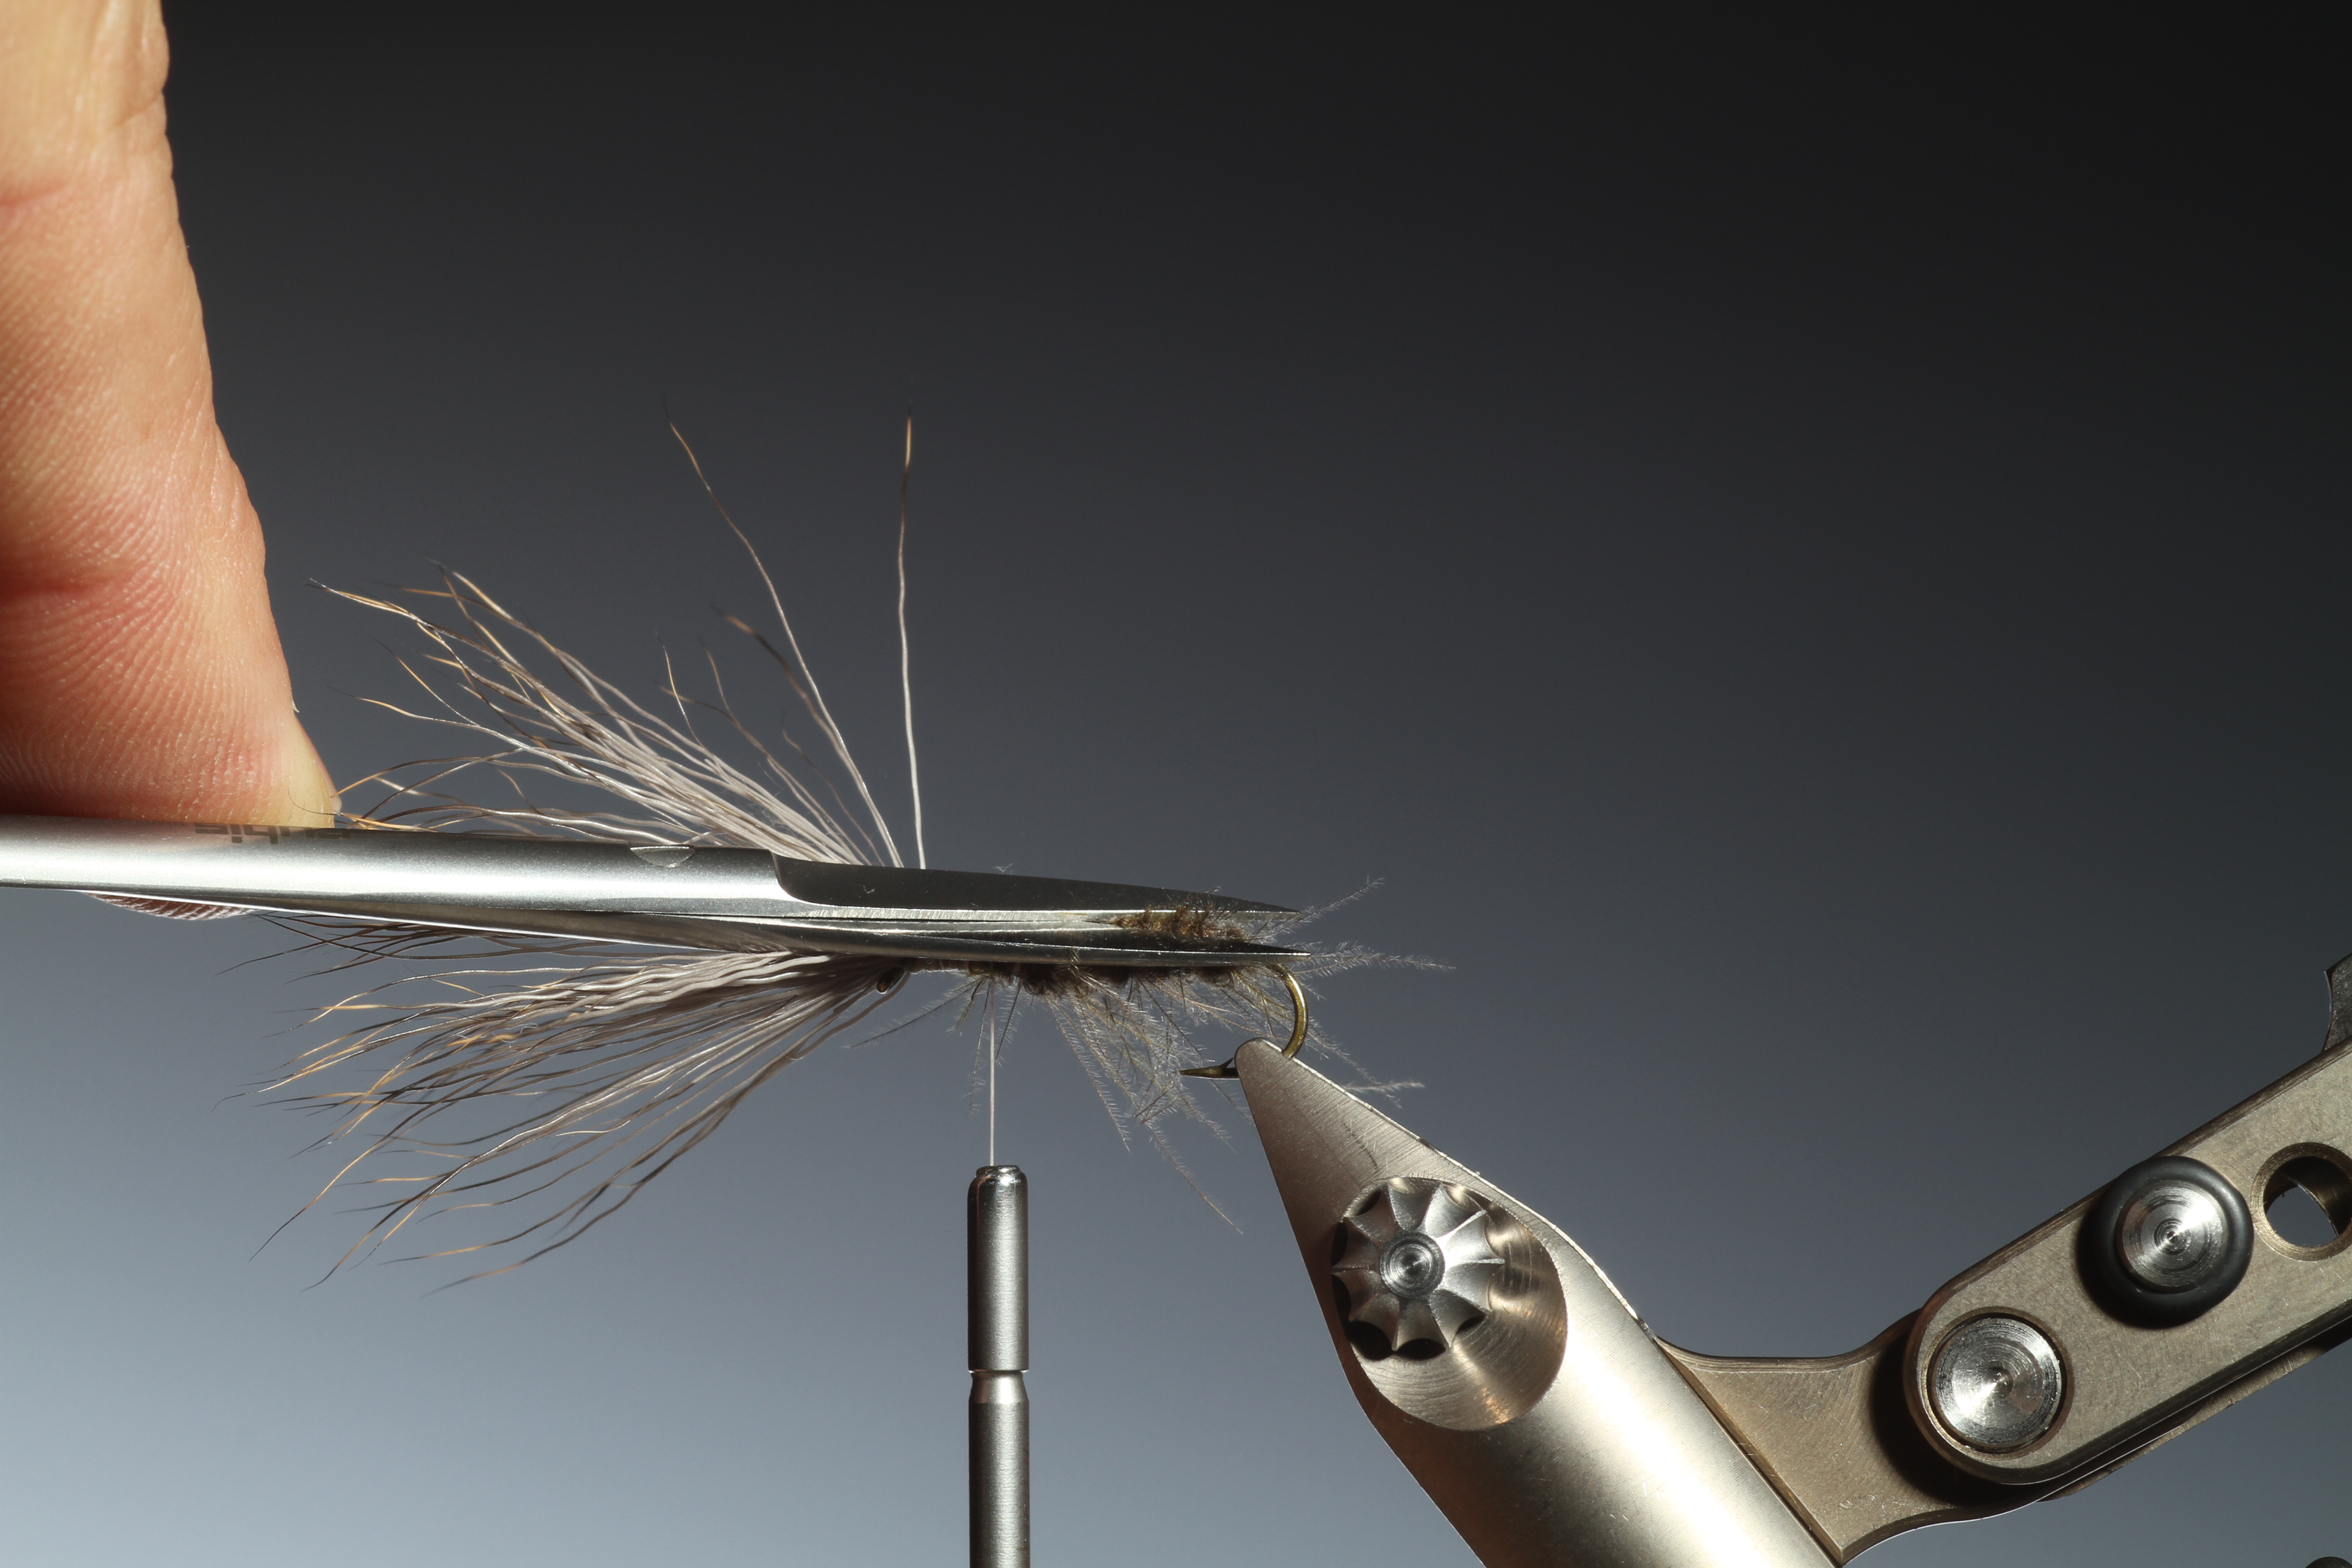
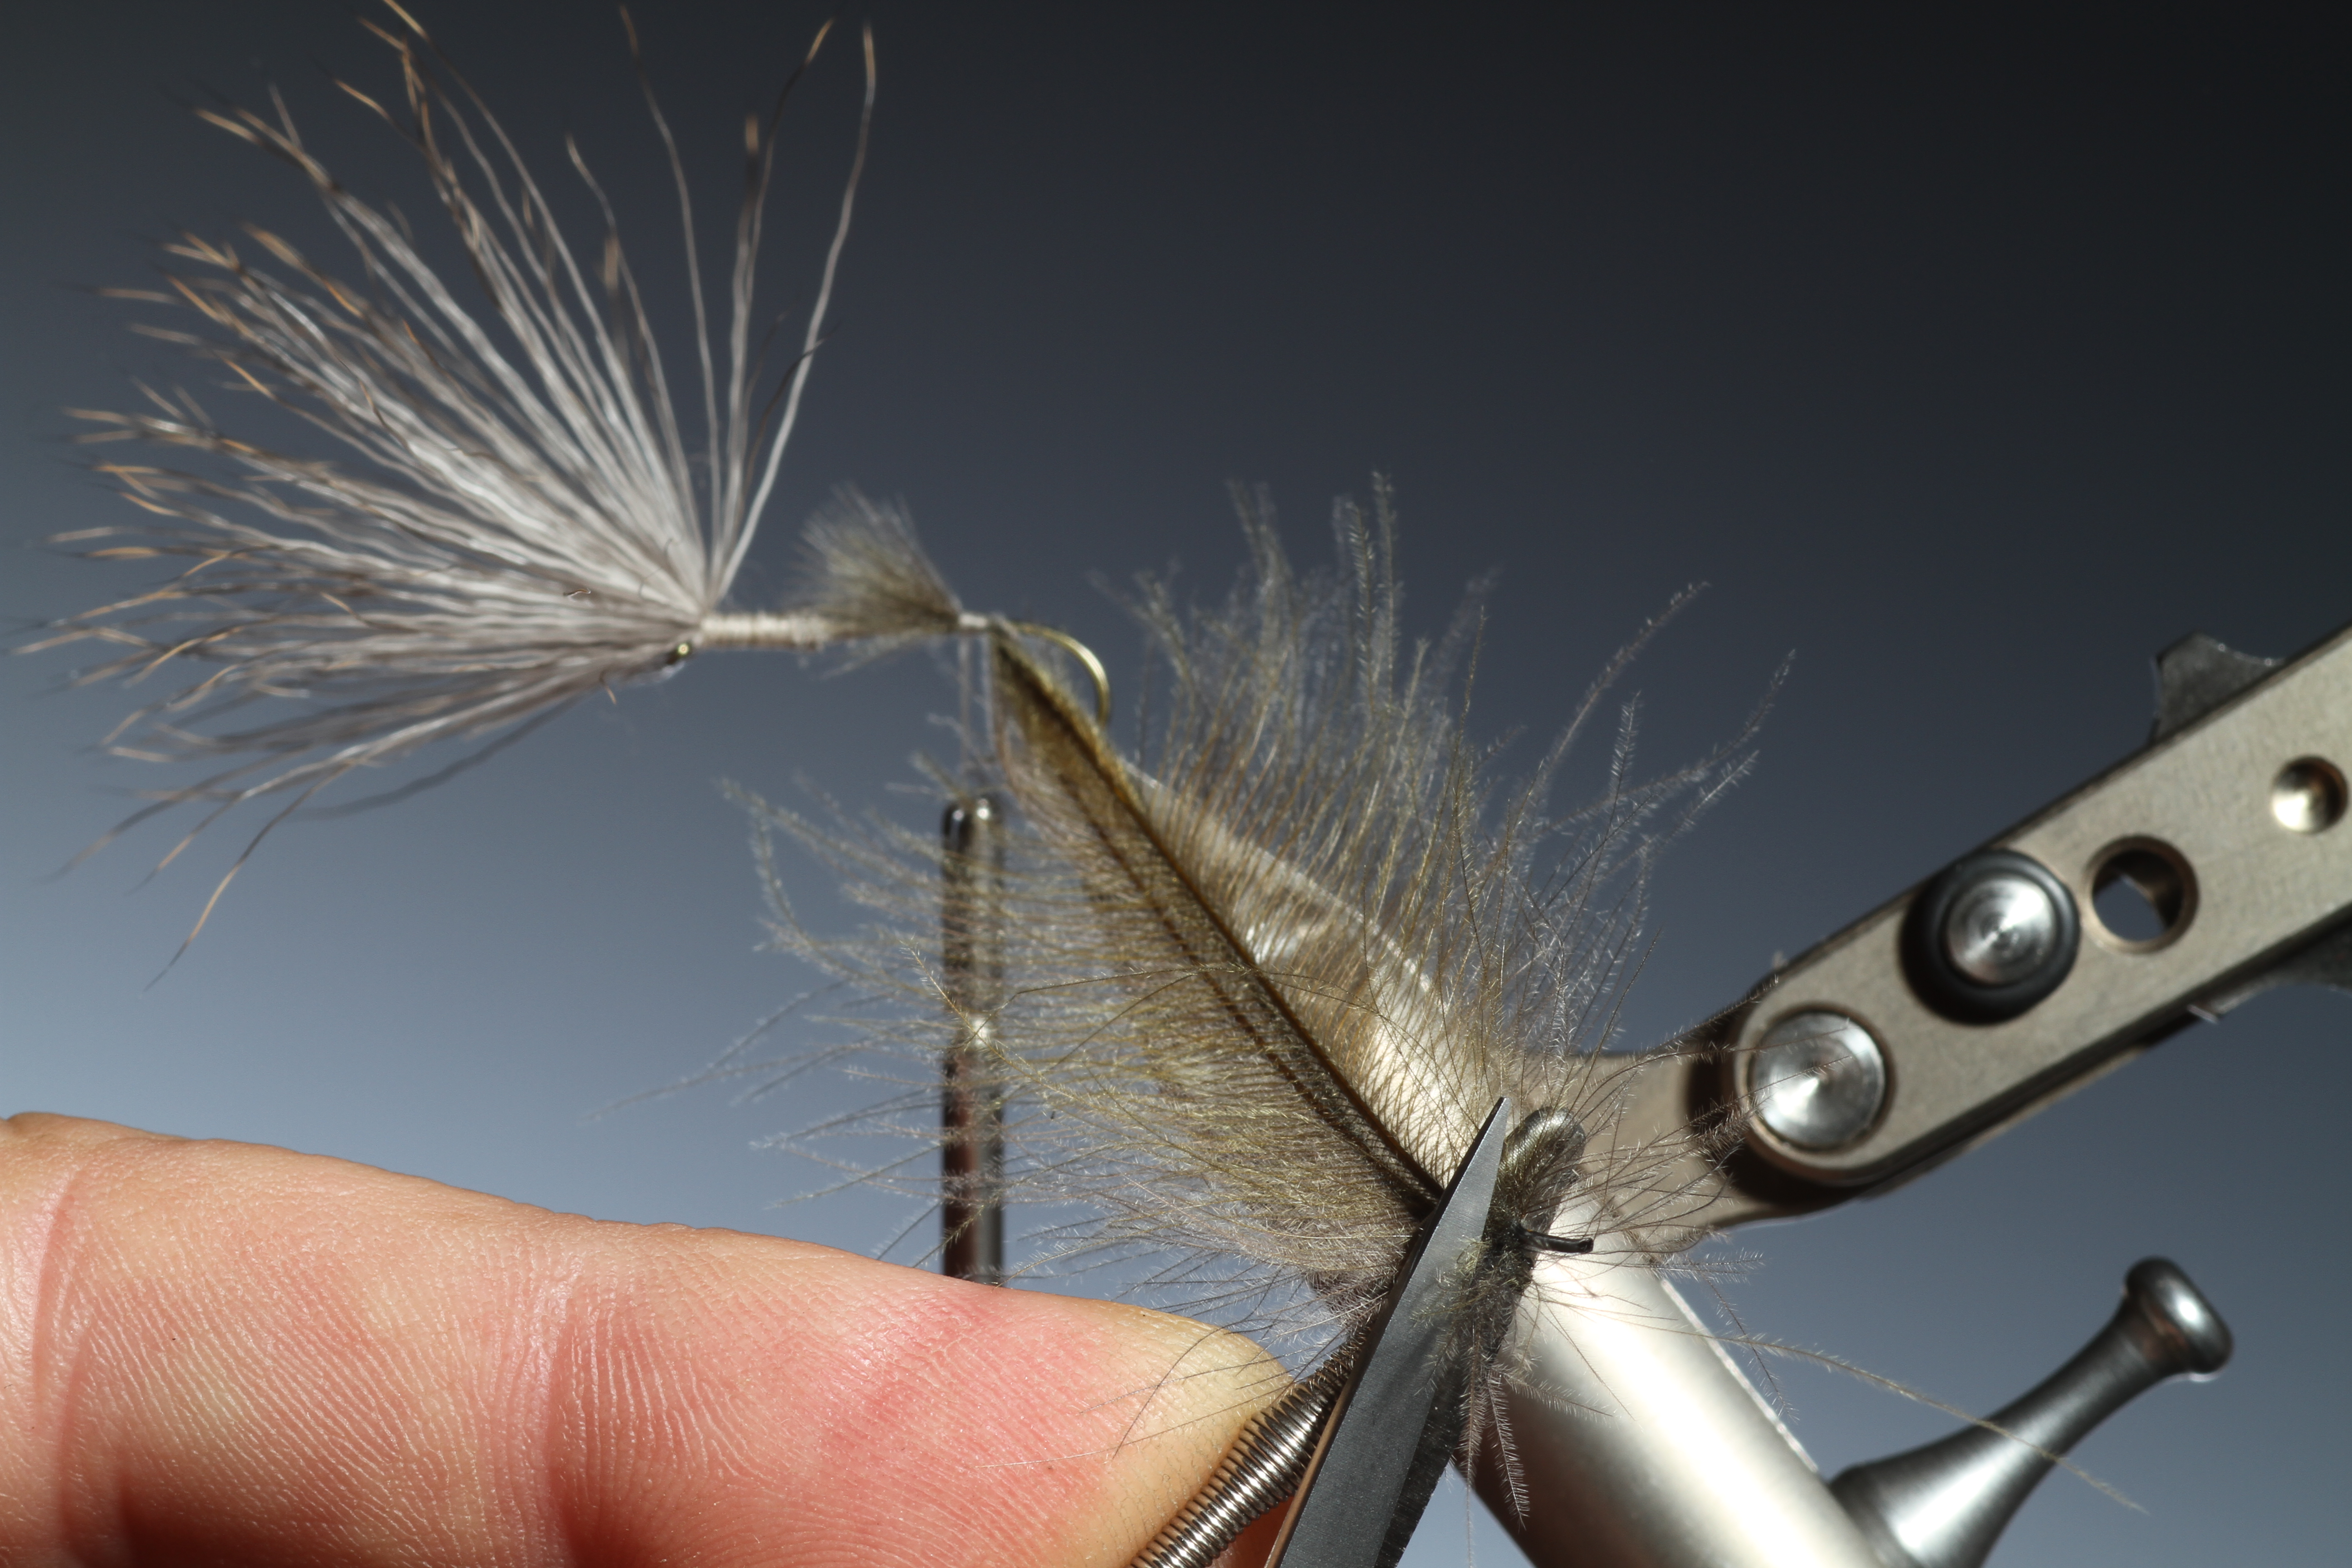
12
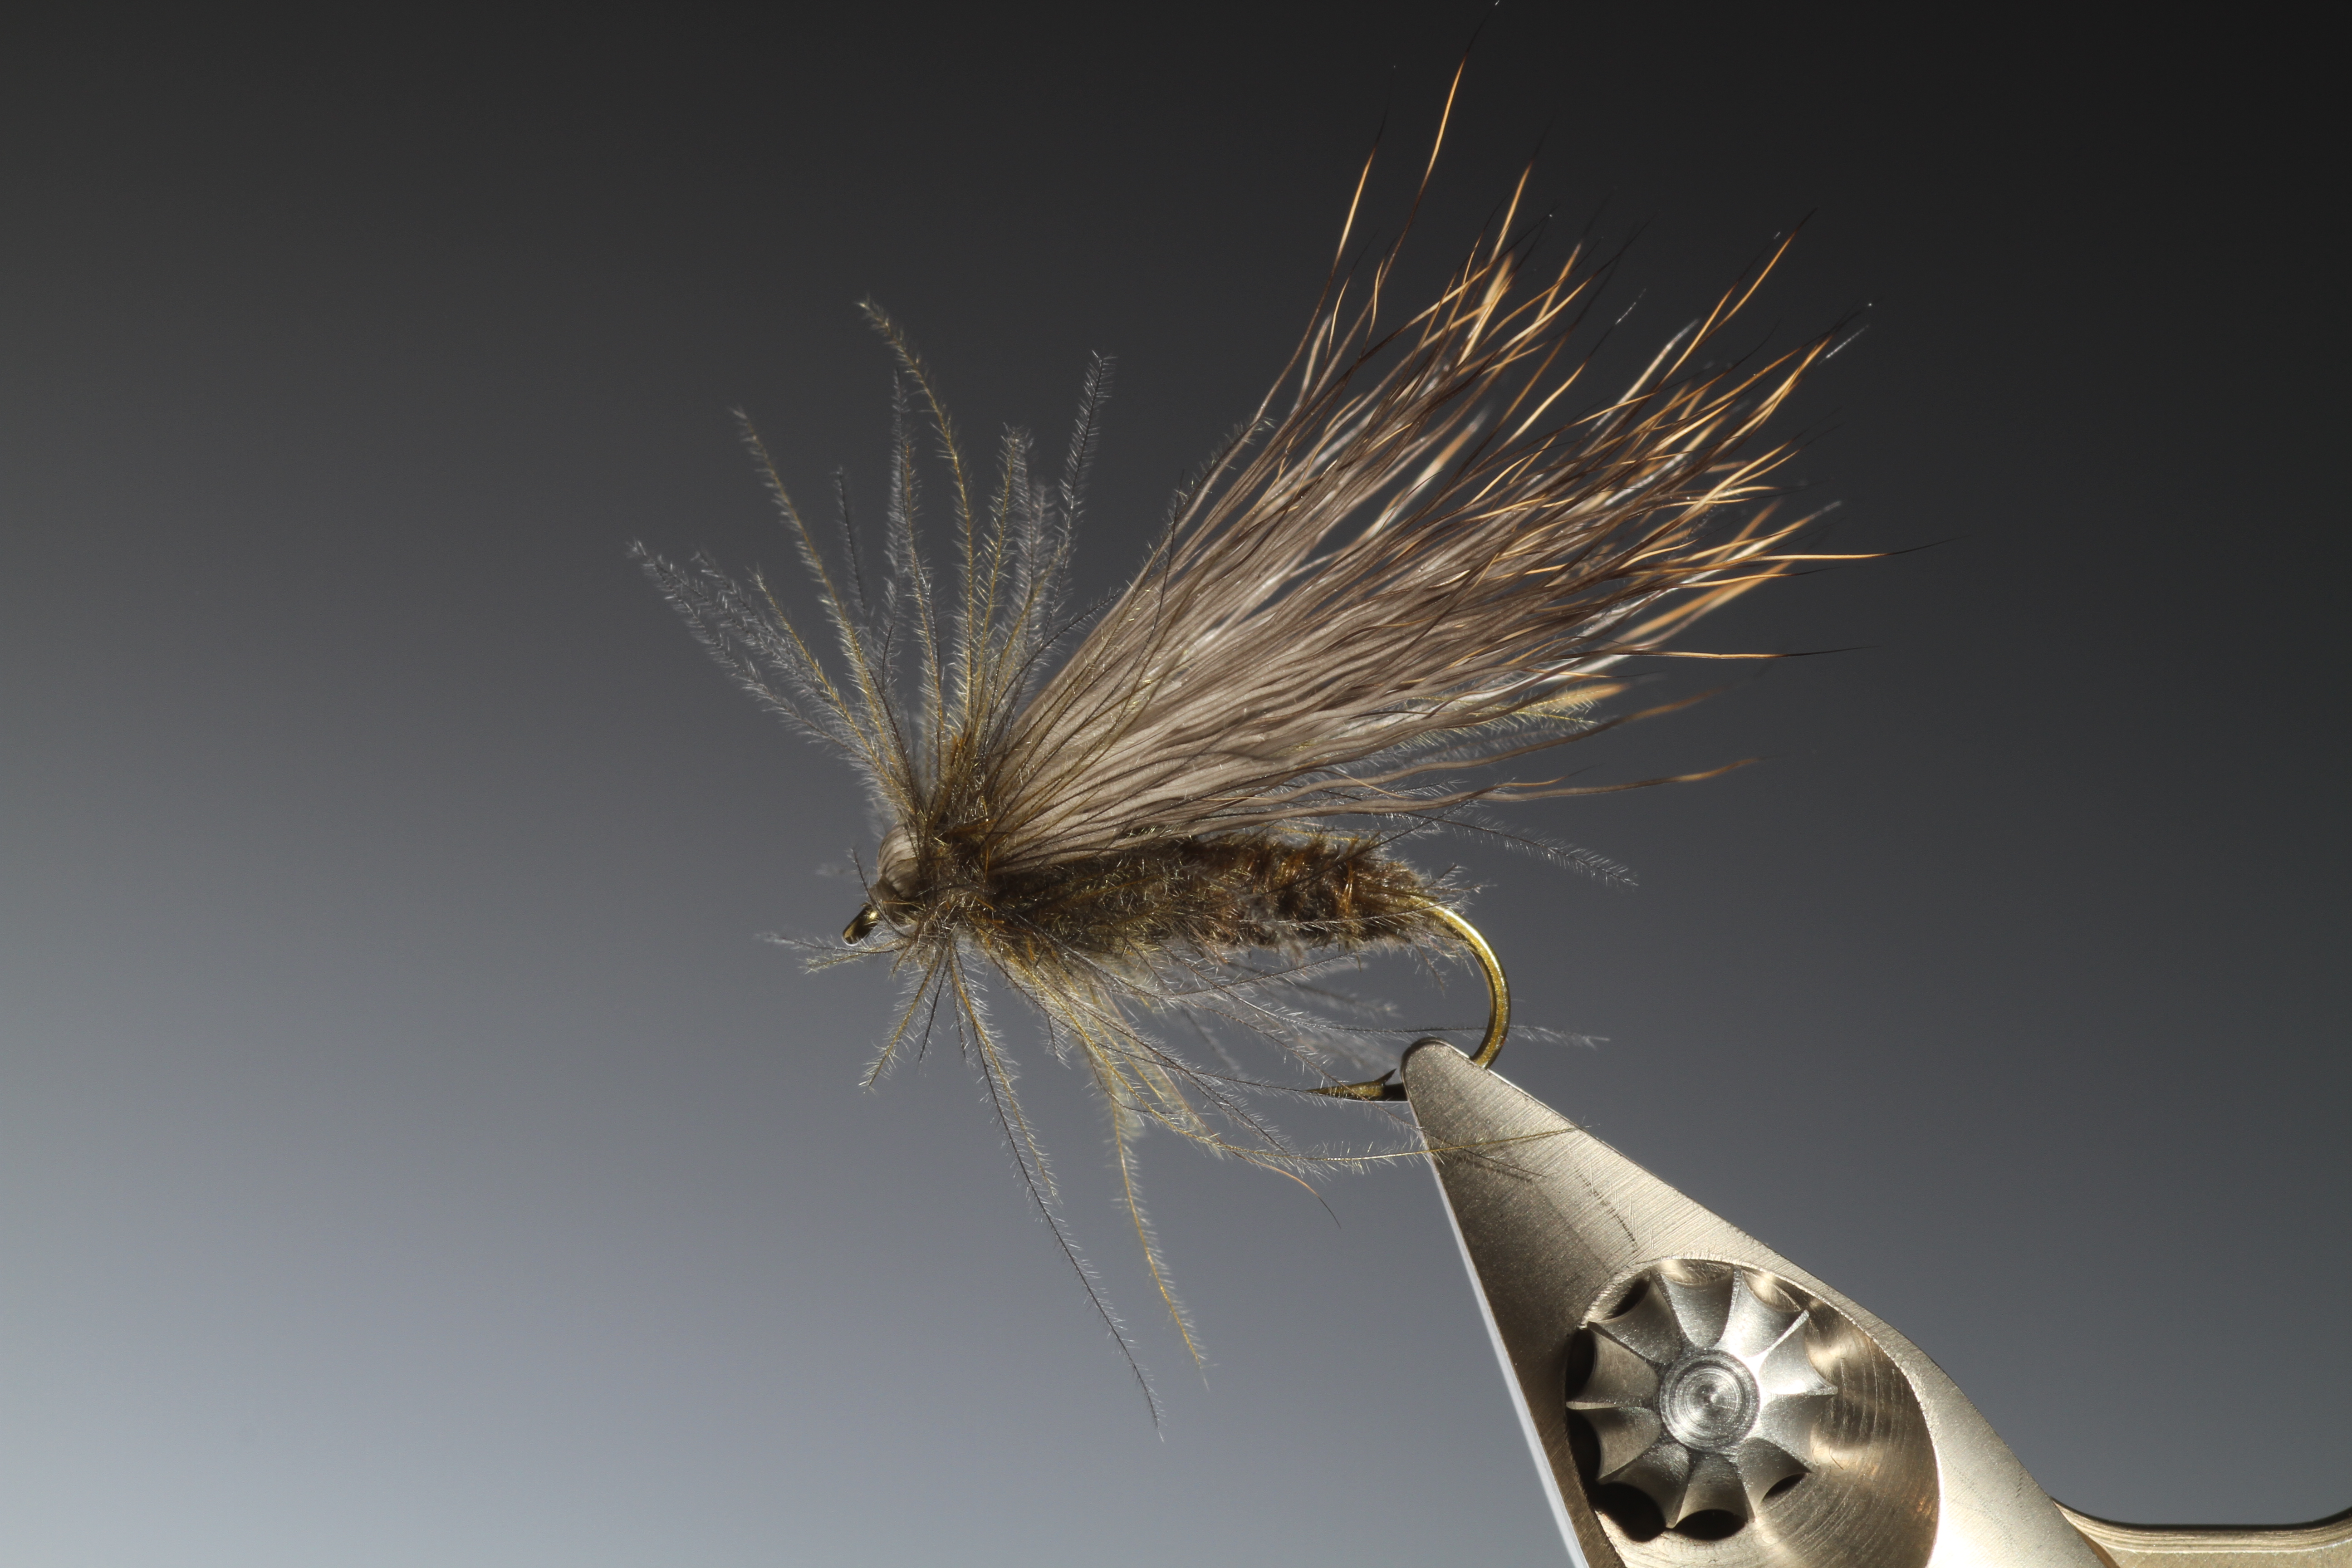
With a pair of straight scissors trim off the extending CdC hackle fibers from the body.
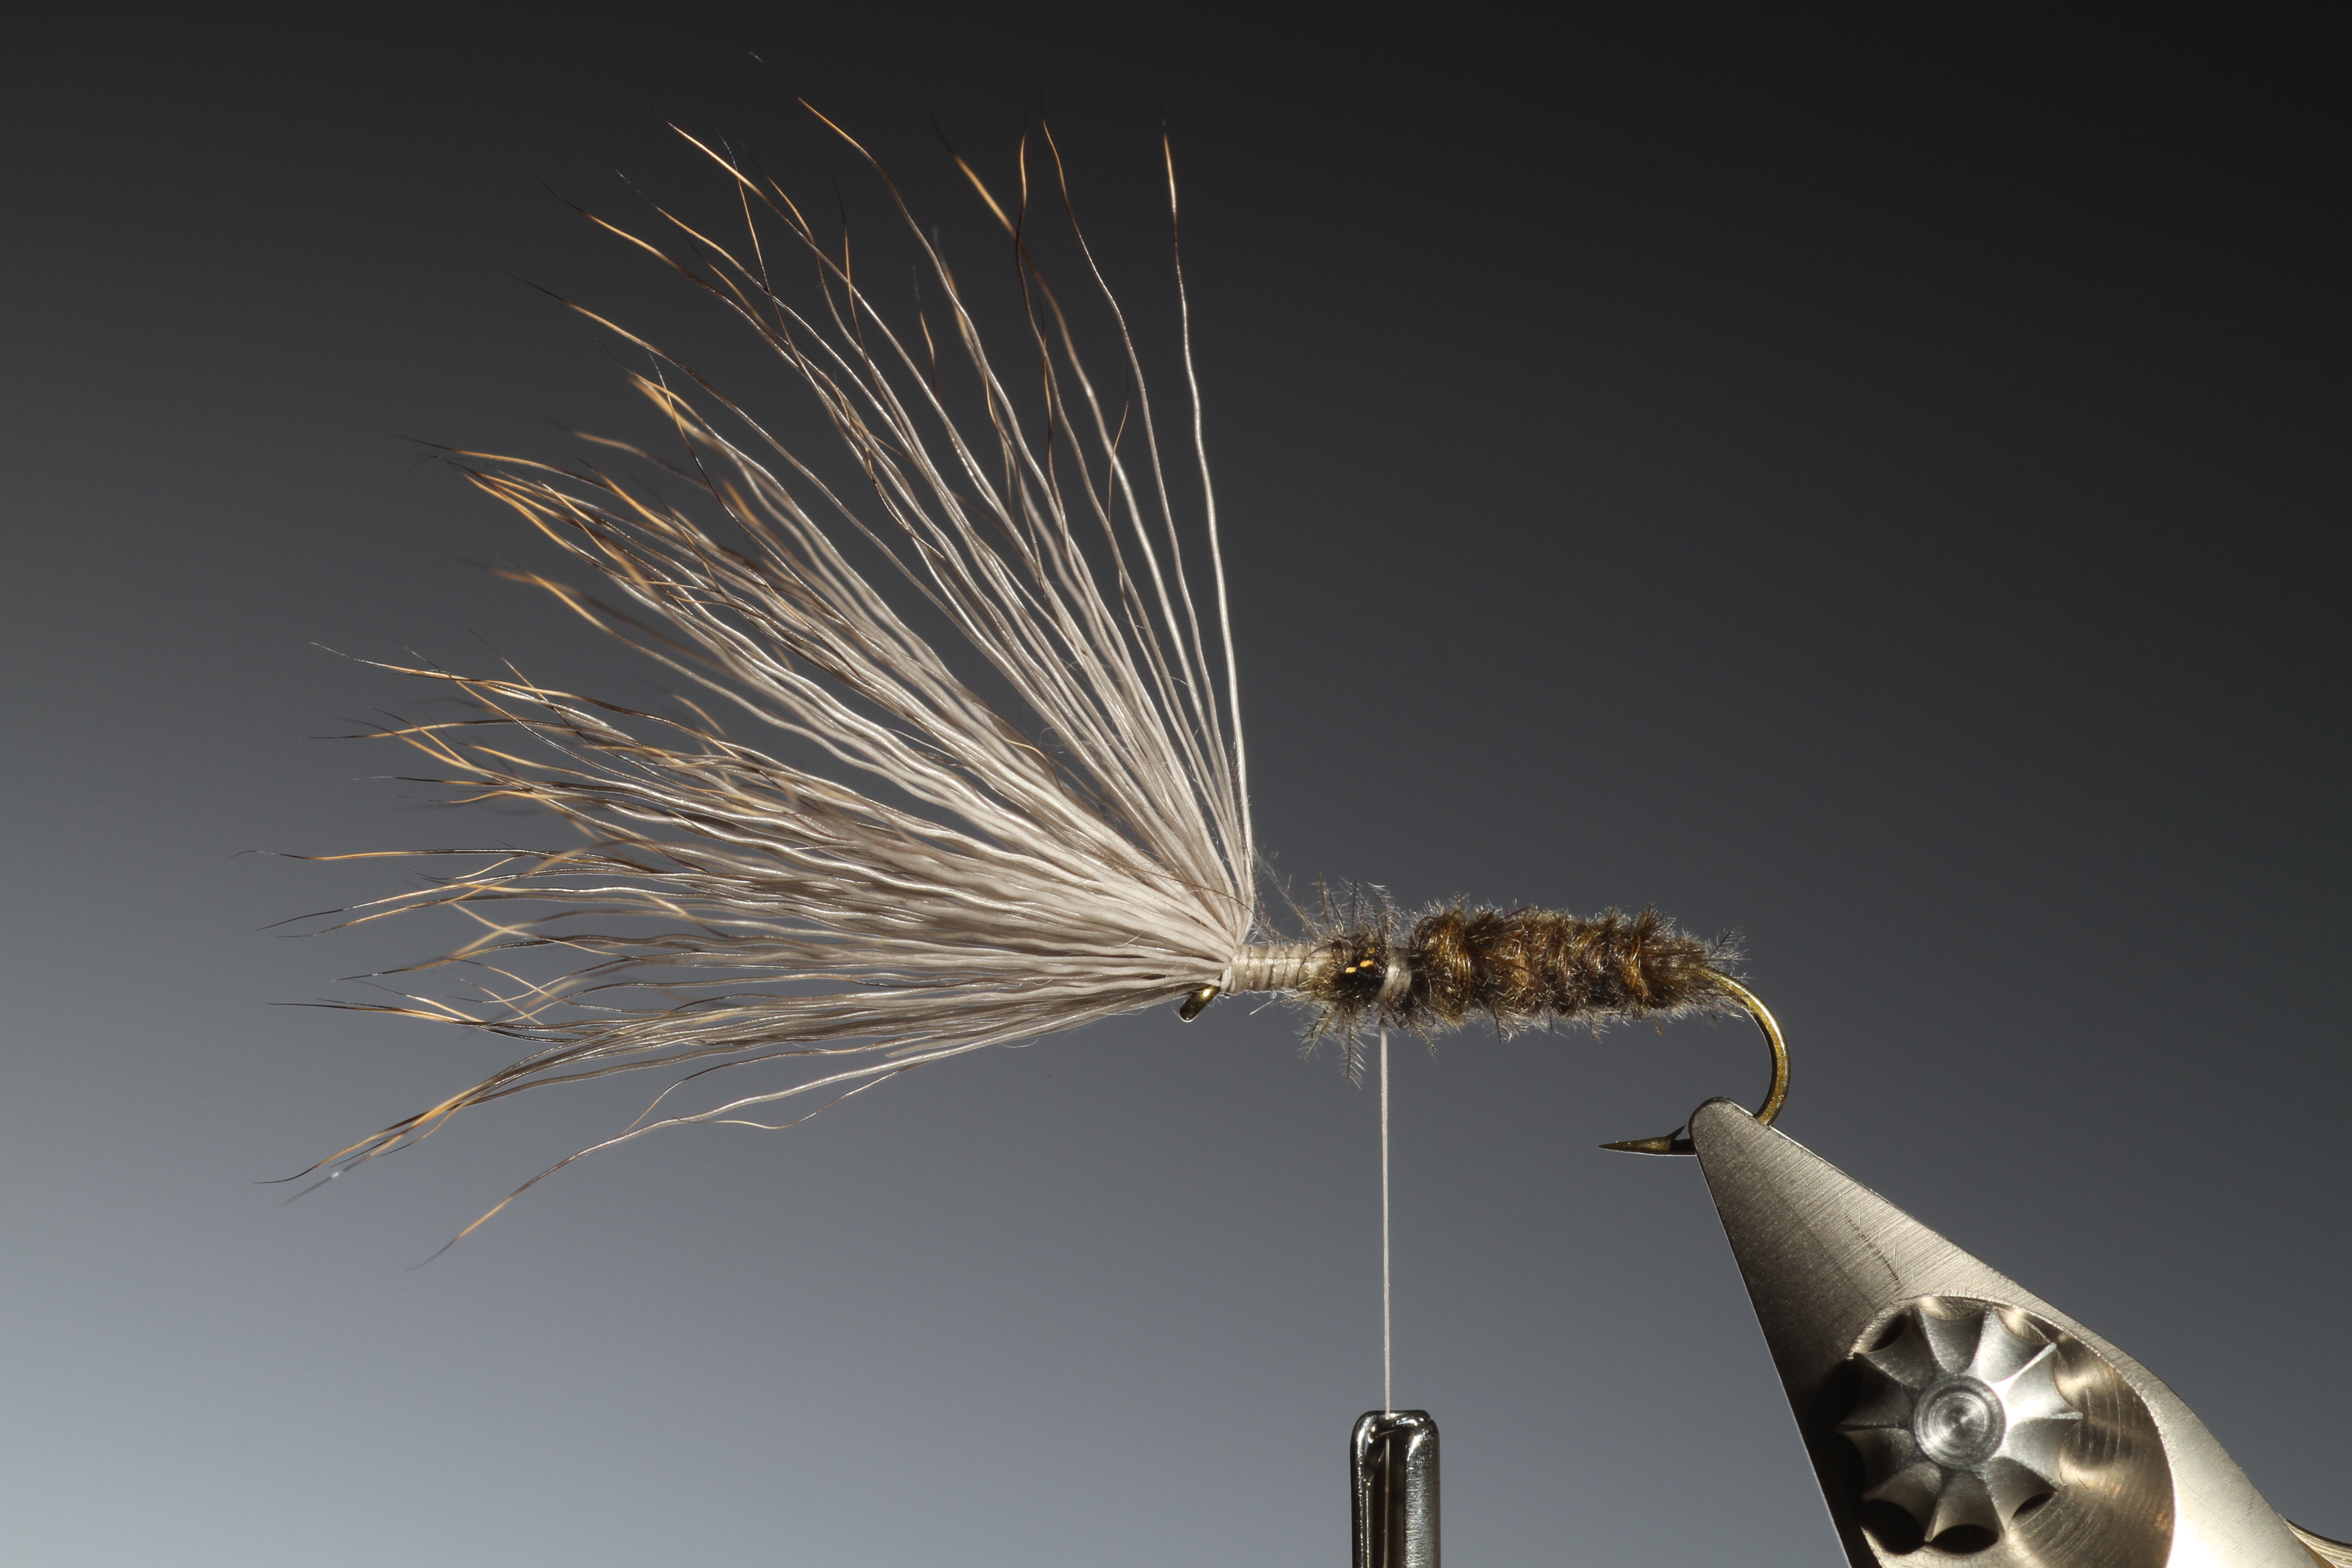
13
The finished result, a segmented CdC caddis body.
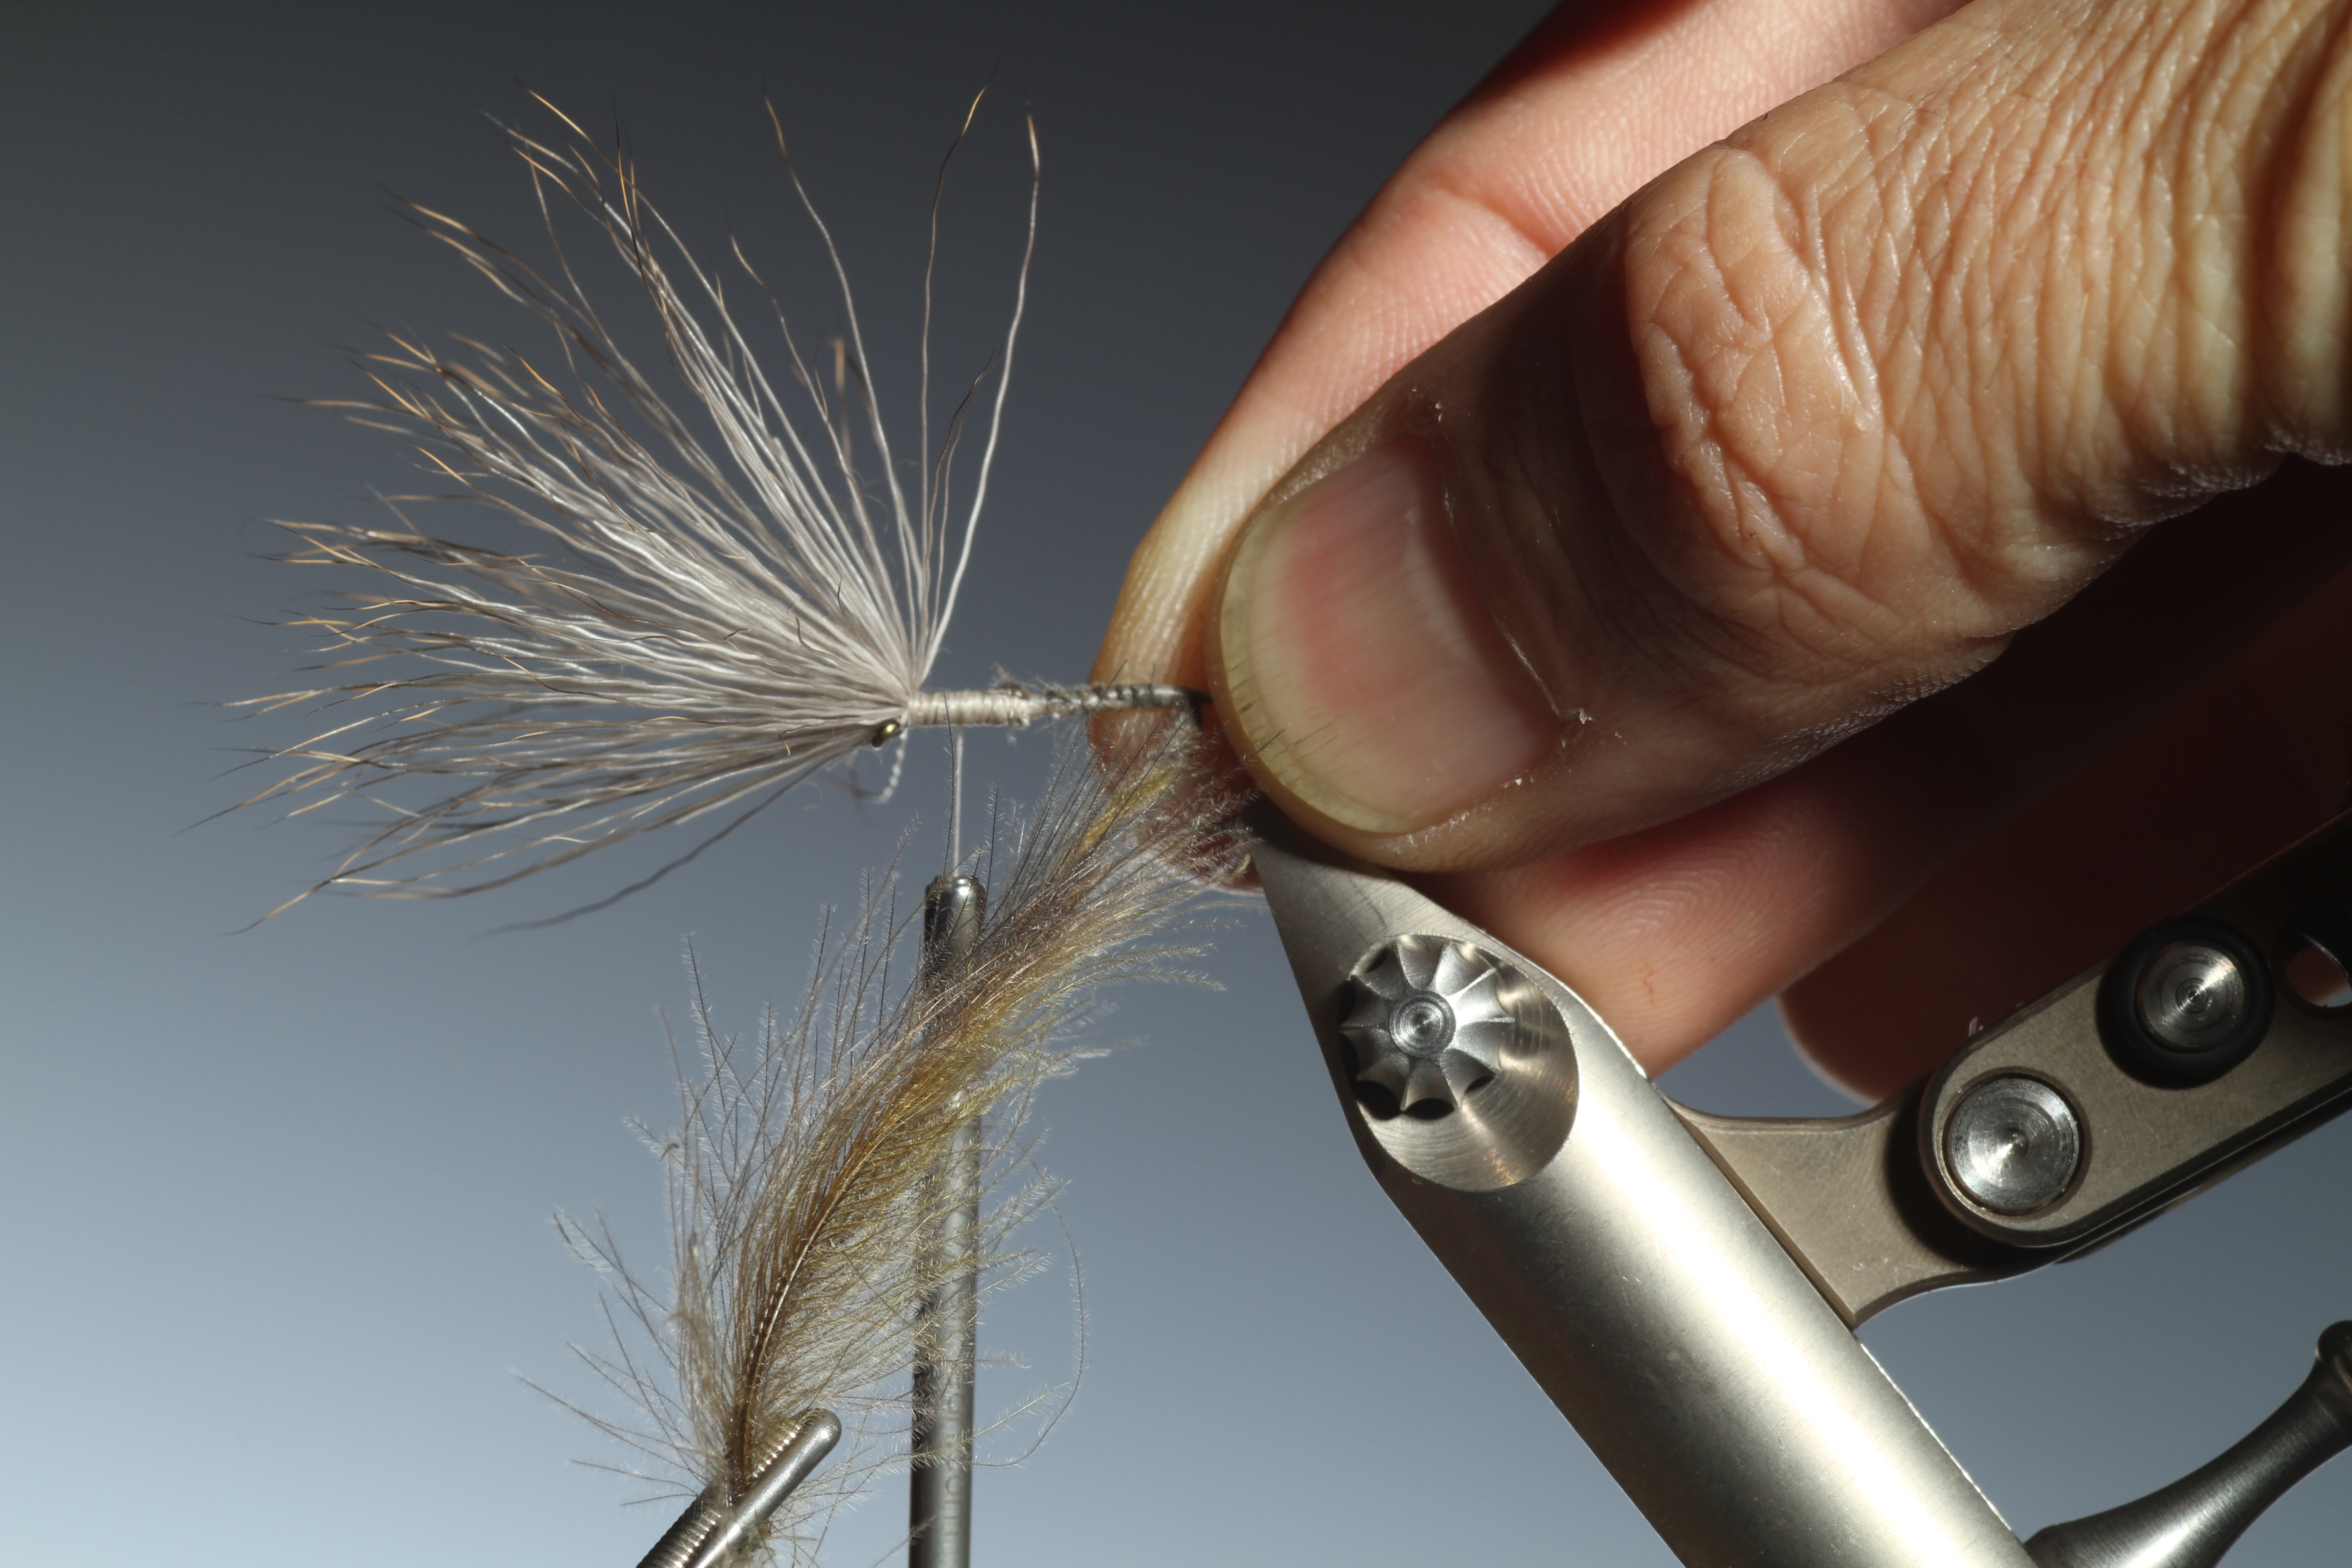
14
Prepare a magic tool with two CdC hackle loaded and place in a split dubbing loop of tying thread. This will form the hackle.
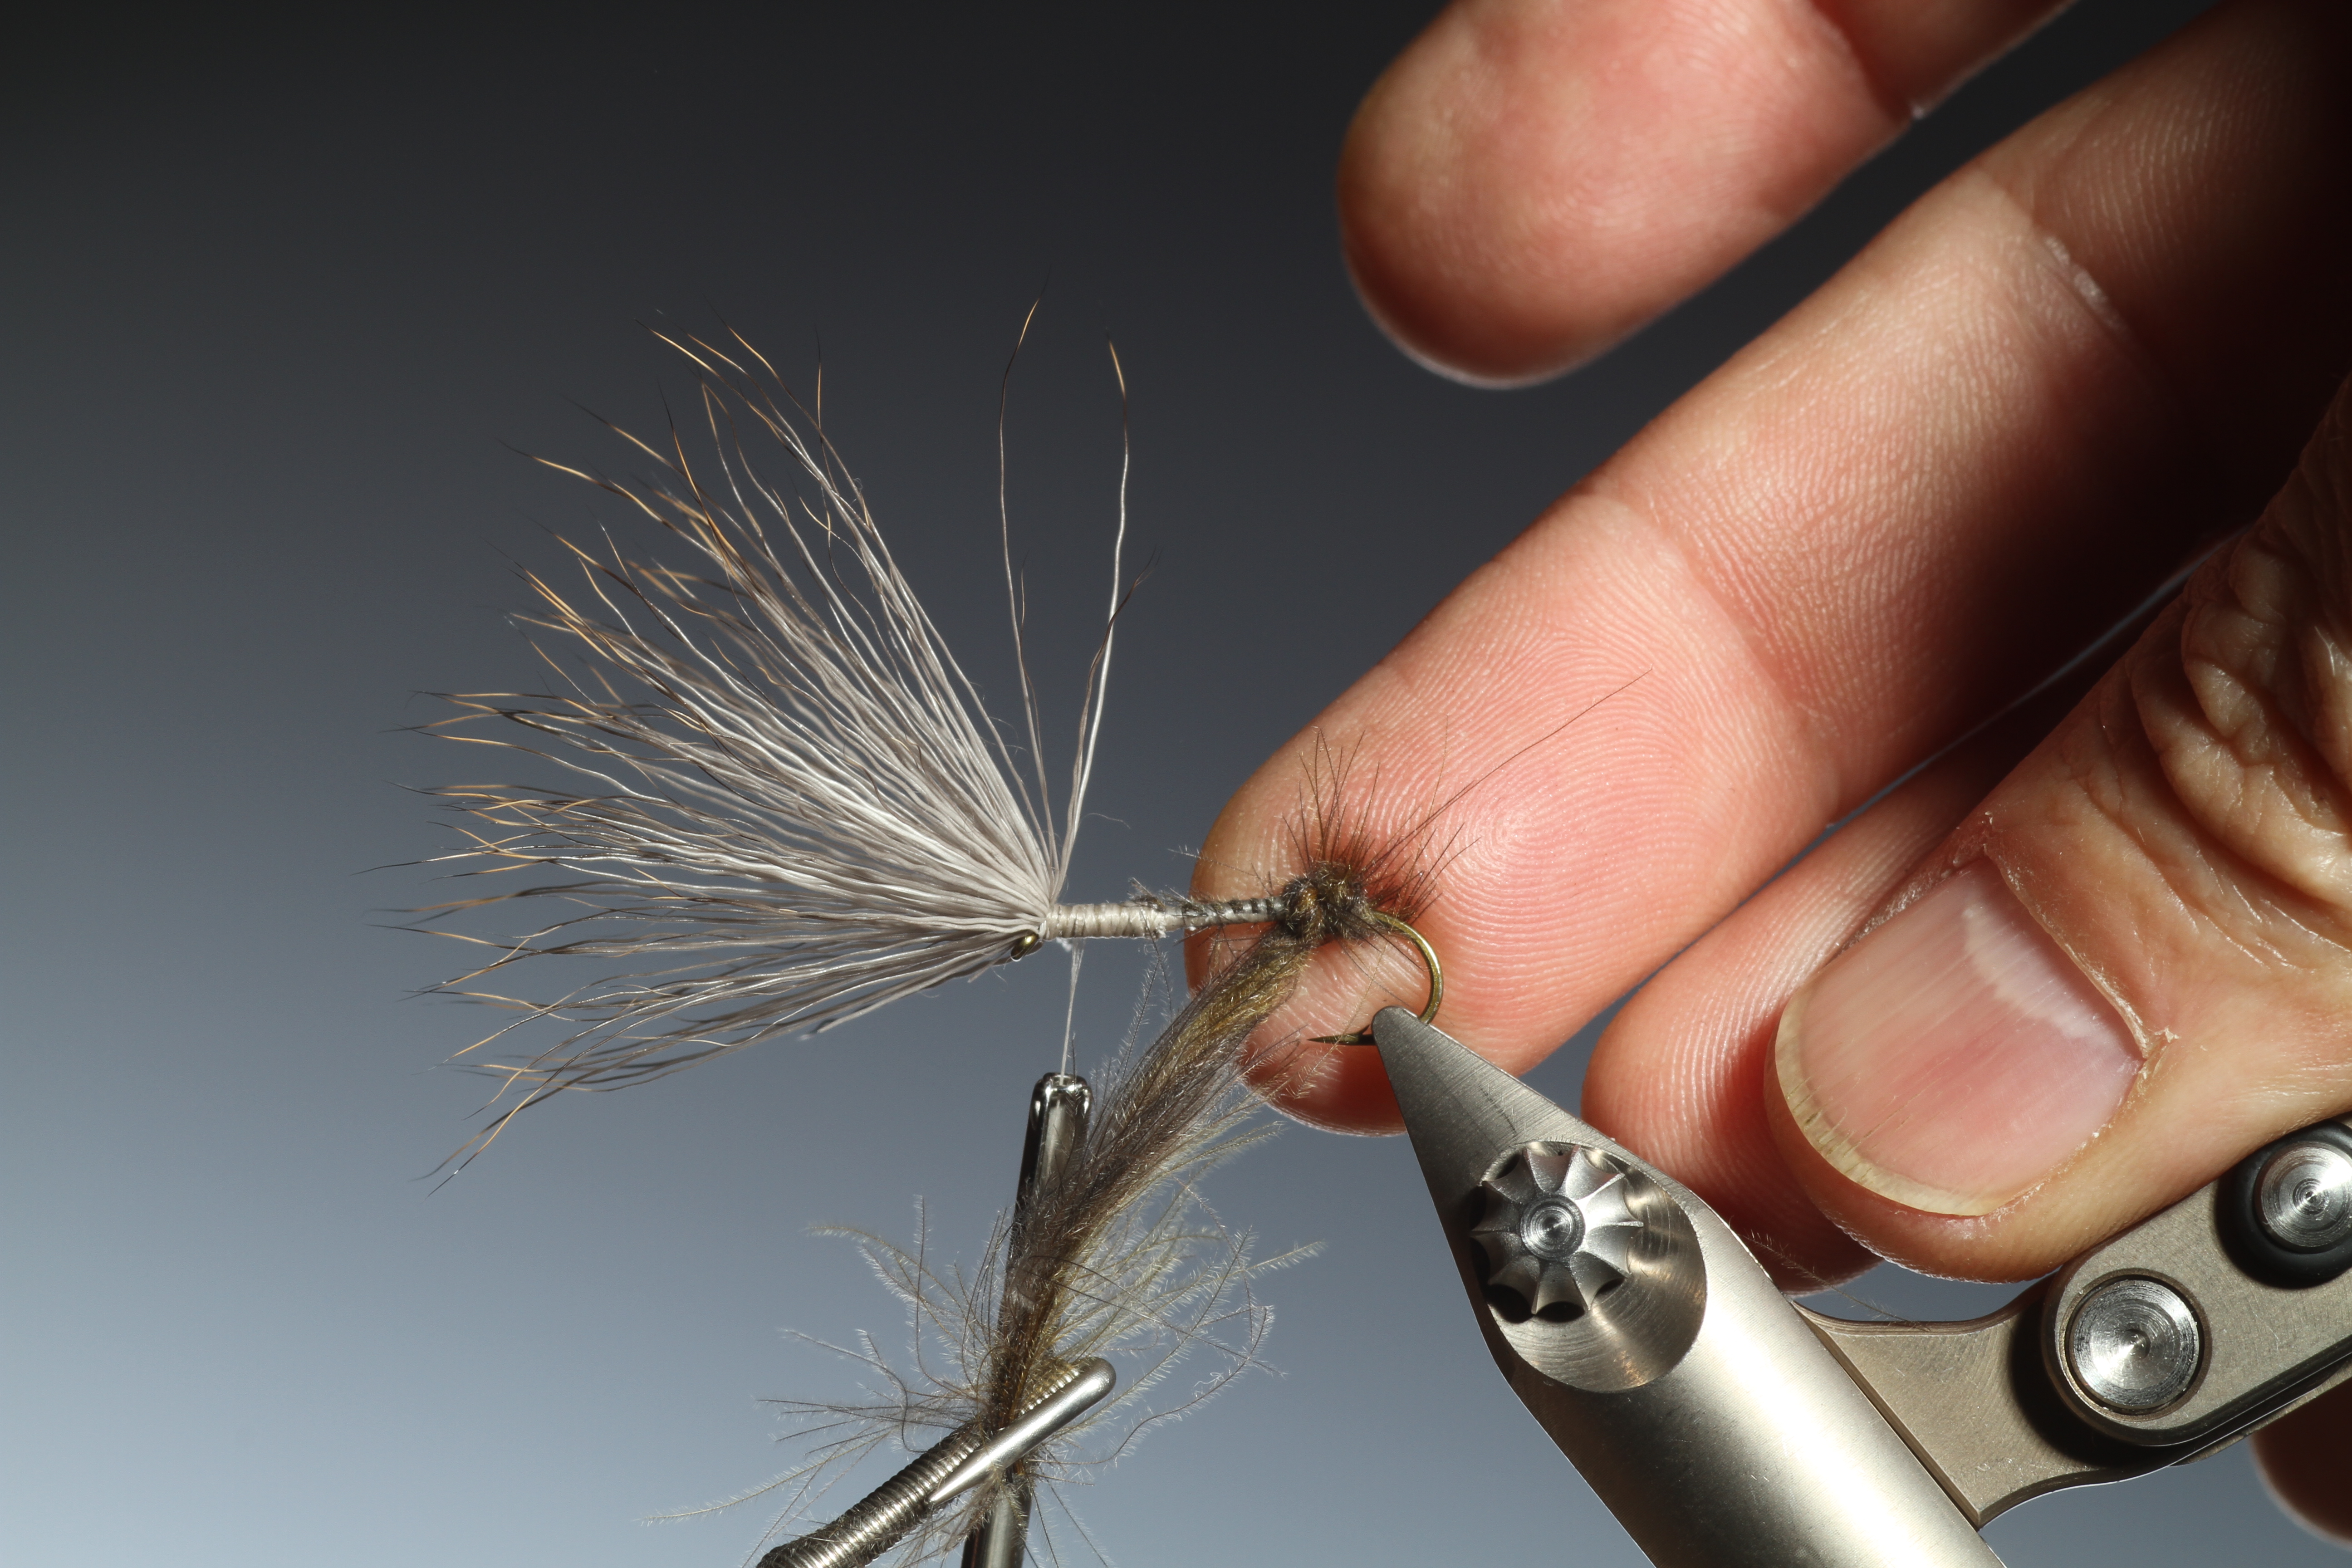
15
Once the CdC fibers are loaded in the magic tool spin your bobbin to make a dubbing brush.
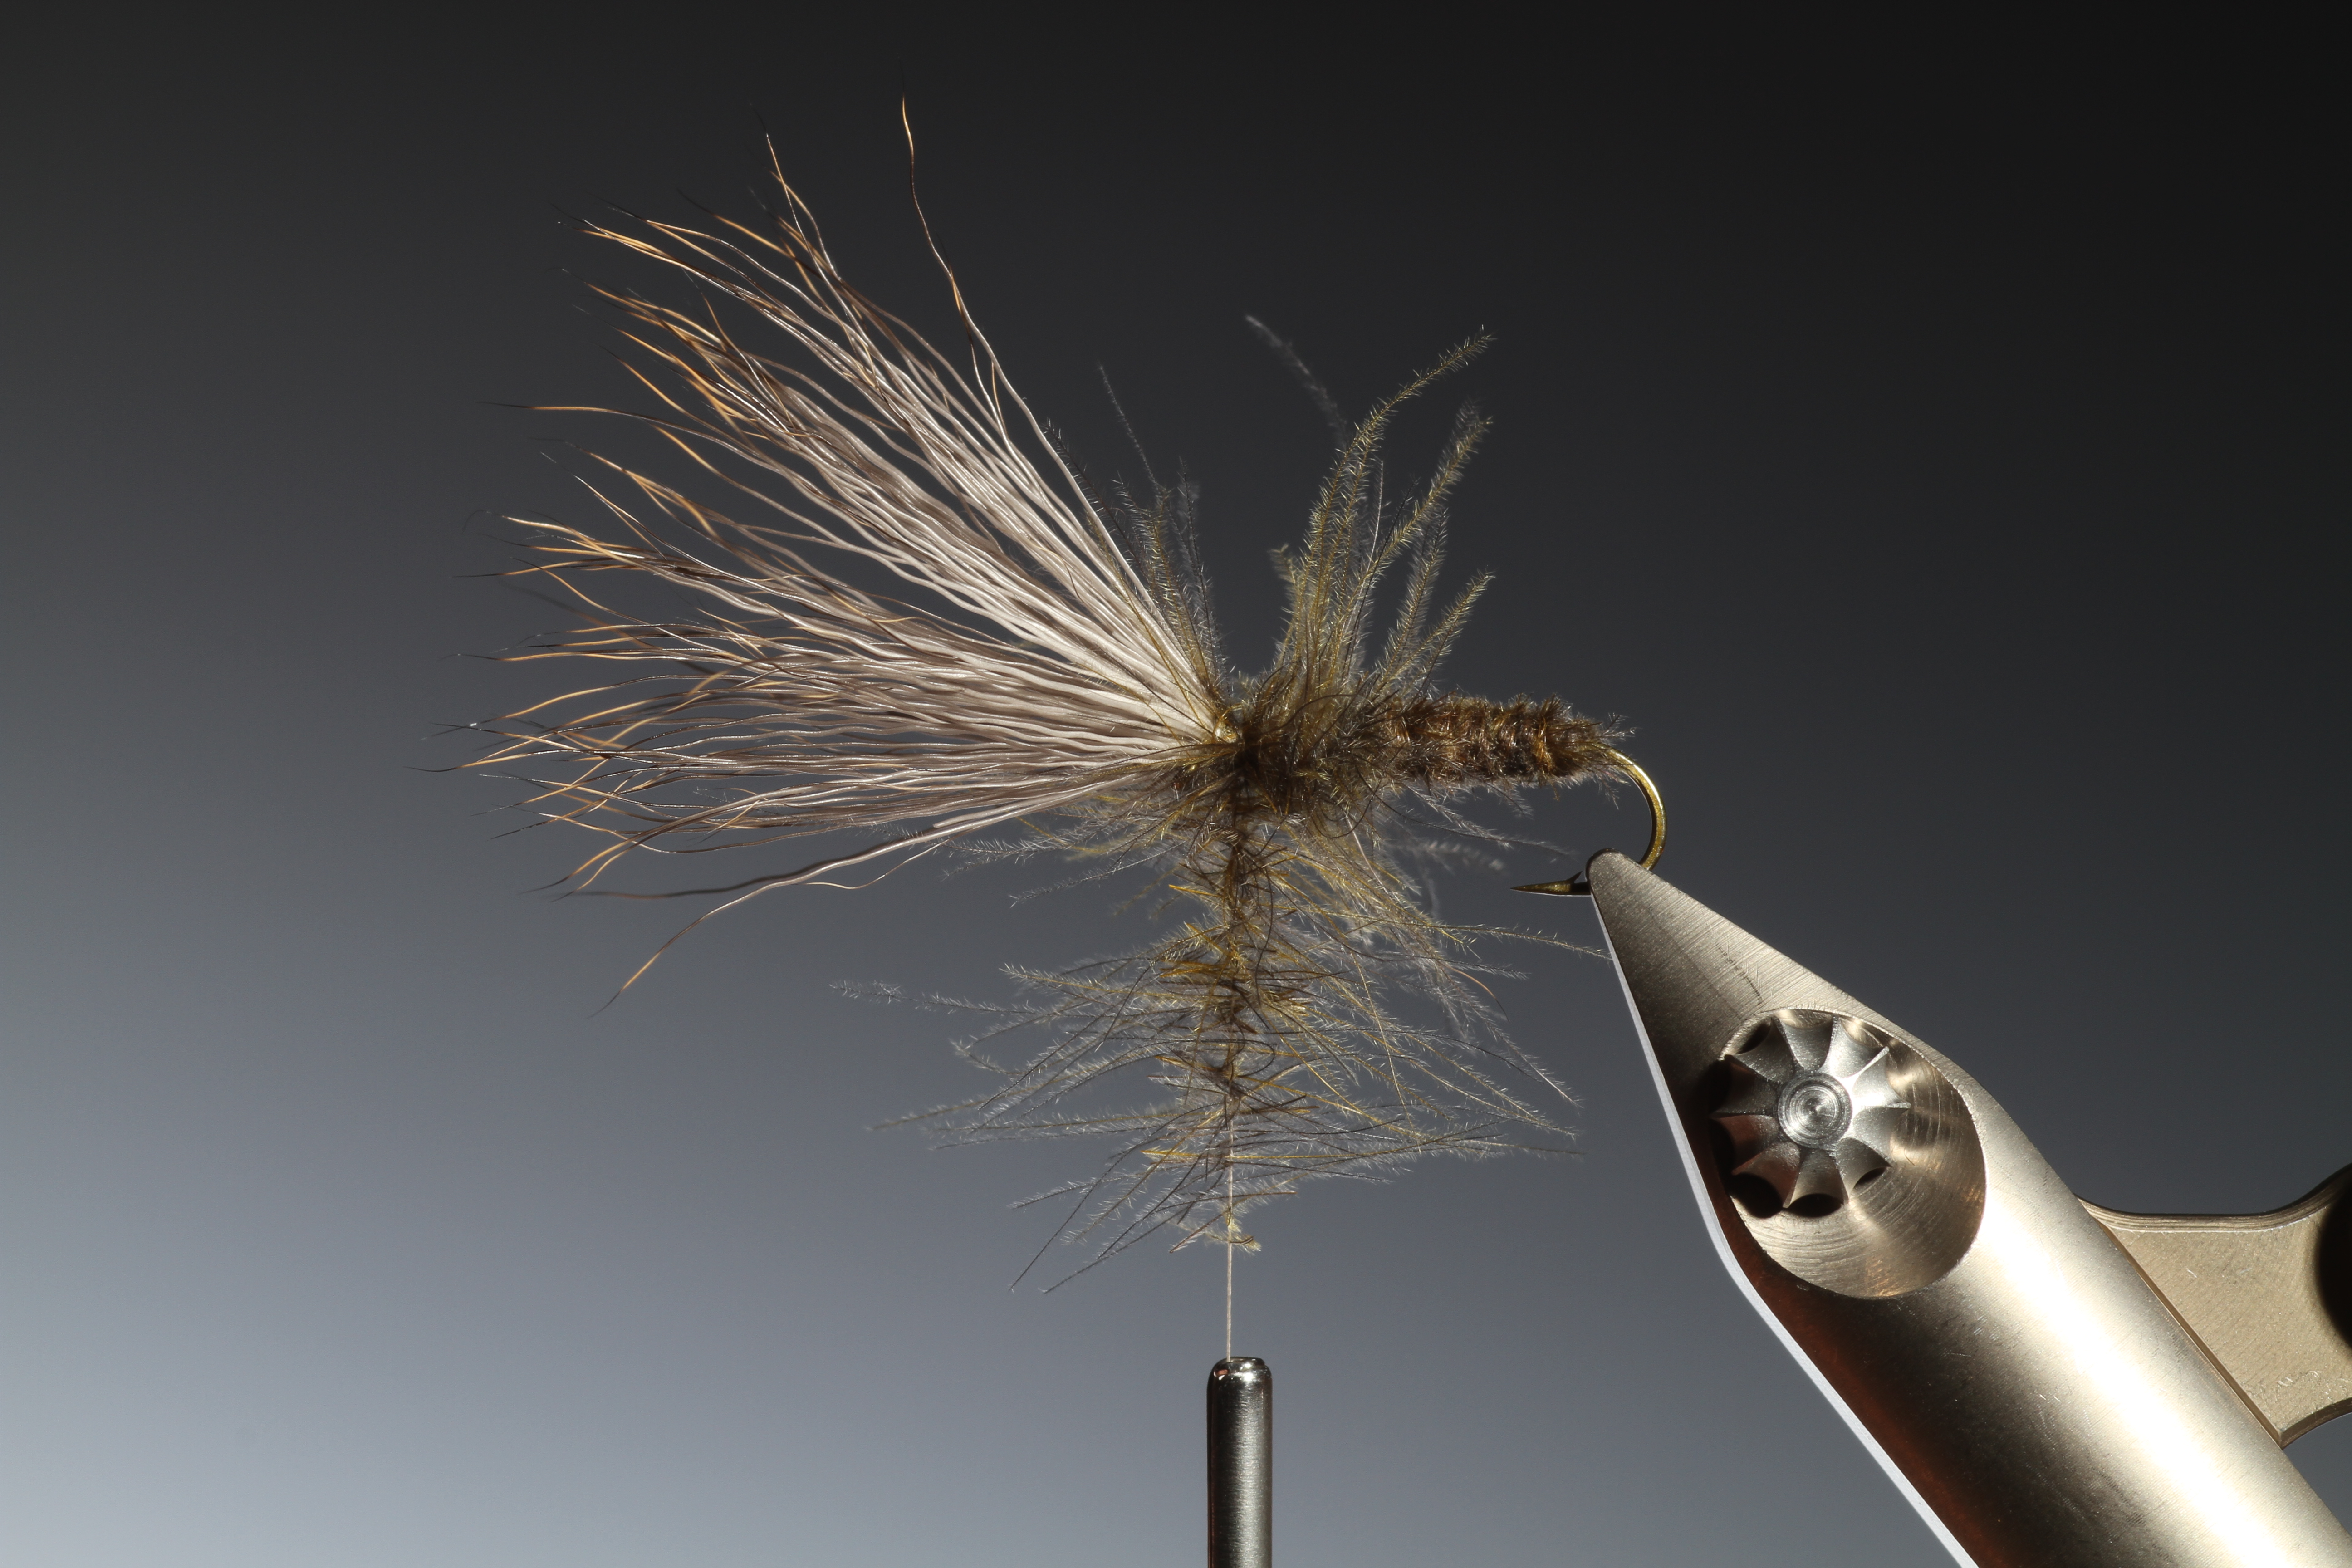
16
Make two or three turns of CdC hackle close into the body and forward towards the head of the fly.
17
Now pull the deer hair wing back over the body, keeping all the deer hair fibers on top of the hook shank and away from the sides of the pattern.
18
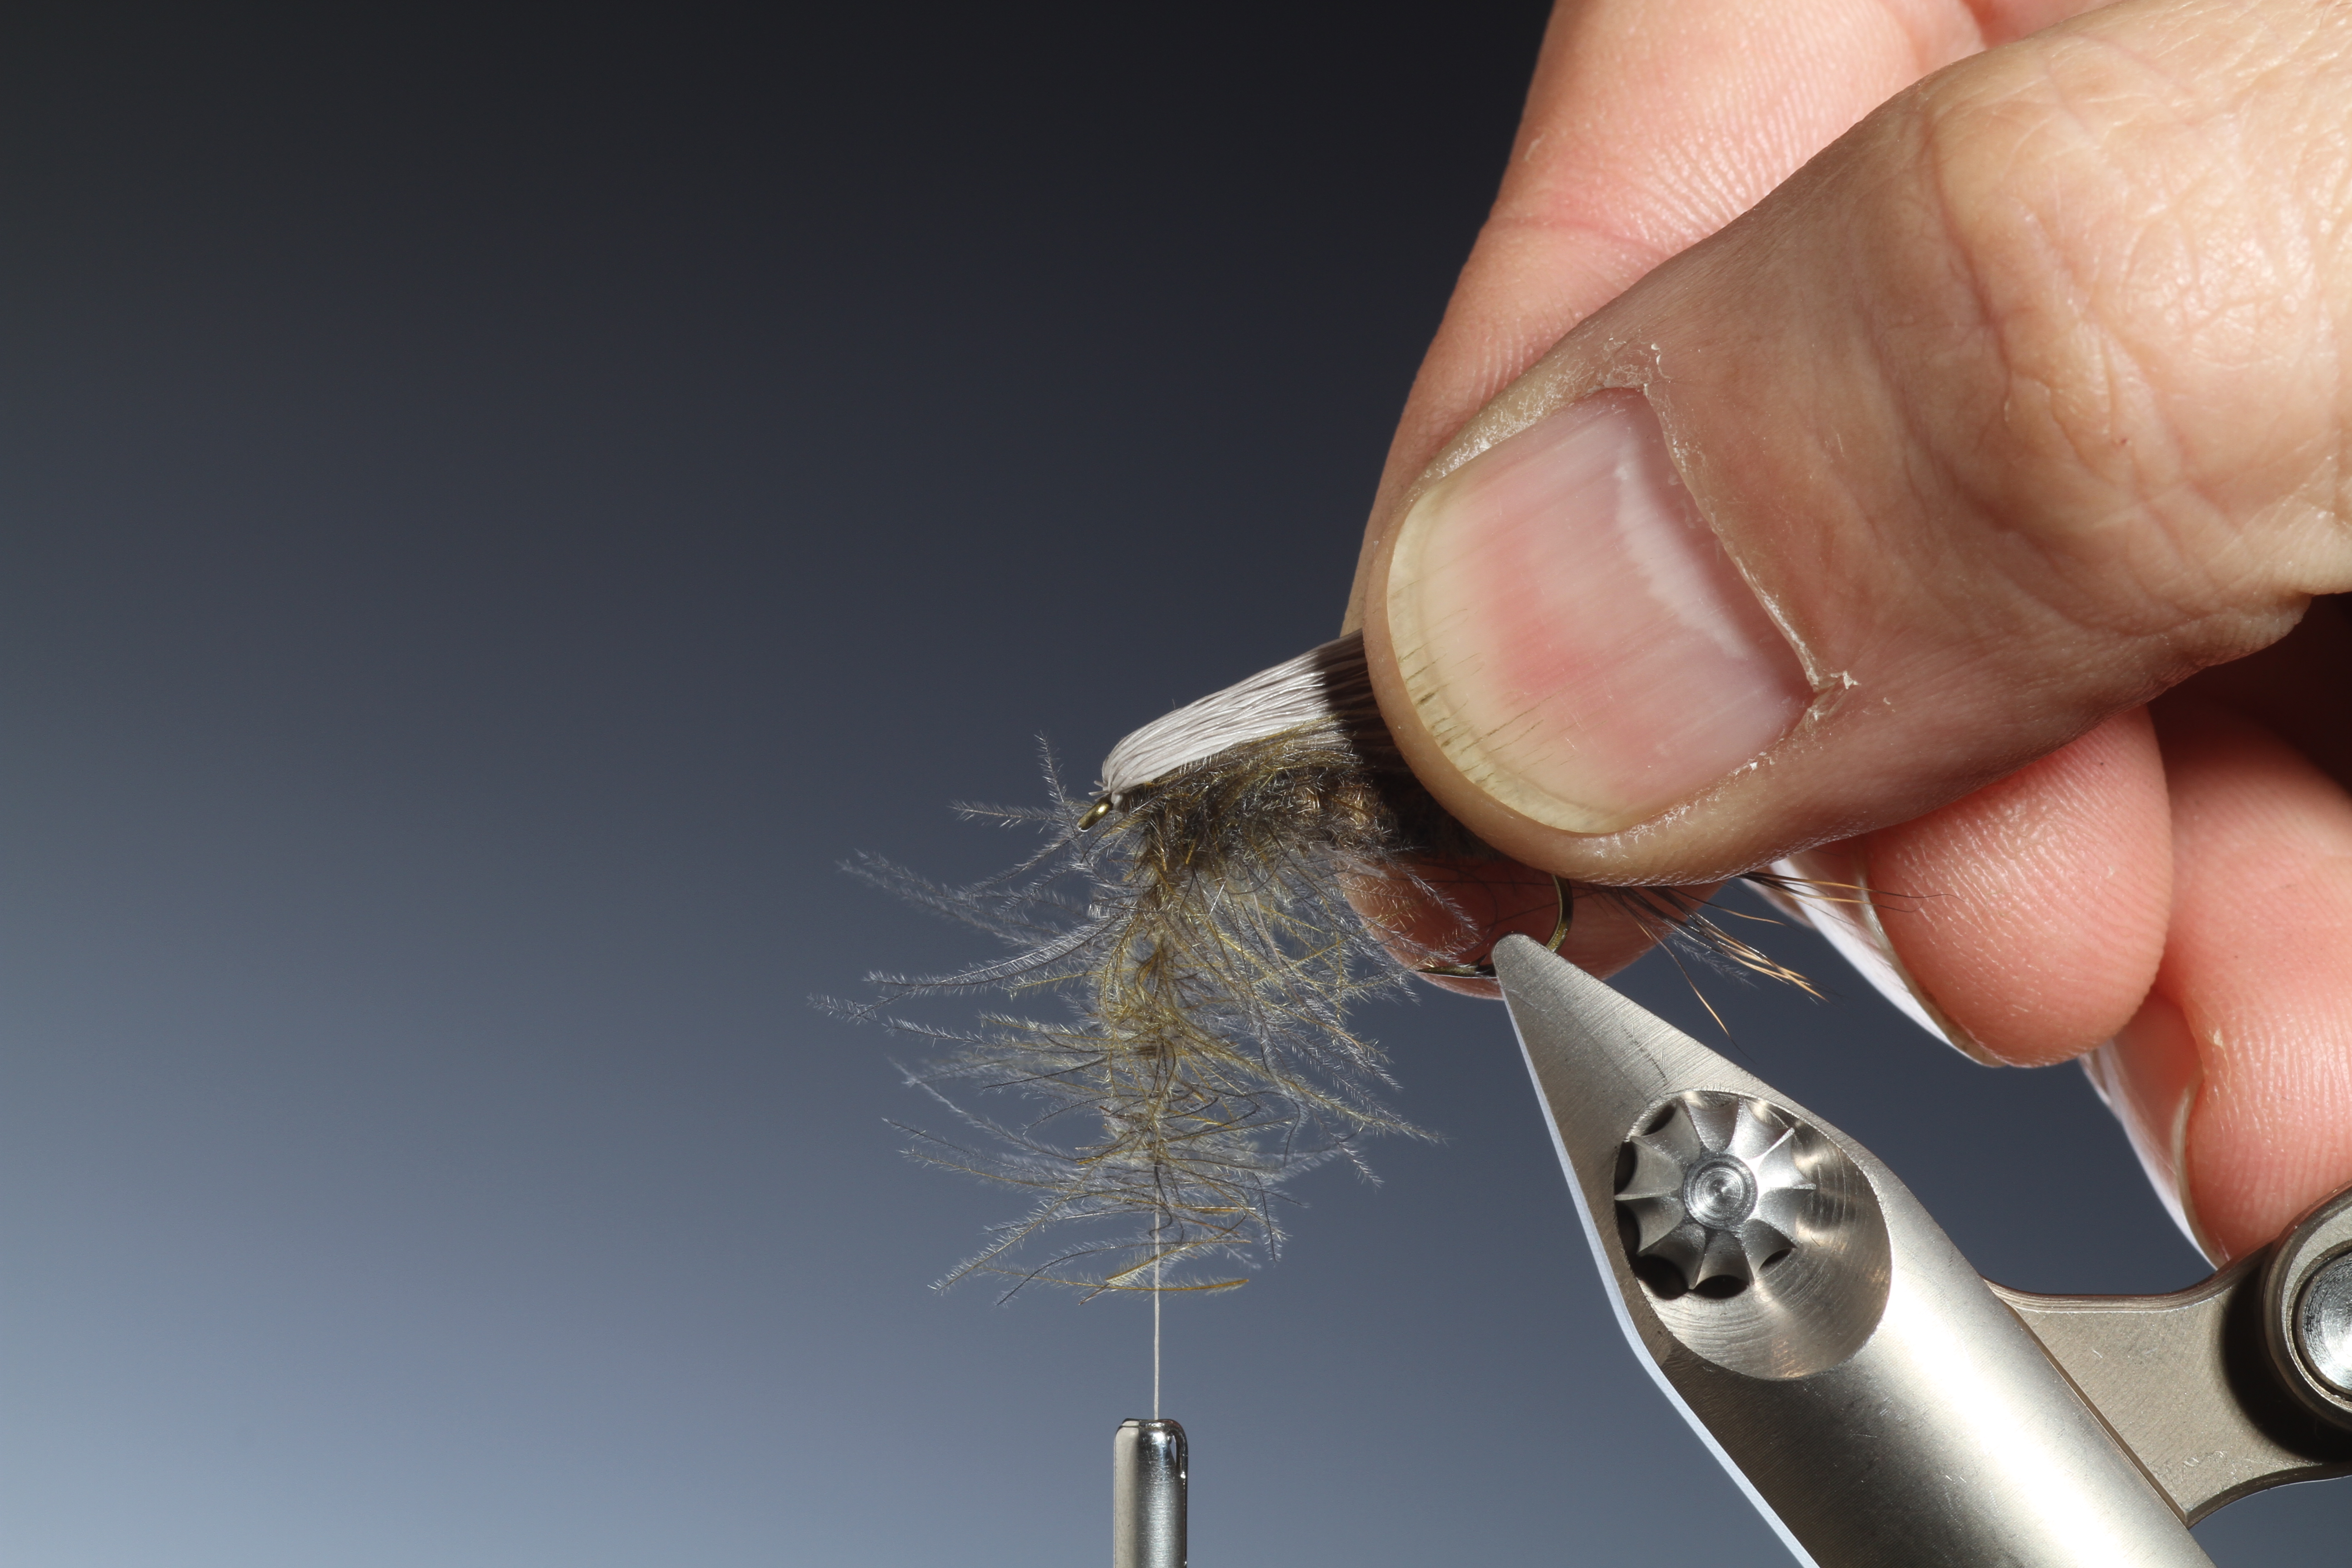
While holding the wing in place, make two or three turns of CdC dubbing brush over the deer hair to form the head and wing.
19
You can see that a small ball of deer hair is formed at the head of the fly. Whip finish.
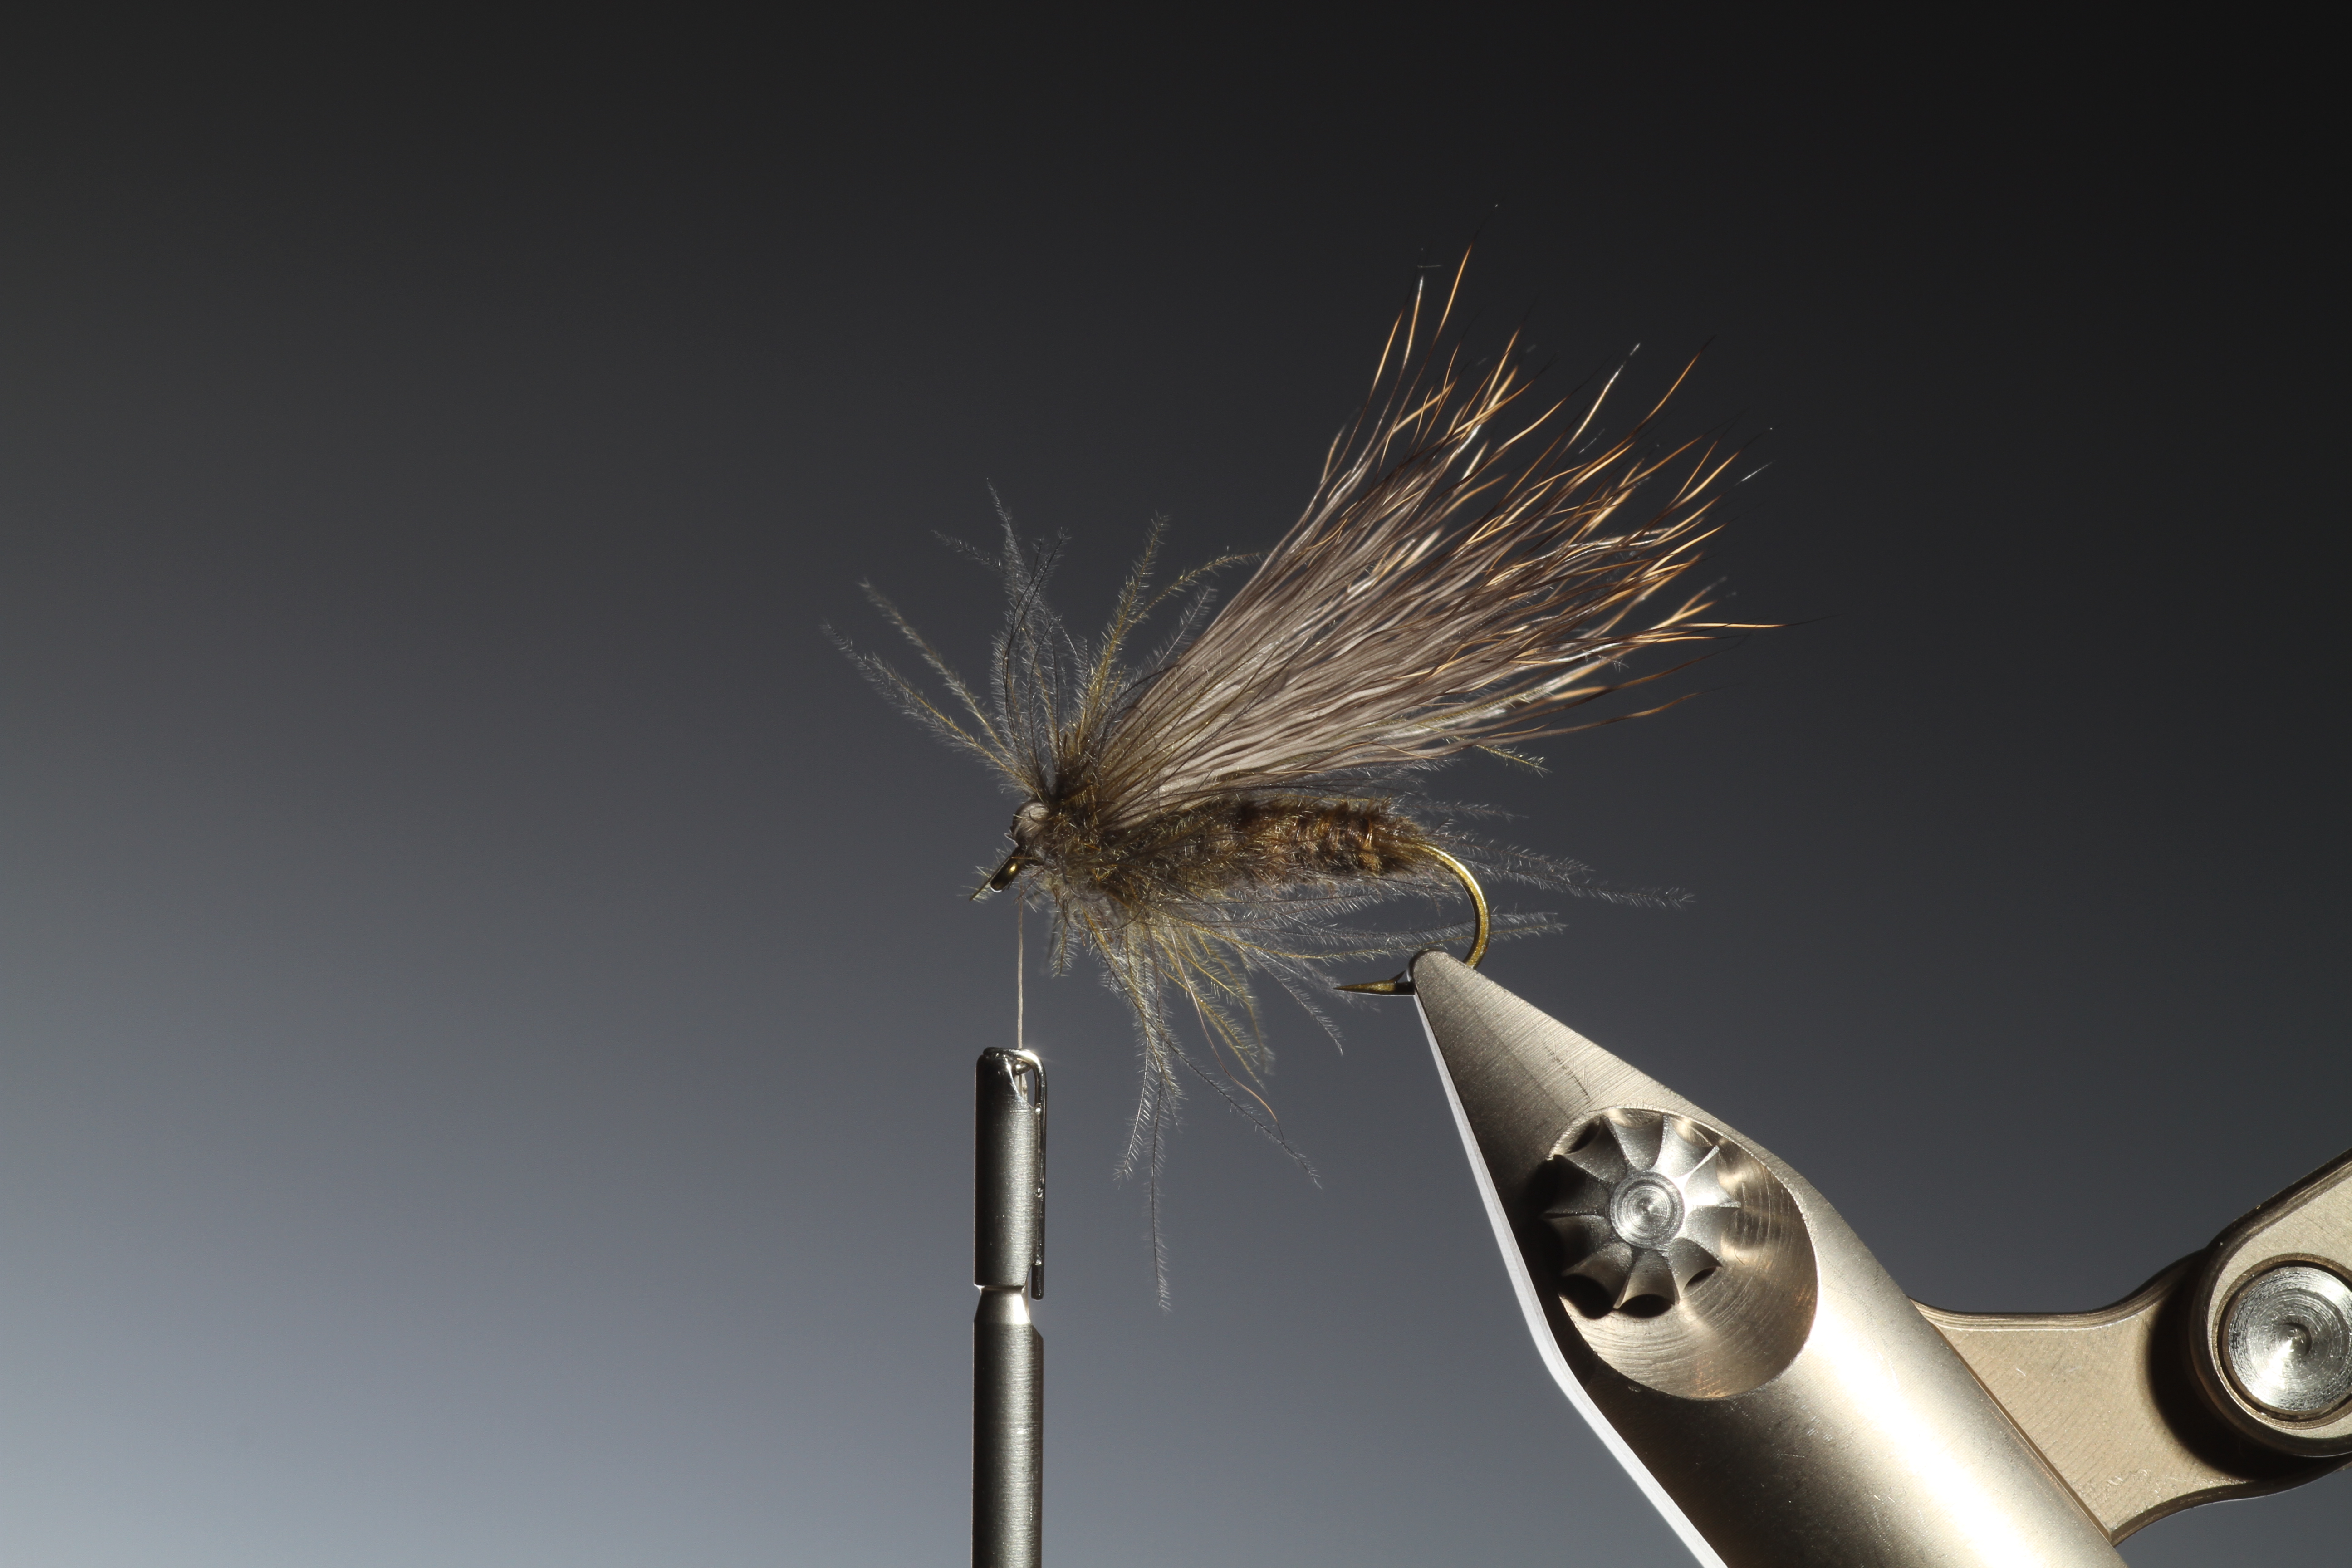
20
The finished MP CdC deer hair caddis that floats high and dry…
My new book

Discover more from HOW TO TIE FLIES | THEFEATHERBENDER
Subscribe to get the latest posts sent to your email.


nice fly but 5 CDC feathers for 1 fly is a bit “bling bling”, i prefer your beaver version of this fly 😉