
Pheasant tail Nymph variant
Apologies, apologies, and more apologies dear friends… Its been a busy summer and posting has had to take a lesser priority in the last few weeks, for photography and fishing. But I am back and will be posting regularly again!
My first post is # 16 in the fly tying course and is the model nymph, the basic pattern for most, if not all nymphs. For those of you that are new to the website, you can find the previous 15 courses in earlier posts. If you have any questions regarding this or other posts, materials, hooks or anything fly tying related please dont hesitate to contact me, and i’ll do my best to help.
Cheers
The feather bender

The original pheasant tail nymph came from the vice of legendary English fly tyer and fishermen Frank Sawyer around 1930. He designed the pheasant tail nymph to imitate may fly nymphs (Baetis) on the southern English river Avon, where he was river keeper. Sawyer’s original pattern used only pheasant tail fibers and fine copper wire instead of normal tying thread, to give the pattern extra weight. Although this is an excellent imitation of the swift swimming Baetis nymphs in little larger sizes it also works as an all round nymph for blind fishing.
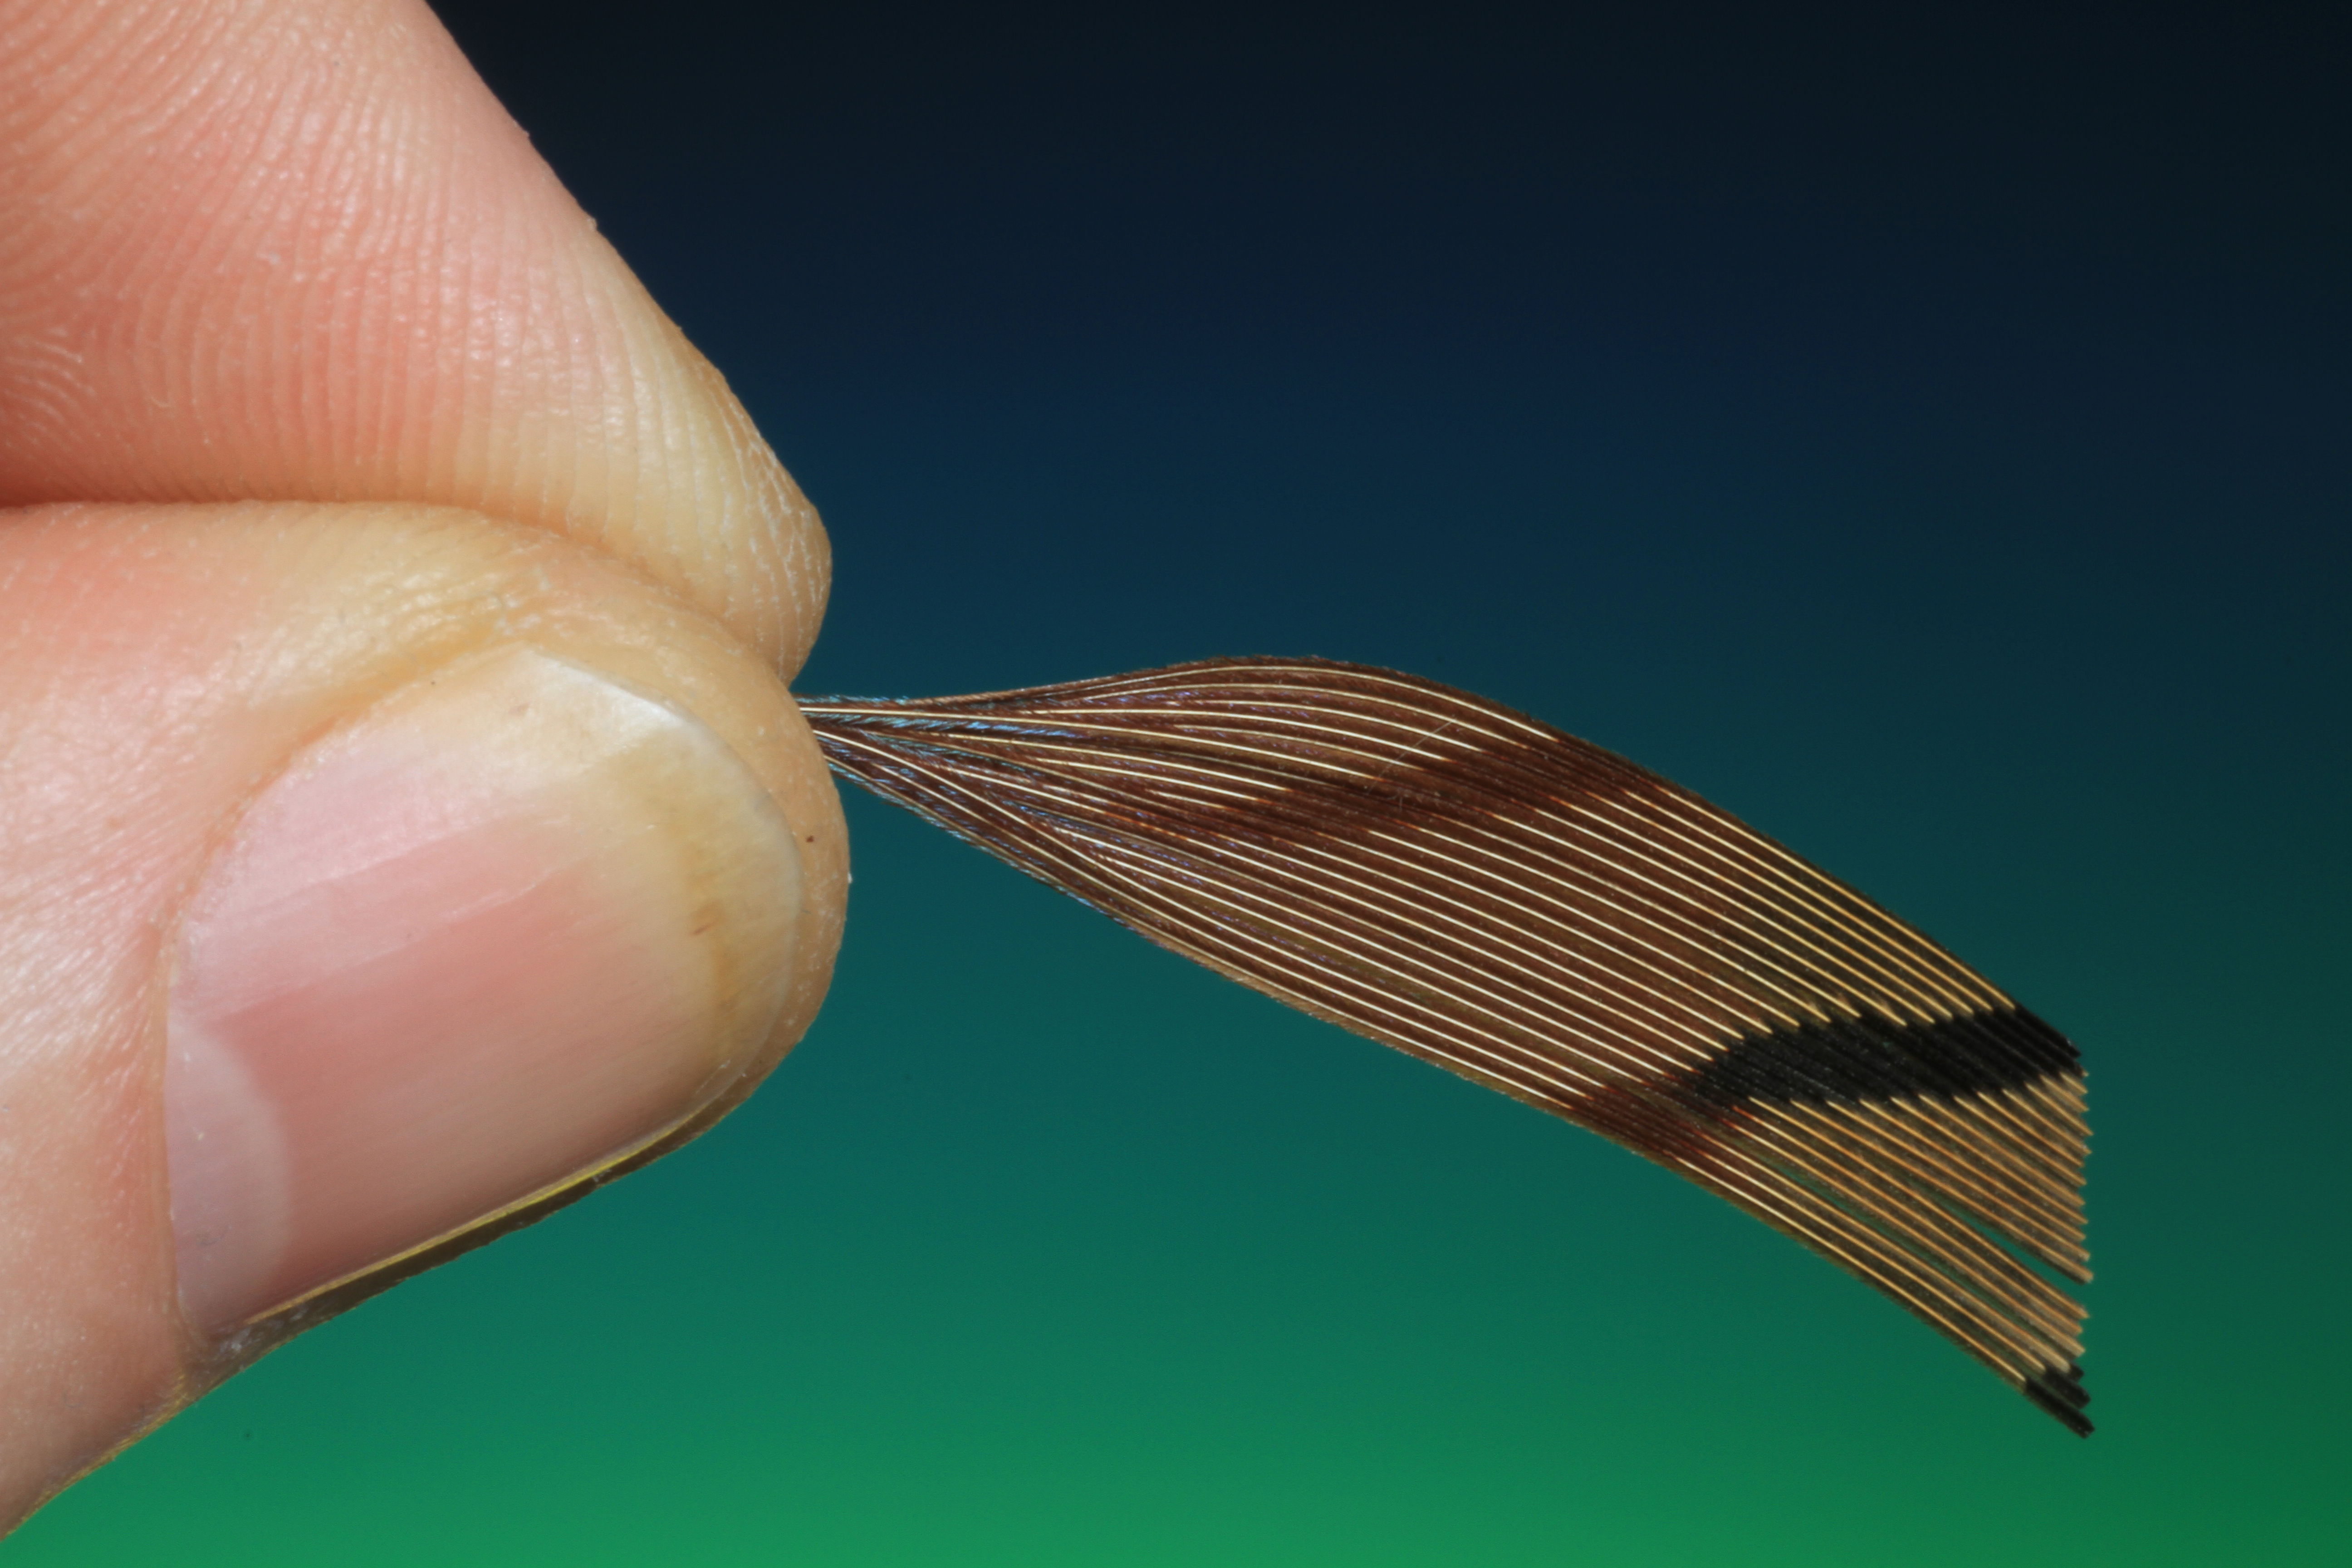
With only only three materials, and tying thread needed for this pattern it still helps to choose the right materials. At first glance, one pheasant tail feather, looks like any other pheasant tail feather, or does it? Take a look at the pheasant tail feathers I chose at random from my materials, and you will see they are very different! Not only does the background colour and shading on each tail differ immensely but the black chevrons vary from light to dark and thin to thick. But probably the most important factor is fiber length. Normally the best marked feathers with the longest fiber length are found center top of the tail.

So remember when buying pheasant tails dont just take the first one you see in the shop, look through them all and find the best for the flies you intend to tie. Examine the feather, is the tip all dirty and worn ? if so its probably come from a domestically bred bird. The best tail feathers are generally from wild birds. Check if the feather is clean and has a nice glossy sheen to it and all the fibers are in place. You should also avoid tail feathers with insect damage. This can easily be seen as a thin transparent line that runs 90 degrees from the feather shaft through the fibers, where the insect has eaten the feathers barbules.
Hook: Mustad S82NP # 18-10
Thread: Olive
Tail: Pheasant tail fibers
Abdomen: Pheasant tail fibers
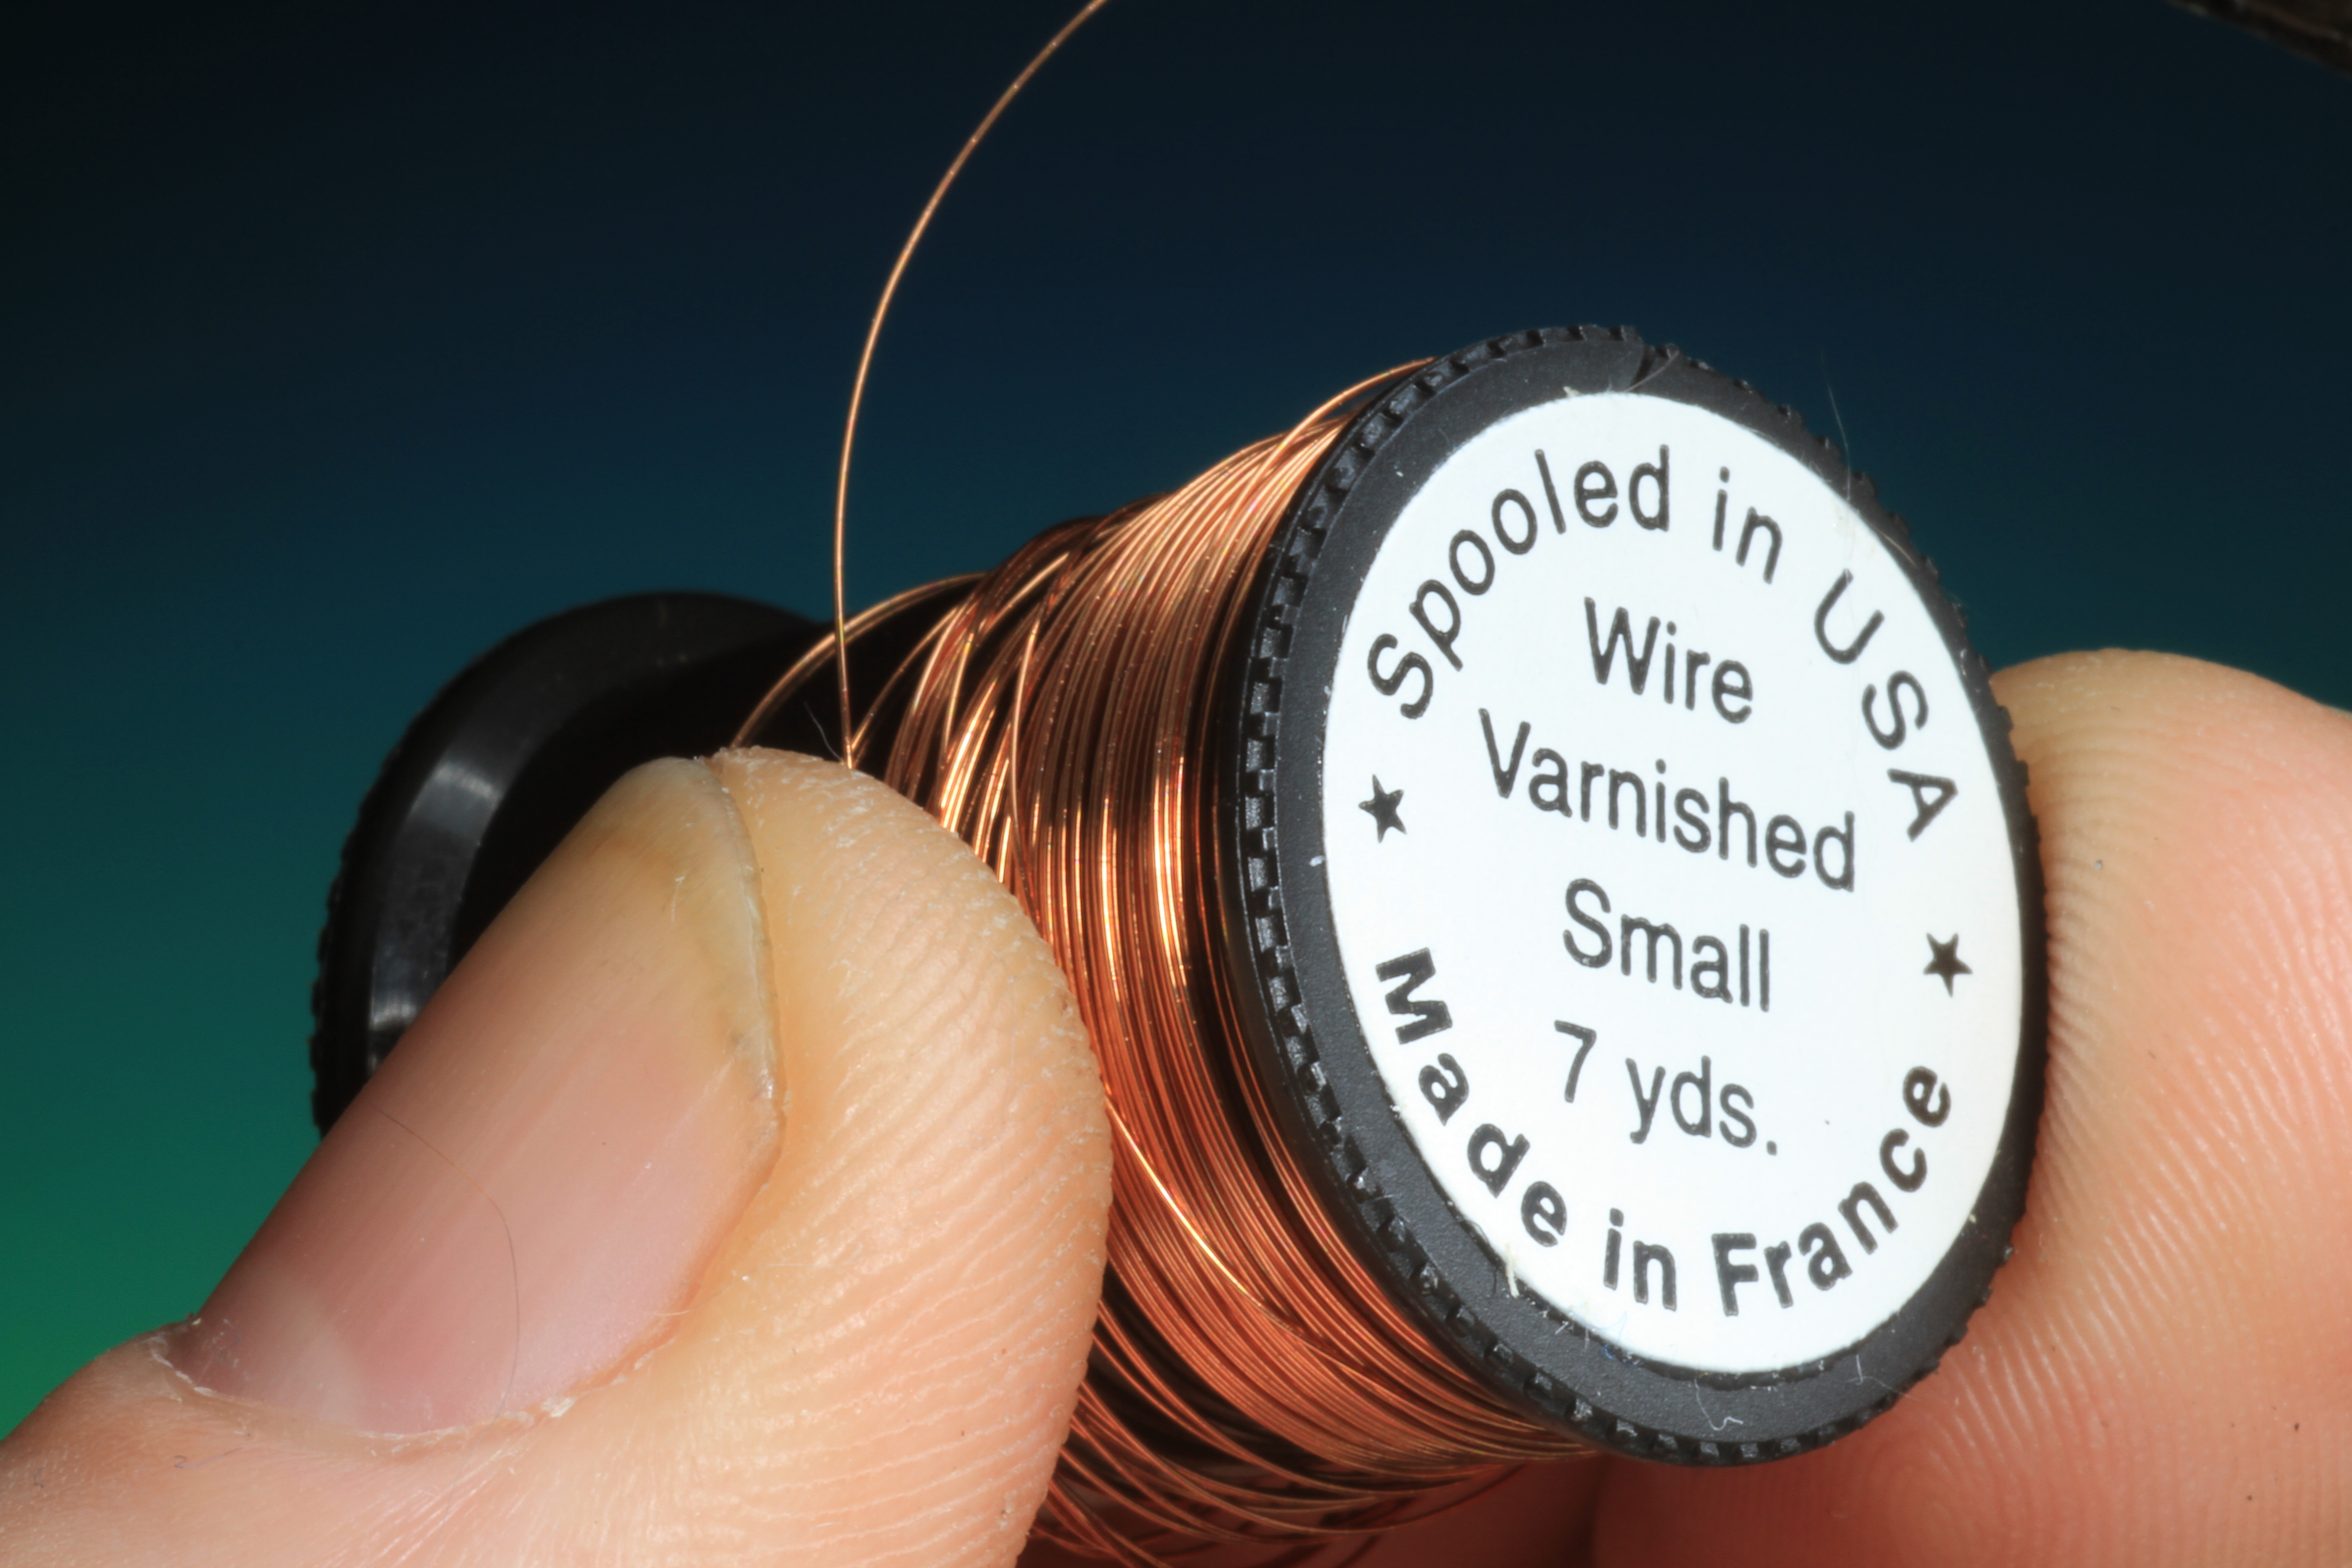
Rib: Fine copper wire
Thorax: Peacock herl
Wing case: Pheasant tail fibers
Legs: Pheasant tail fibers
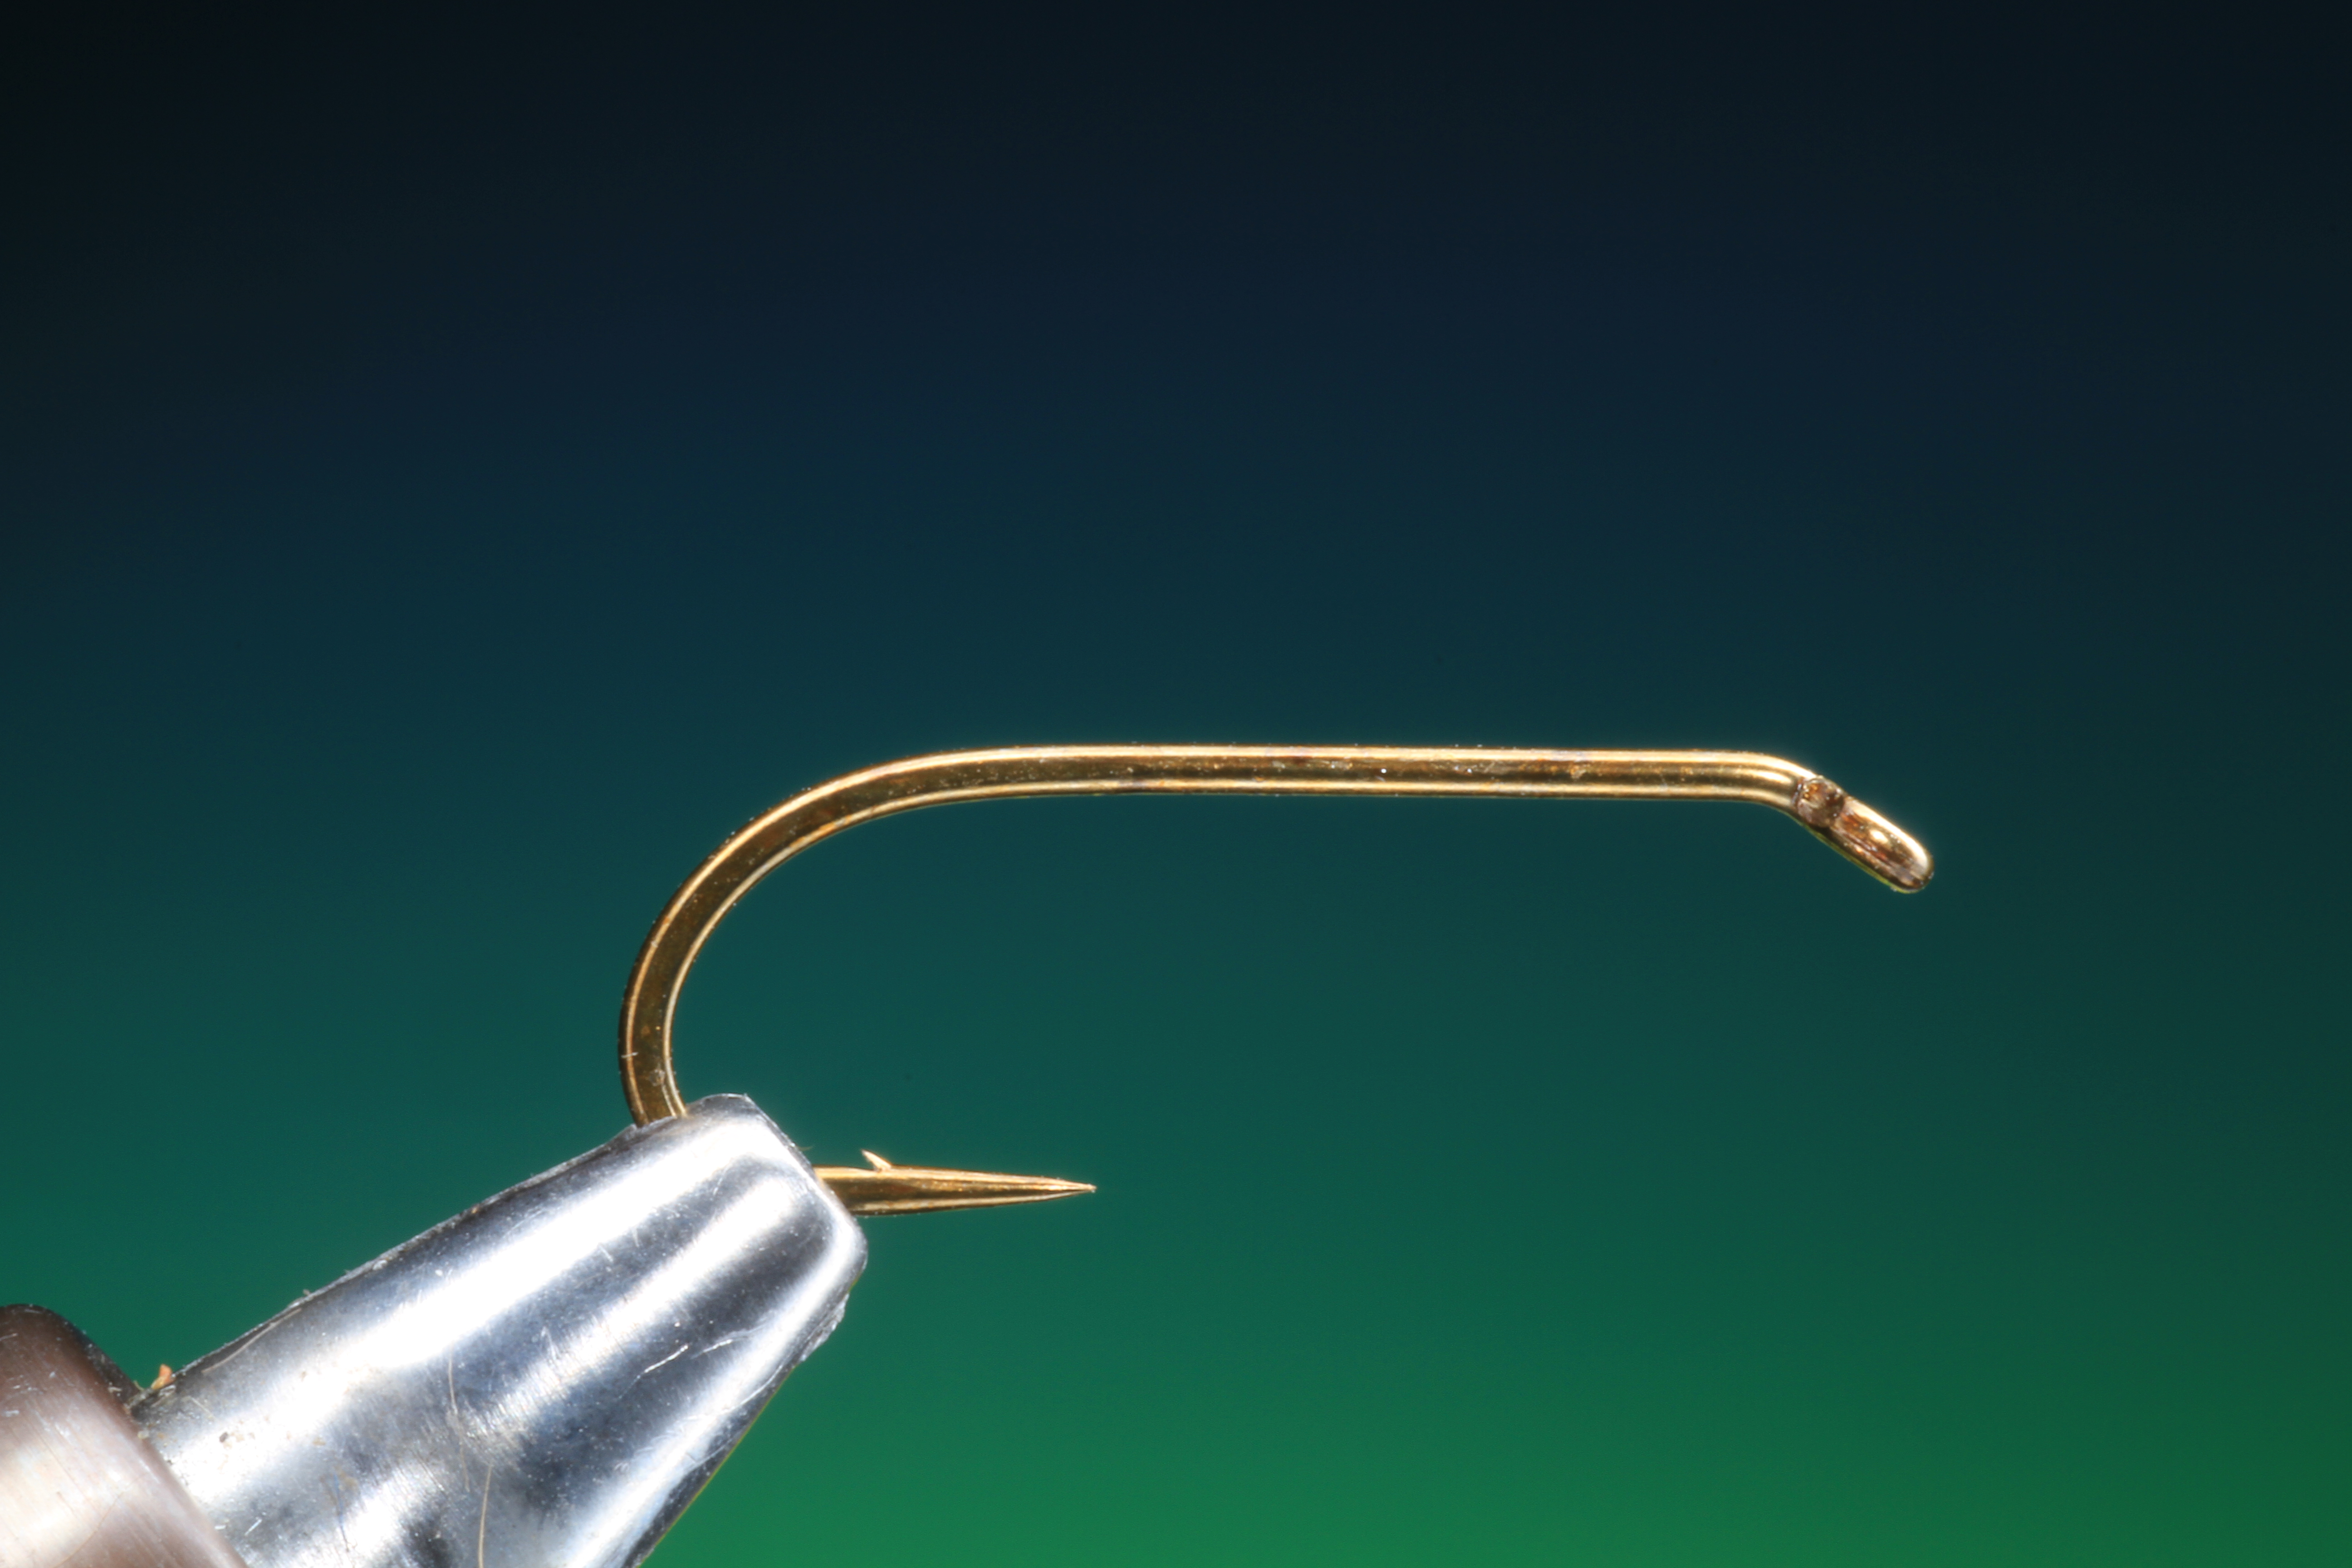
1
Secure your hook in the vice so that the hook shank is horizontal.

2
Attach your tying thread and run a foundation over the whole hook shank, until the thread hangs approximately vertically with the hook barb.

3
Firstly find a tail feather with nice long fibers. To get all the points of the pheasant tail fibers even for the tail, take a small bunch in between your finger and thumb and slowly pull them away from the shaft of the feather until all the points are level.
4
Now still holding the bunch tight so the points remain level cut them away from the feather shaft with one swift cut.

5
Tie in the tail fibers on top of the hook shank. Three turns of tying thread over the tail and two under. The tail should be approximately 2/3 of the hook shank length.
6
Cut a 10 cm length of fine copper wire.

7
Tie in the copper wire the whole length of the hook shank, finishing just before the tail base.

8
Before you start to wind on the abdomen take your copper wire and swing it under and onto the back side of the hook, as shown. Before you commence wrapping the peasant tail fibers to form the abdomen make sure that ALL the fibers are parallel with each other! Not twisted.

9
Once you have wrapped the fibers 2/3 the length of the hook shank Tie them off as shown with 4 or 5 tight turns of tying thread over the fibers and the two in front of the the fibers on the hook shank. This will lock the tying thread and stop it from slipping.

10
Take the copper wire and firstly take one turn in the opposite direction you wound the fibers, around the tail base tight into the abdomen, and then 4 or 5 open turns to form the rib. Once you come to the remaining tuft of fibers at the thorax make several tight turns of wire along the remaining hook shank. Stopping about 3 mm from the hook eye.

11
Trim off the tuft of fibers and cover the bare copper wire with a layer of tying thread.

12
Now cut another bunch of tail fibers and tie them on a little way into the abdomen on top of the hook shank.

13
Cut two peacock herls from just under the eye of the peacock tail feather. The herl found here is much stronger than lower on the tail feather.

14
Trim off the excess fibers from the wing case. Tie in the peacock herls, point first and cover the ends with tying thread towards the hook eye.
15
Take both peacock herls at the same time and wrap them over the whole thorax making sure they dont twist and cross each other. Tie off behind the hook eye and cut off the excess.
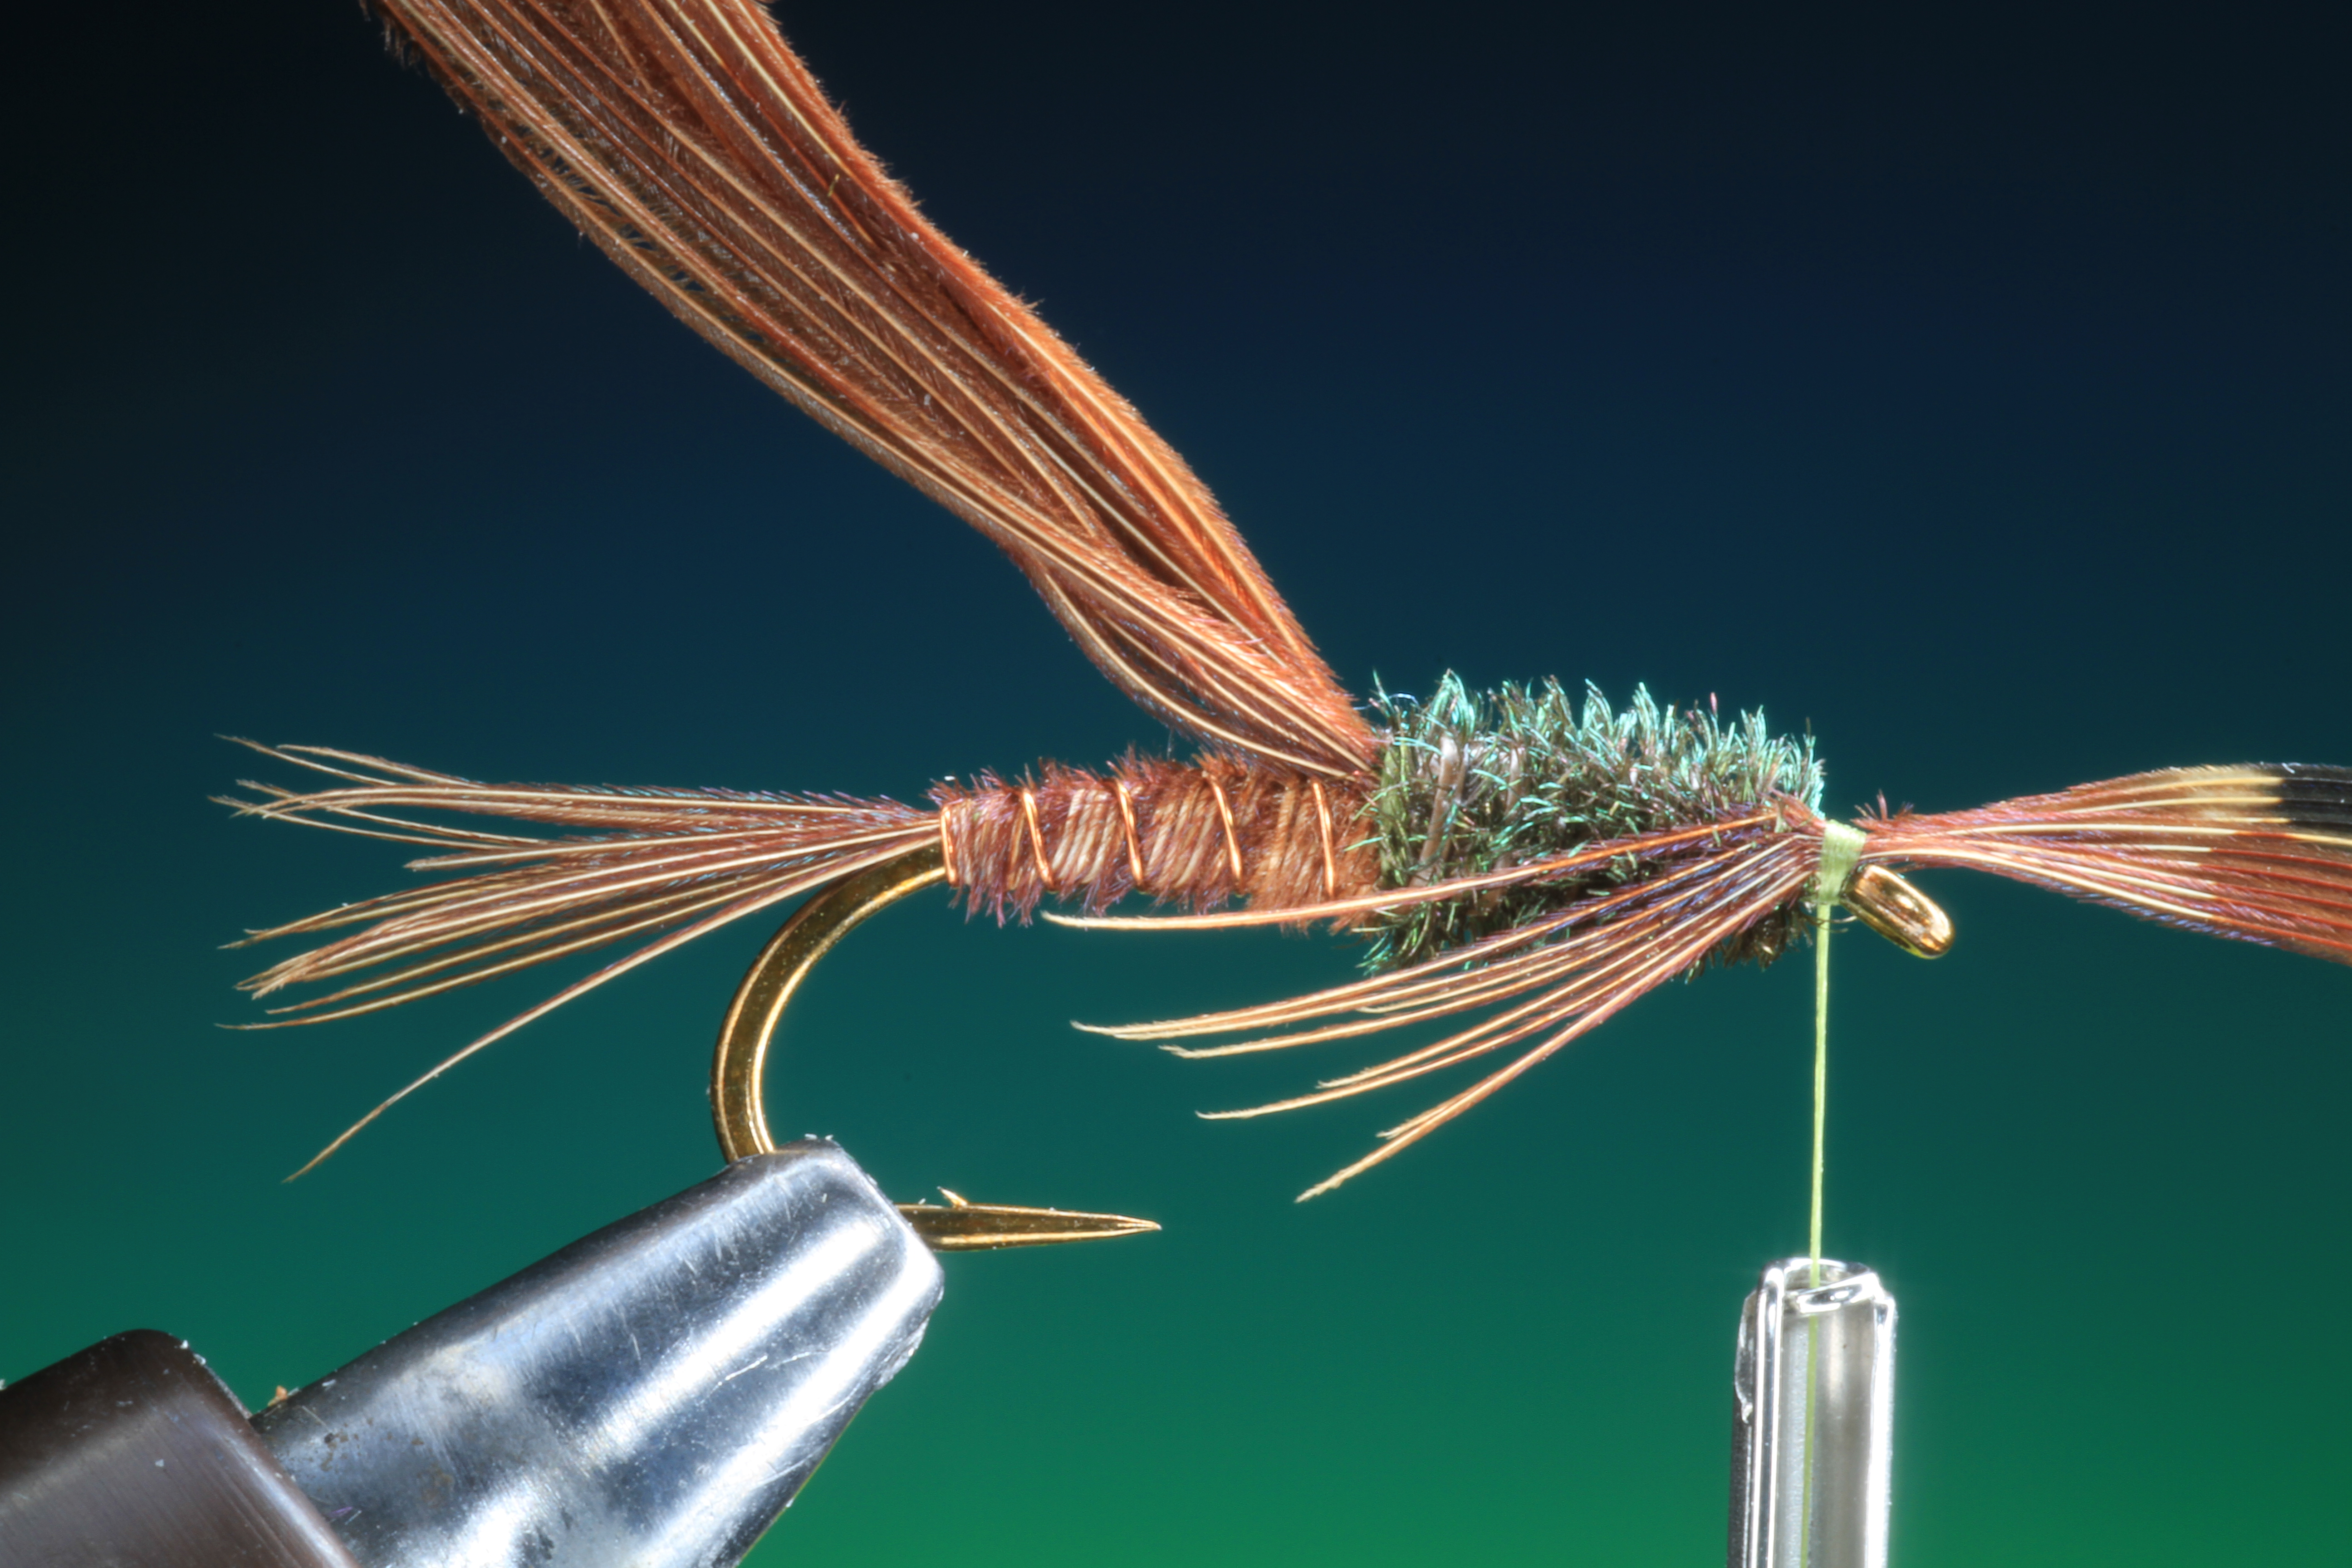
16
Cut a small bunch of pheasant tail fibers and tie in as shown, just behind the hook eye on the side of the thorax.
17
Trim off the excess fiber and repeat step 16 on the other side of the thorax.

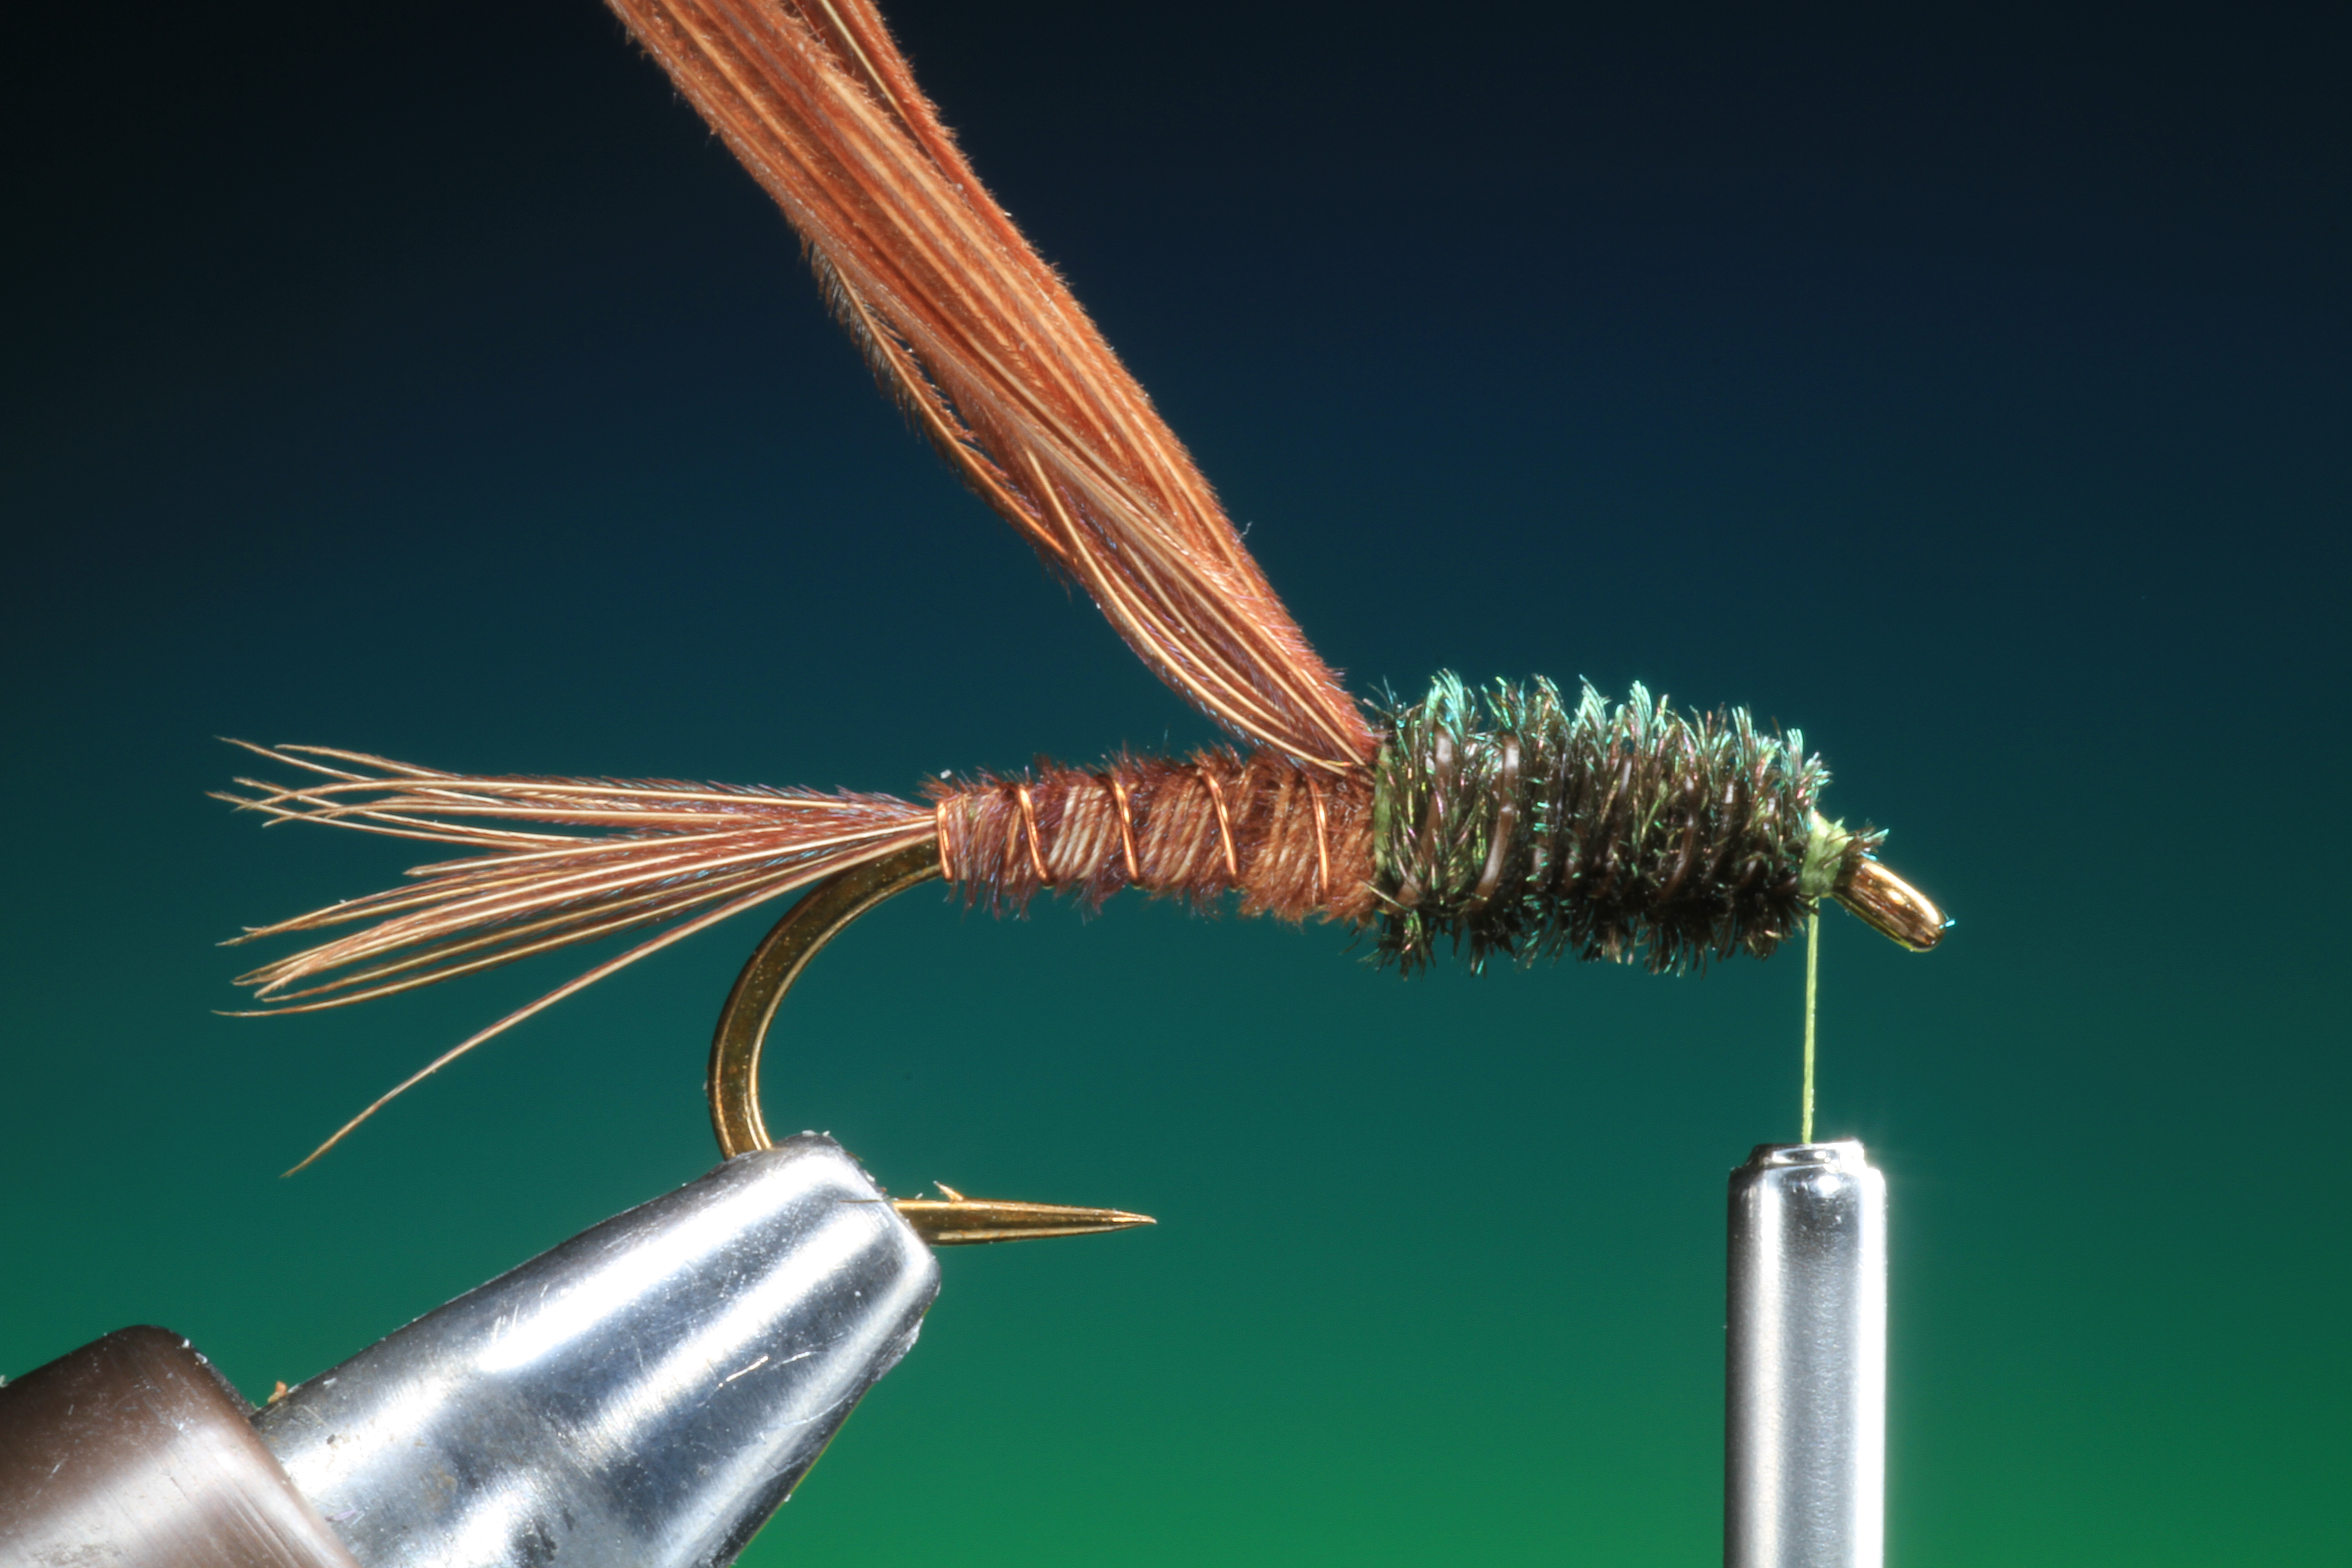
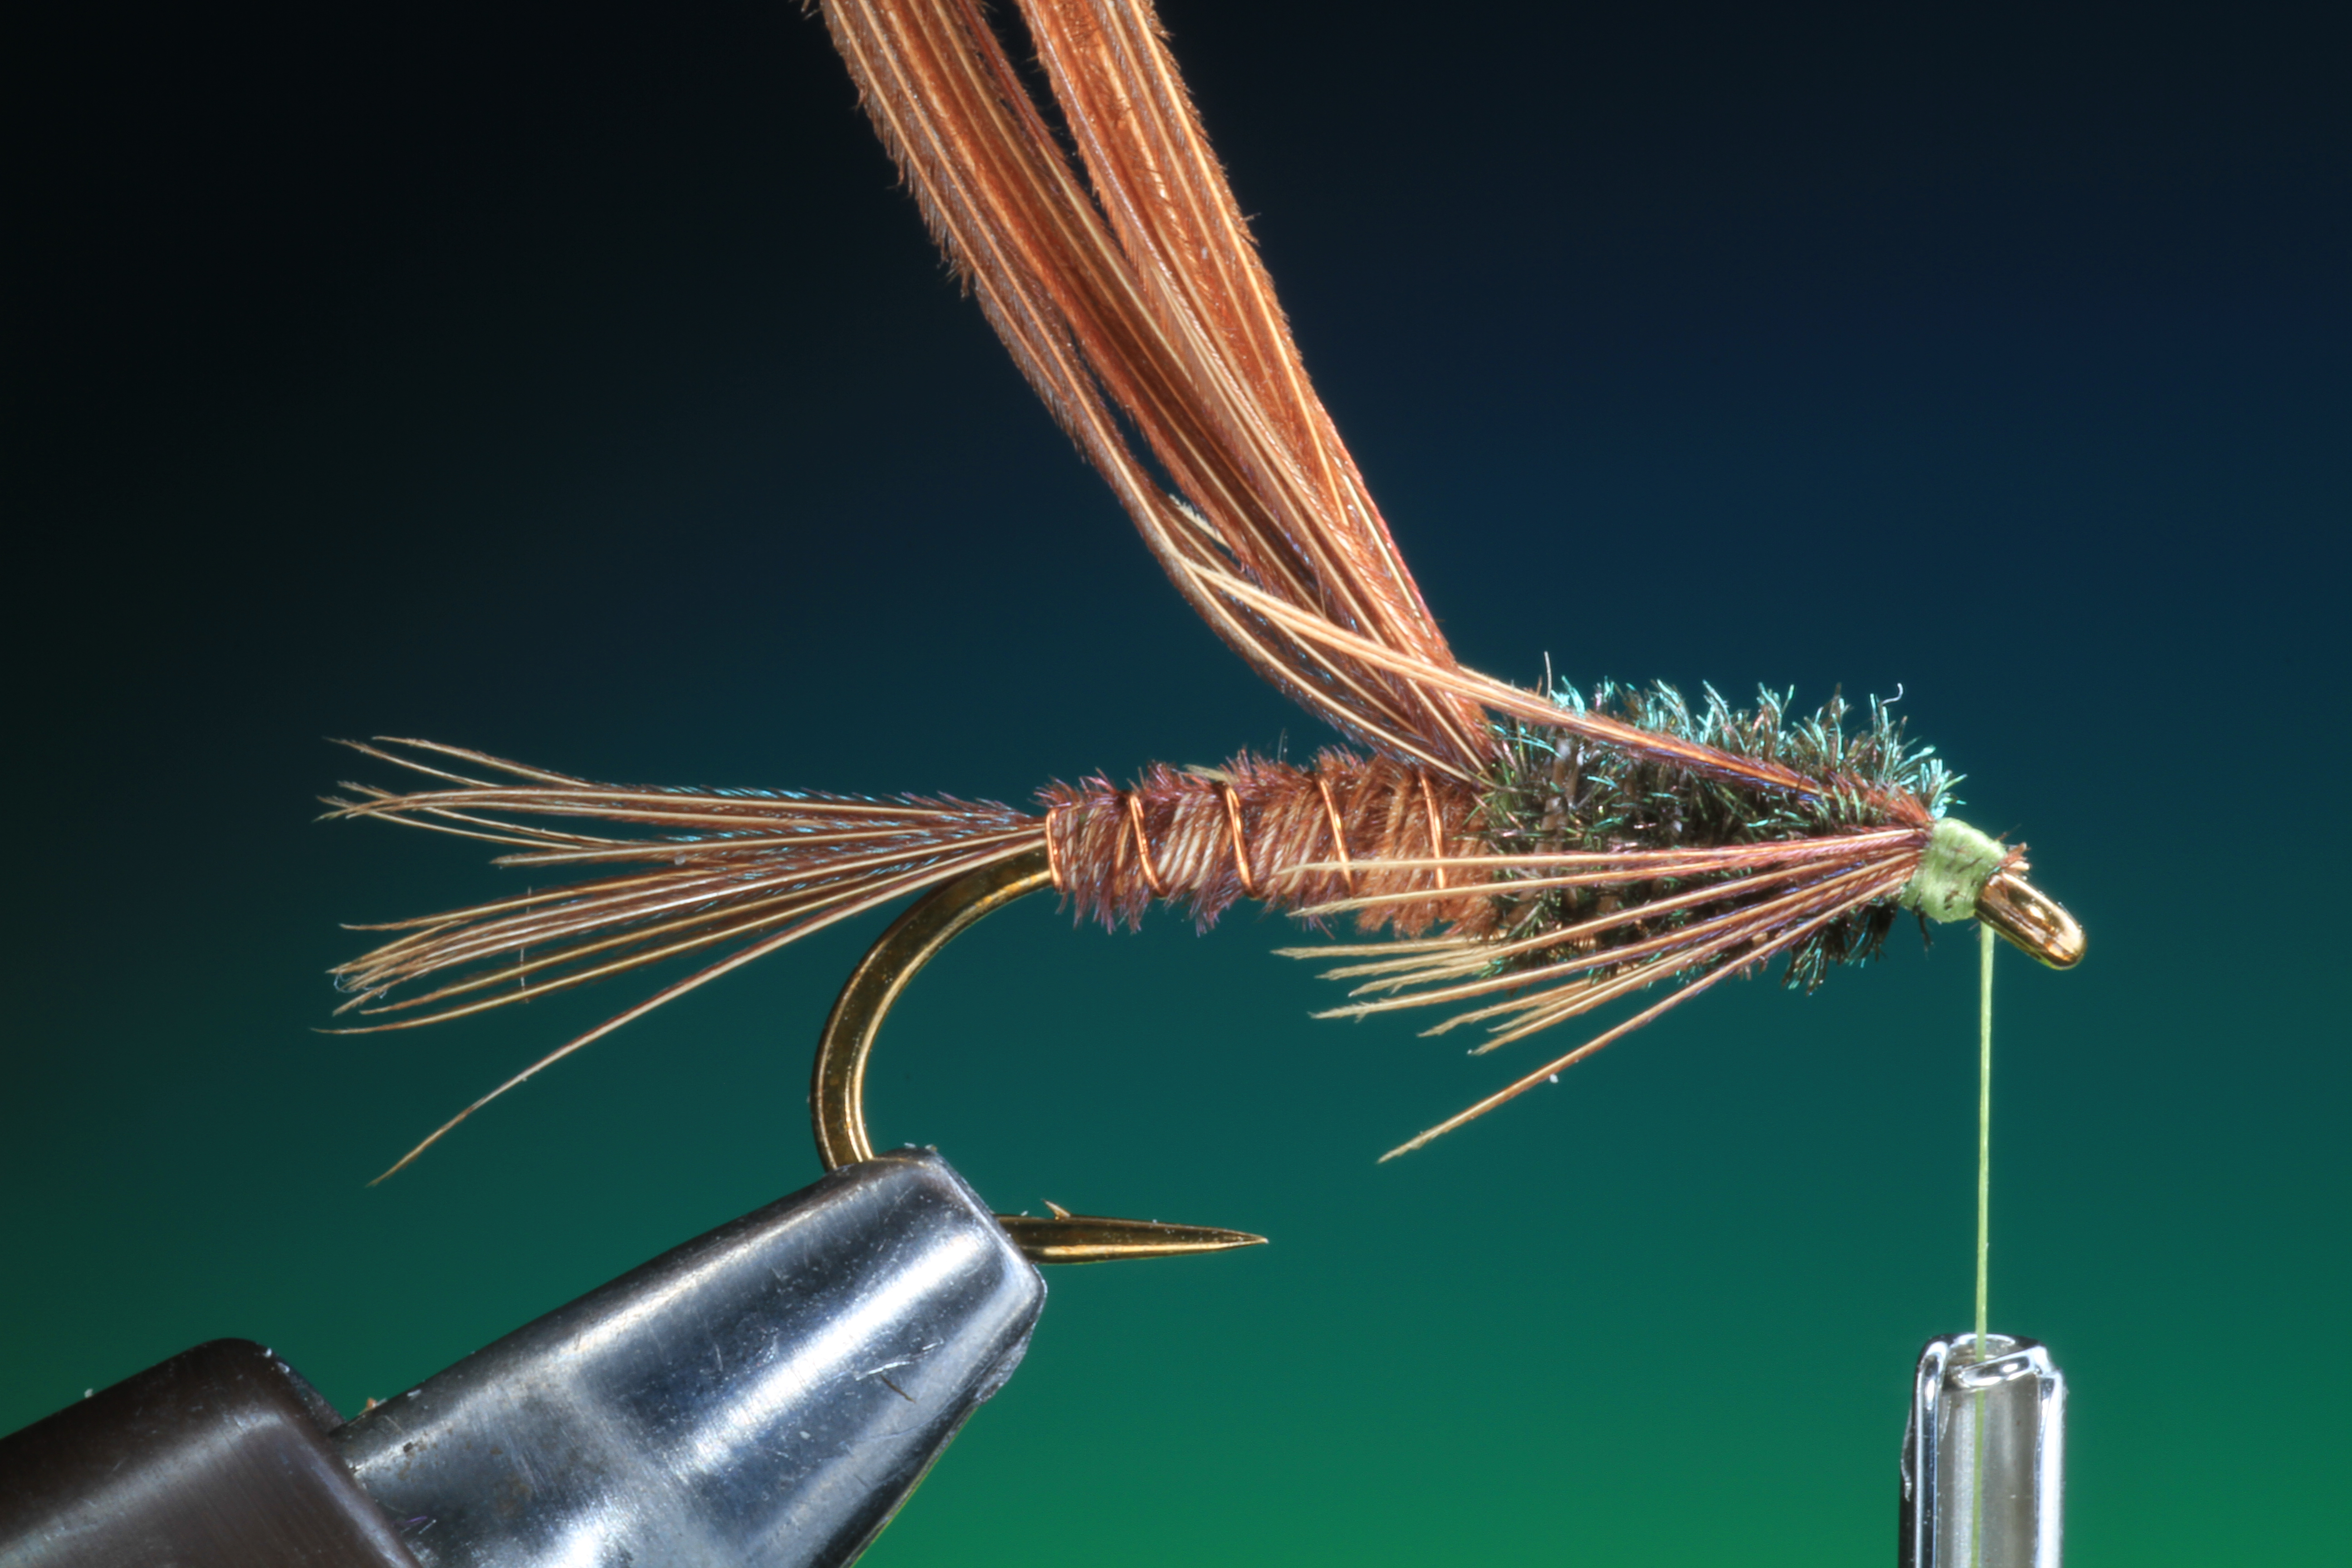
18
Now take the bunch of pheasant tail fibers you tied in for the wing case, and fold them over the thorax. Again taking care to make sure that all the fibers are parallel and dont cross over each other.
19
Trim off the fibers over the hook eye, about the same length as the hook eye and whip finish. Remove the tying thread and coat the whippings with a small drop of varnish.

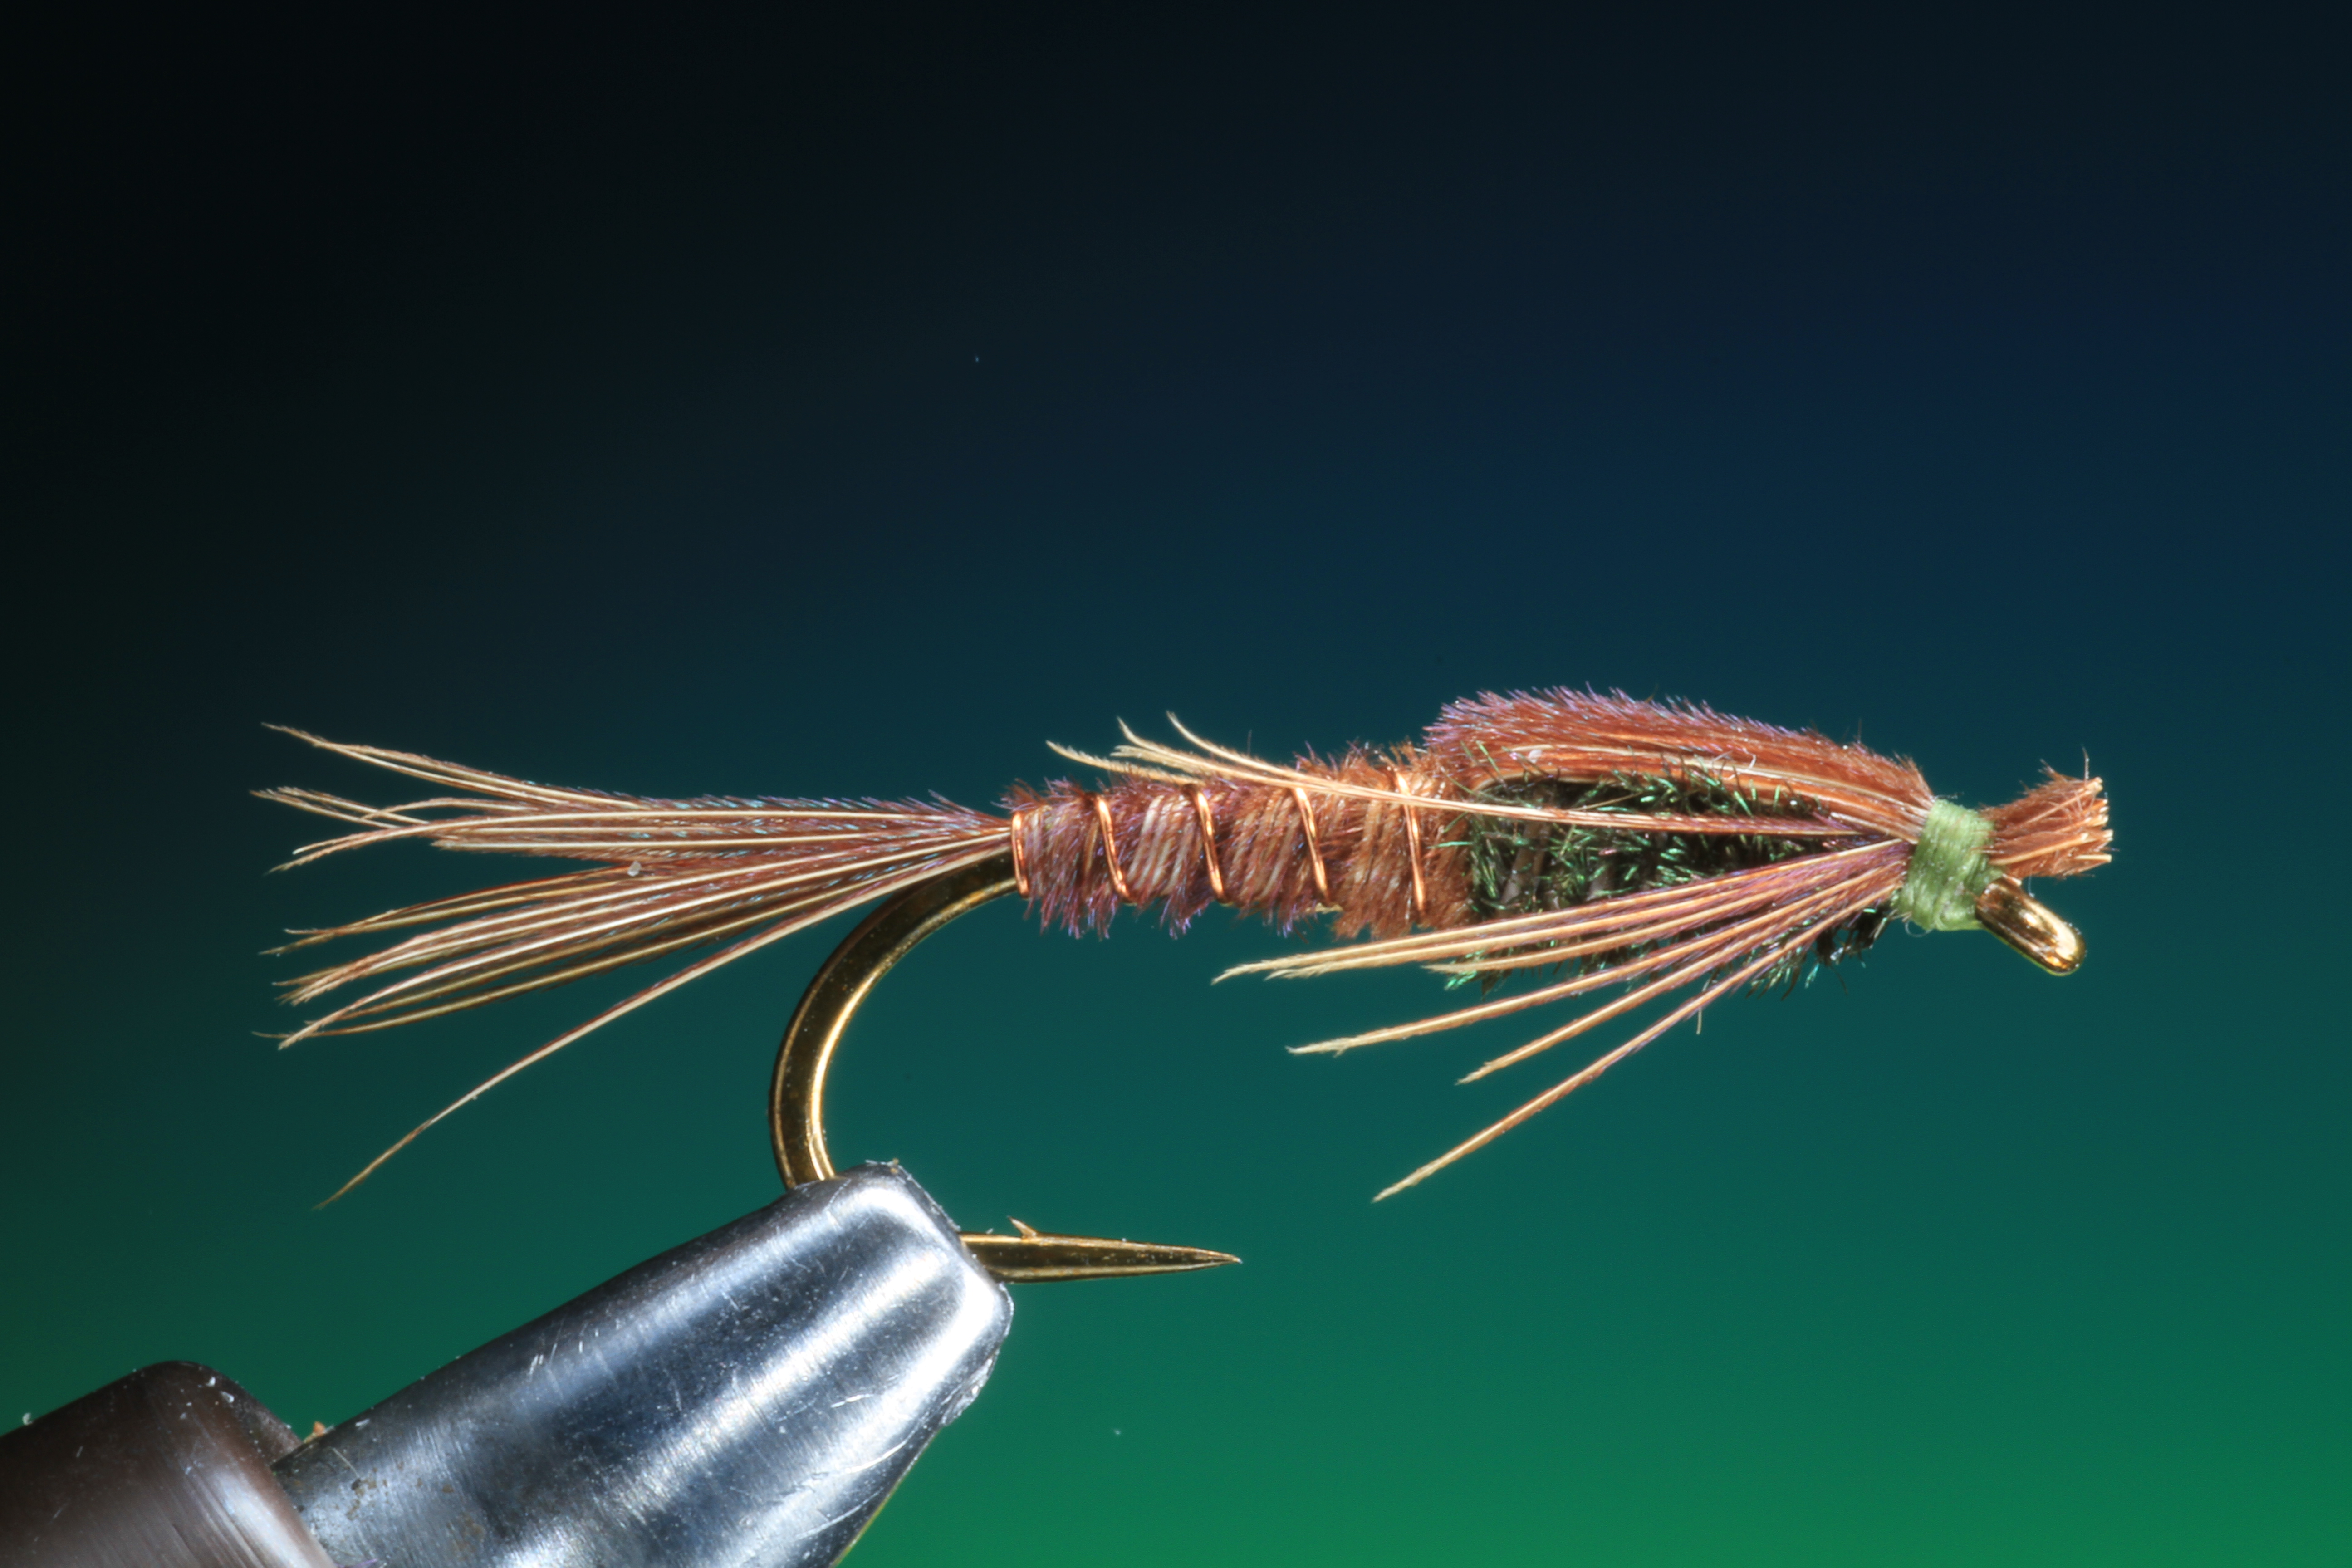
20
The finished pheasant tail nymph as seen from above, note the symmetry in the tail, body wing case and legs.
Table of Contents
My new book

Discover more from HOW TO TIE FLIES | THEFEATHERBENDER
Subscribe to get the latest posts sent to your email.


Proven and improved 😉
Thanks Sven!
Nicely done.
Thanks, Steve.
There is always something to be learned from every version of a fly pattern and the tying details. Even the photography here is crisp in detail and focus. excellent!
Thanks Dan,
I will be posting now at least three times per week so stay tuned.
Cheers
Barry
Very nice!
the perfect classic fly…catches fish over and over…
Great work! just stumbled onto your blog browsing for some new patterns. will most certainly be using some of your techniques in the future. Thank you! and keep it up 🙂
Hi Mark, Thanks for your kind words.
Please ‘sign up’ and get all the new post as I publish them.
Cheers
Barry
Hello again
I am very new to this site but was wondering where the Fly Tying Courses #1 through to #15 are.
Keep up the great work.
Thanks
Phil
Hi Phil, you can search for them in the search window to the right on my blog. Or just scroll down the post archive.
Cheers
Barry
Beautiful take on the PTN, Barry. My only problem is, it is a good bit more fiddly than the ones I’m used to. On the plus side, the result is more segmented. Tied your way, it displays a distinct separation between body parts.
I changed two things (I hope you don’t mind):
1. Instead of cutting off the tail fibres, I kept them and used them for the shellback. One less thing for my nimrod fingers to make a mess of!
2. Instead of peacock herl, I used peacock Ice Dub. This adds a sparkle one step up from the natural herl.
I fish for bluegill, not trout. This should work well in my waters.
I know everyone always lauds your efforts – so let me join them. Brilliant, as usual!