
Once again this is a request I have had from several fellow bloggers for the fur hackle spinning technique. Although similar too the spinning deer hair article, there are a few pointers you should be aware of when mastering this technique.

Just about all natural and synthetic furs, feathers and hairs can be used as one form of dubbing or another. Before you start its worth considering what type of hair or material is suitable for the type of fly you are tying. There are several factors regarding the choice of natural materials.
1. Dry fly, nymphs, wet flies.
2. Sinking, floating.
3. Ridged or pulsating.
4. Neat or scruffy.
When you are using natural materials you should consider what kind of animal, lifestyle, and climate it derives from. If choosing a dubbing for a small dry fly the under fur from otter, beaver and coypu have, because of their aquatic lifestyle a super fine under fur which is impregnated with natural water repellant oils, rather like the fur equivalent of CdC. On the other hand if you would like a long pulsating, sinking hackle choose a soft finer hair from an opossum or a rabbit that will absorb water but remain mobile and lively when fished. For nymphs there is of course the classic spiky hares ear dubbing. So to achieve optimal function and design of the the pattern you intend to tie, consider the above before starting.
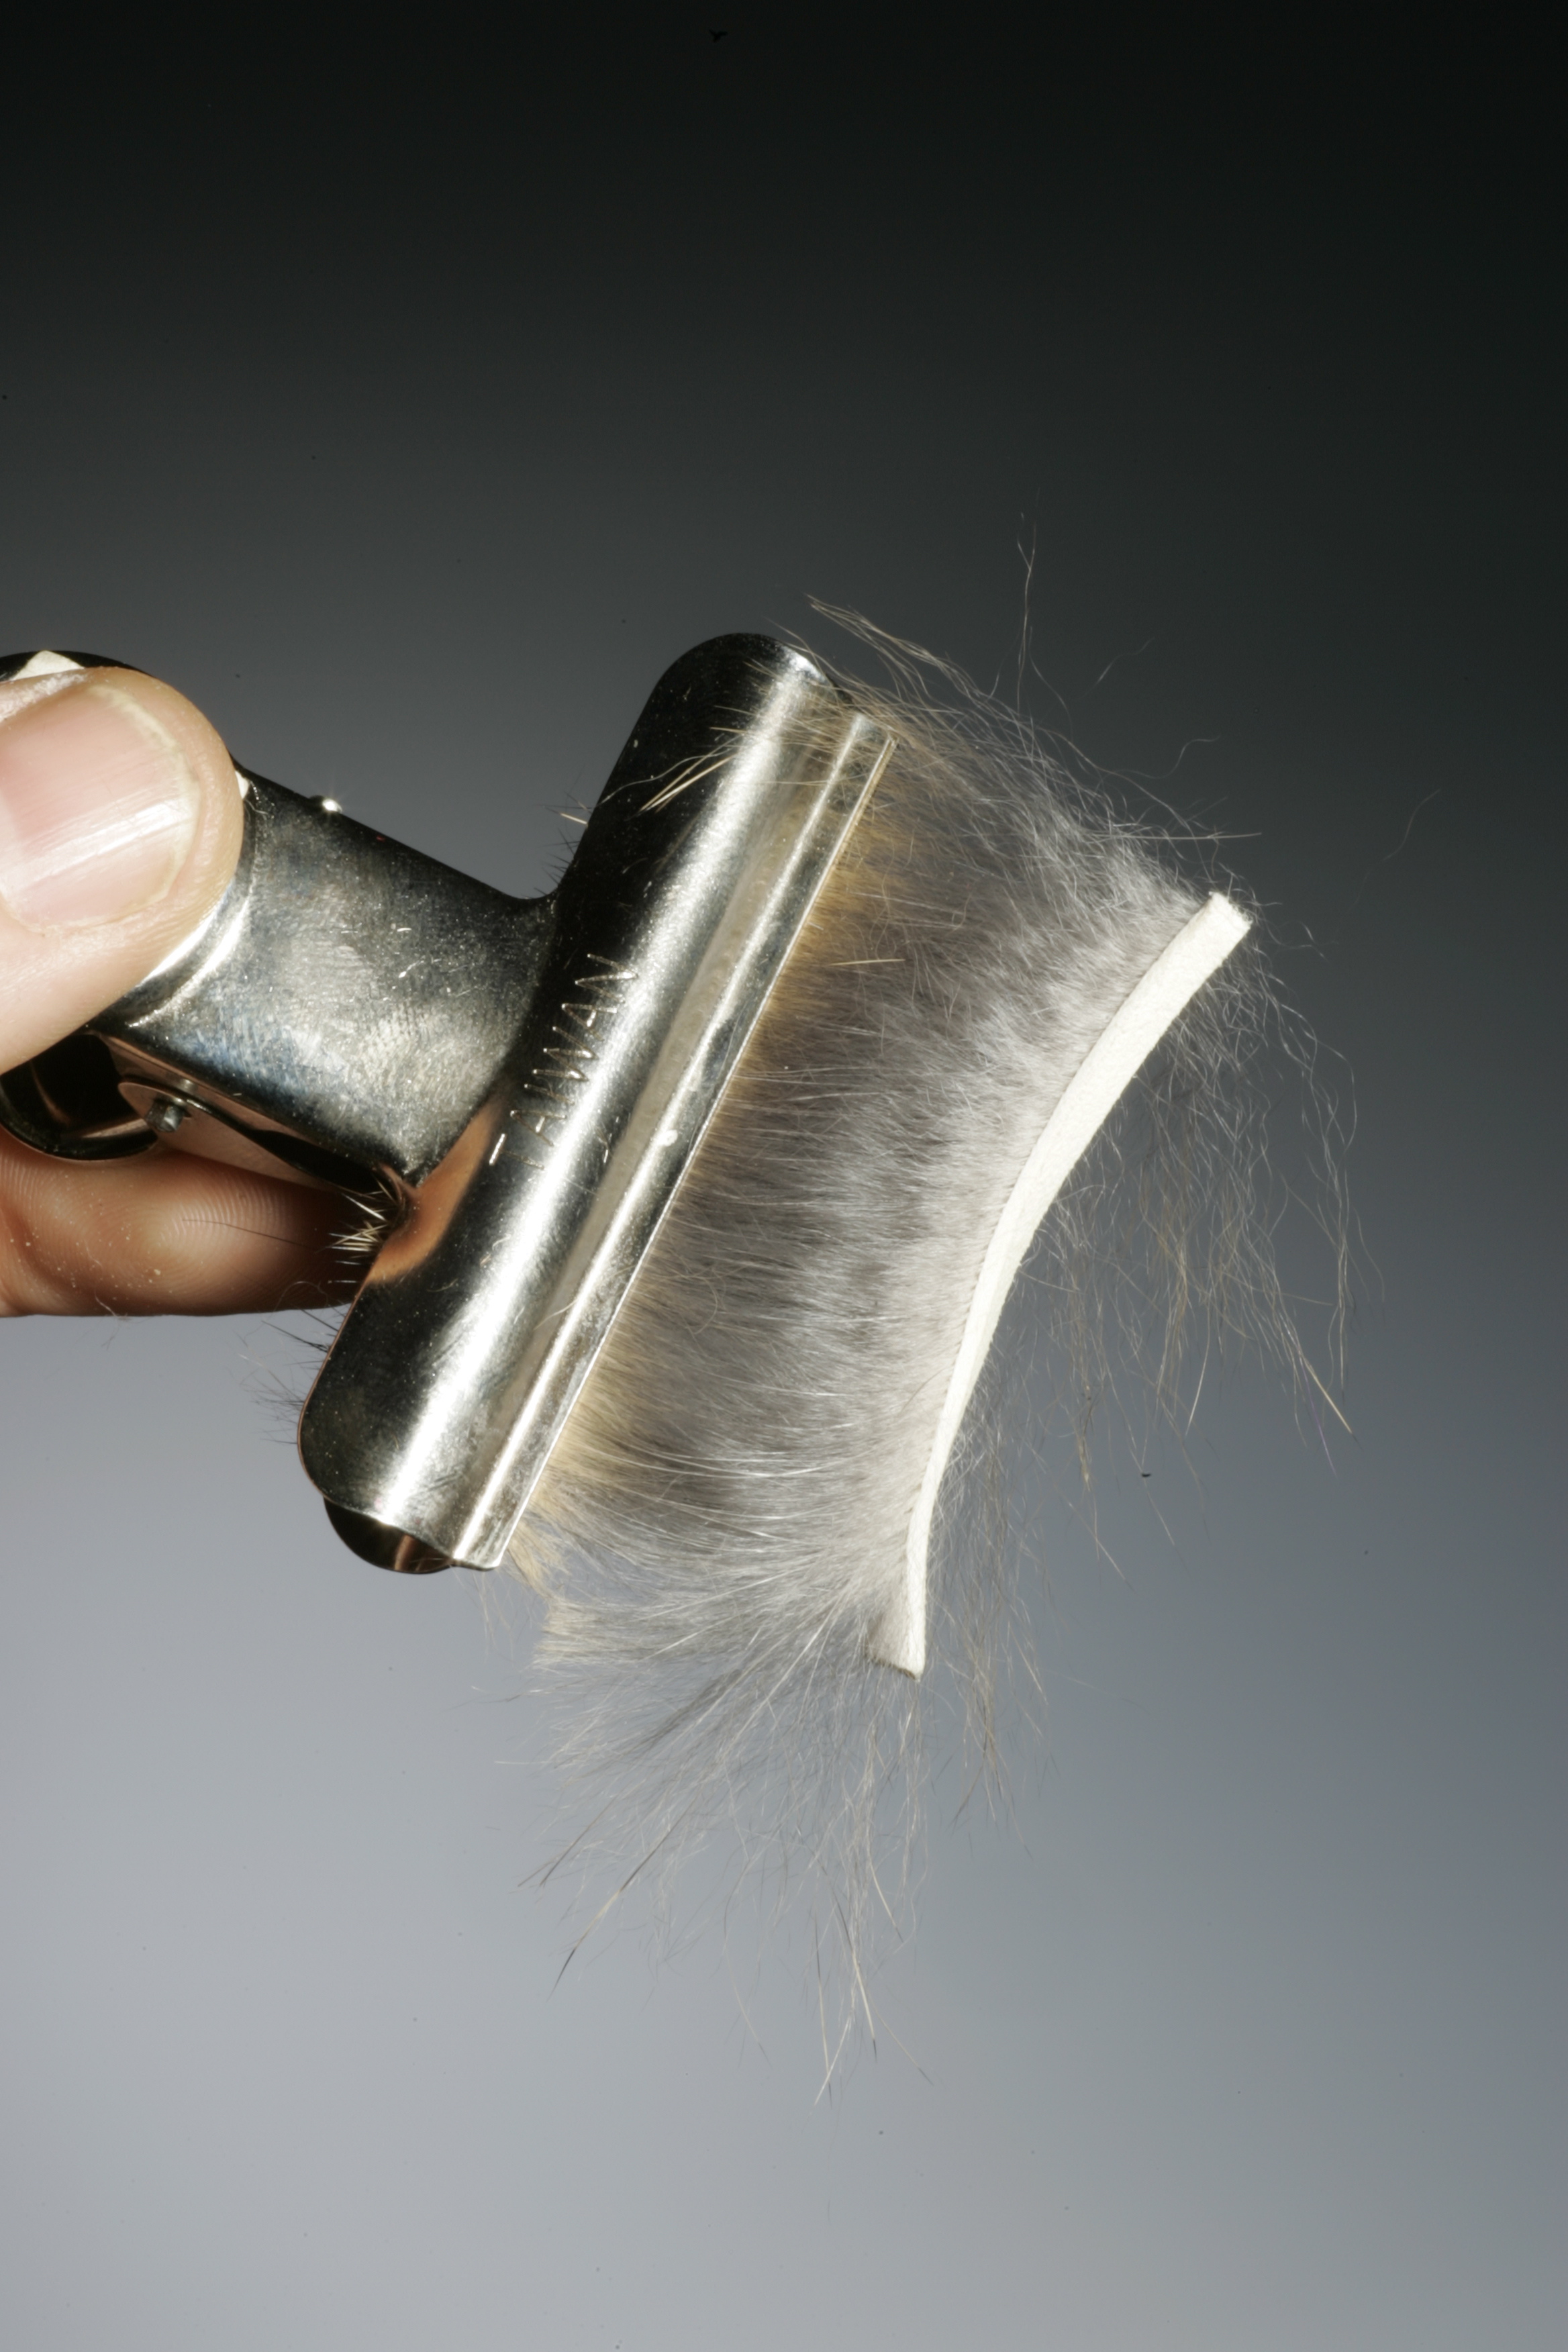
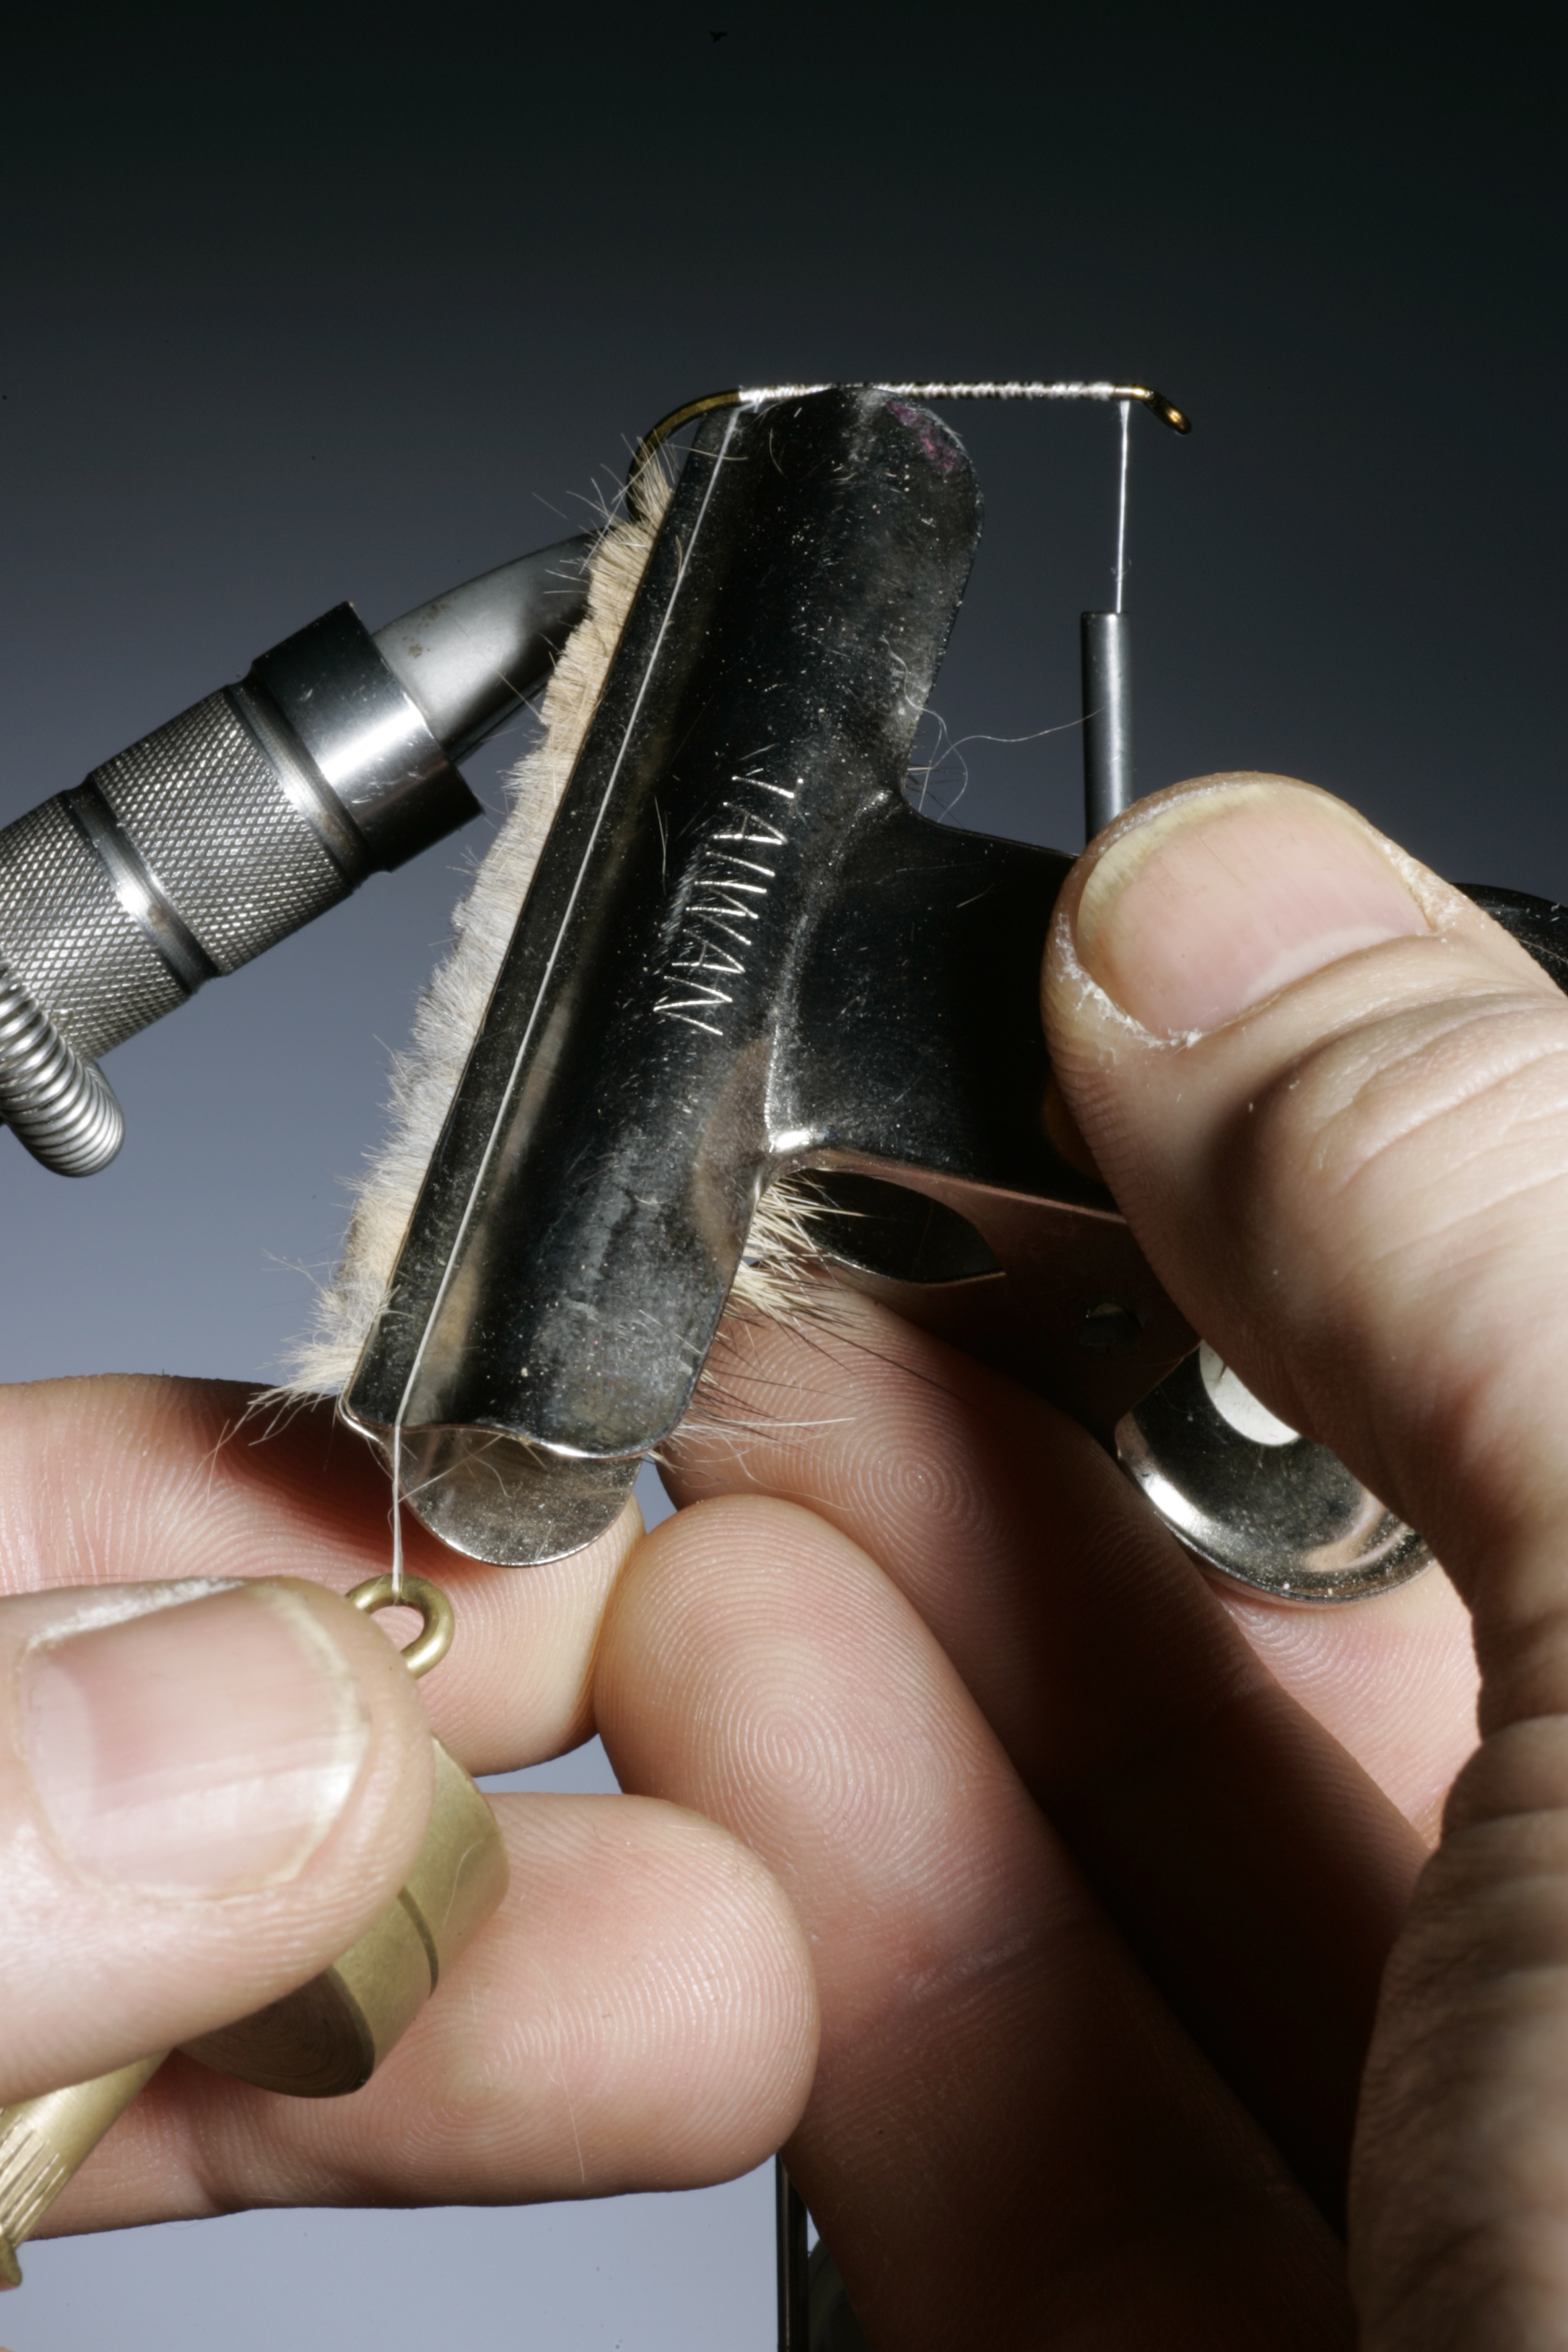
1. Here I am using an old fashioned bull dog paper clip to hold the fur but for perfect dubbing spinning I can recommend the Marc Petitjean Magic tool set. Marc’s magic tool is made from transparent plastic, the advantage with this is that you have much more visual control over the length and lie of the material being used. The above material is a regular hare zonker strip. Place this in the clip so the fibers are 90 degrees to the clip and at this stage you also determine the length of the hackle required.
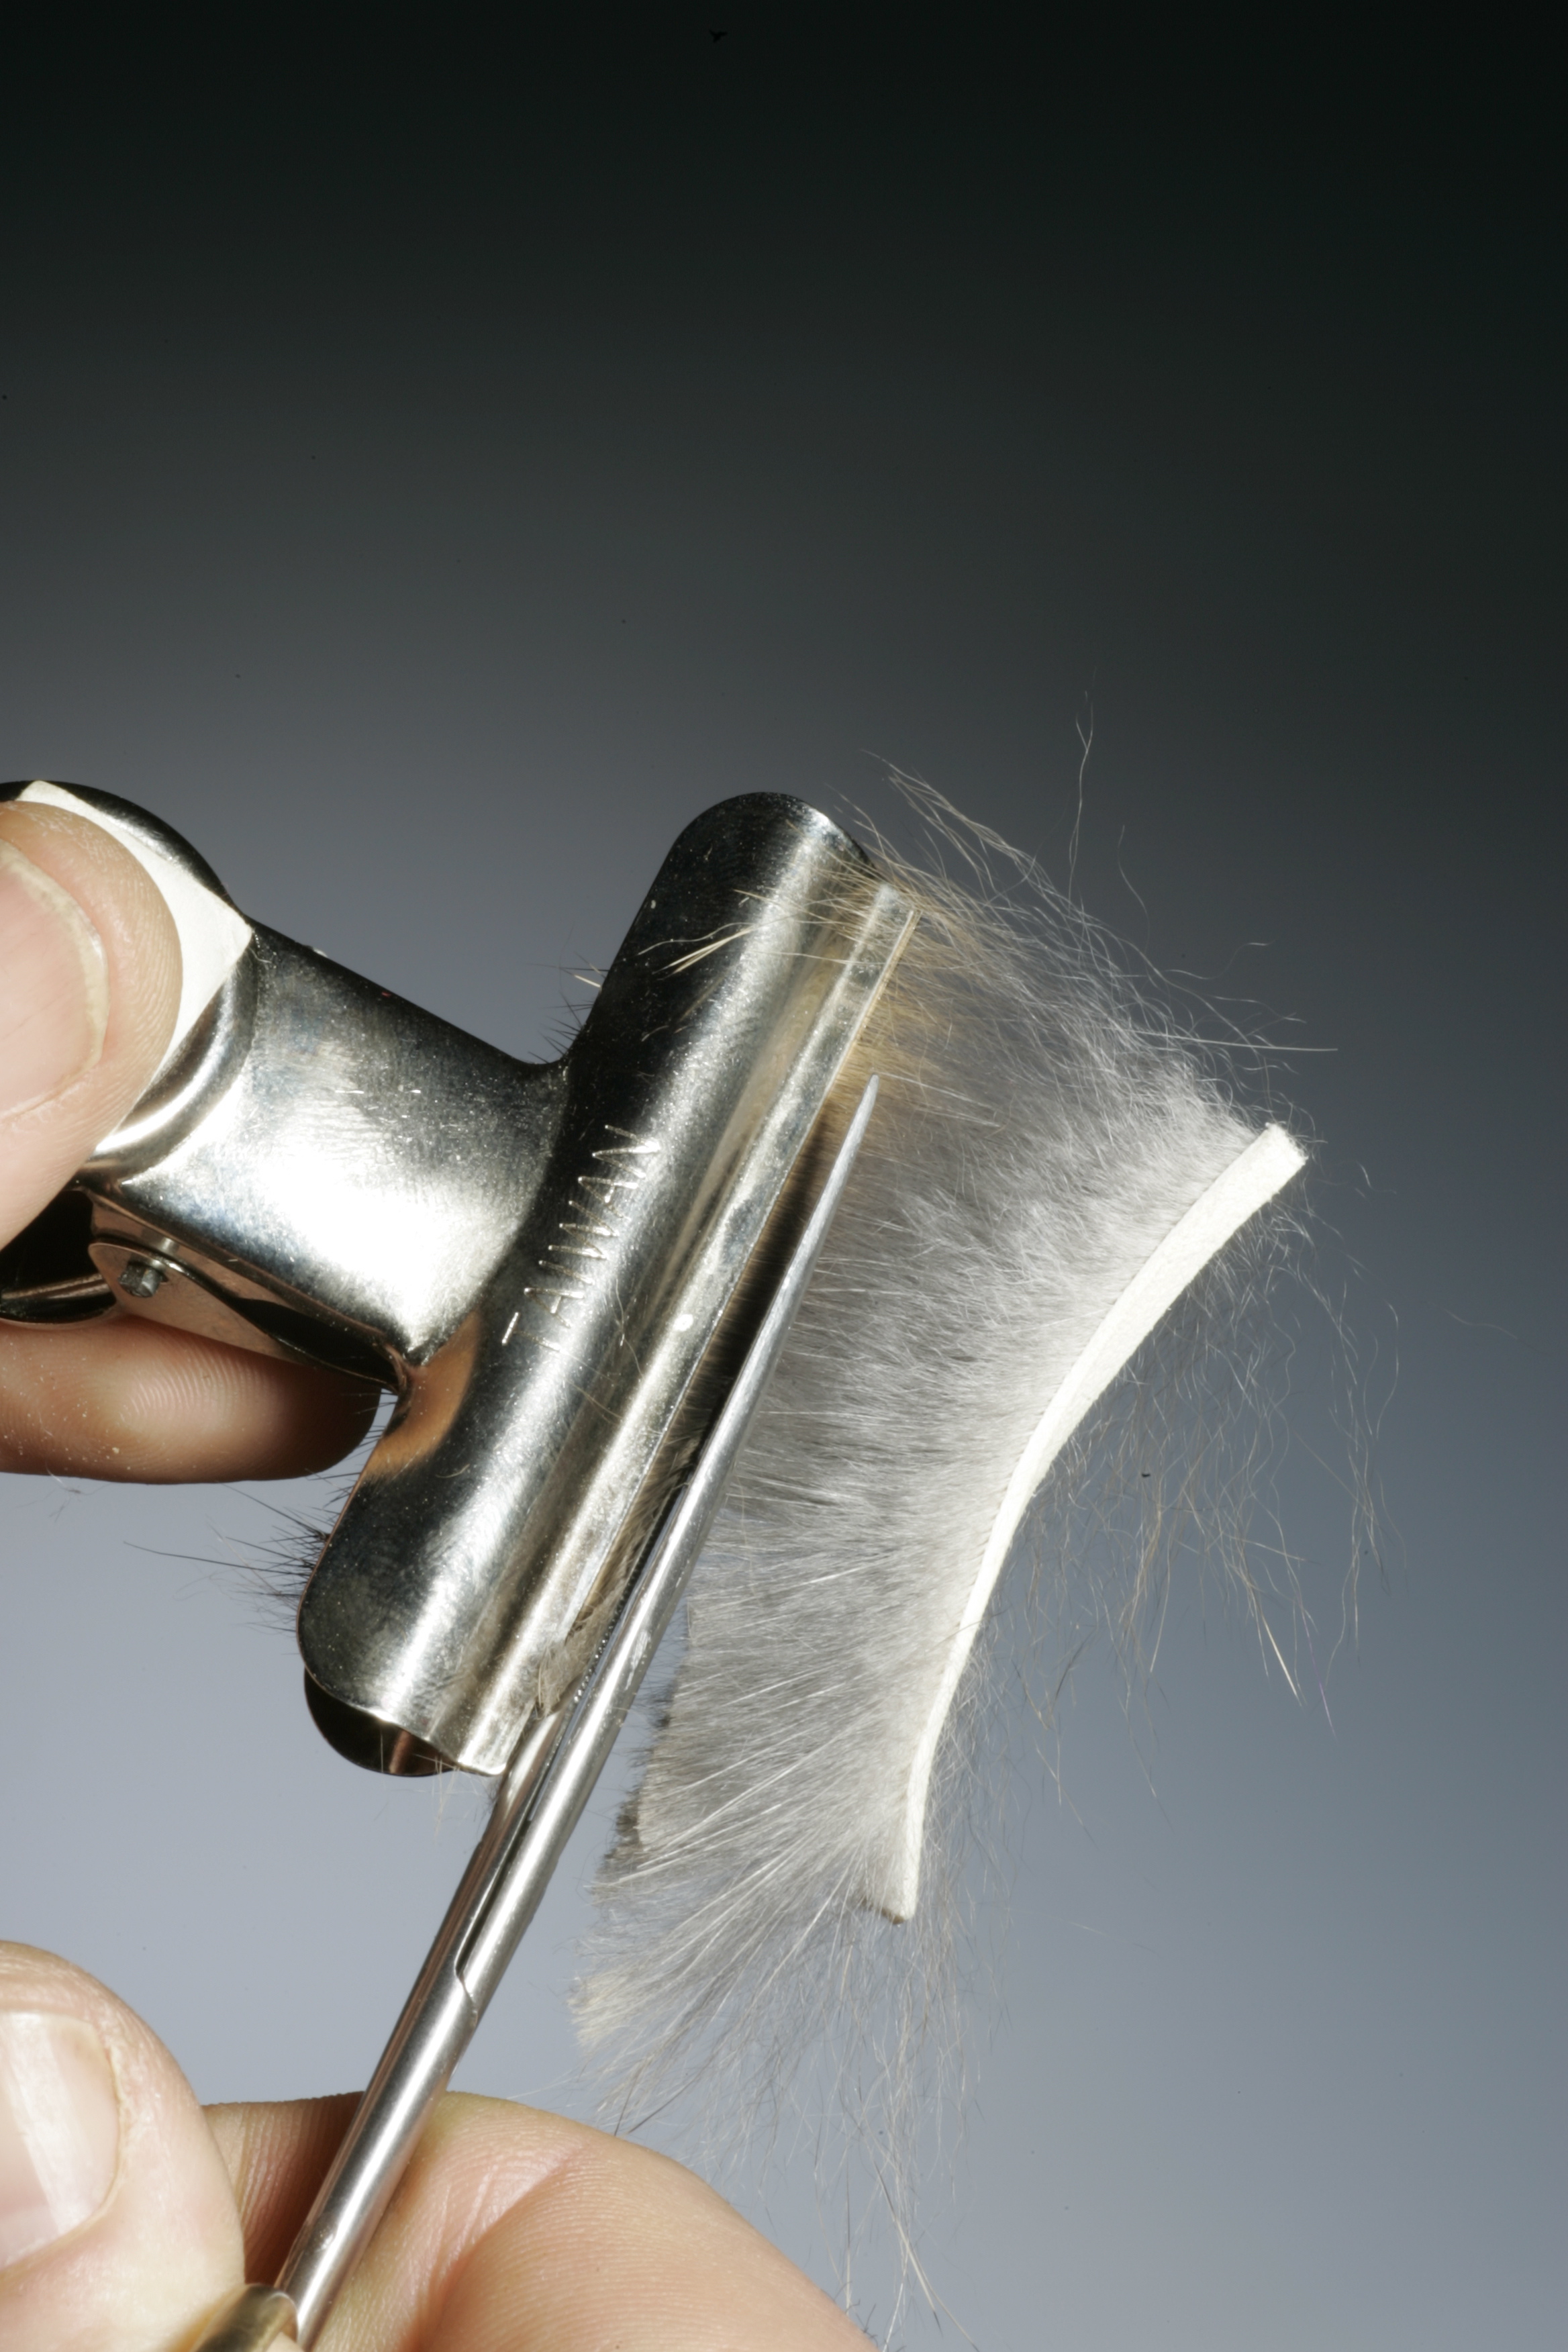
2. Now with long straight scissors cut off the base and hide from the strip leaving only 2 or 3 mm of fur out from the clips jaws.
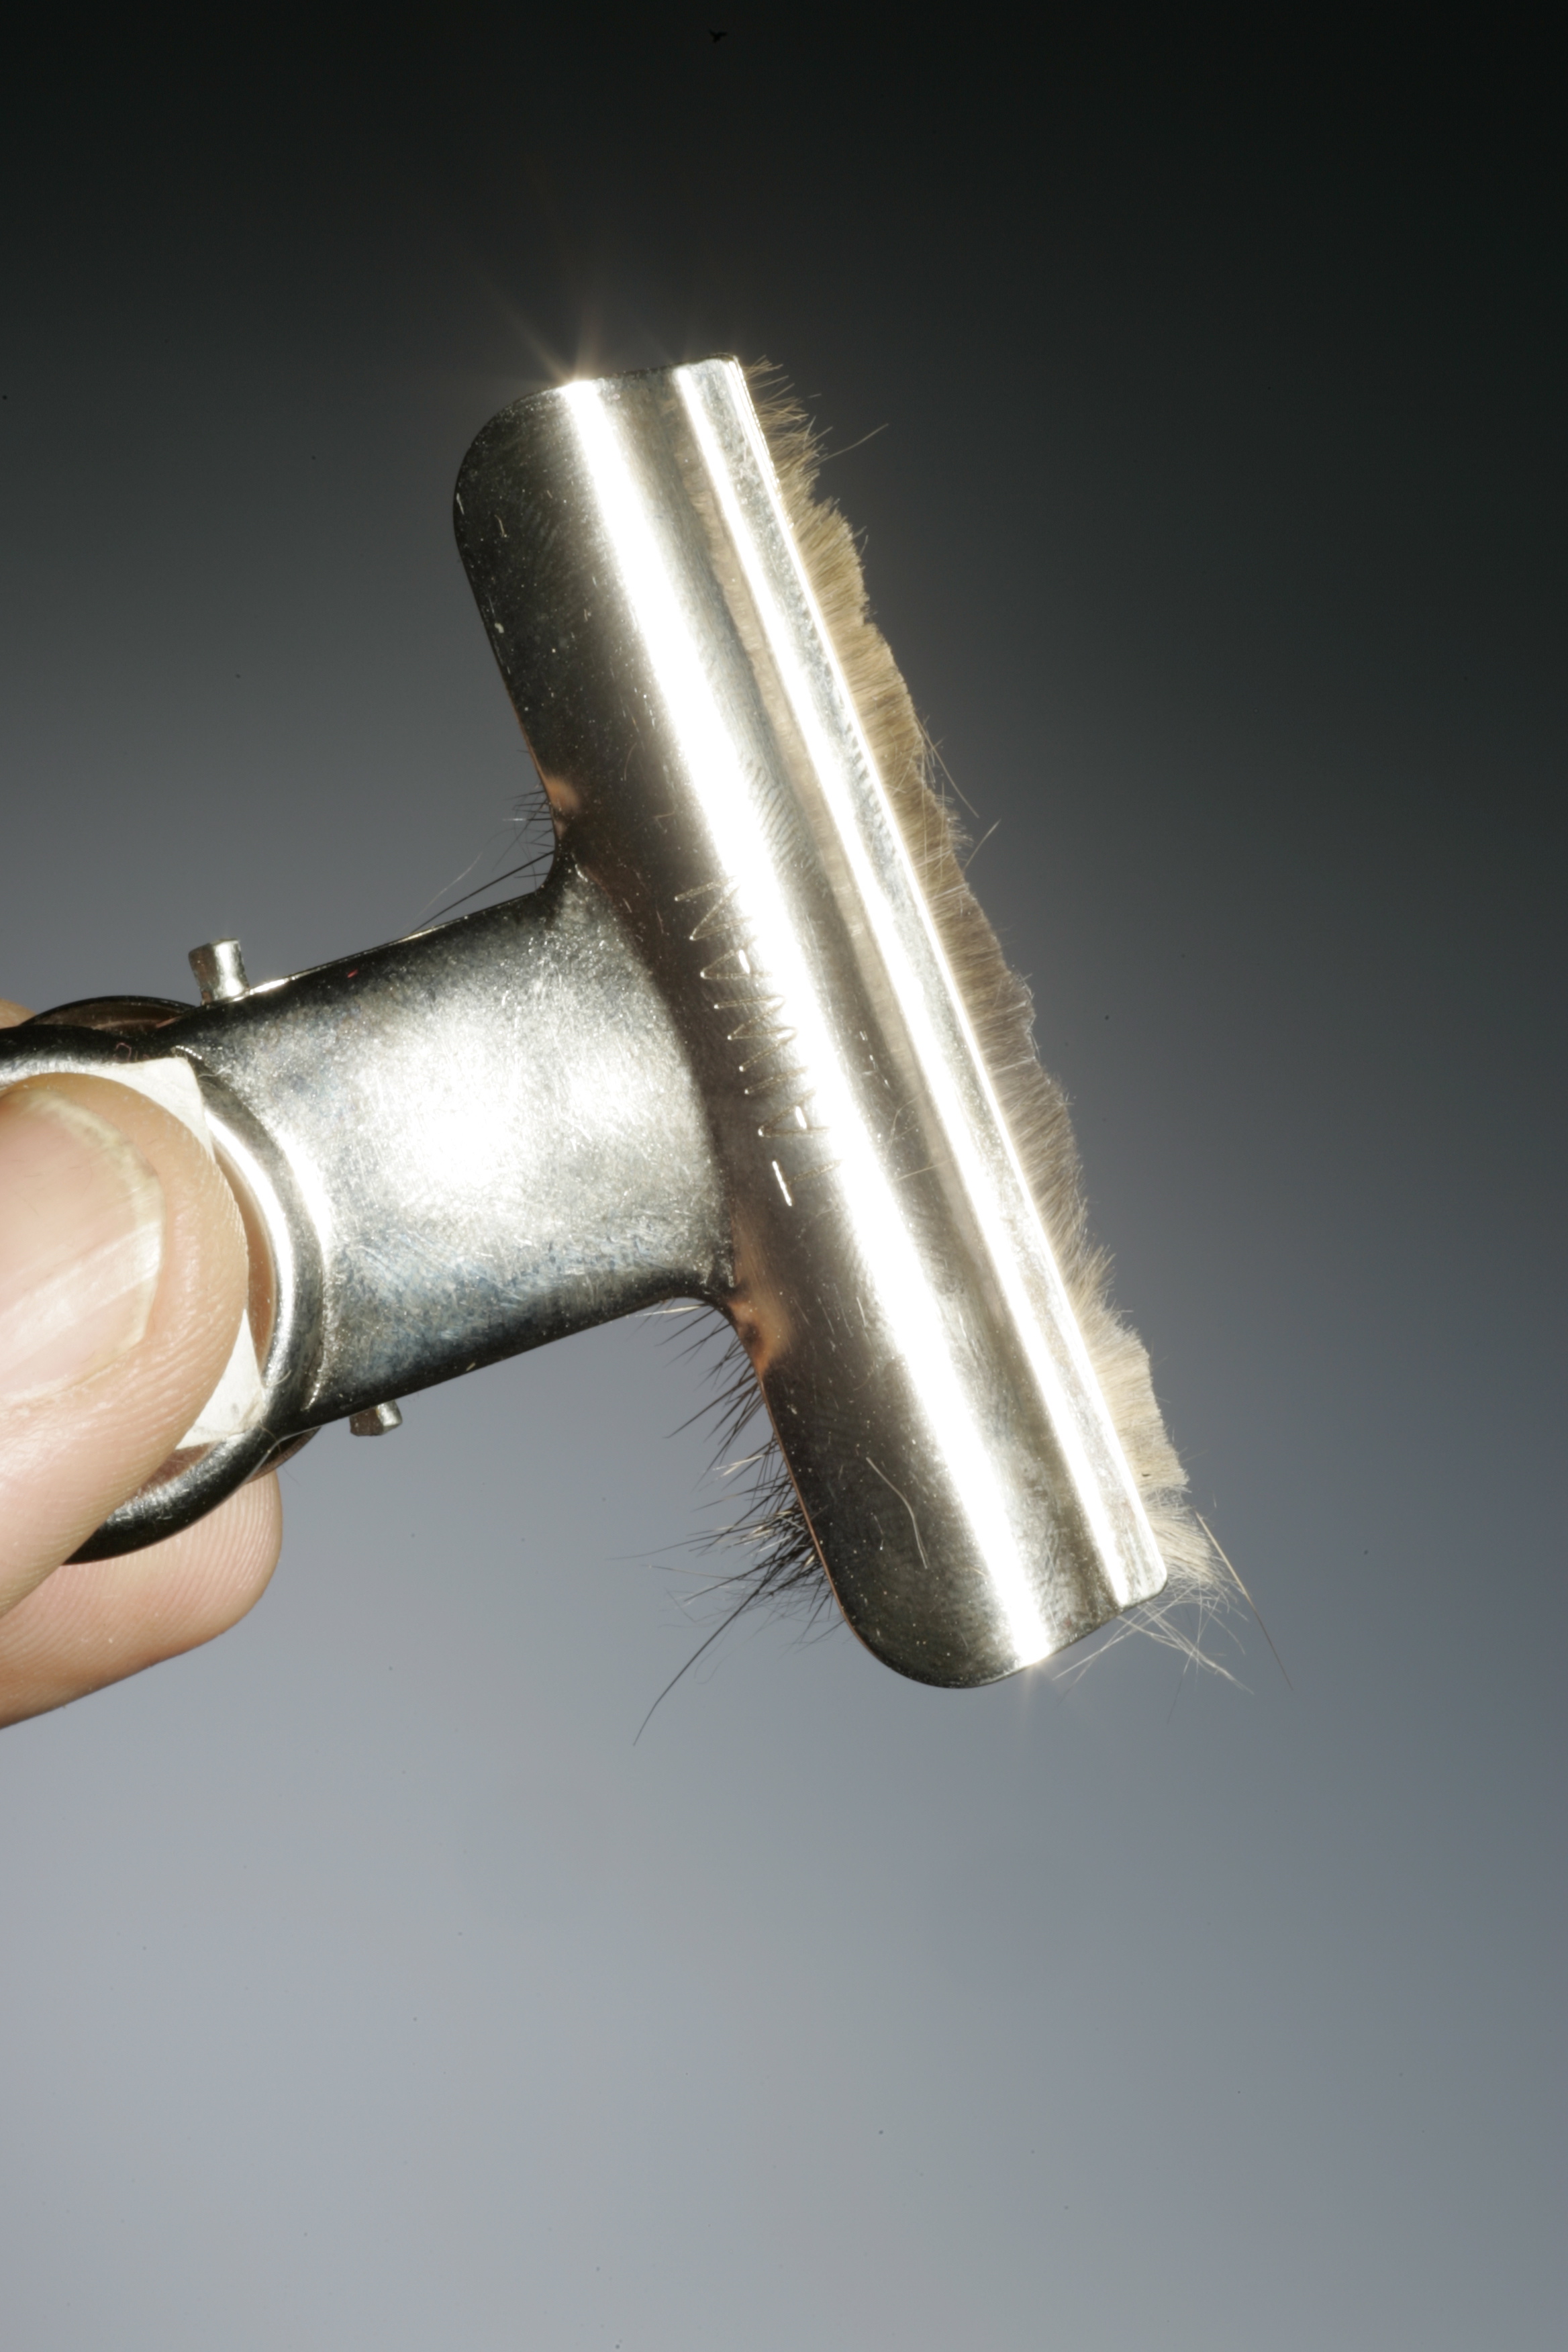
3. The finished loaded clip. You should now take care not to apply pressure to the clip and open it before needed. Otherwise all the material will shift or fall out.
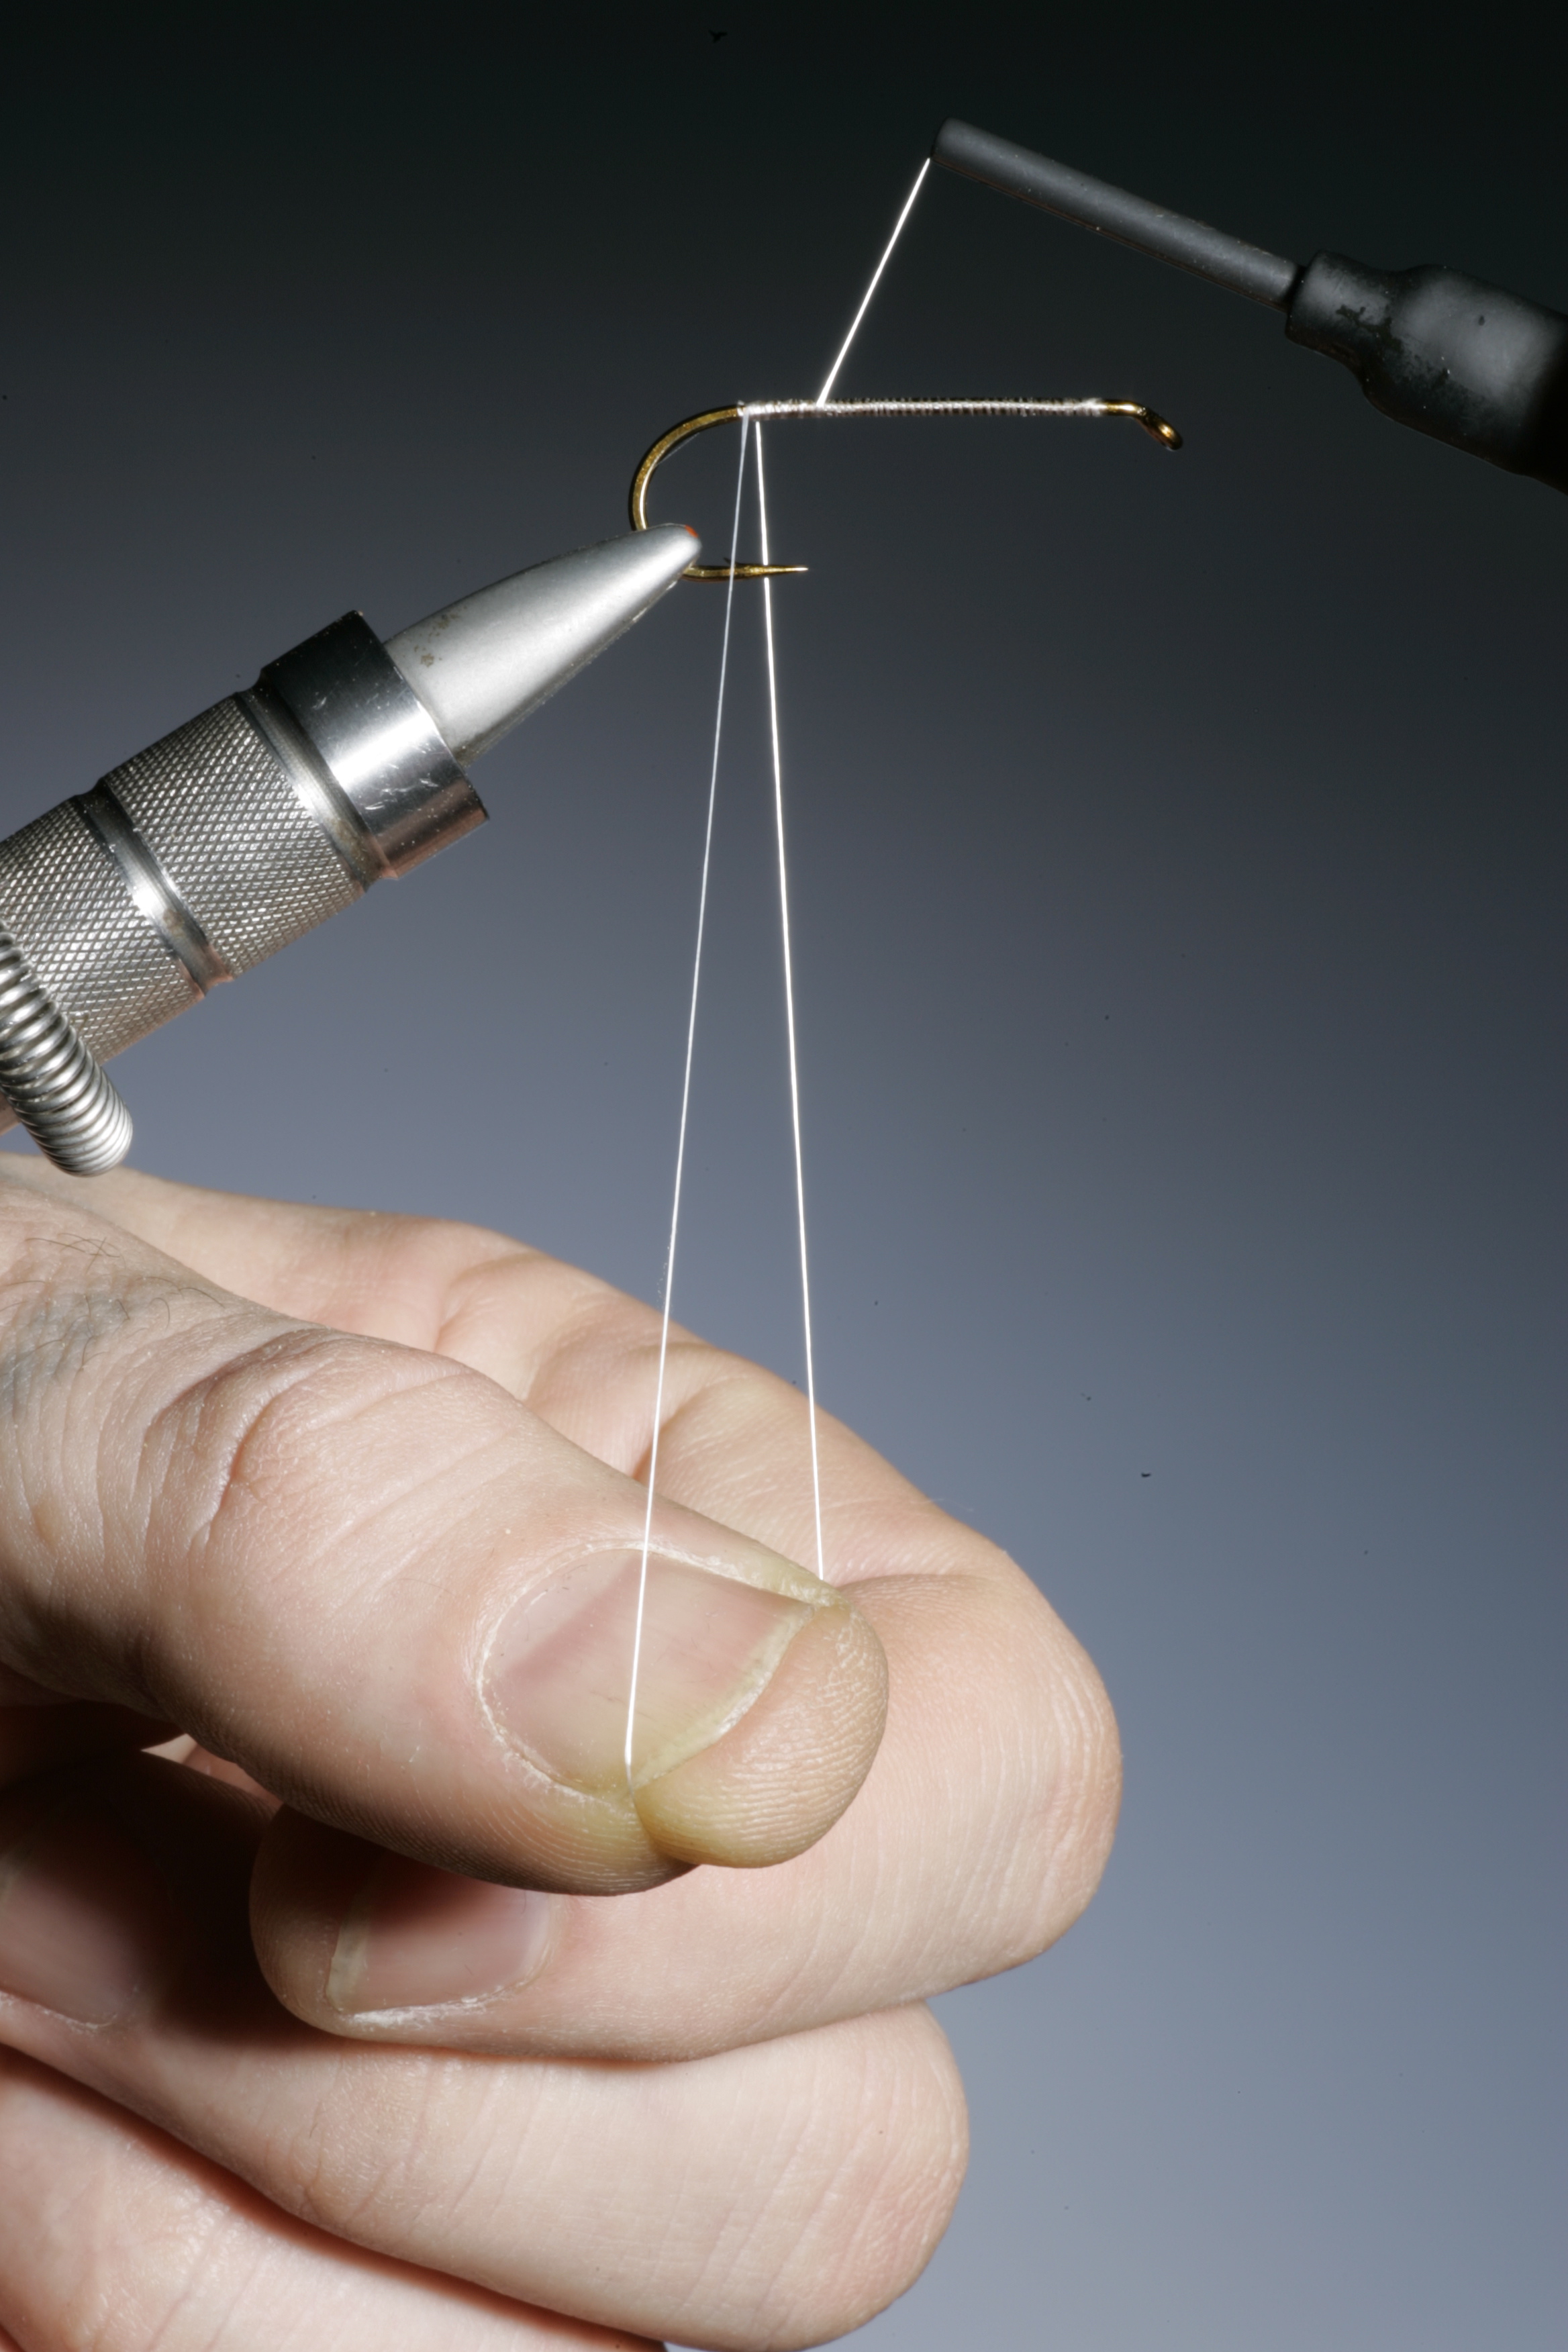
4. Make a dubbing loop. If the material you are using is dense ( thick guard hairs and under fur) you will need to make a loop of double tying thread as above. But if the material is fine, a finer loop of split tying thread is sufficient. Also its important that where the two sides of the loop meet the hook shaft that they are touching. If you have them open, one strand of thread on each side of the hook shank the loop will not close correctly, and the material spun will loosen and fall out.
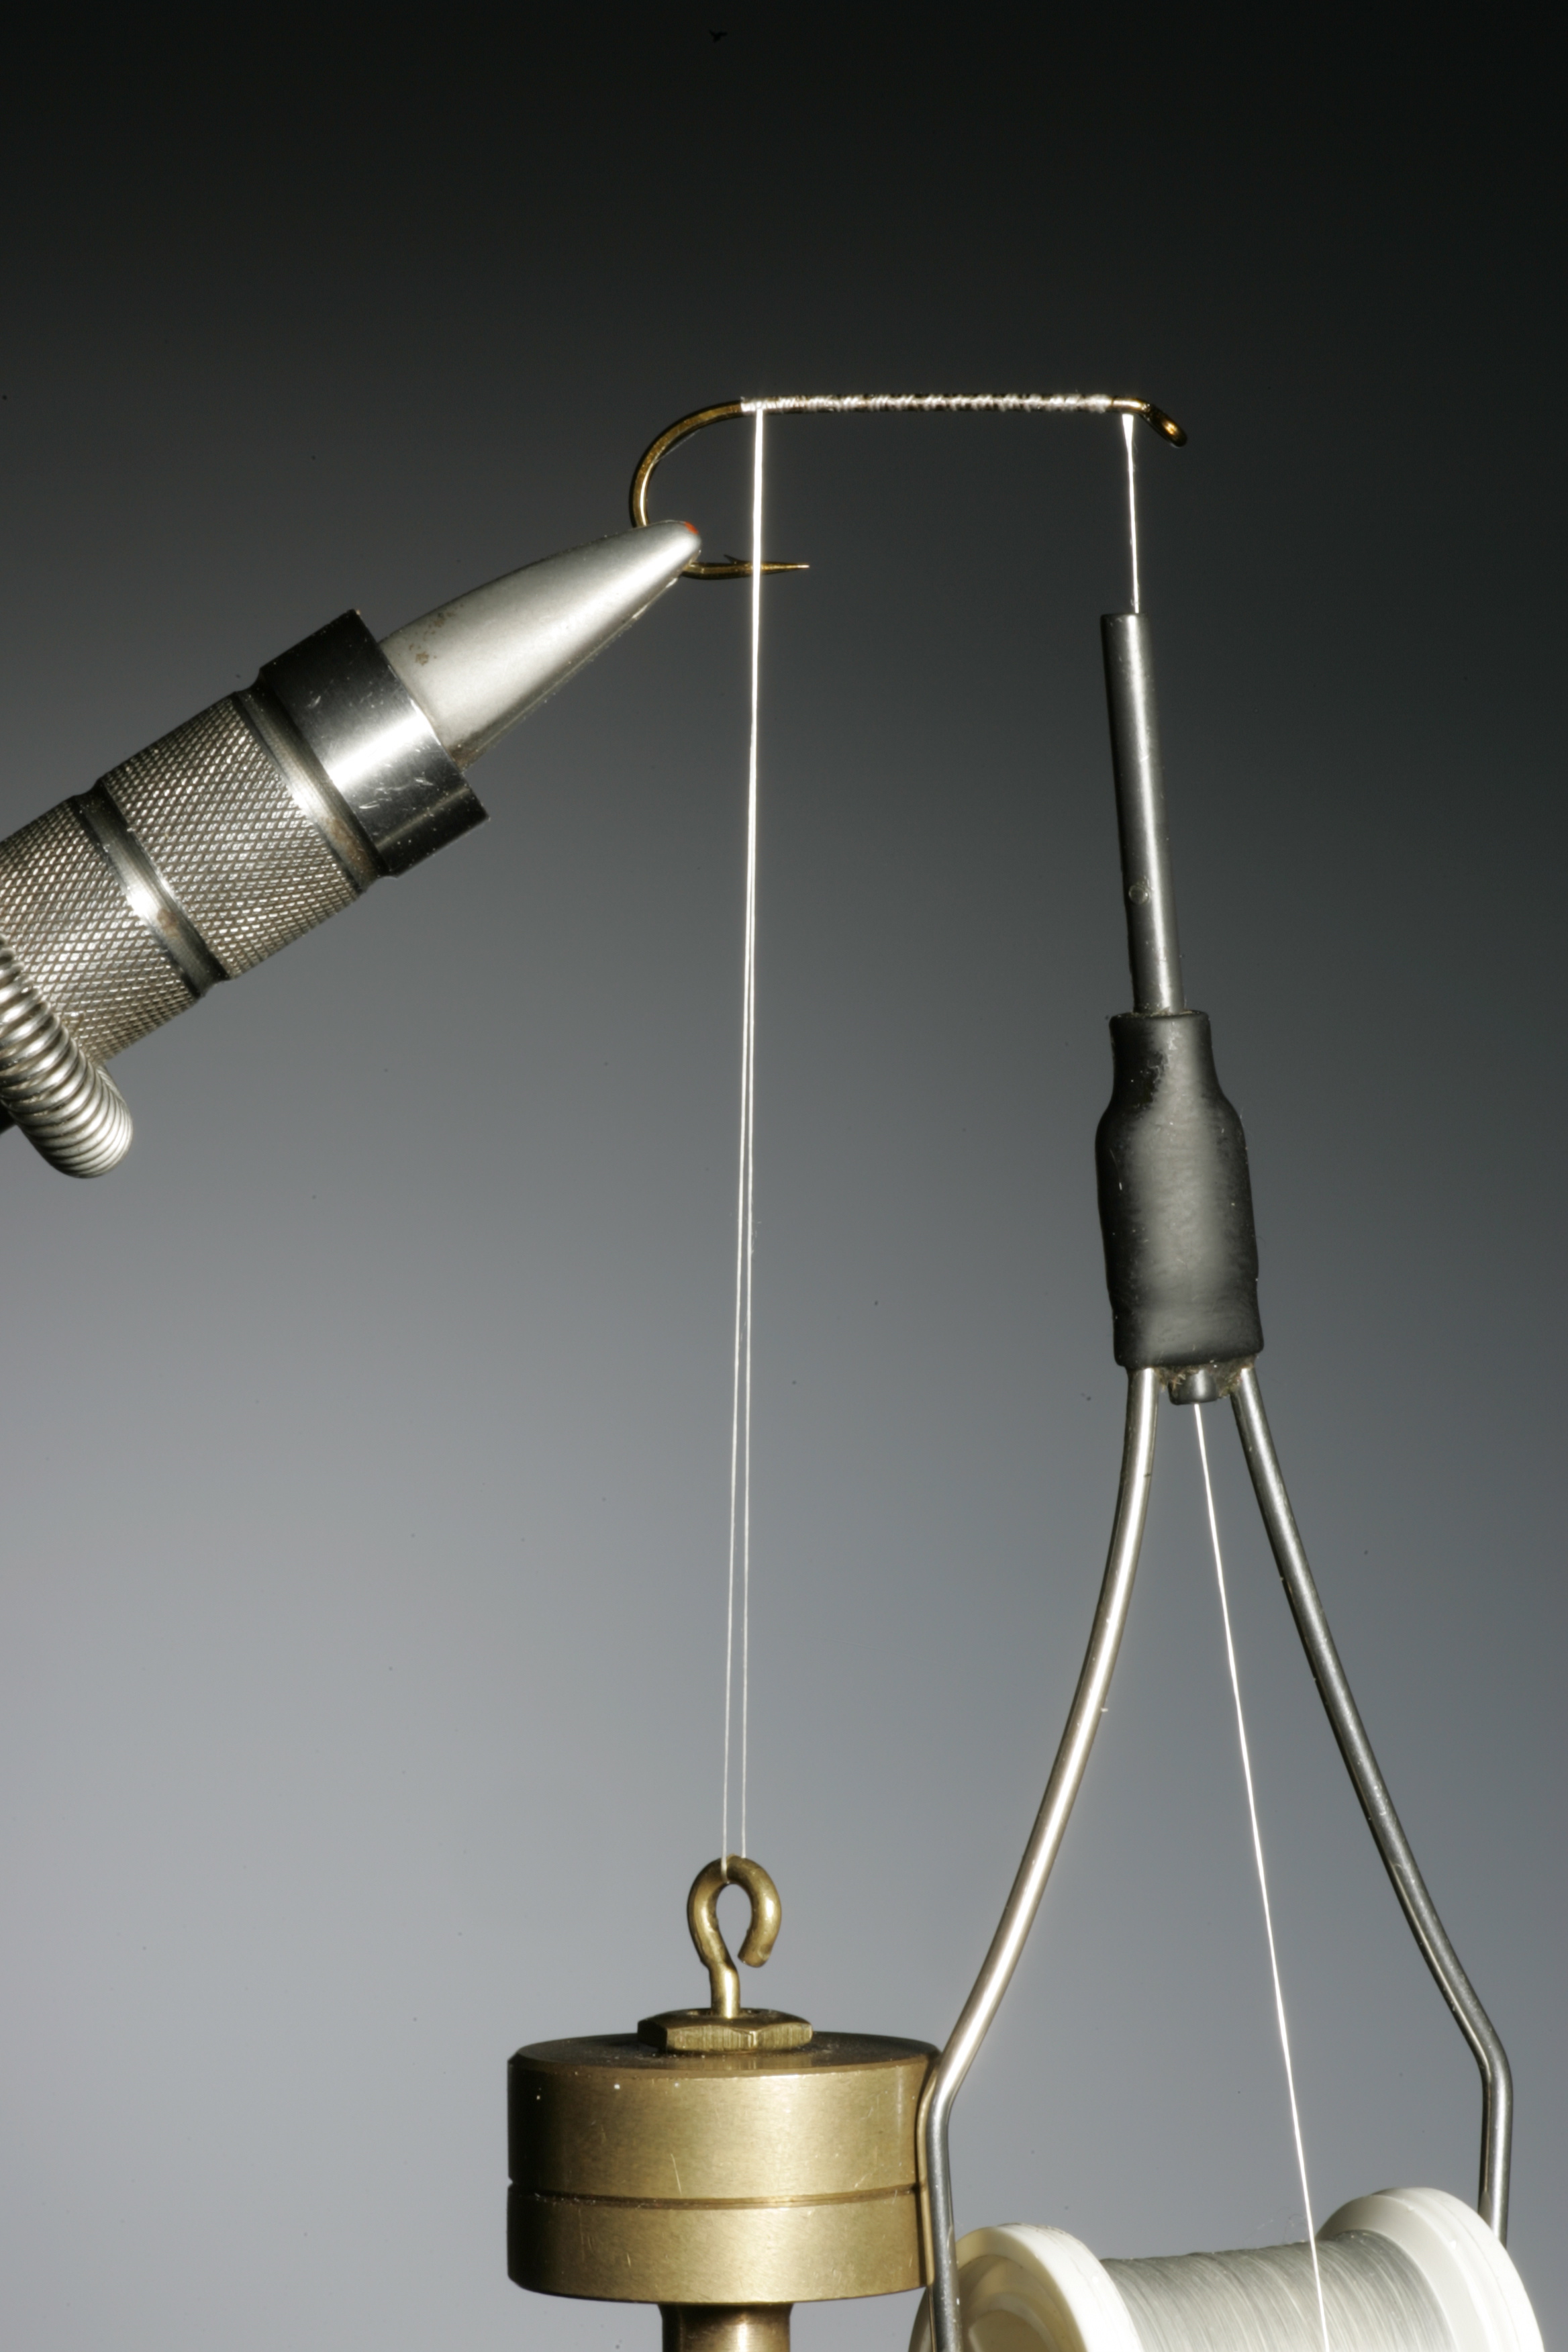
5. Move your bobbin forward towards the hook eye and attach your dubbing spinner.
6. If you are using Dyneema or another thread that is un-waxed, you will need to apply a little dubbing wax to the thread to gain ultimate traction.

7. Once you have placed the material in the loop carefully remove the clip in one smooth movement while keeping tension on the spinner to hold the dubbing loop tight and closed.
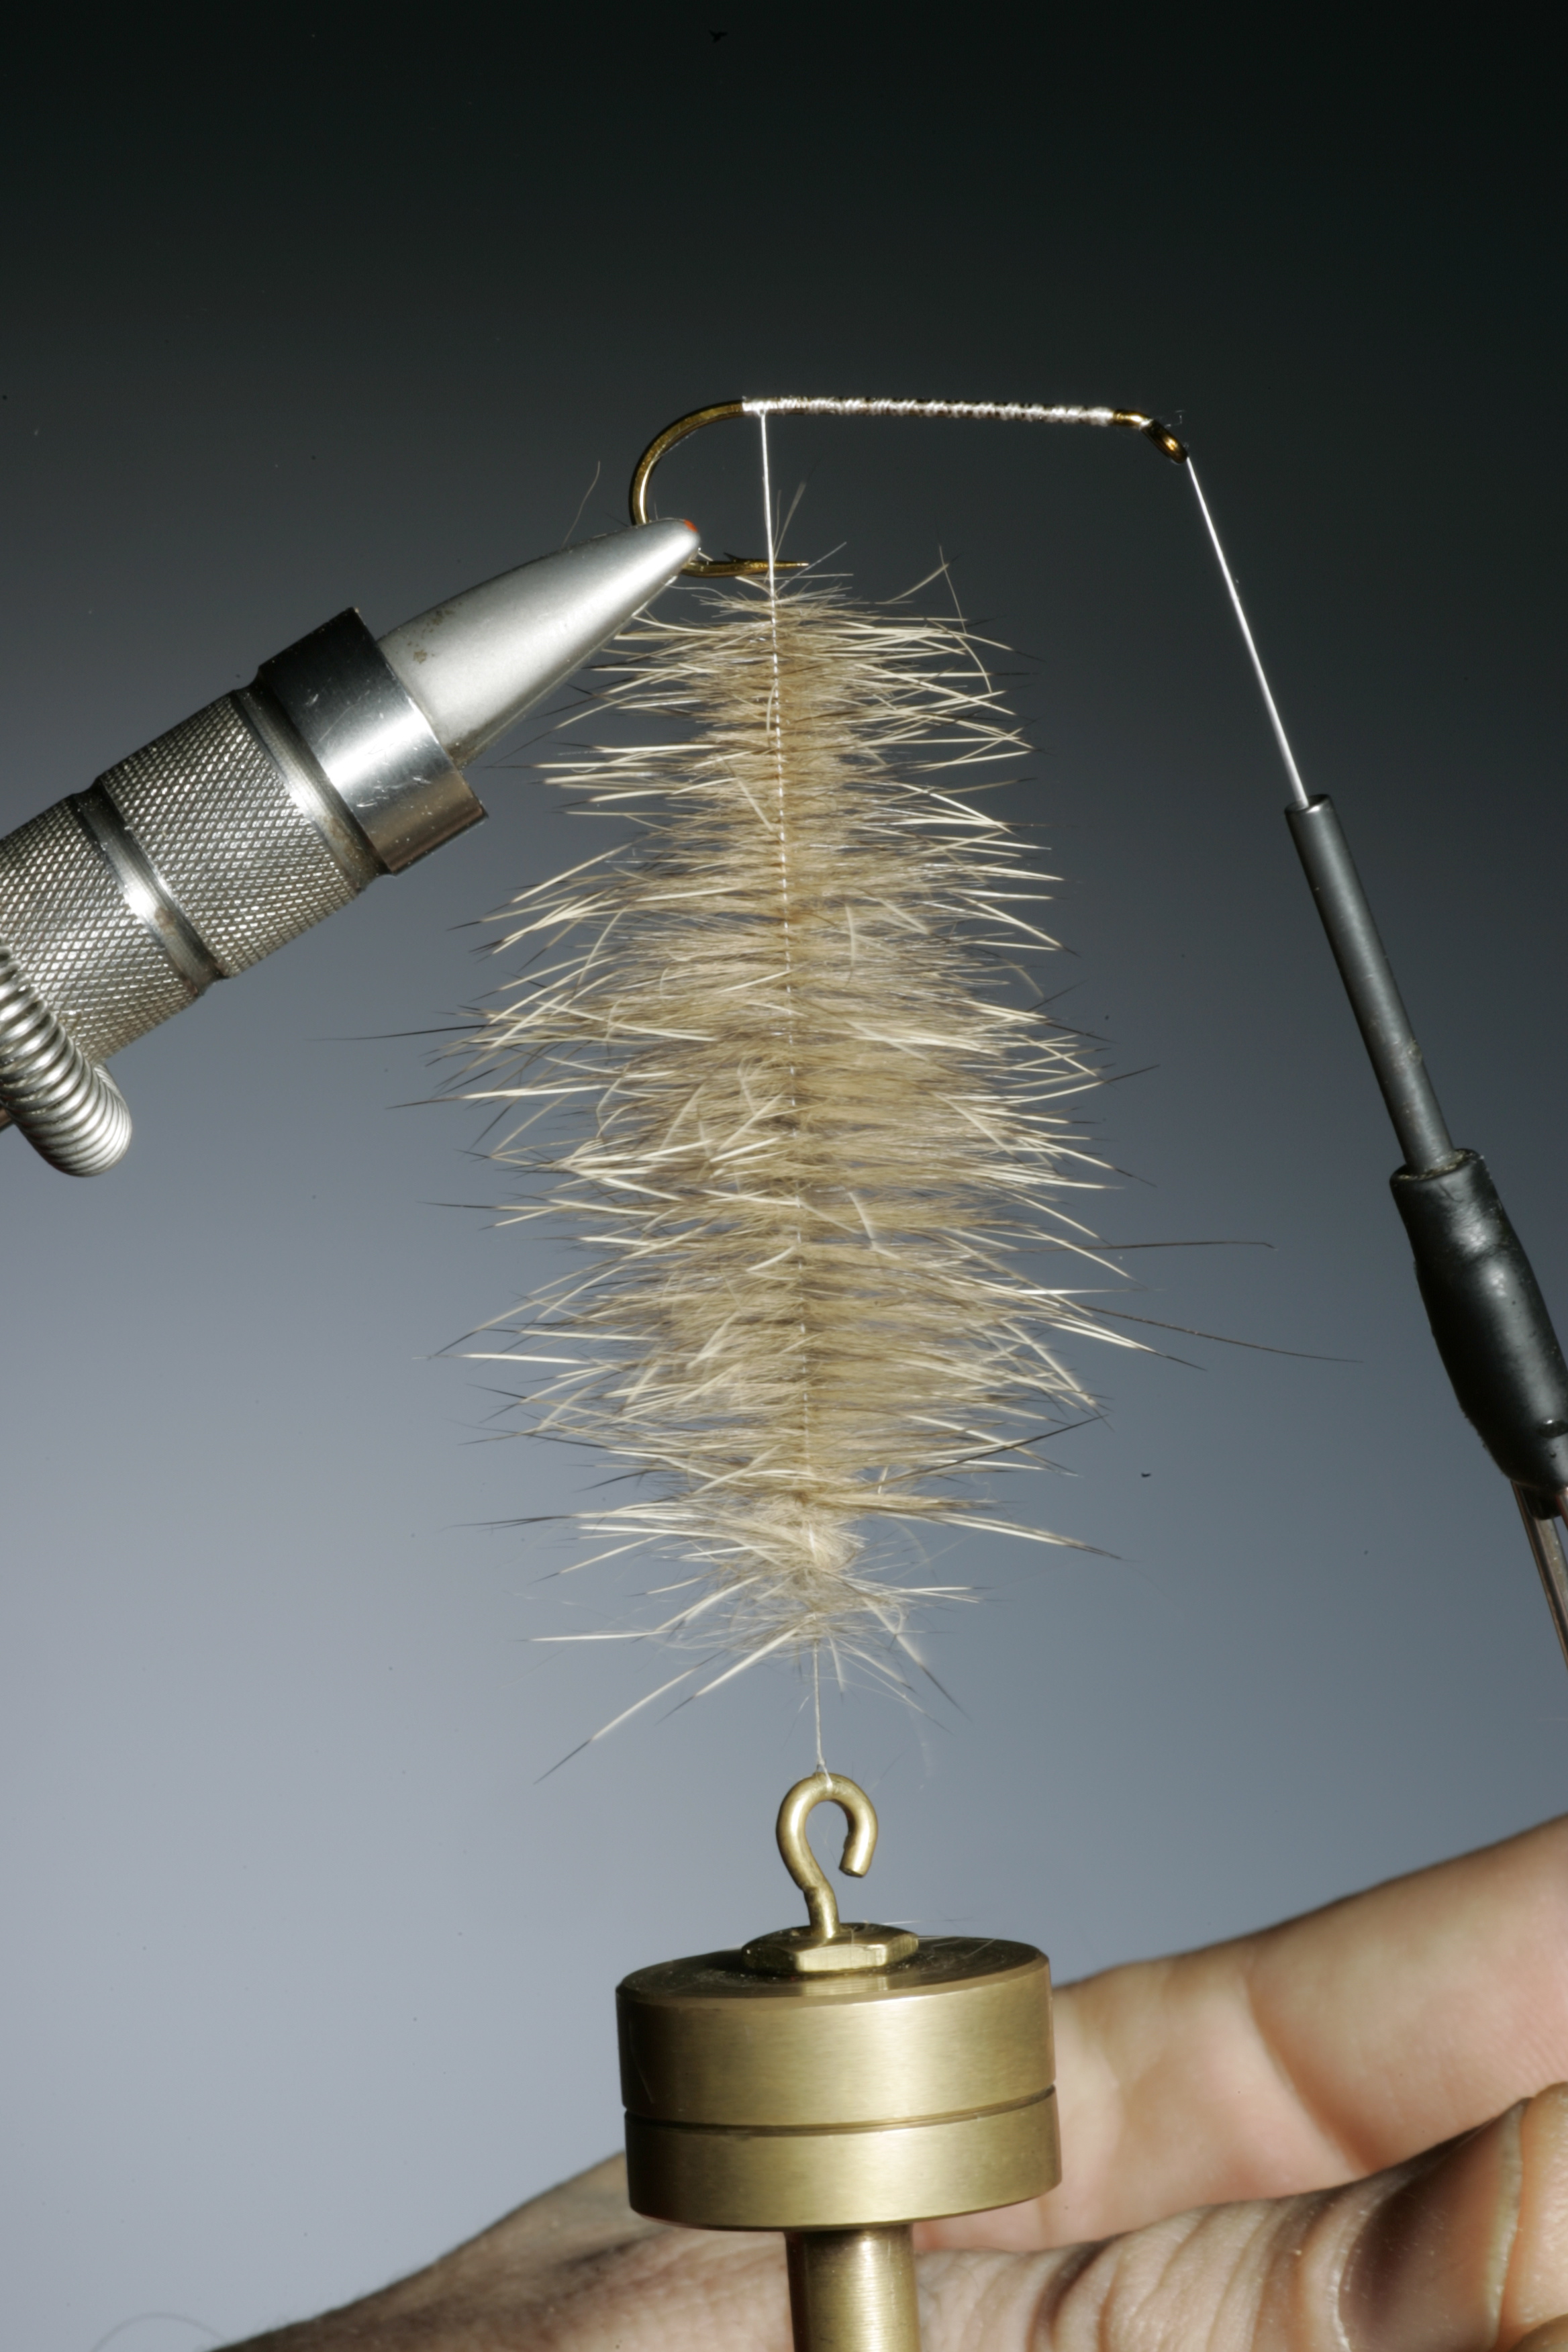
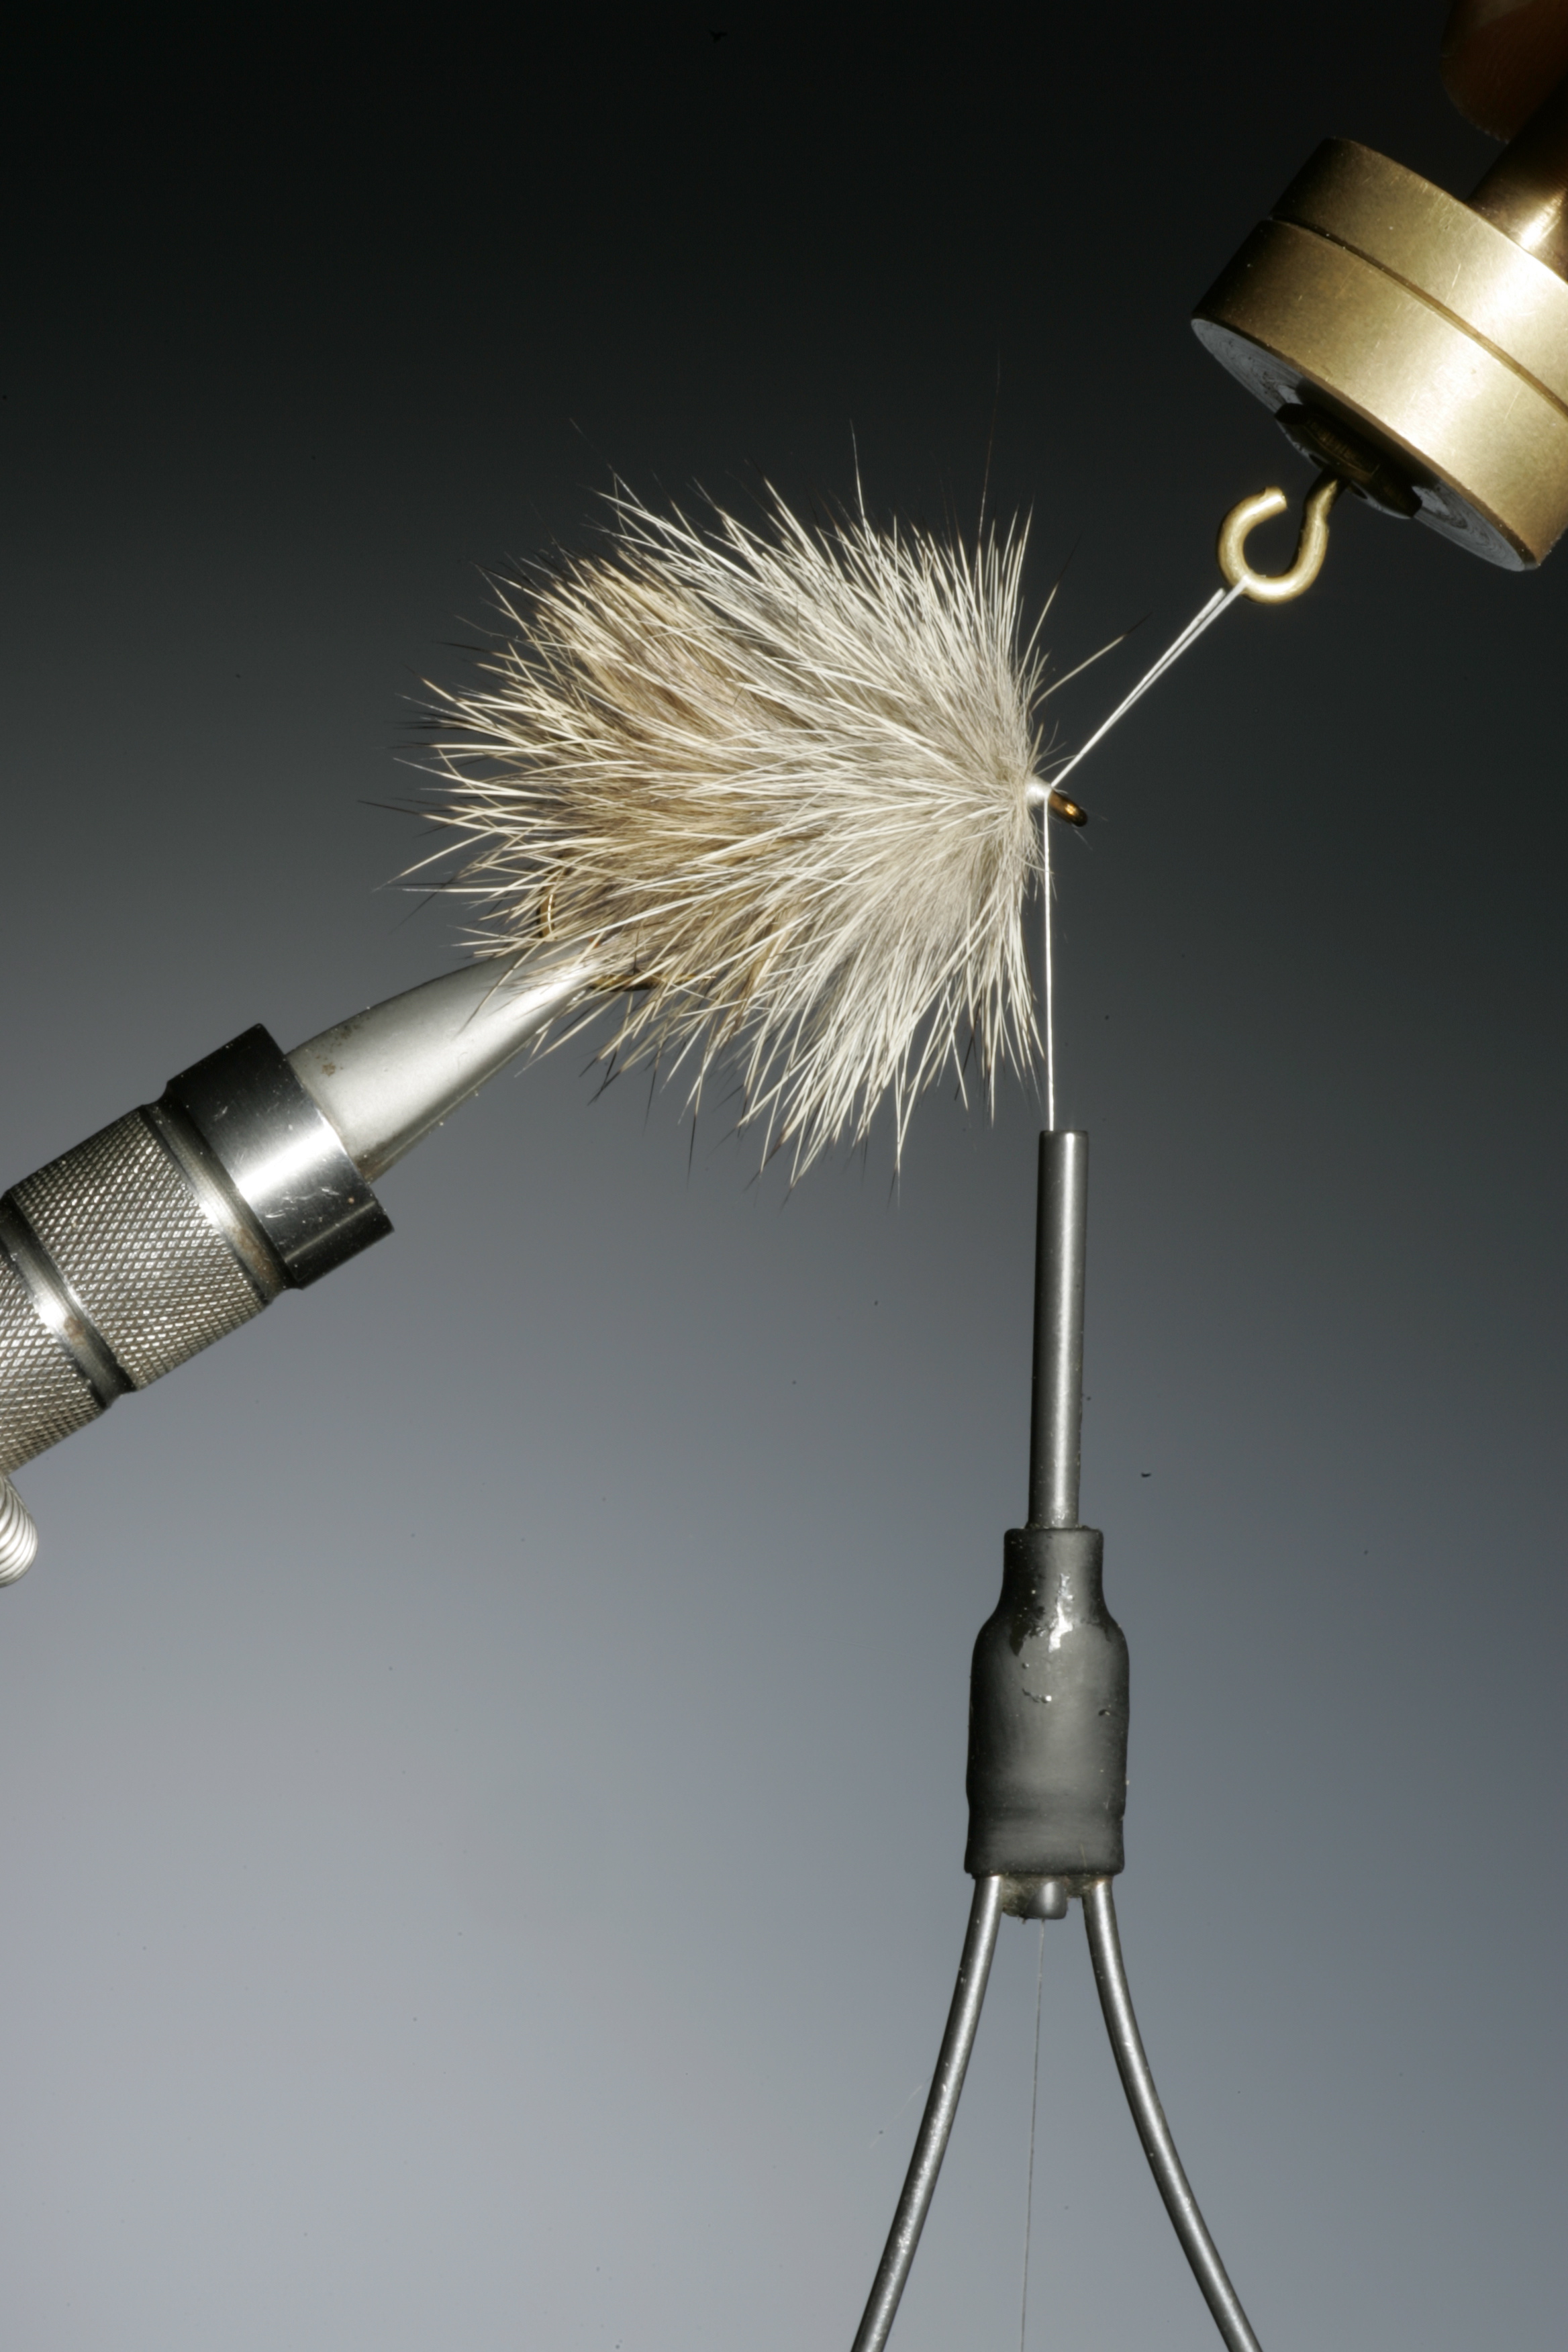
8. While keeping tension, spin the dubbing loop clockwise until all the material is secured and flares like a regular hackle.
9. You can now wind on your fur dubbing loop in a traditional hackle style. Taking care to brush back the fibers of each turn before making the next.
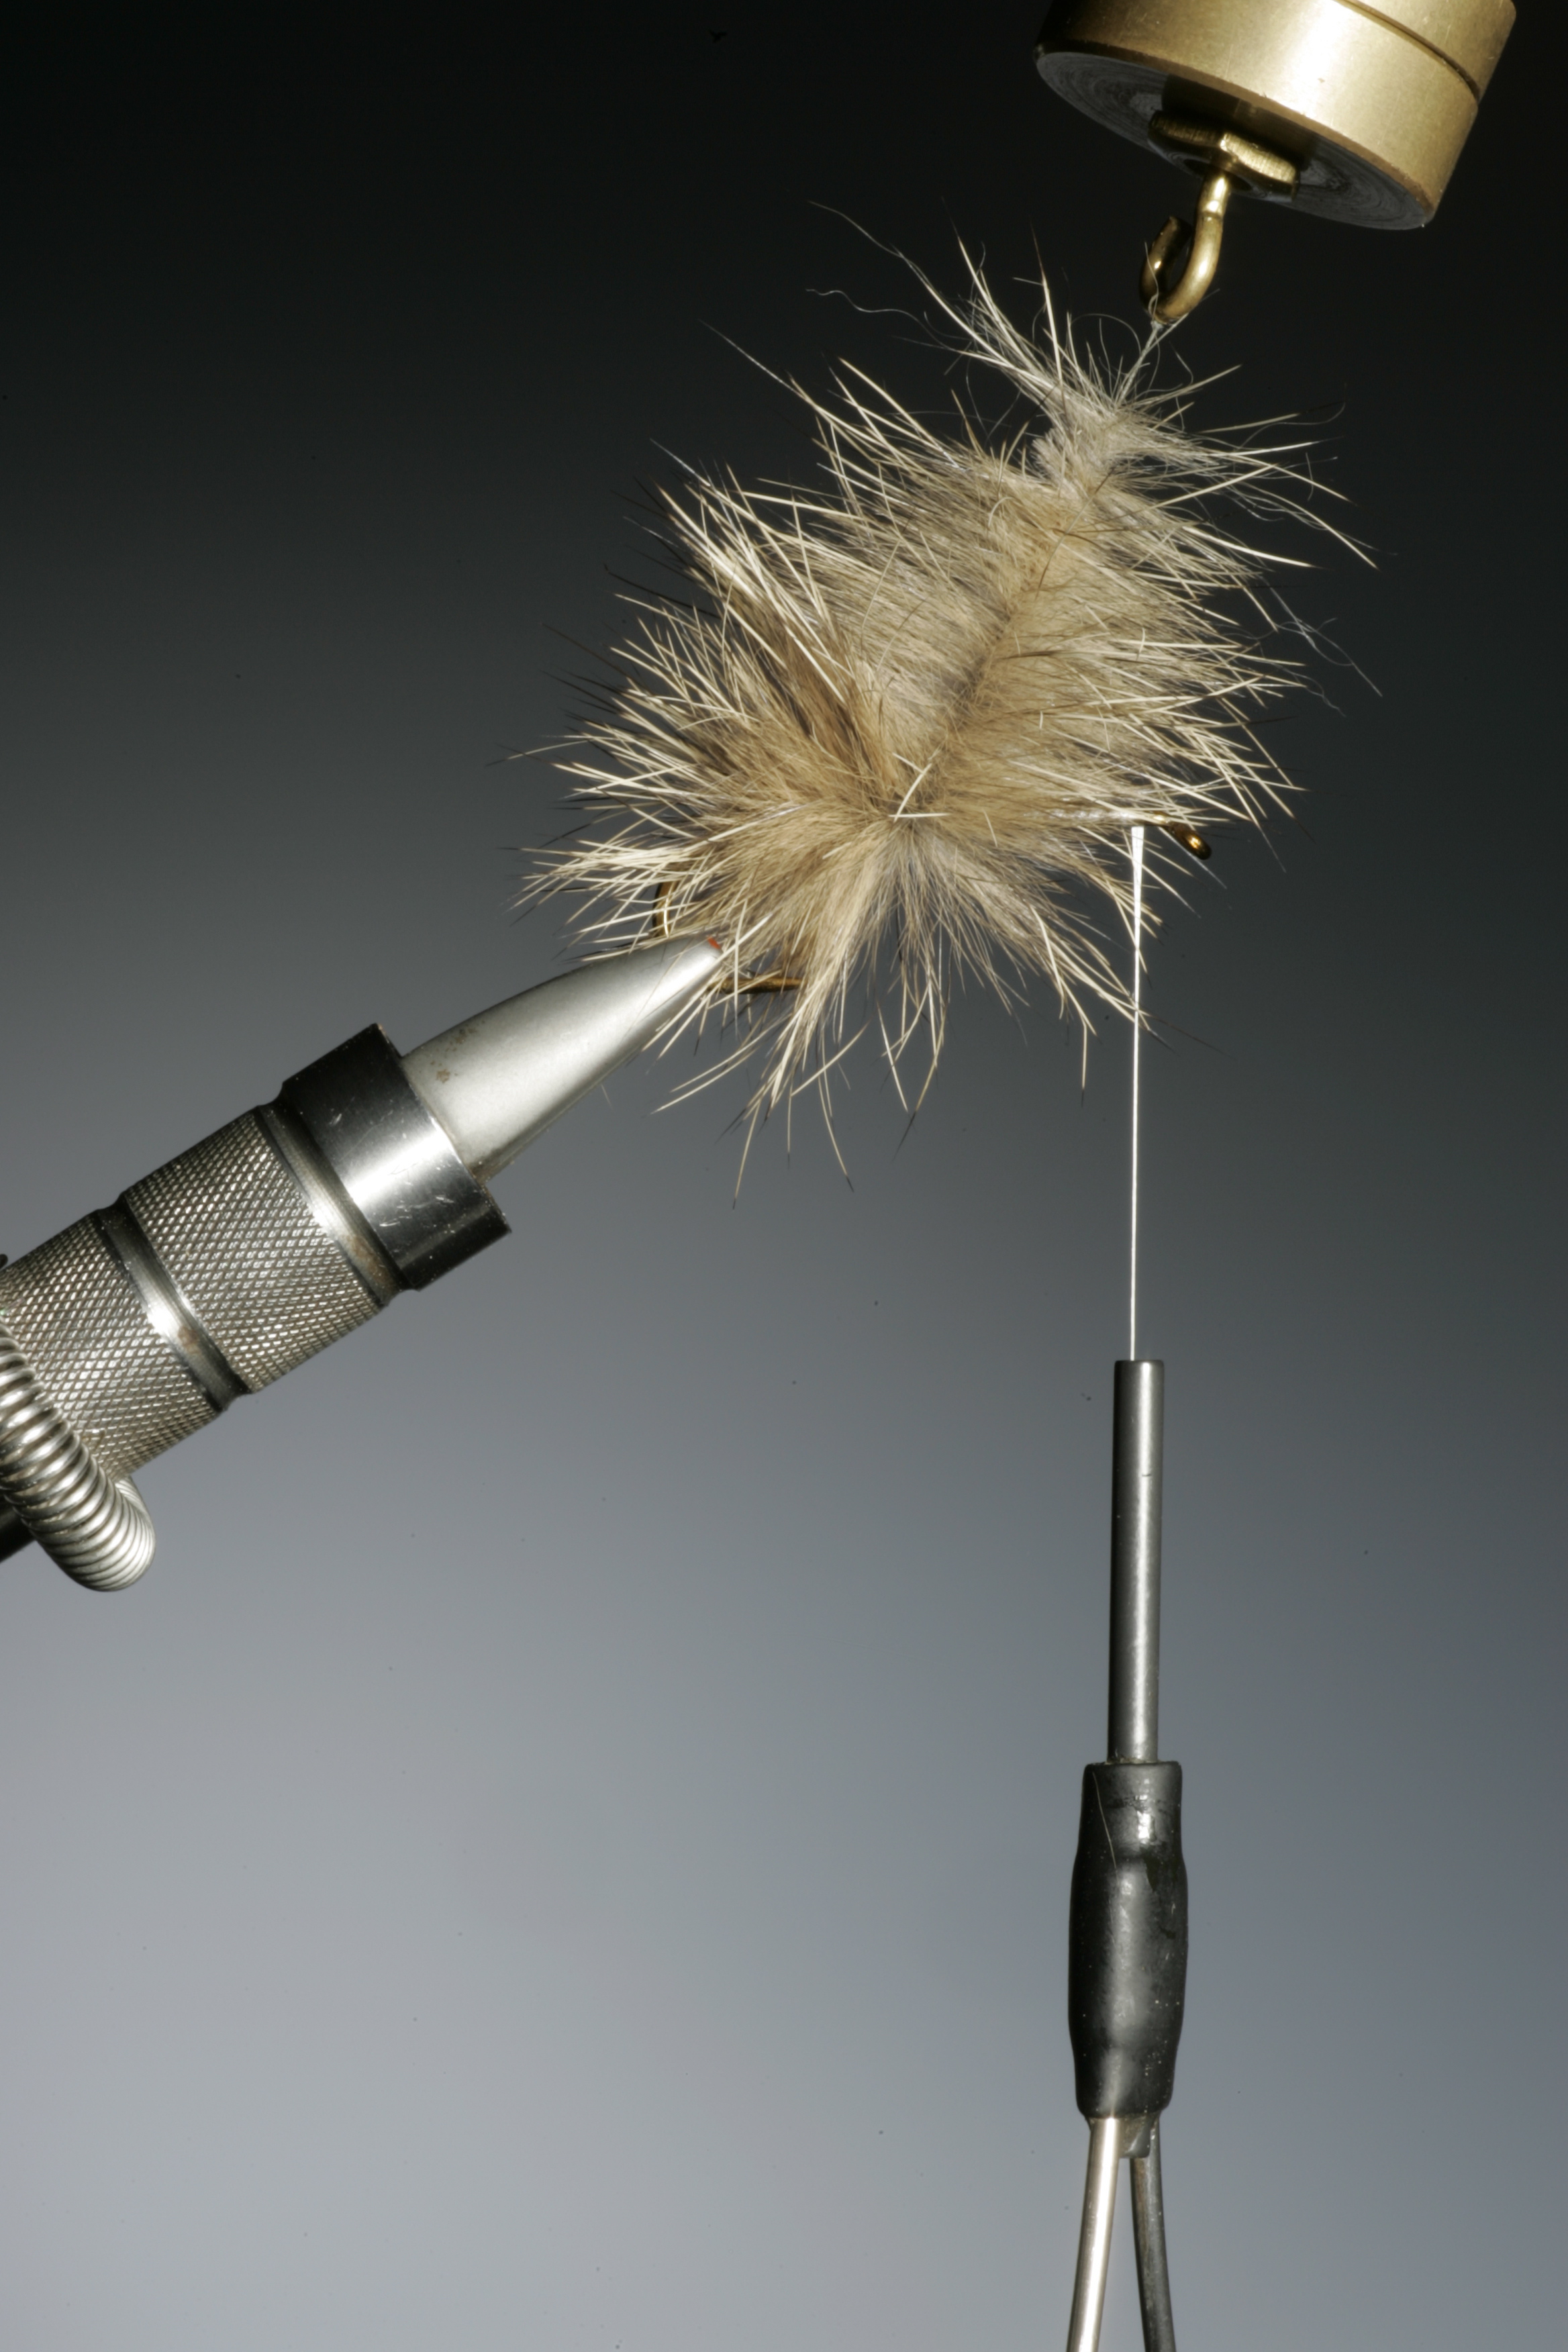
10. With this technique you can make as many turns of fur hackle as required. If you make only two turns you have a perfect fur hackle collar or you can cover the whole of the hook shank. If you would like a very spiky dubbed body for a nymph you can cover the whole hook shank and then trim it all down to the body shape you would like.
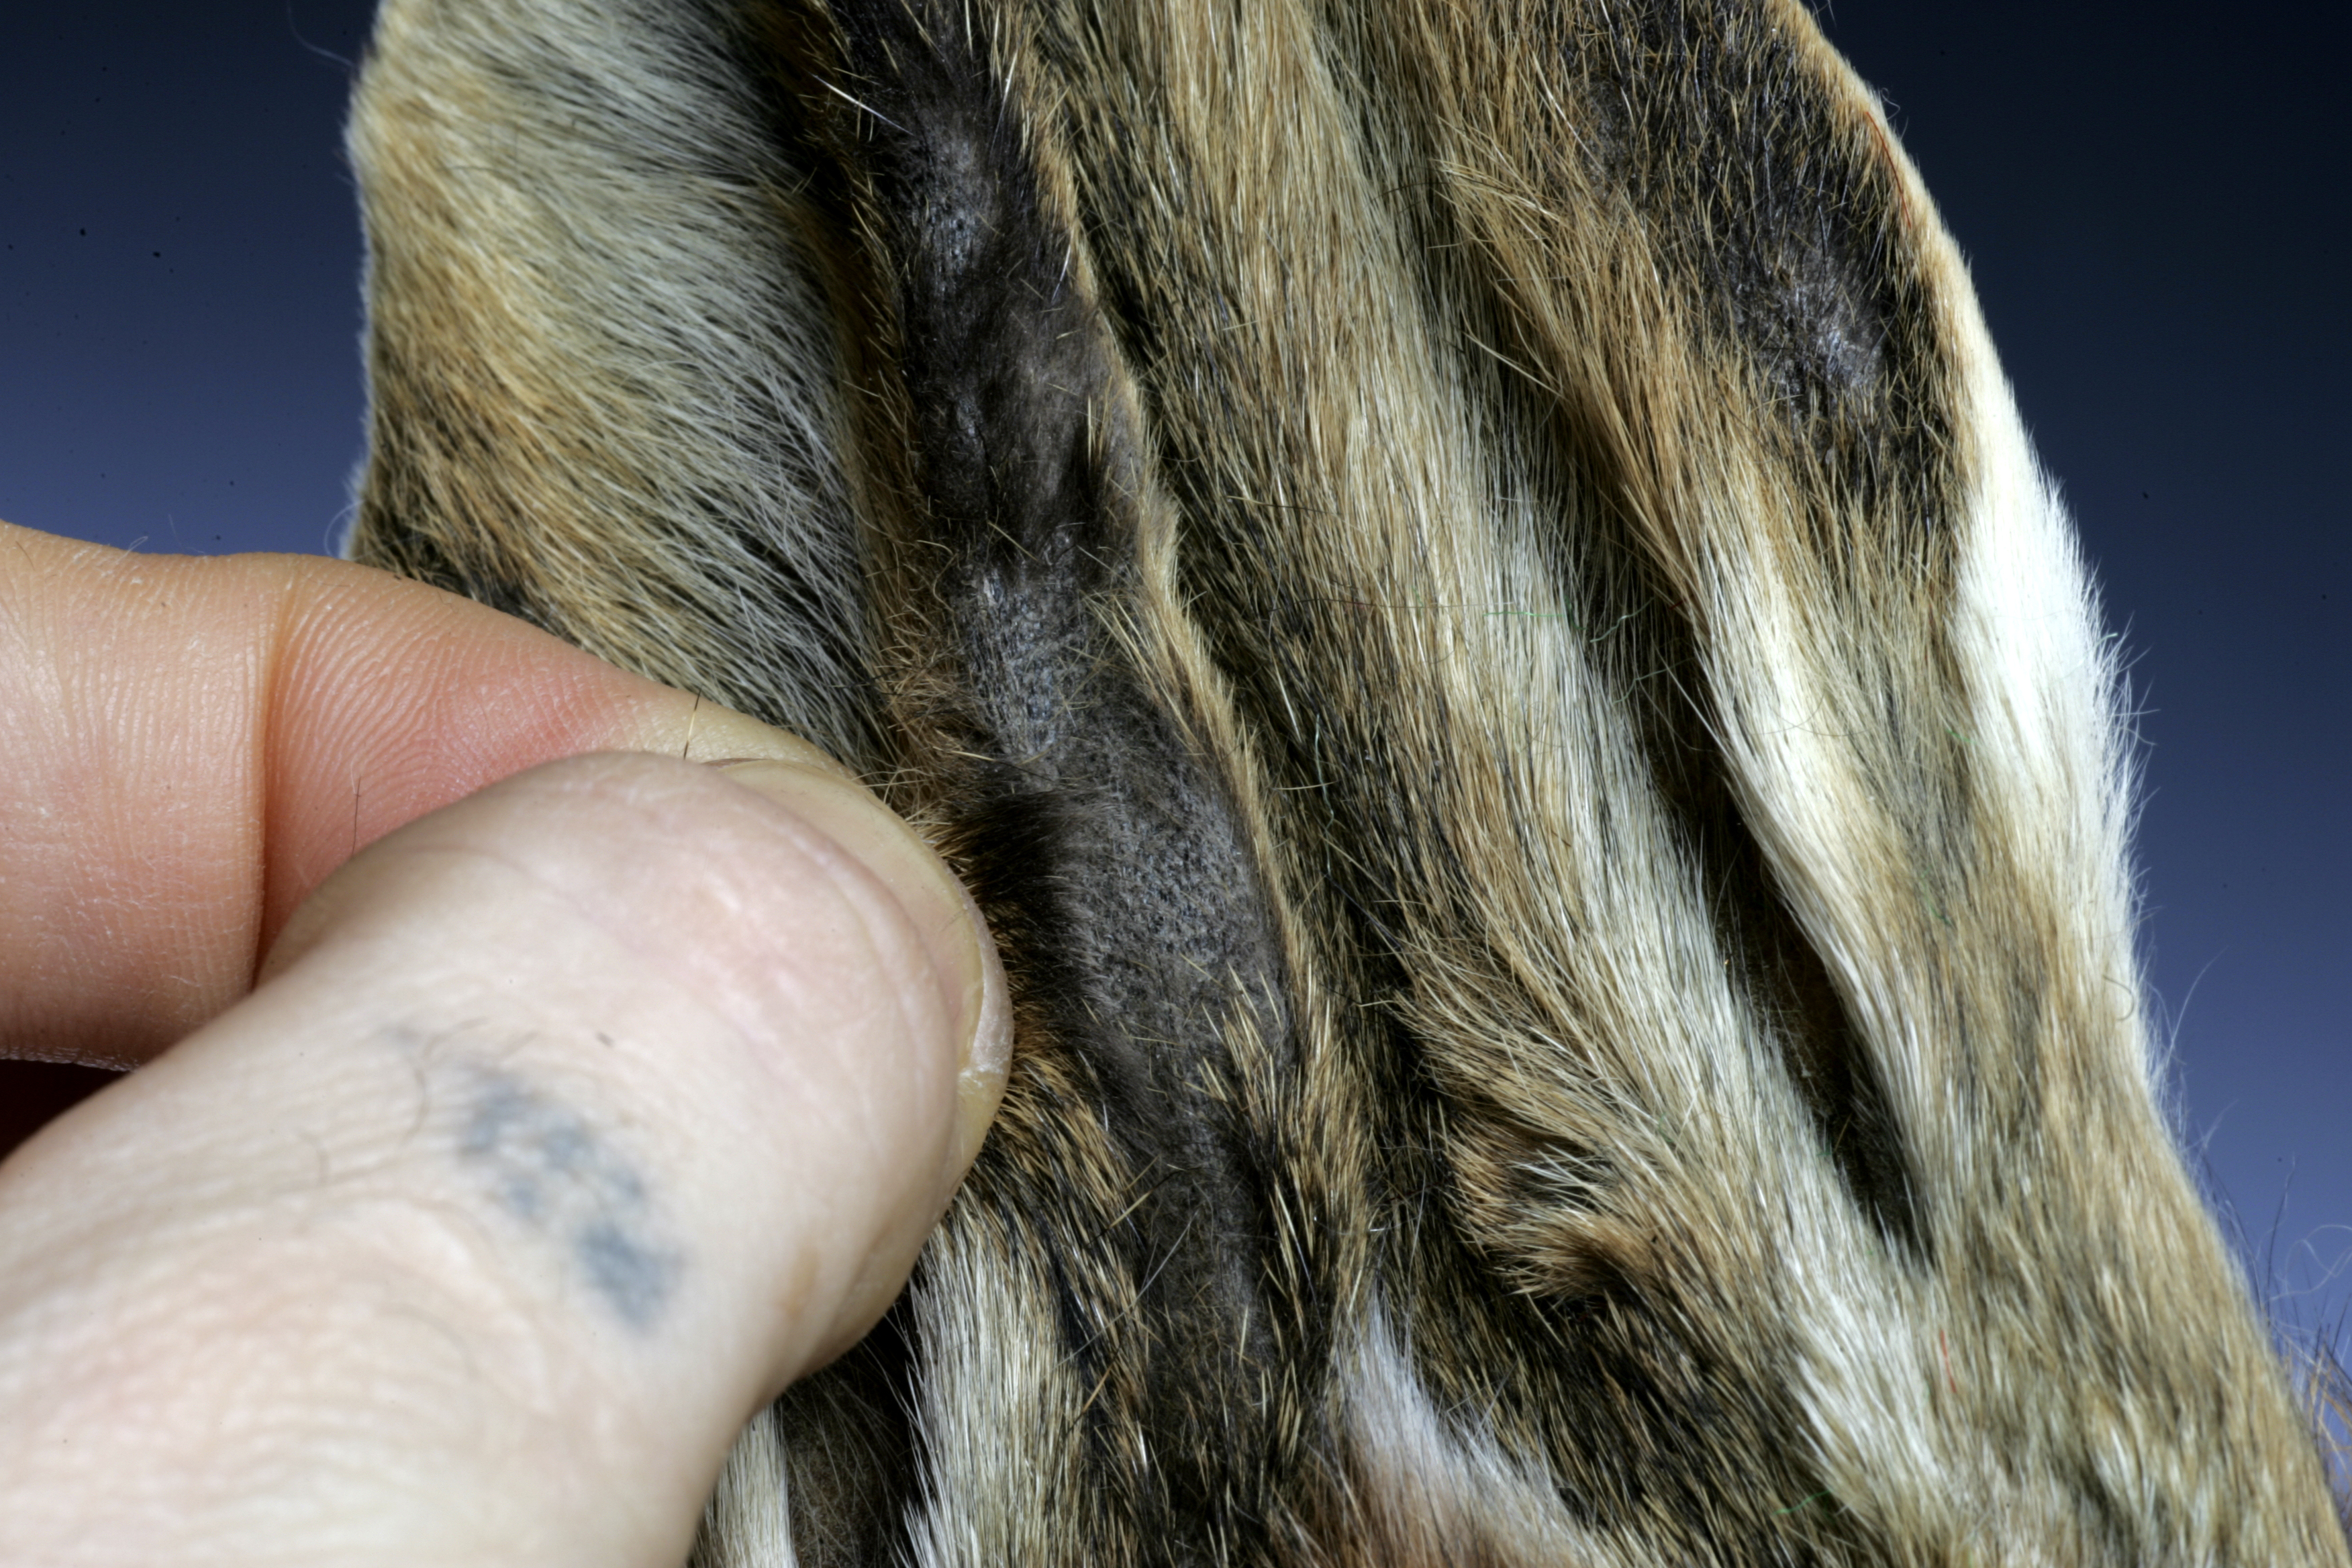
11. For a buggy nymph dubbing you would need a material that will sink and command a little more volume that a fine dry fly body. This is hares ear. Pull some stiff short fibers from the ears of the hare and some softer more dense hair and fur from the mask.
If you would like to use a fine material make use of a dubbing rake. When pulled through the fur on a skin, this will collect only the finer under fur. If you don’t have a dubbing rake you can also just pluck out the fibers with your fingers.
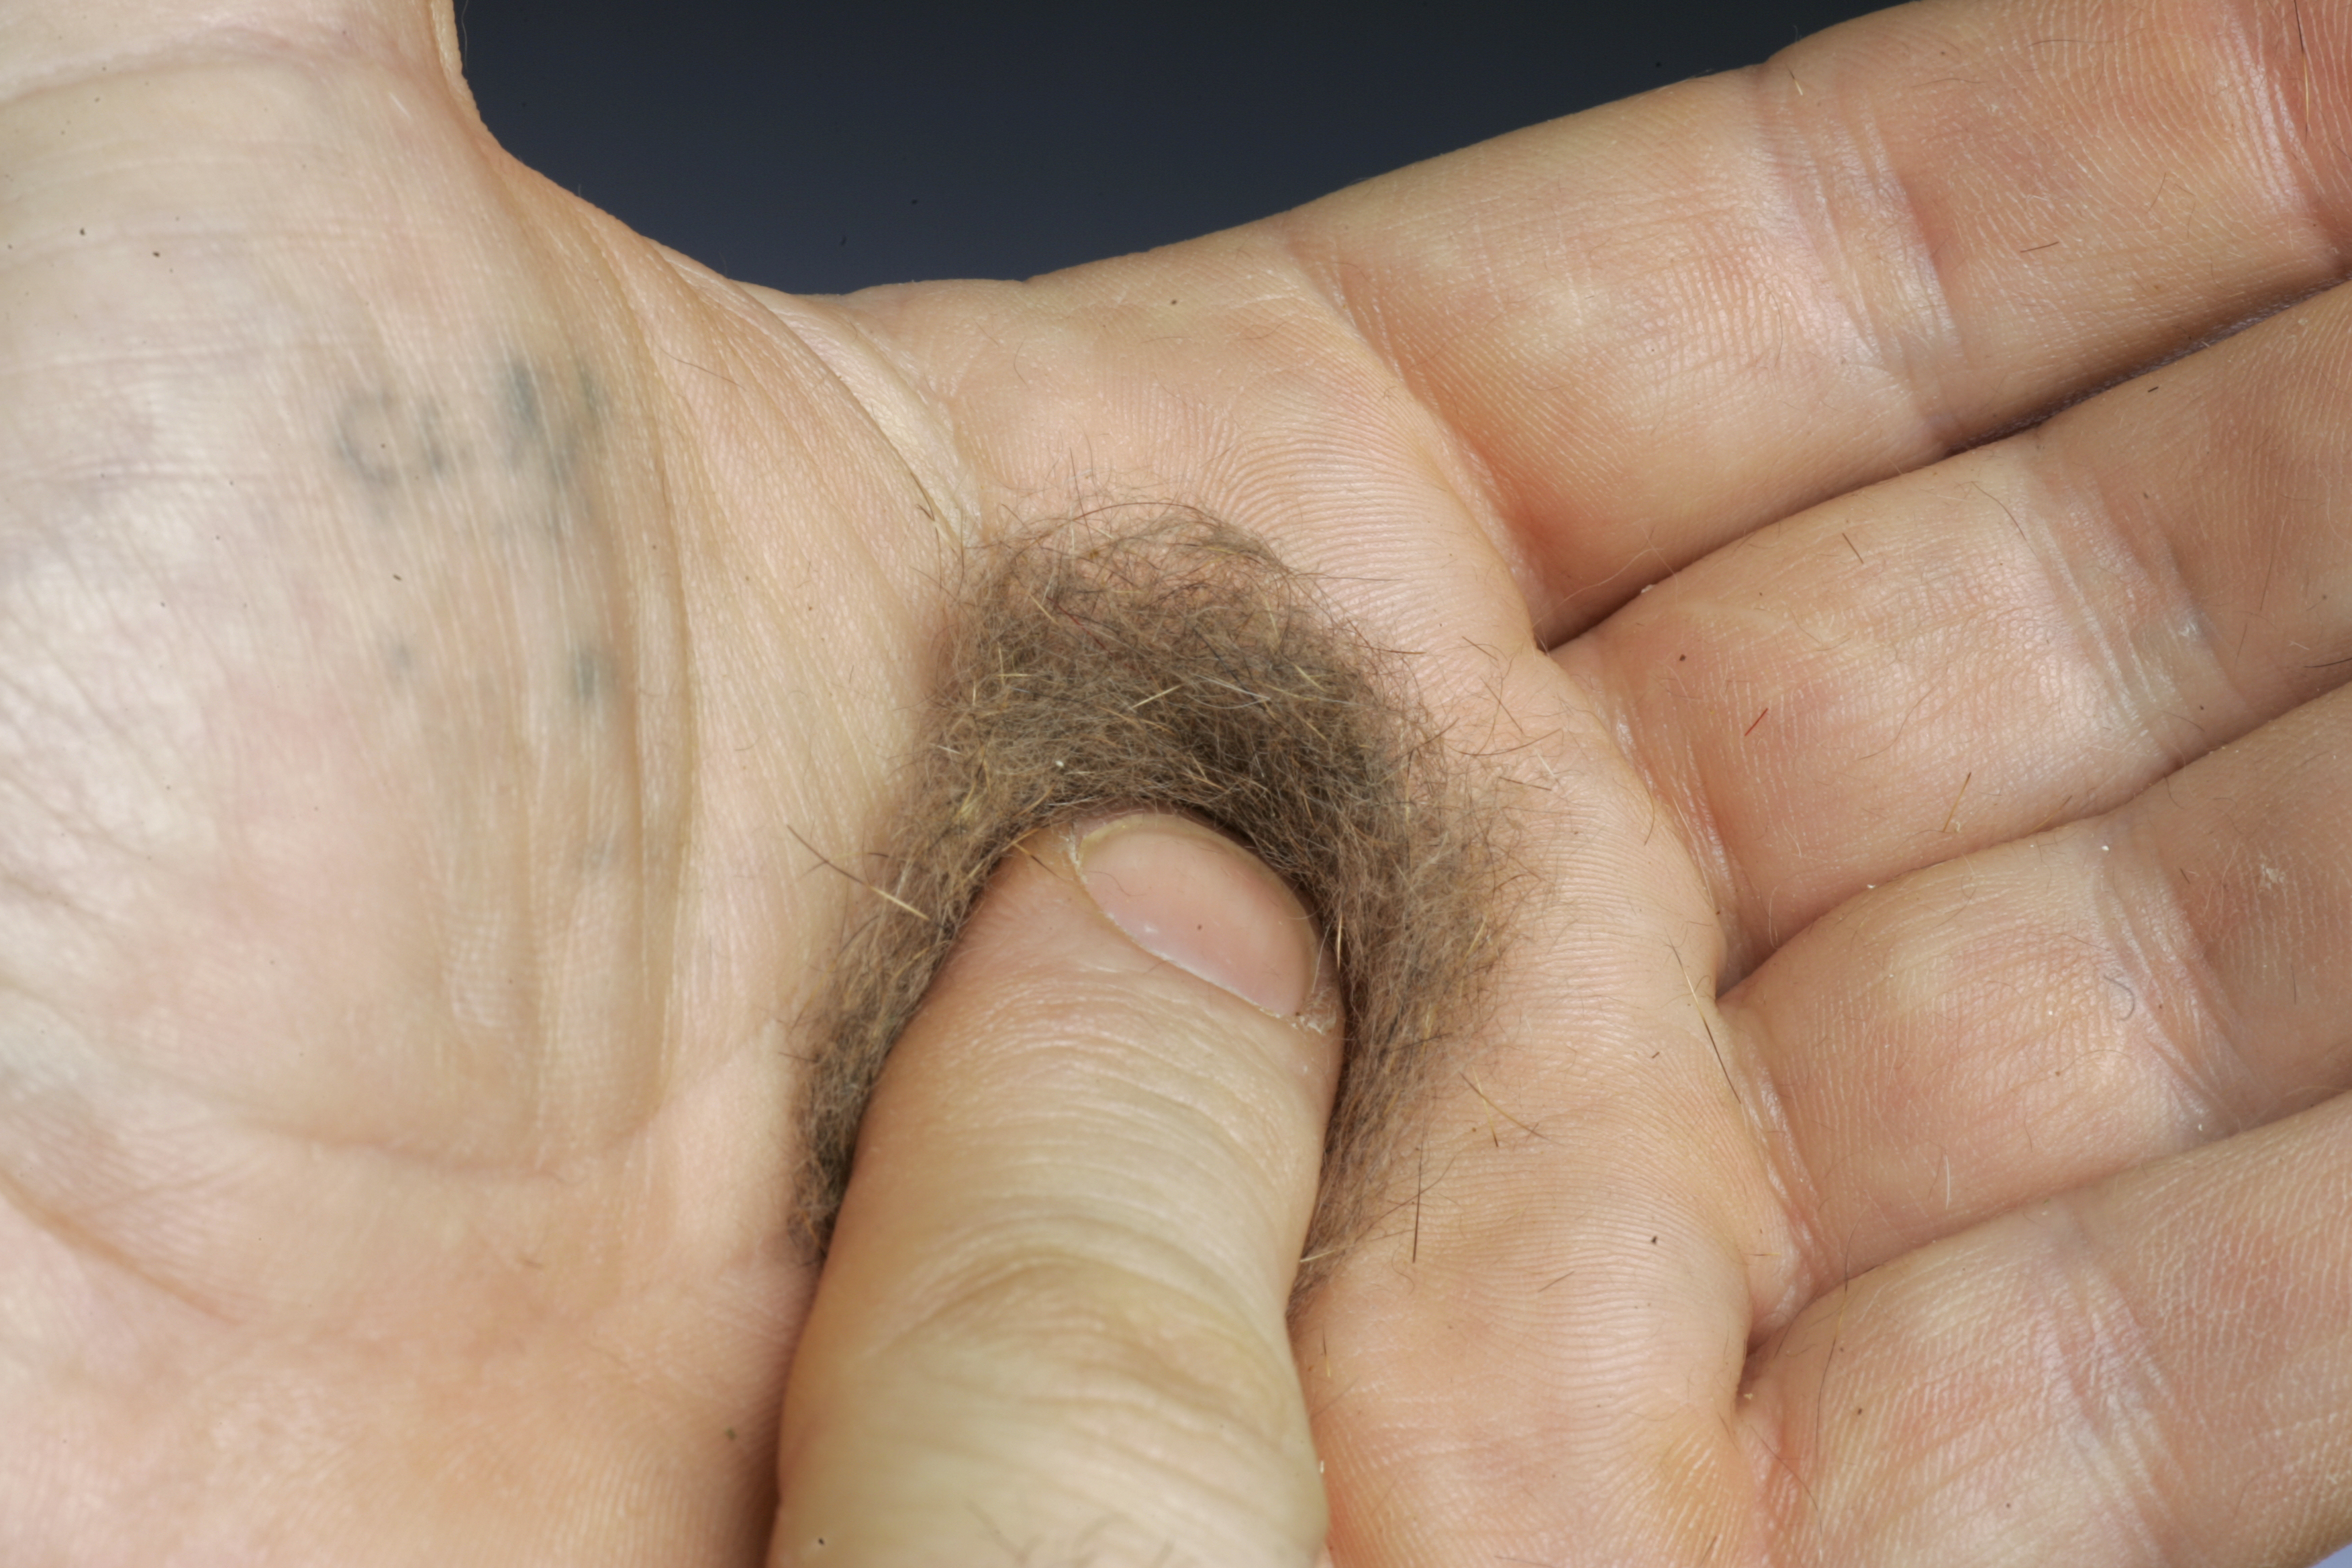
12. Now place the under fur in the palm of your hand and with the finger of your other hand rub the dubbing around in a clockwise motion. This will blend the dubbing evenly, making it easier to work with.
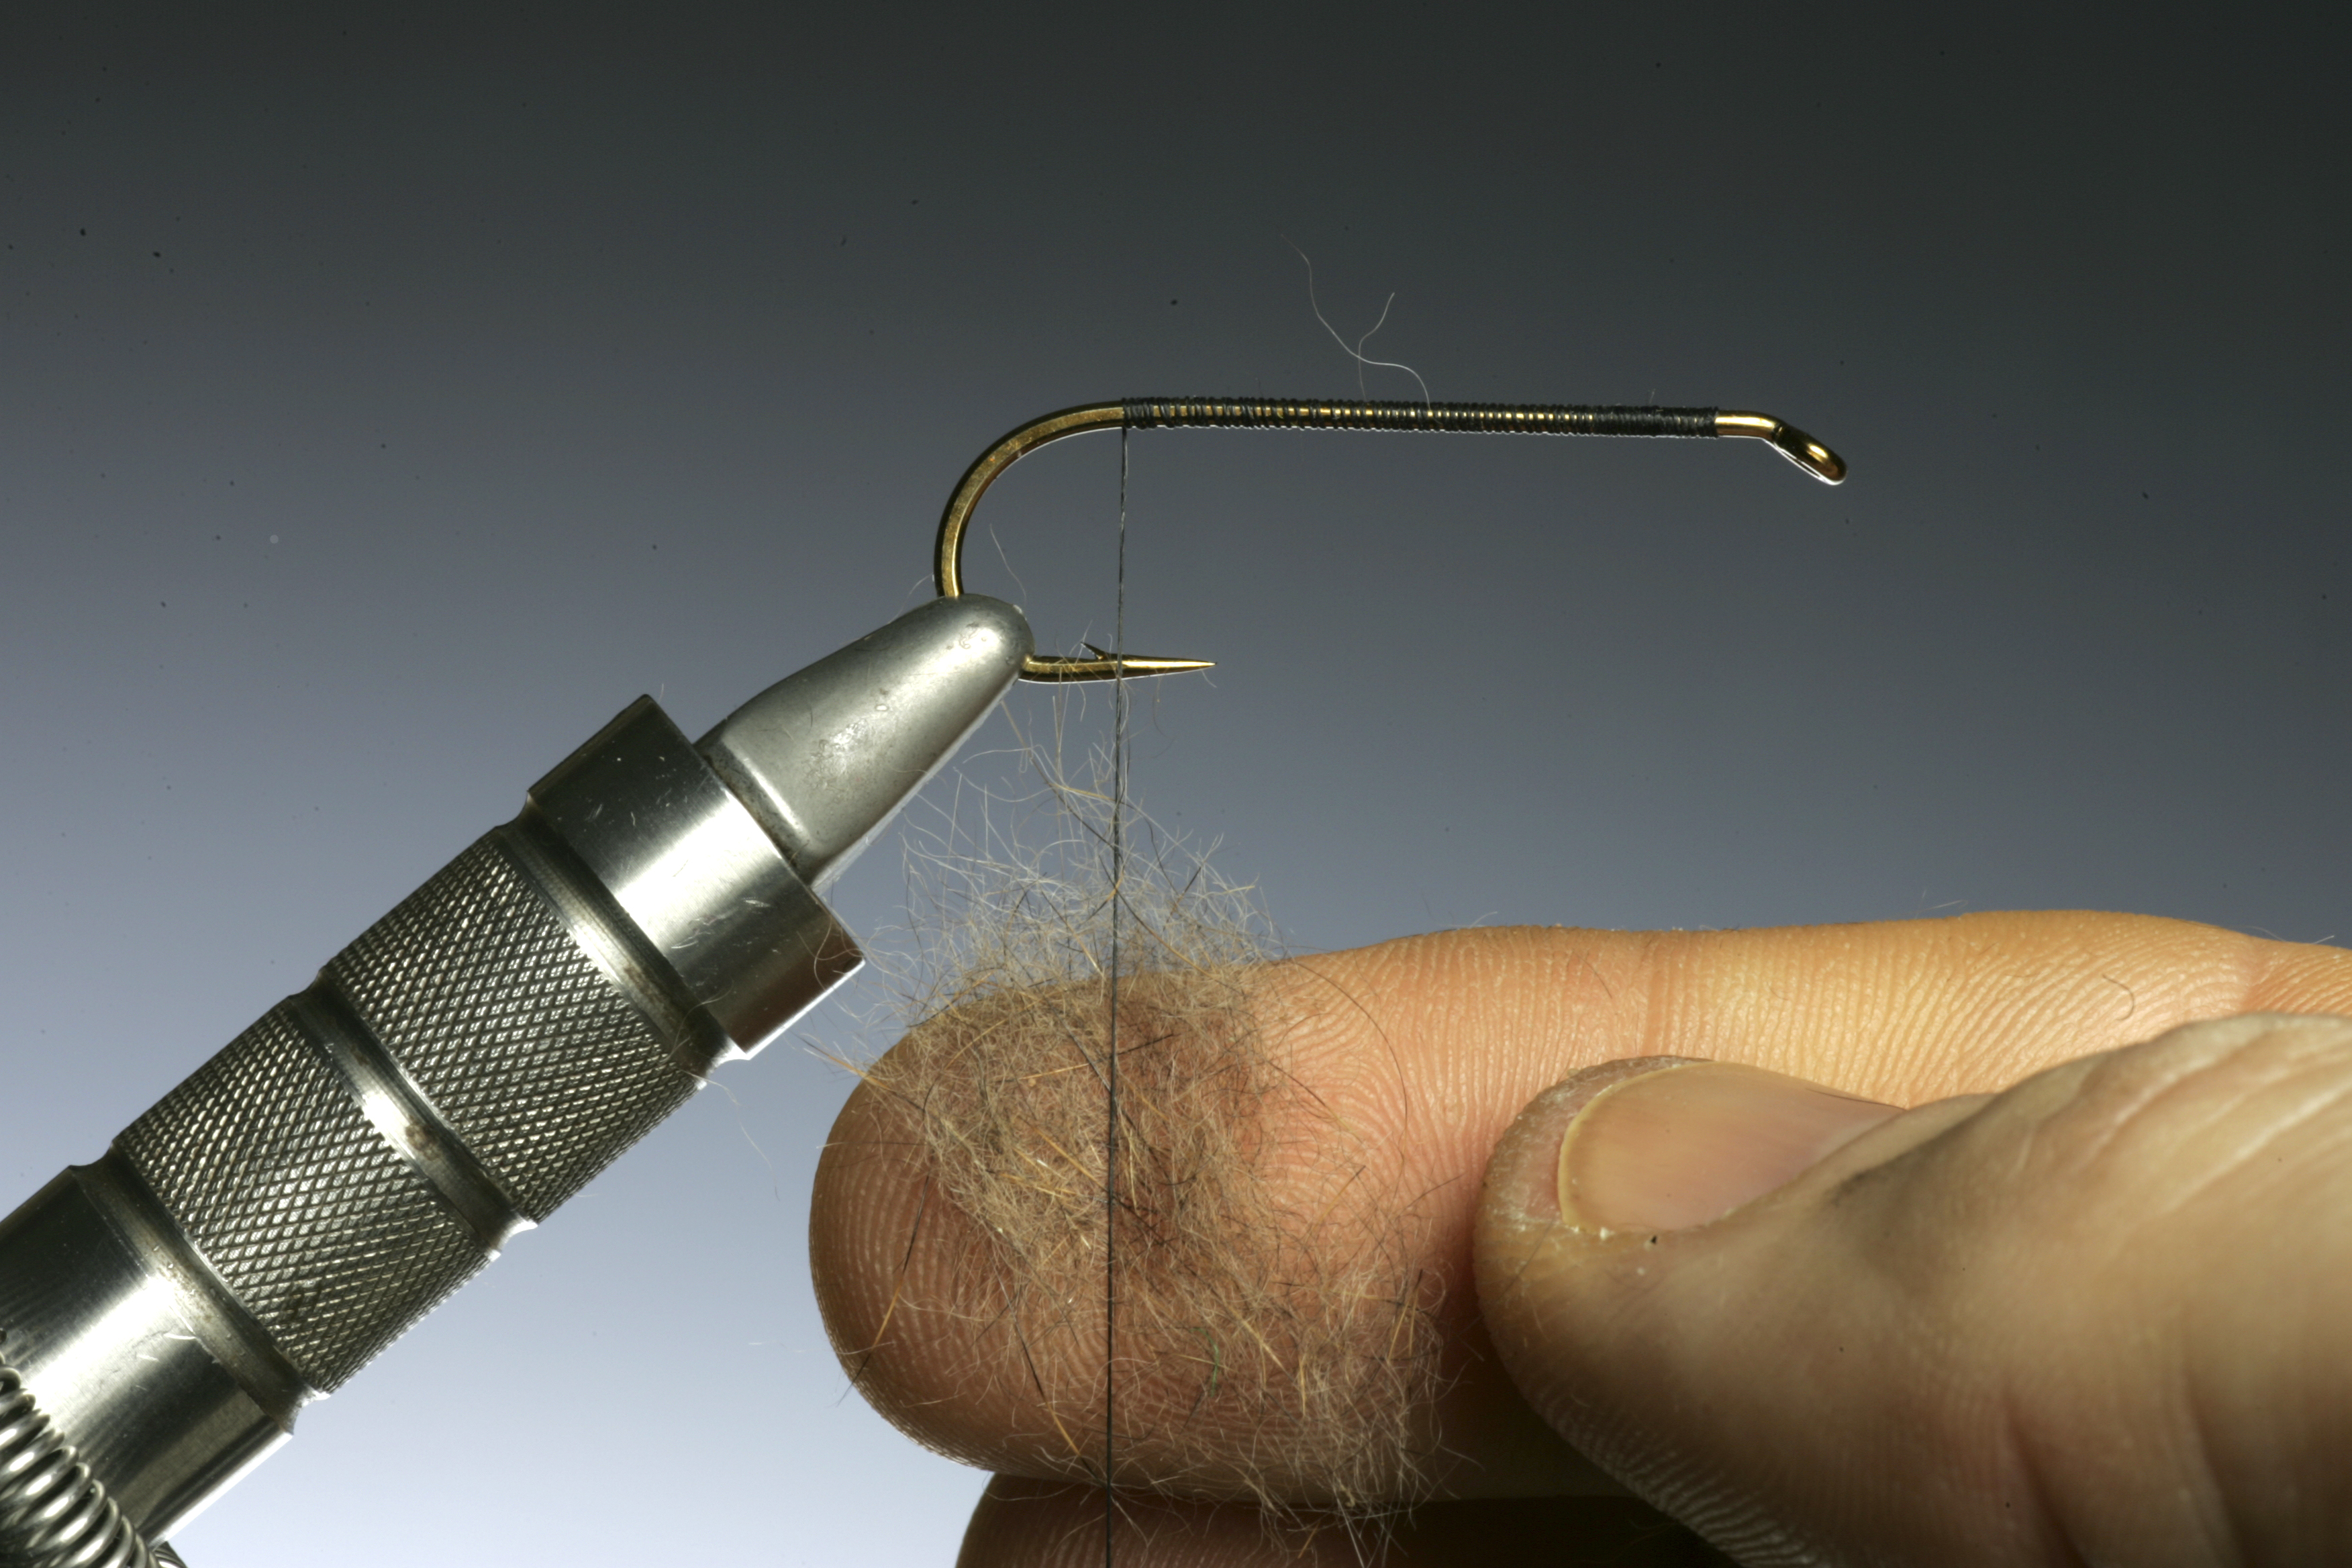
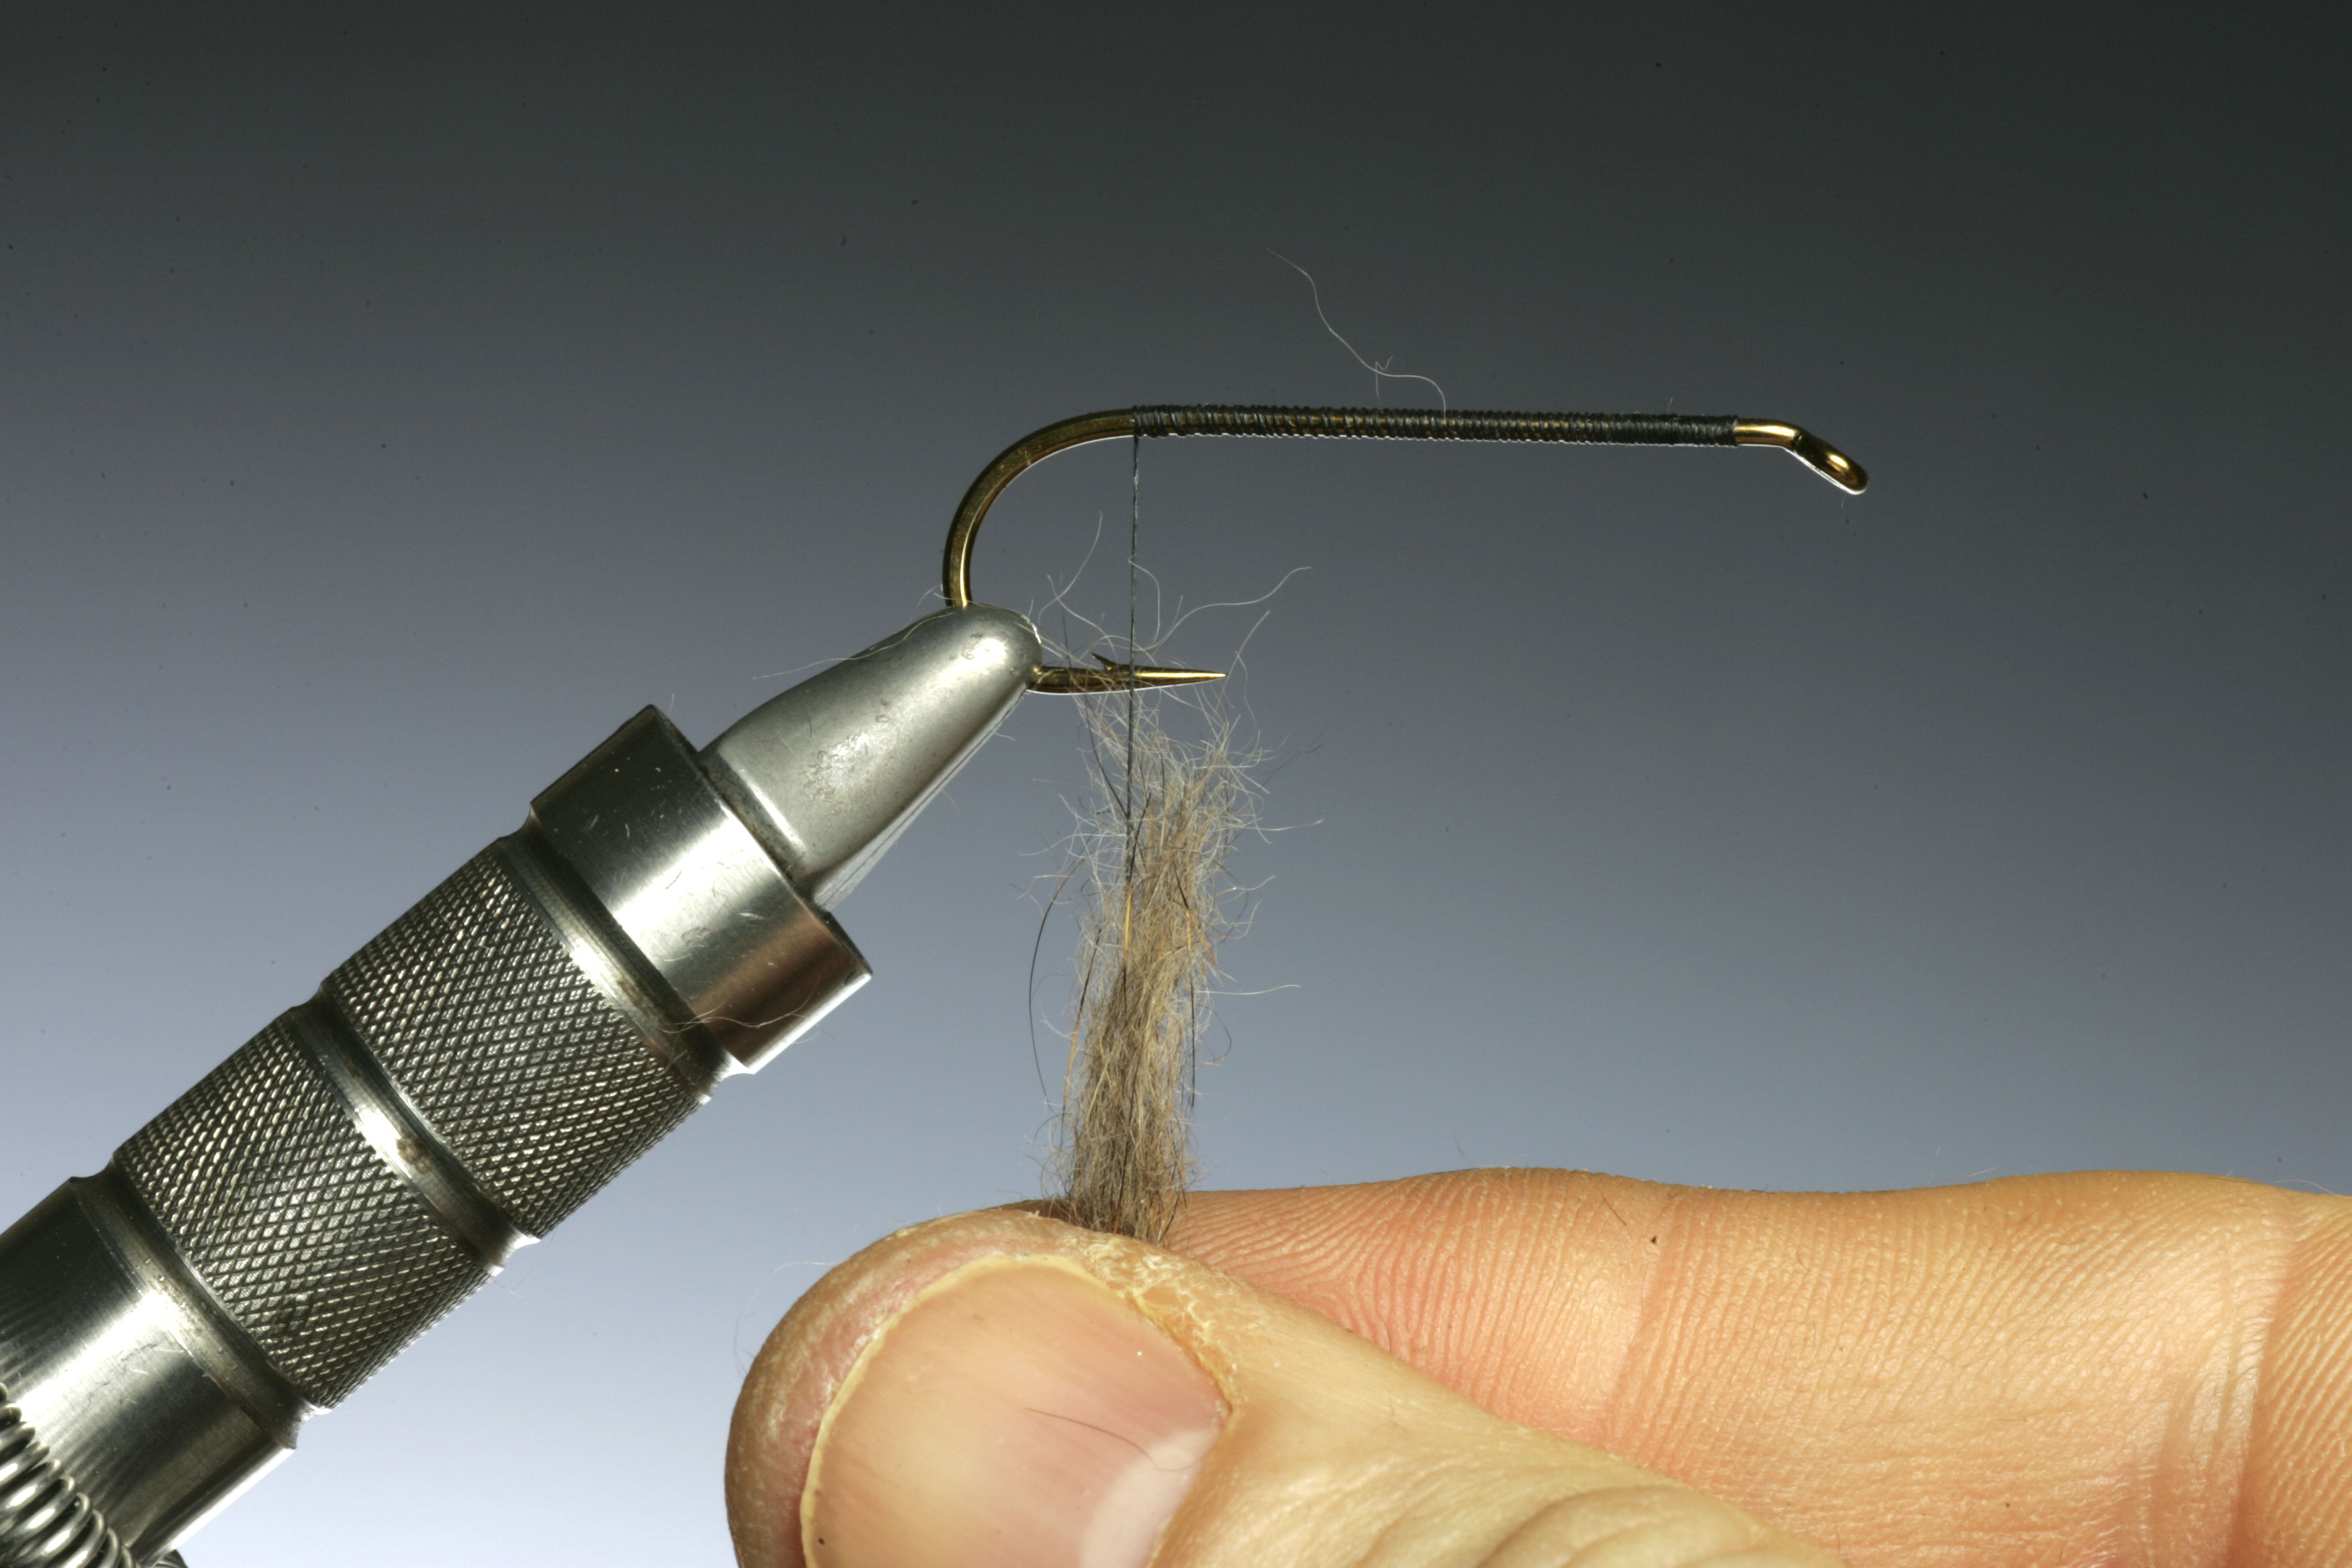
13. Select a small amount of dubbing and place it between your index finger and the tying thread as shown. When I am teaching people to tie flies one of the most frequently asked questions is – how much dubbing shall I use ? Most fly tyers apply way too much dubbing to the tying thread at one go, so I say, take what you think you should use, half it, and then half it again, and normally you arrive at a usable amount.
14. Now its time to roll the dubbing material onto the tying thread. With the fly tying thread and dubbing resting on your index finger place the tip of your thumb on top of this so as to trap the material and the thread between your finger and thumb.
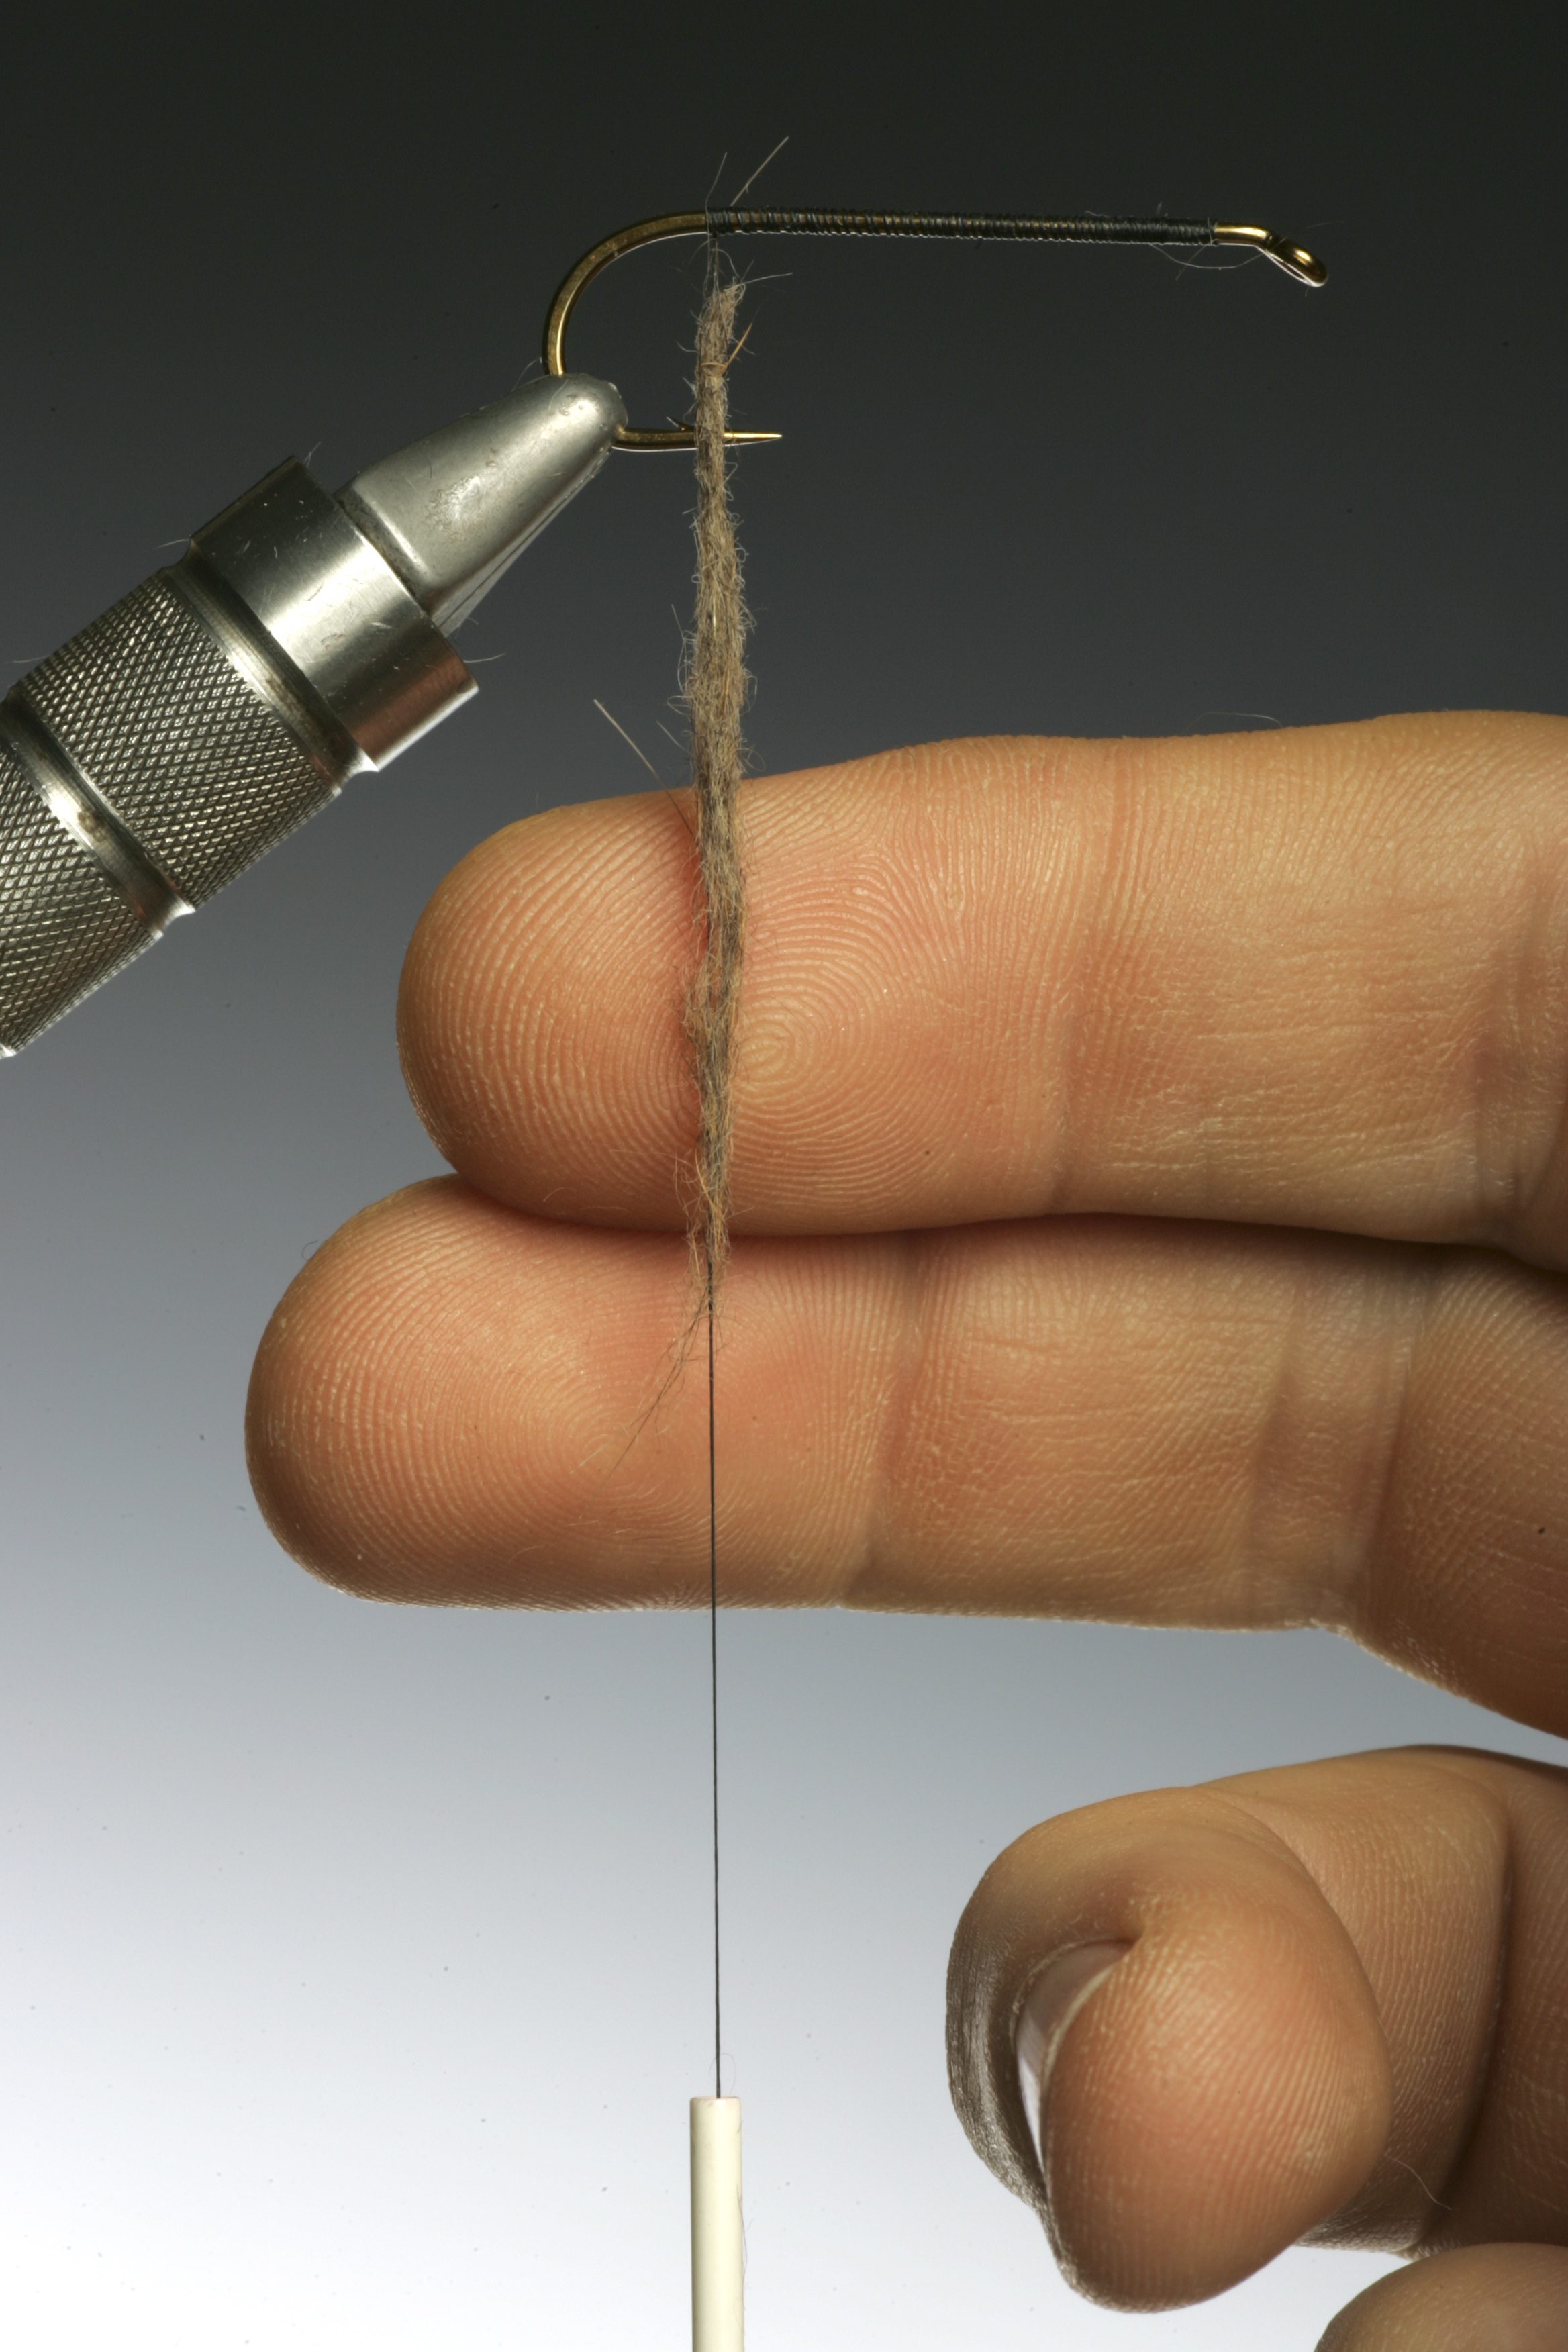
Still trapping the thread and material between your finger and thumb push the tip of your thumb towards the tip of your finger, clockwise, thus rolling the material around the thread. You must do this several times up and down the thread to attach the material, forming a kind of dubbing rope. You should also remember one of the most common mistakes with attaching dubbing is that the fly tyer will roll the dubbing firstly clockwise and then anti clockwise when replacing the thumb back into the beginning of the rolling stage, this unwinds the dubbing. Also don’t try and make more than a few cms of dubbing rope at one time, this will also unwind as you wind it onto the hook shank.
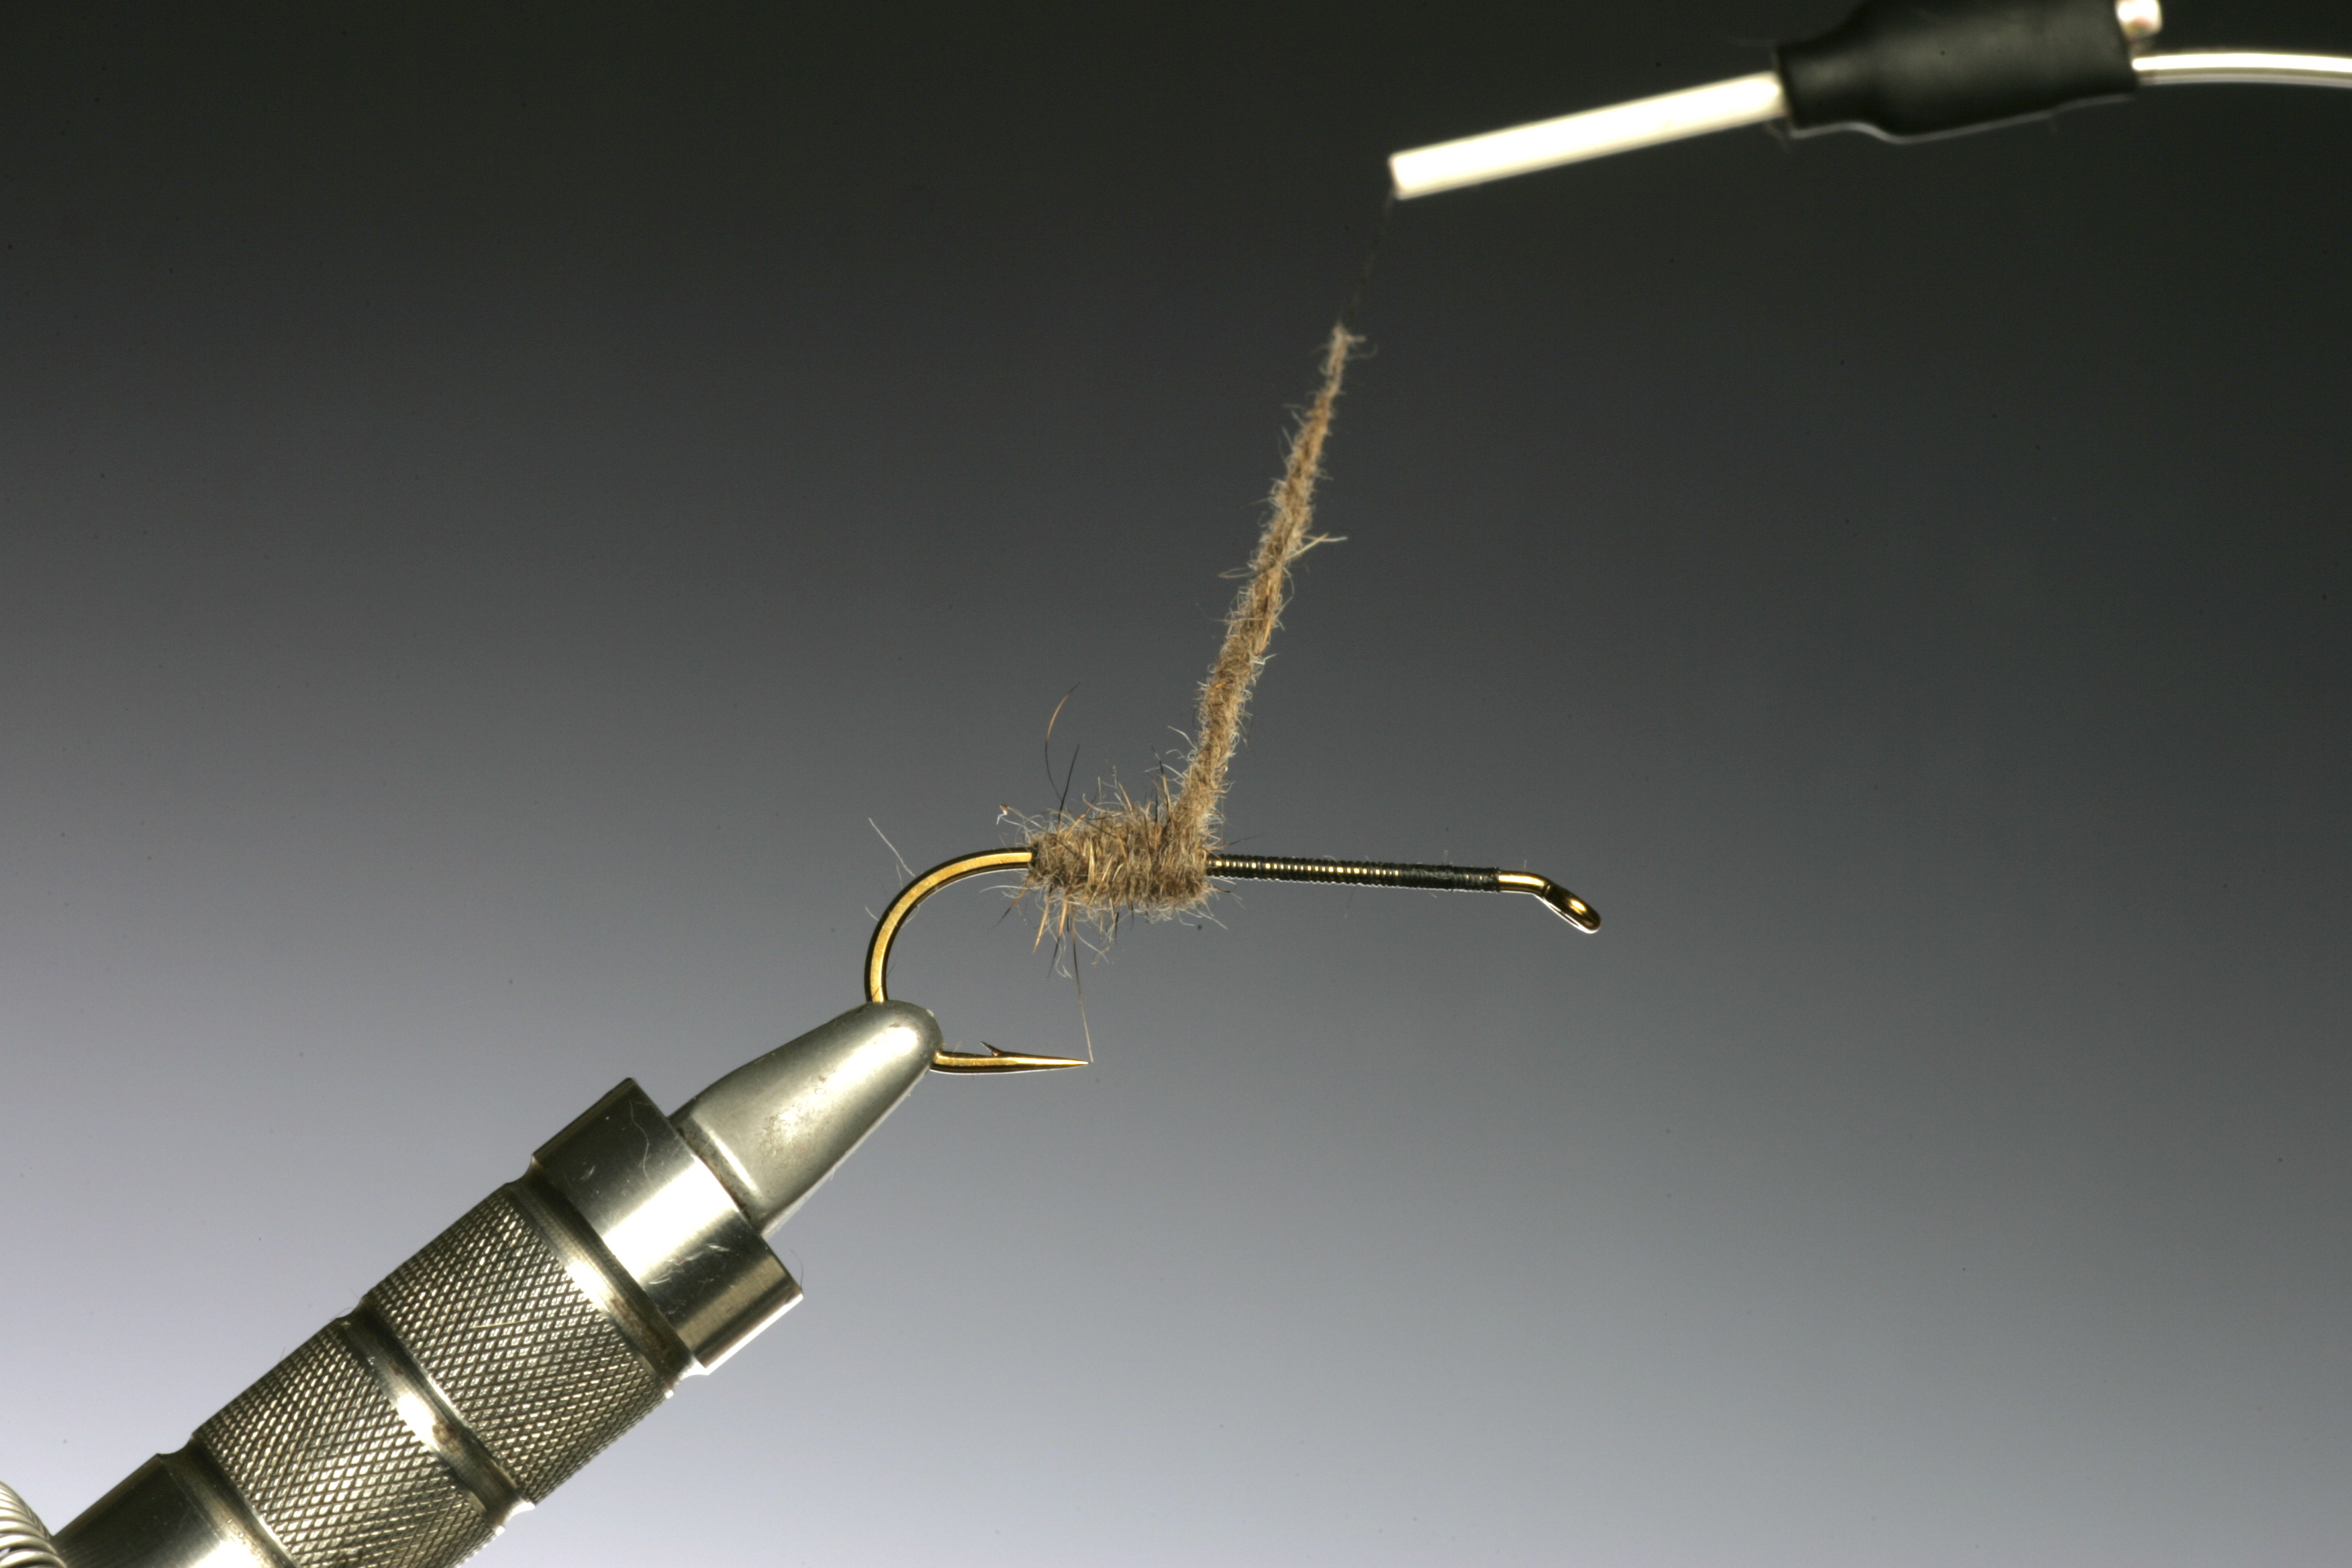
15. Once your dubbing rope is ready you can now begin to wind it onto the hook shank to form the body. When you have wound on the first length of dubbing, repeat the process until the desired size of body is achieved. If you would like to taper the body, as in most nymphs begin with a thin dubbing rope, and the apply more dubbing each time making a thicker rope.
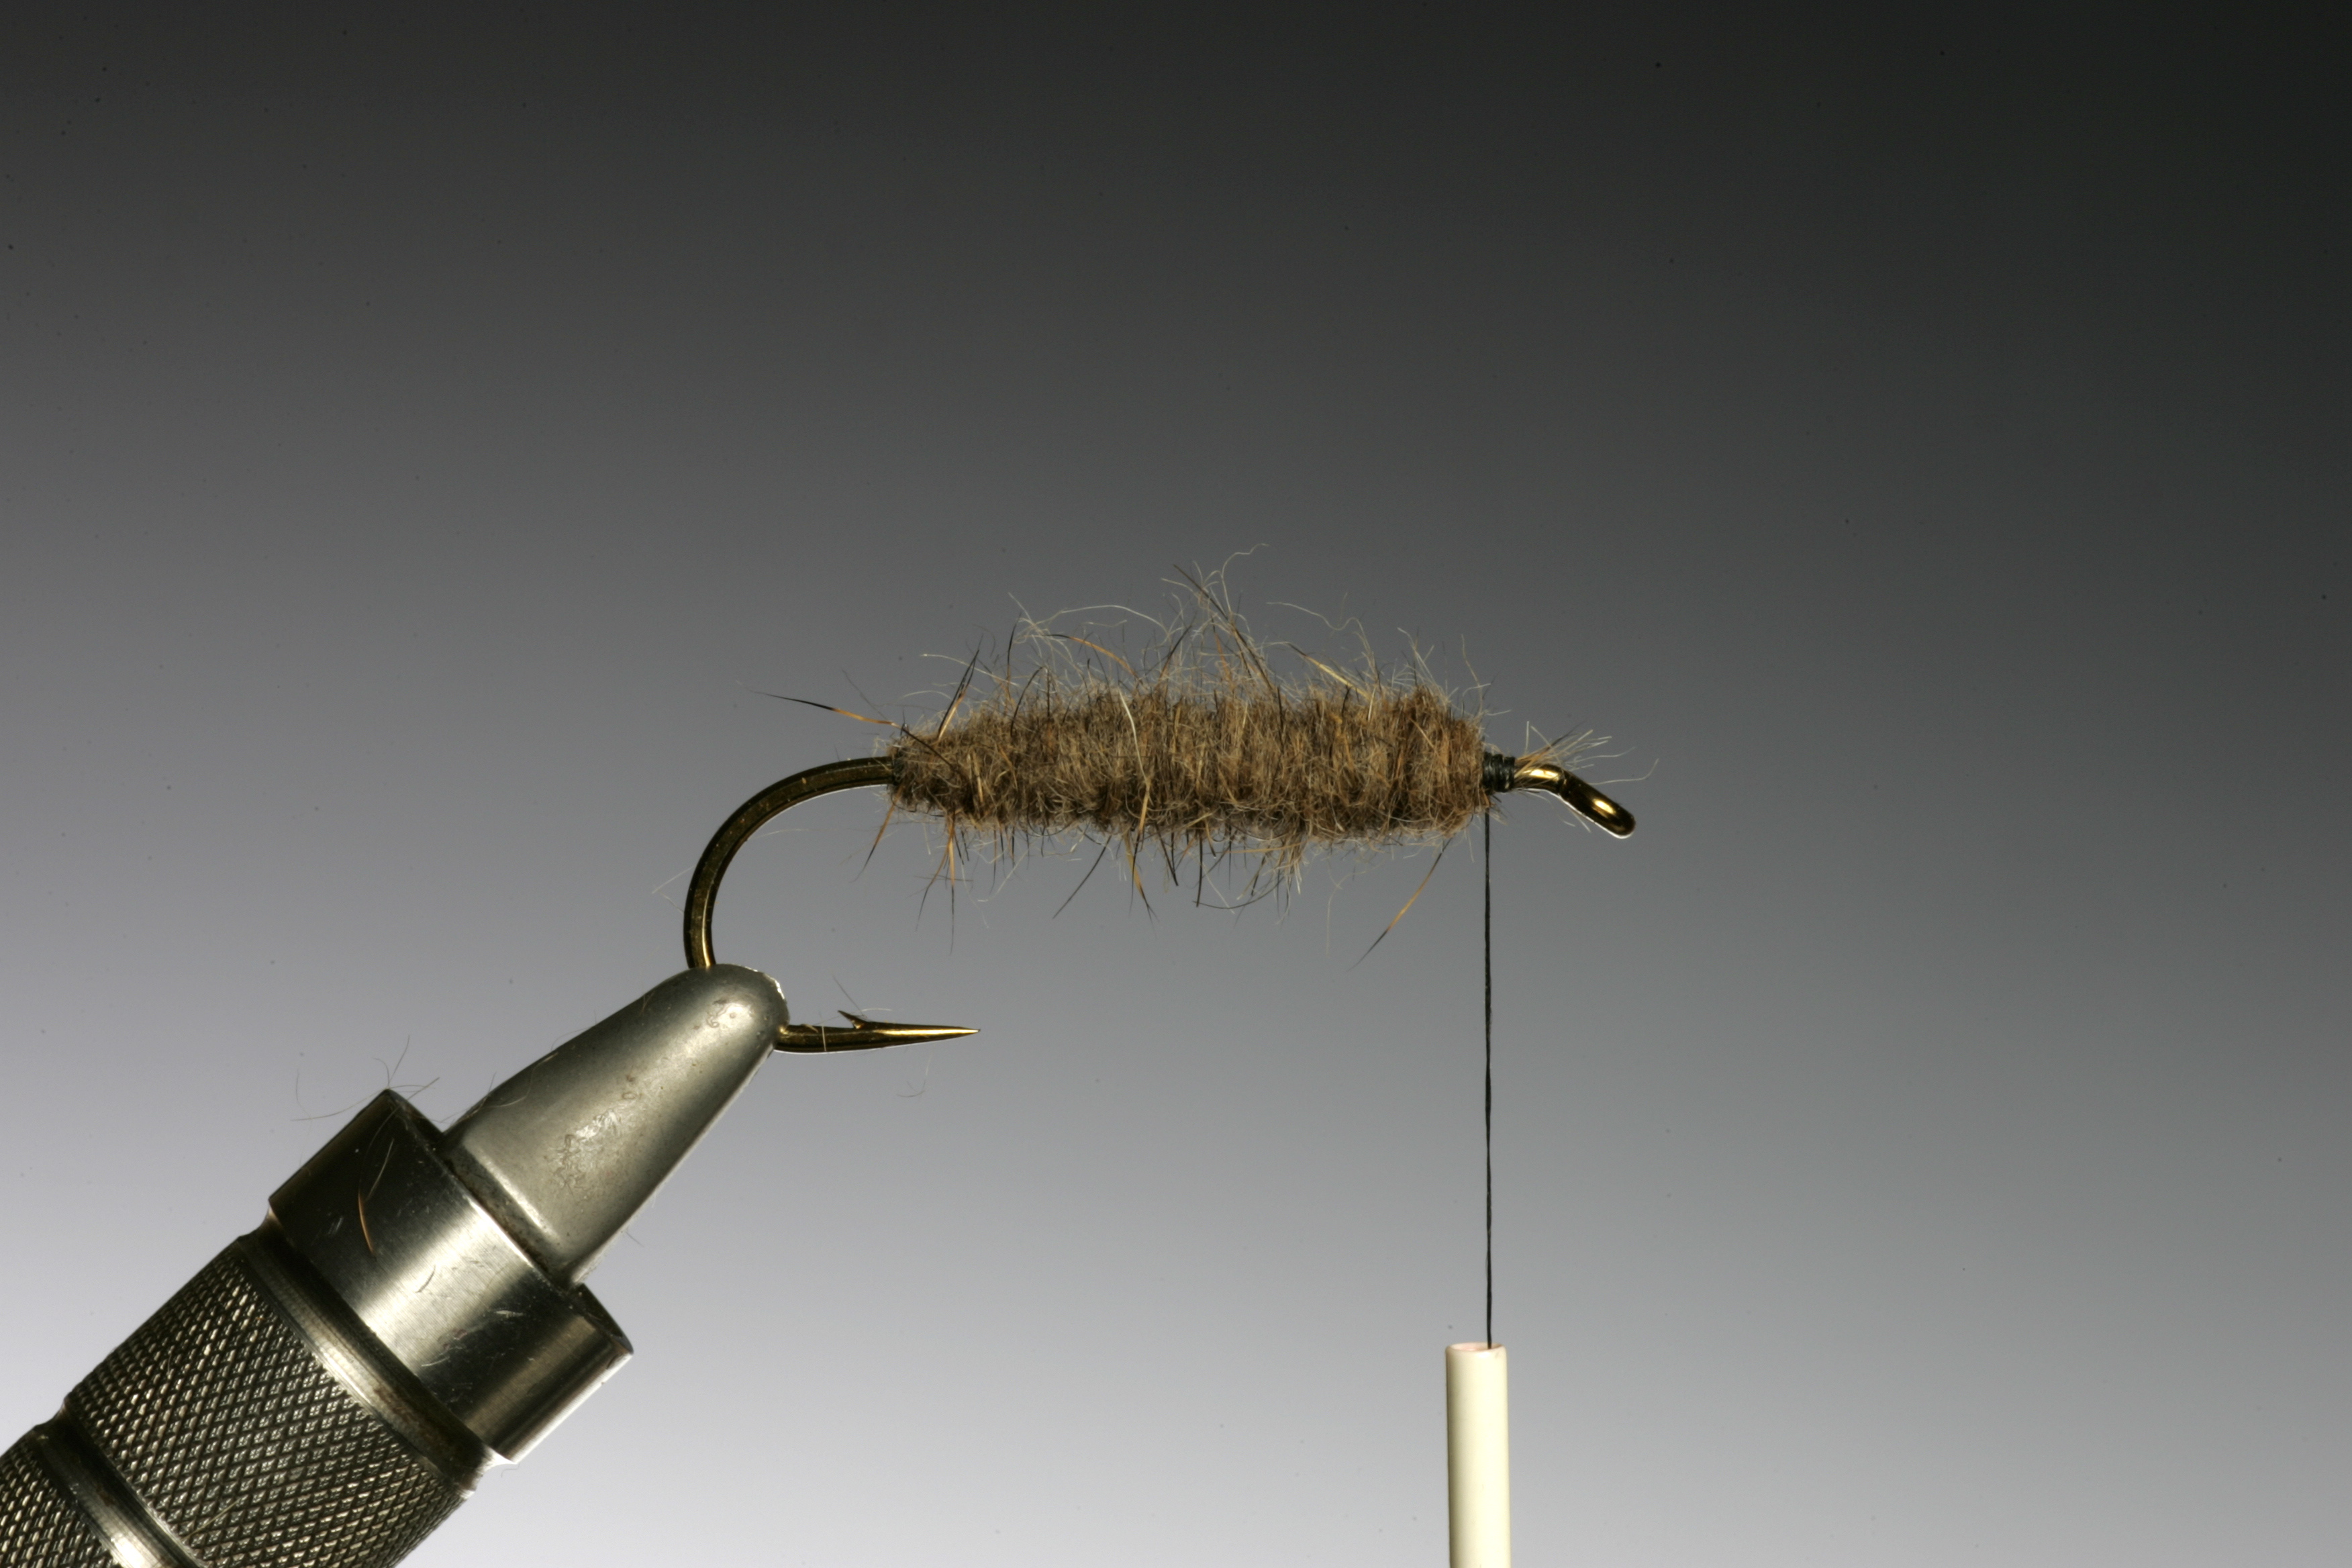
16. Once the nymph body is finished tie off behind the hook eye.

17. If you would like an even more buggy effect use a brush ( I use an old tooth brush ) to pull out the fibers to make a buggy body.
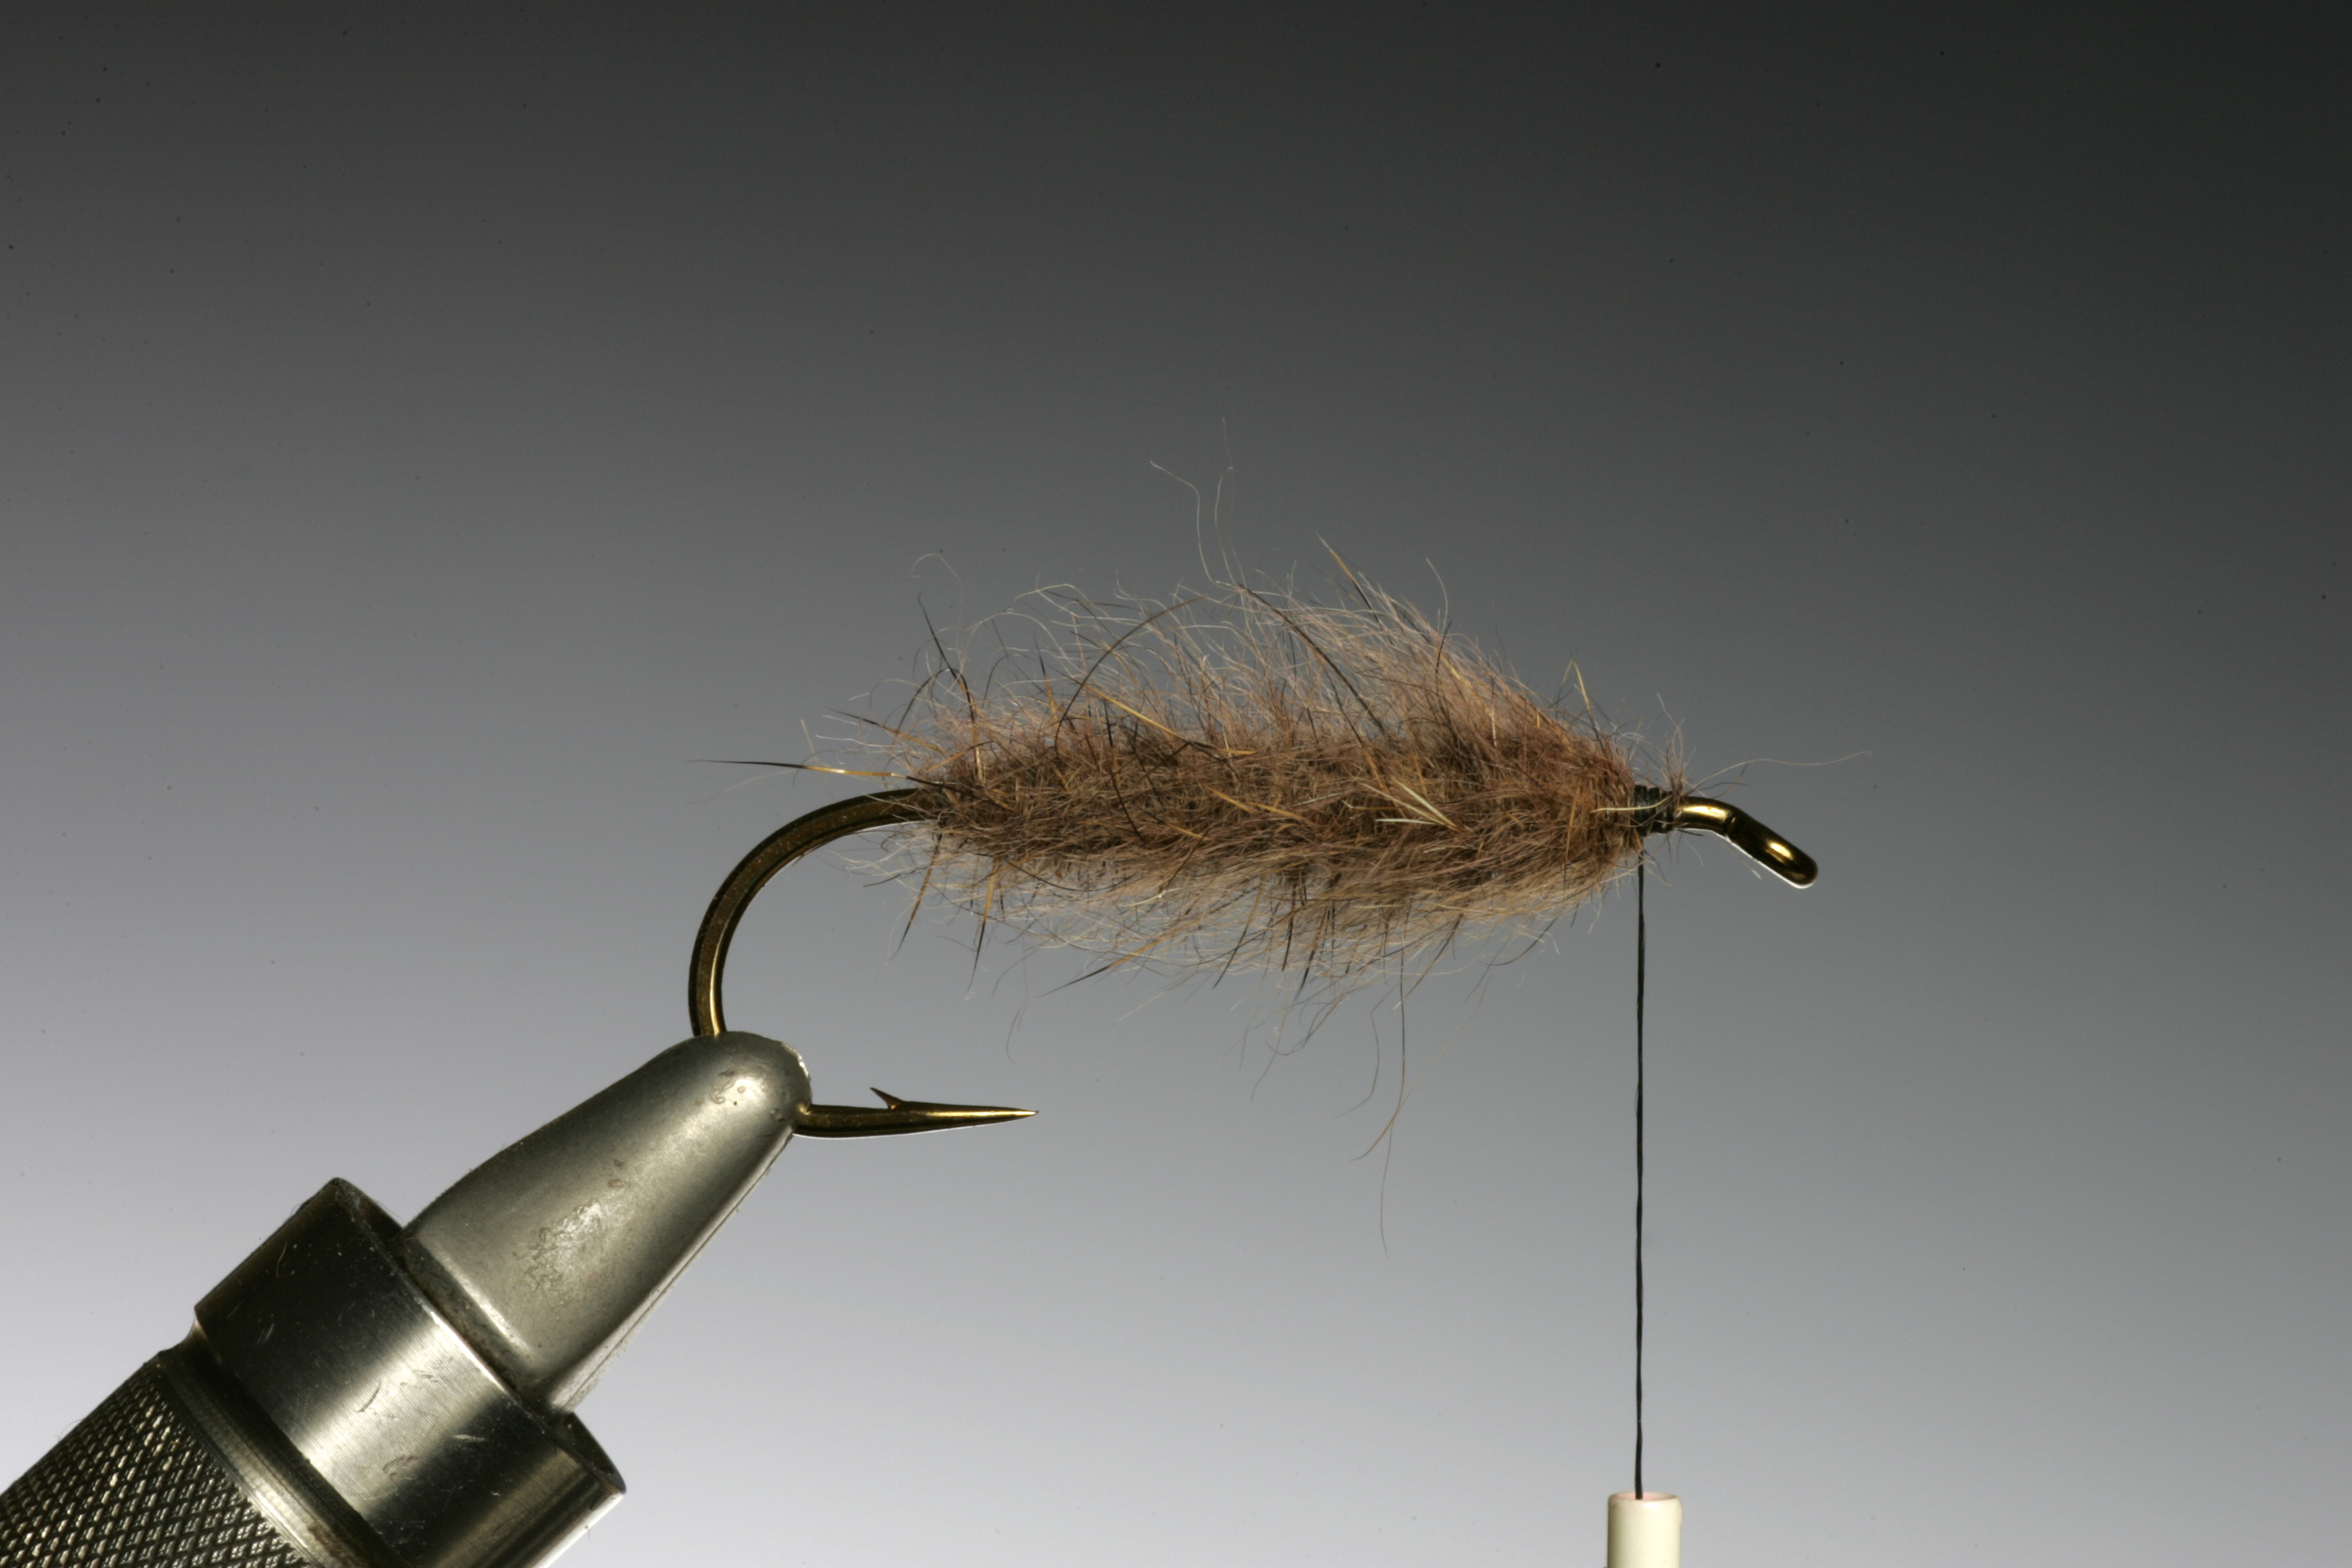
18. The brushing gives a soft and mobile, yet spiky nymph body.
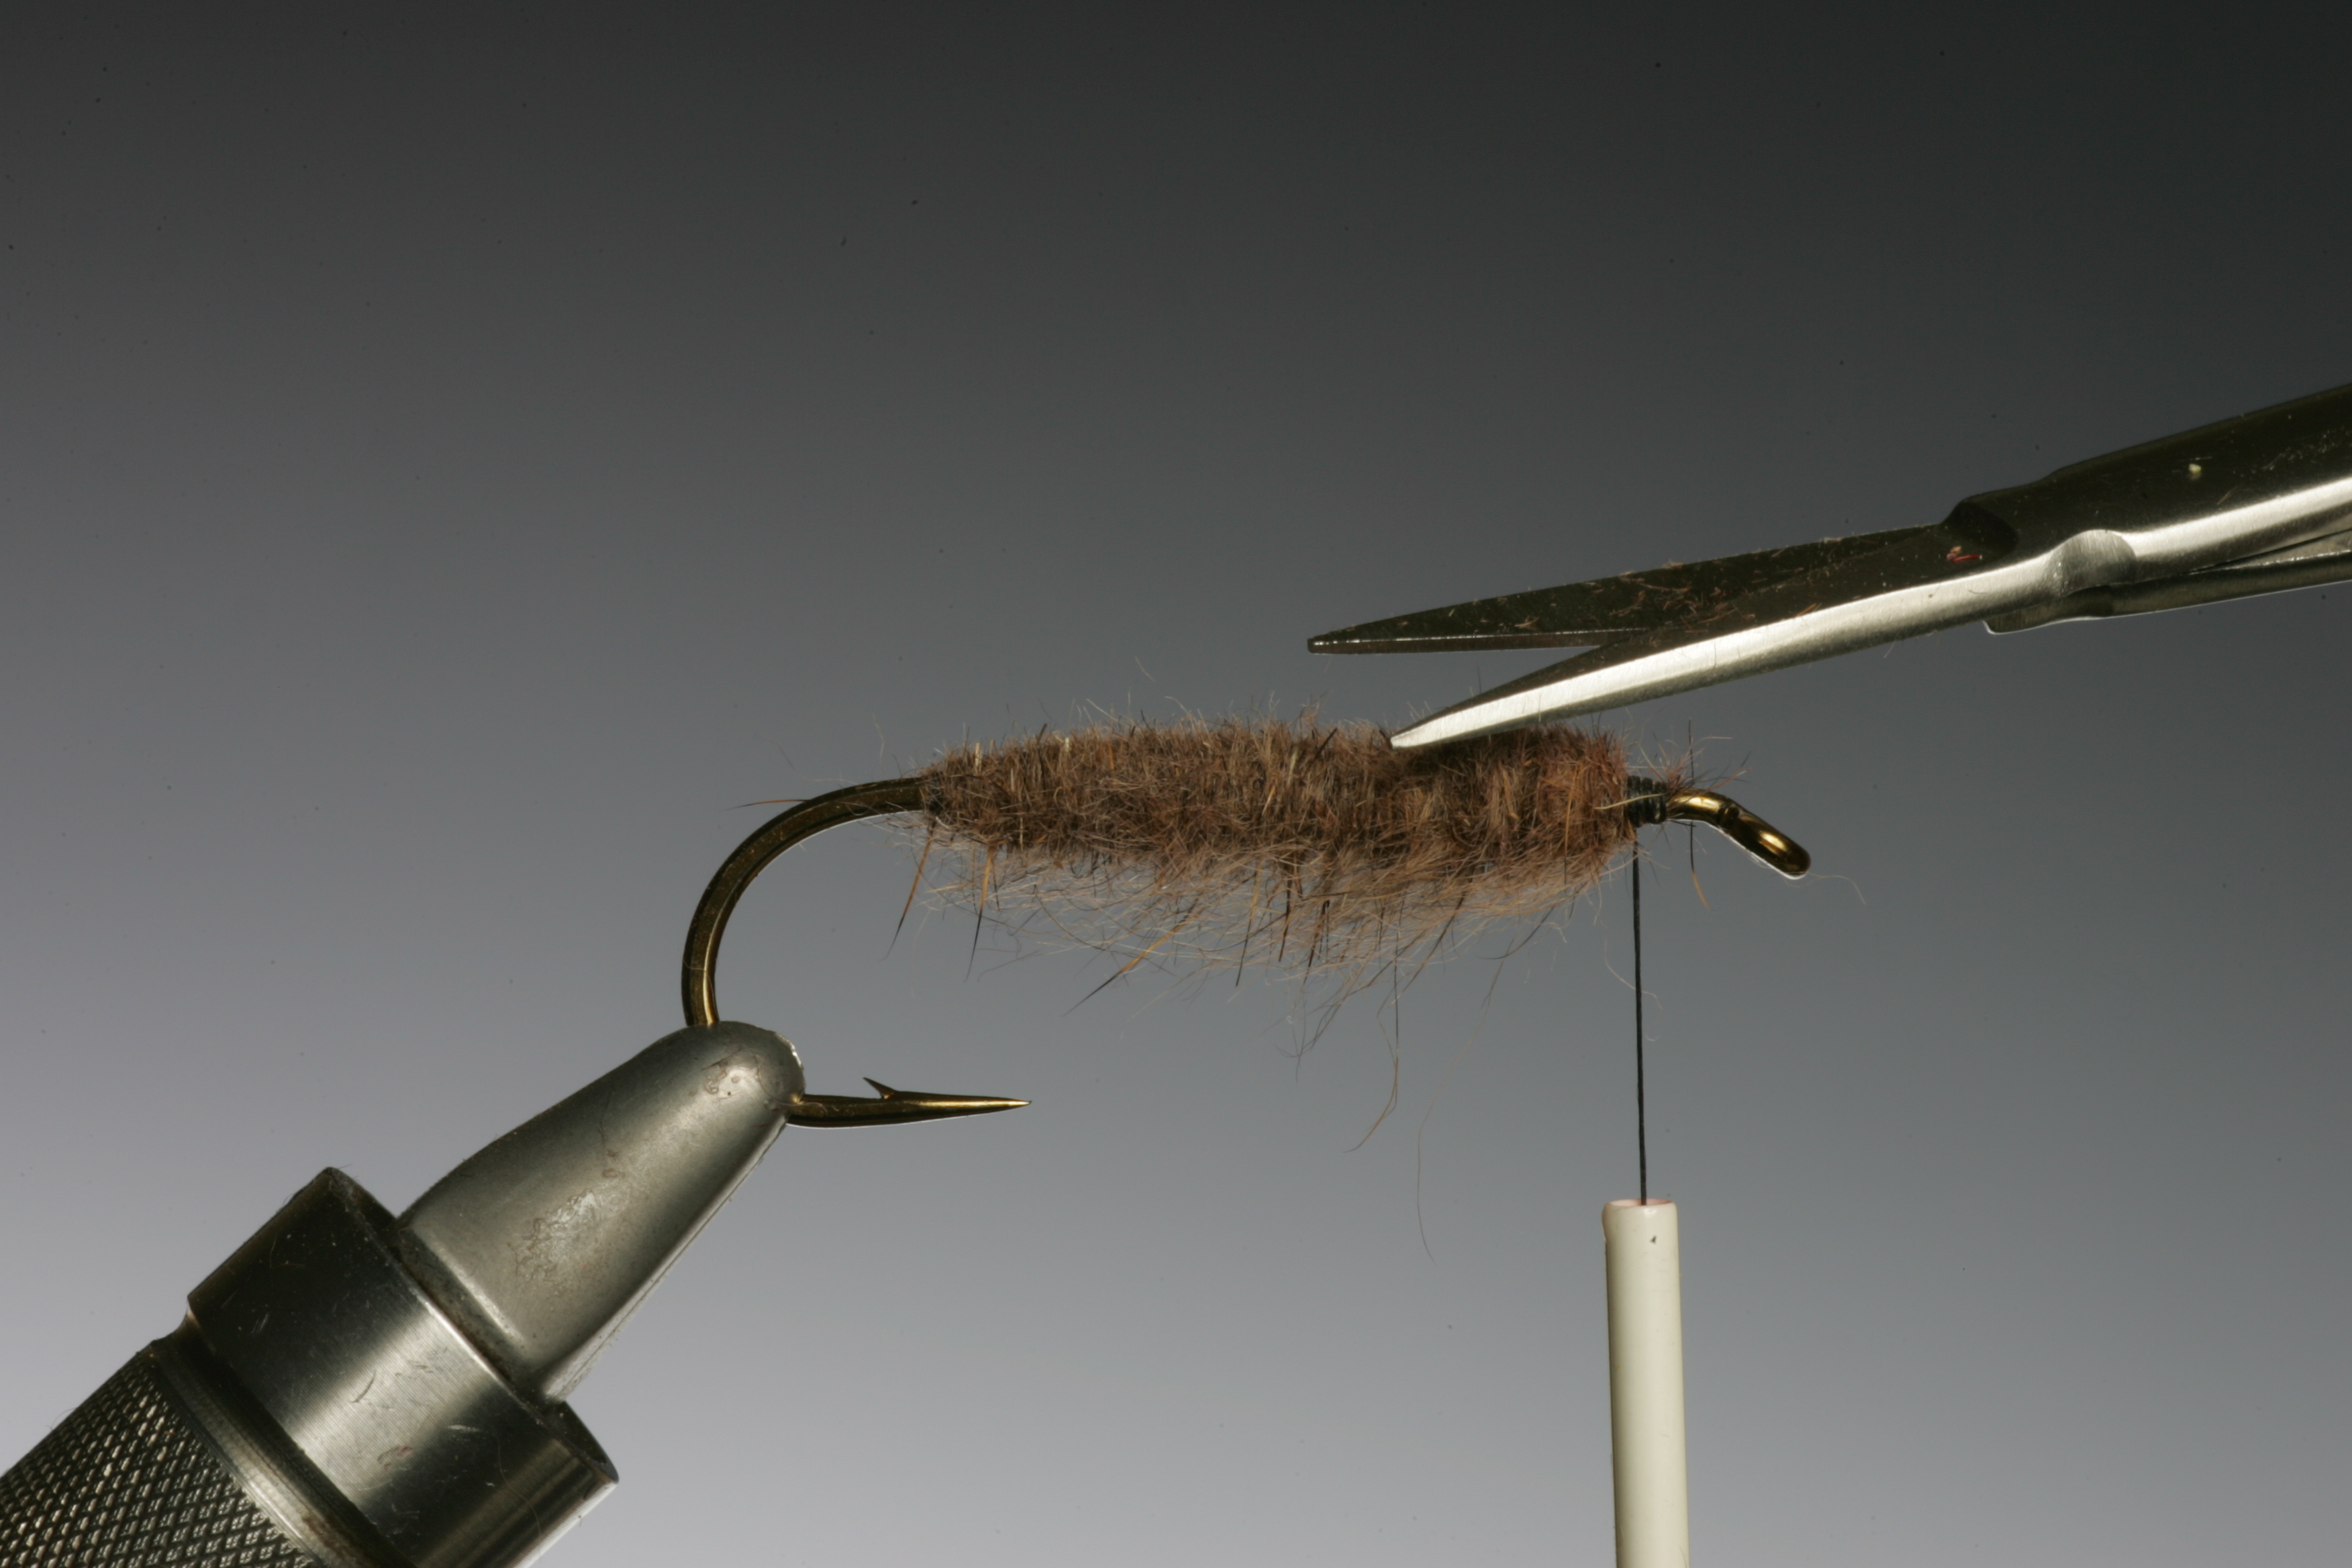
19. But if you would like a fine slim body without too many fibers you can trim these off with a fine pair of scissors.
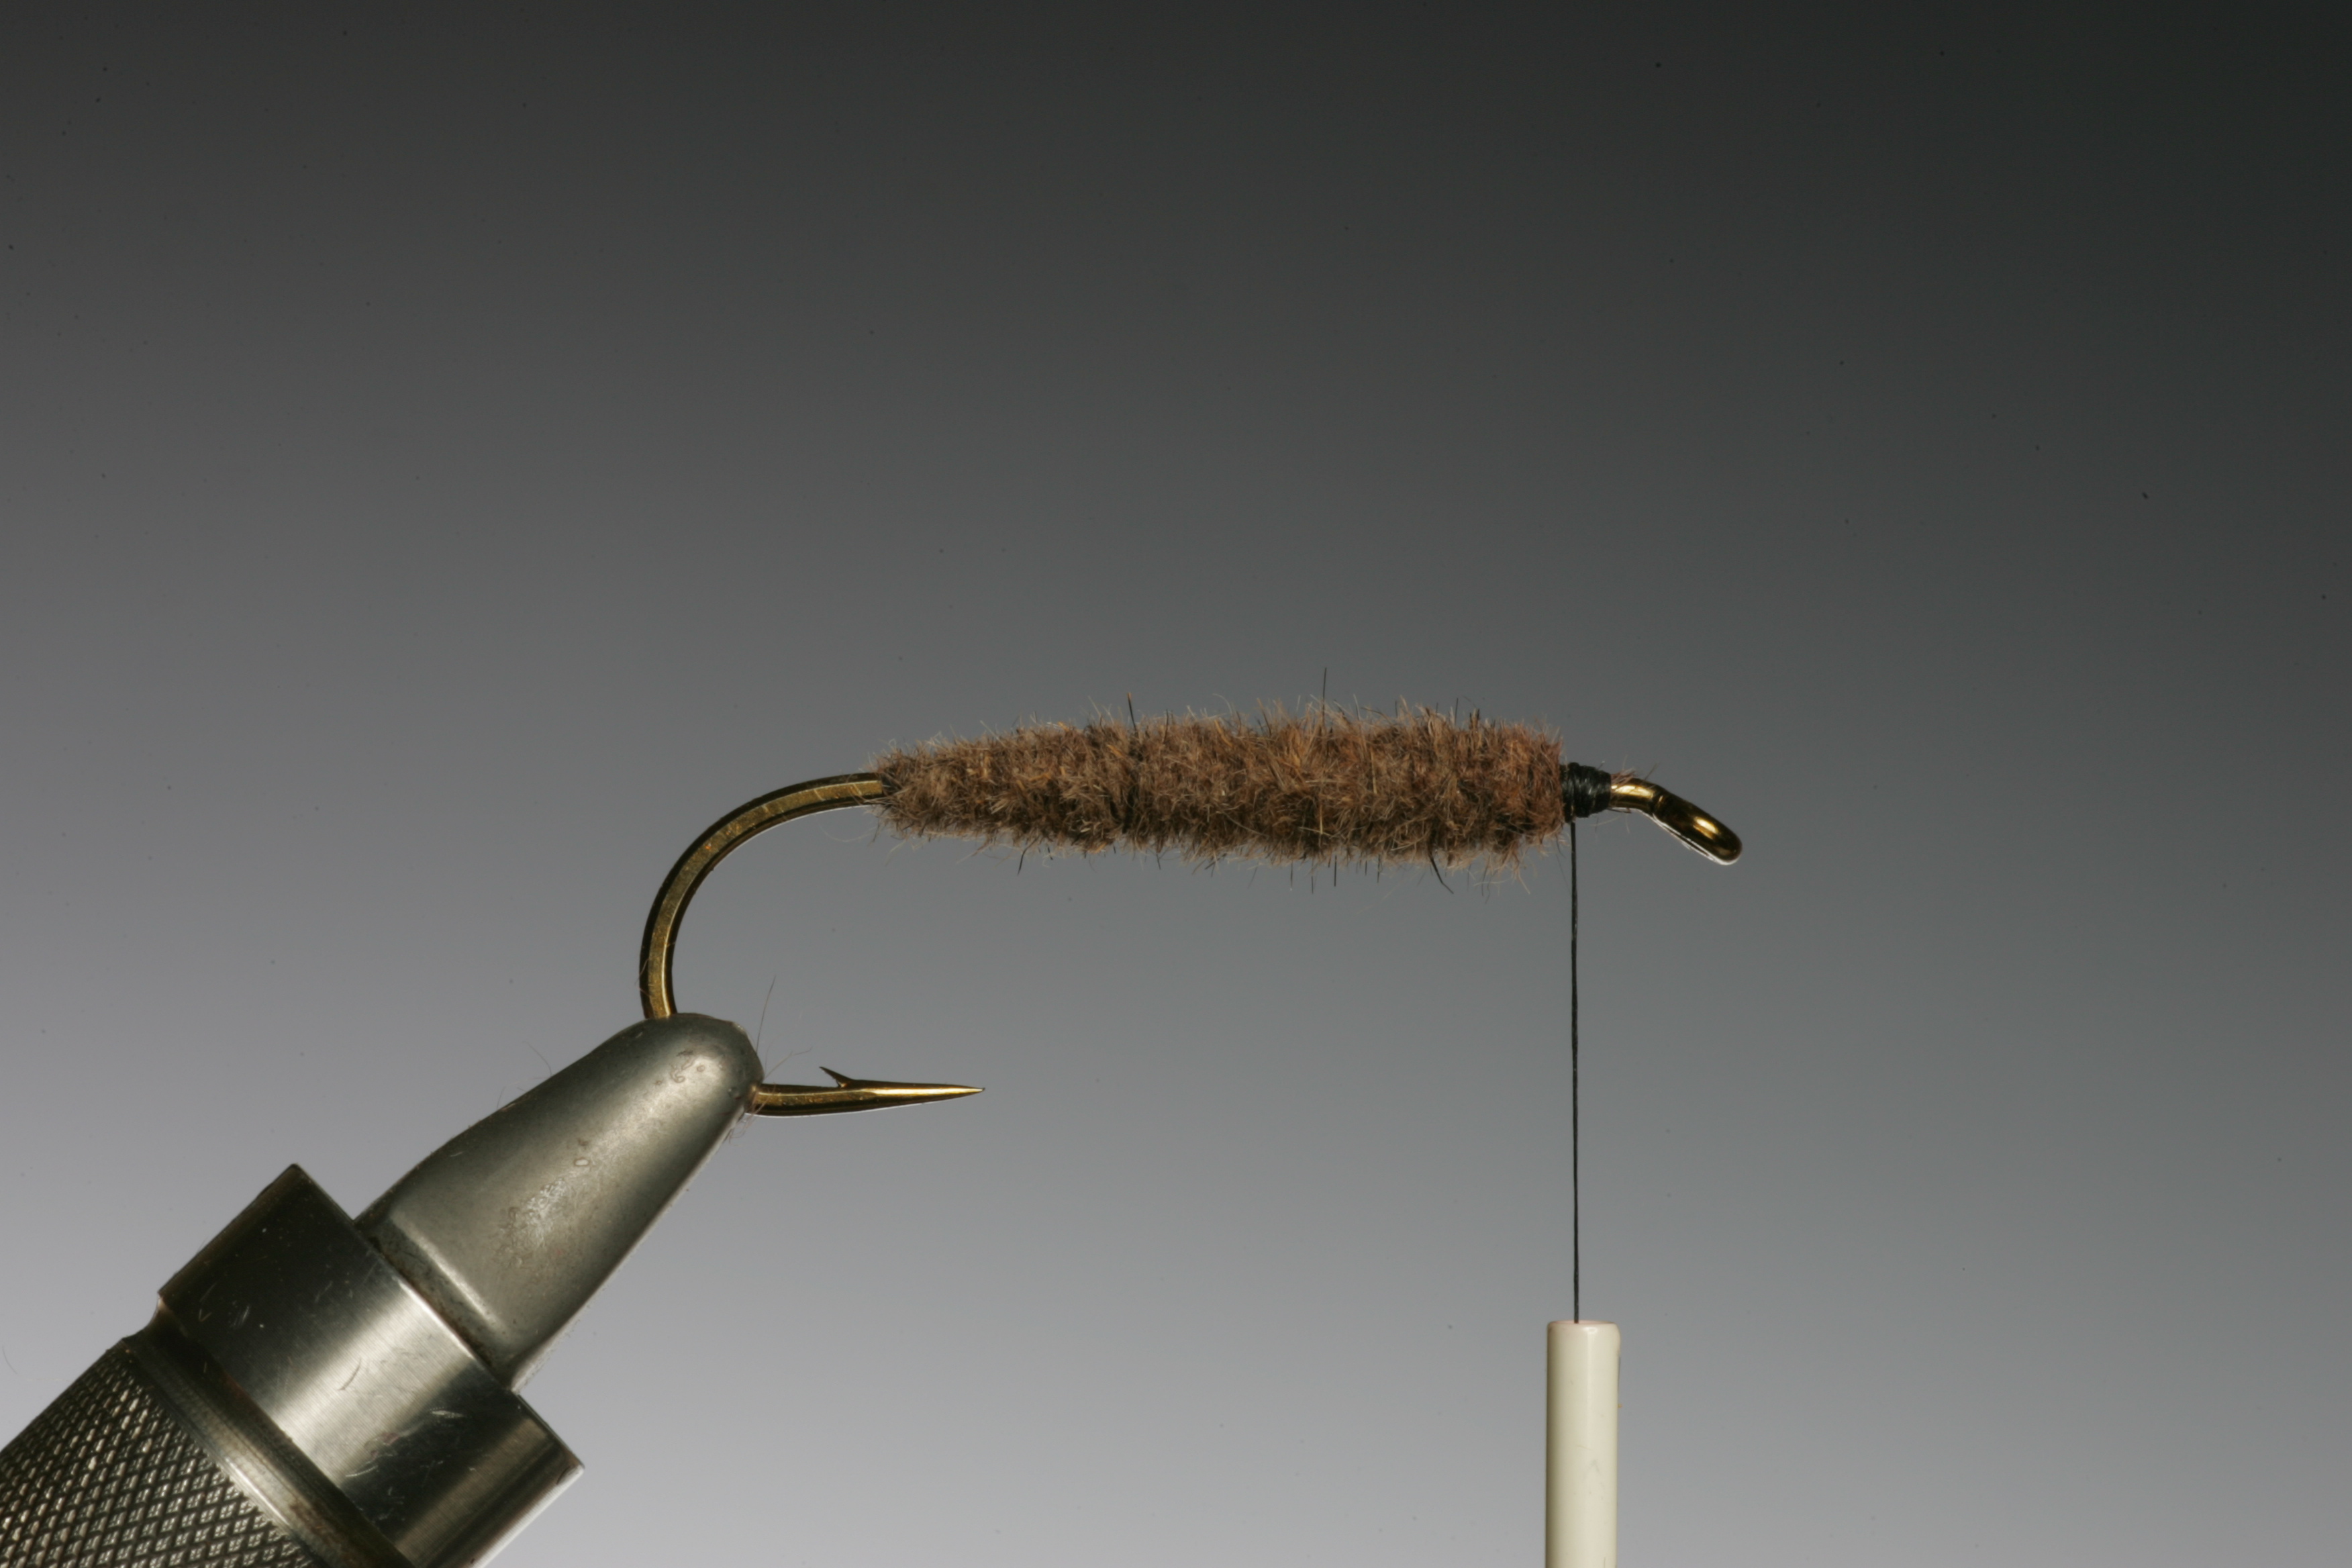
20. The finished trimmed cigar shaped body. Good luck! If you have any questions regarding dubbing dont be shy.
Table of Contents
My new book

Discover more from HOW TO TIE FLIES | THEFEATHERBENDER
Subscribe to get the latest posts sent to your email.

