
This is a tutorial I made with my good friend Marc Petitjean to demonstrate how he uses the magic tool and a few other CdC techniques he has up his sleeve.

If you are not familiar with Marc’s tools and materials they really are the bee’s knee’s. Super high quality Swiss made Vices and ingenious, yet simple to use tools and his CdC is some of the continuously best available.
This is the step by step for one of Marc’s quick and simple CdC body and caddis wing. The vice, tools and all materials used are Marc’s own and are available from http://www.petitjean.com/shop/

1. Once your hook is secure in the vice attach you tying thread.

2. Select a nice large CdC hackle and place it up towards the hook shaft and tying thread.

3. With a couple of loose turns of tying thread, catch the CdC hackle and slowly pull towards you.

4. Once you have reached the point of the hackle secure it well with a few tight turns of tying thread.

5. Tie down the end of the hackle to the hook shank and attach your hackle pliers at the base of the shaft.

6. When your hackle pliers are attached make a couple of turns of the hackle while holding the fibers into the hackle stem, but only a couple.

7. Once the hackle stem is twisted you are ready to start winding it on.

8. Holding the CdC hackle tight make your first turn around the hook shank. You are going to use the twisted CdC hackle as a dubbing rope.

9. Once you have made one turn of the hackle, hold the fibers into the hackle shaft again and twist only once or twice.

10. Repeat the turn and twist until the whole hook shank is covered. Its very important that you dont twist the hackle all in one go and then wind it on the hook shank. This will lead to the hackle breaking when you try to wind it on.

11. Once the hackle is wound on, with a little room left behind the hook eye for the wing tie it off.

12. Trim off the excess hackle.

13. Your caddis body should now look like this.

14. With a pair of small sharp scissors carefully trim off the protruding CdC fibers from the body.

15. Now you should have a fine segmented spun CdC caddis body as here.

16. Select three similar lengthen CdC hackles of your chosen colour.

17. Take each hackle and hold horizontally.

18. Carefully draw the fibers so they are 90 degrees to the hackle stem.

19. The correctly prepared hackles should look like this.

20. Once all three hackles are prepared lie them on top of each other as shown.

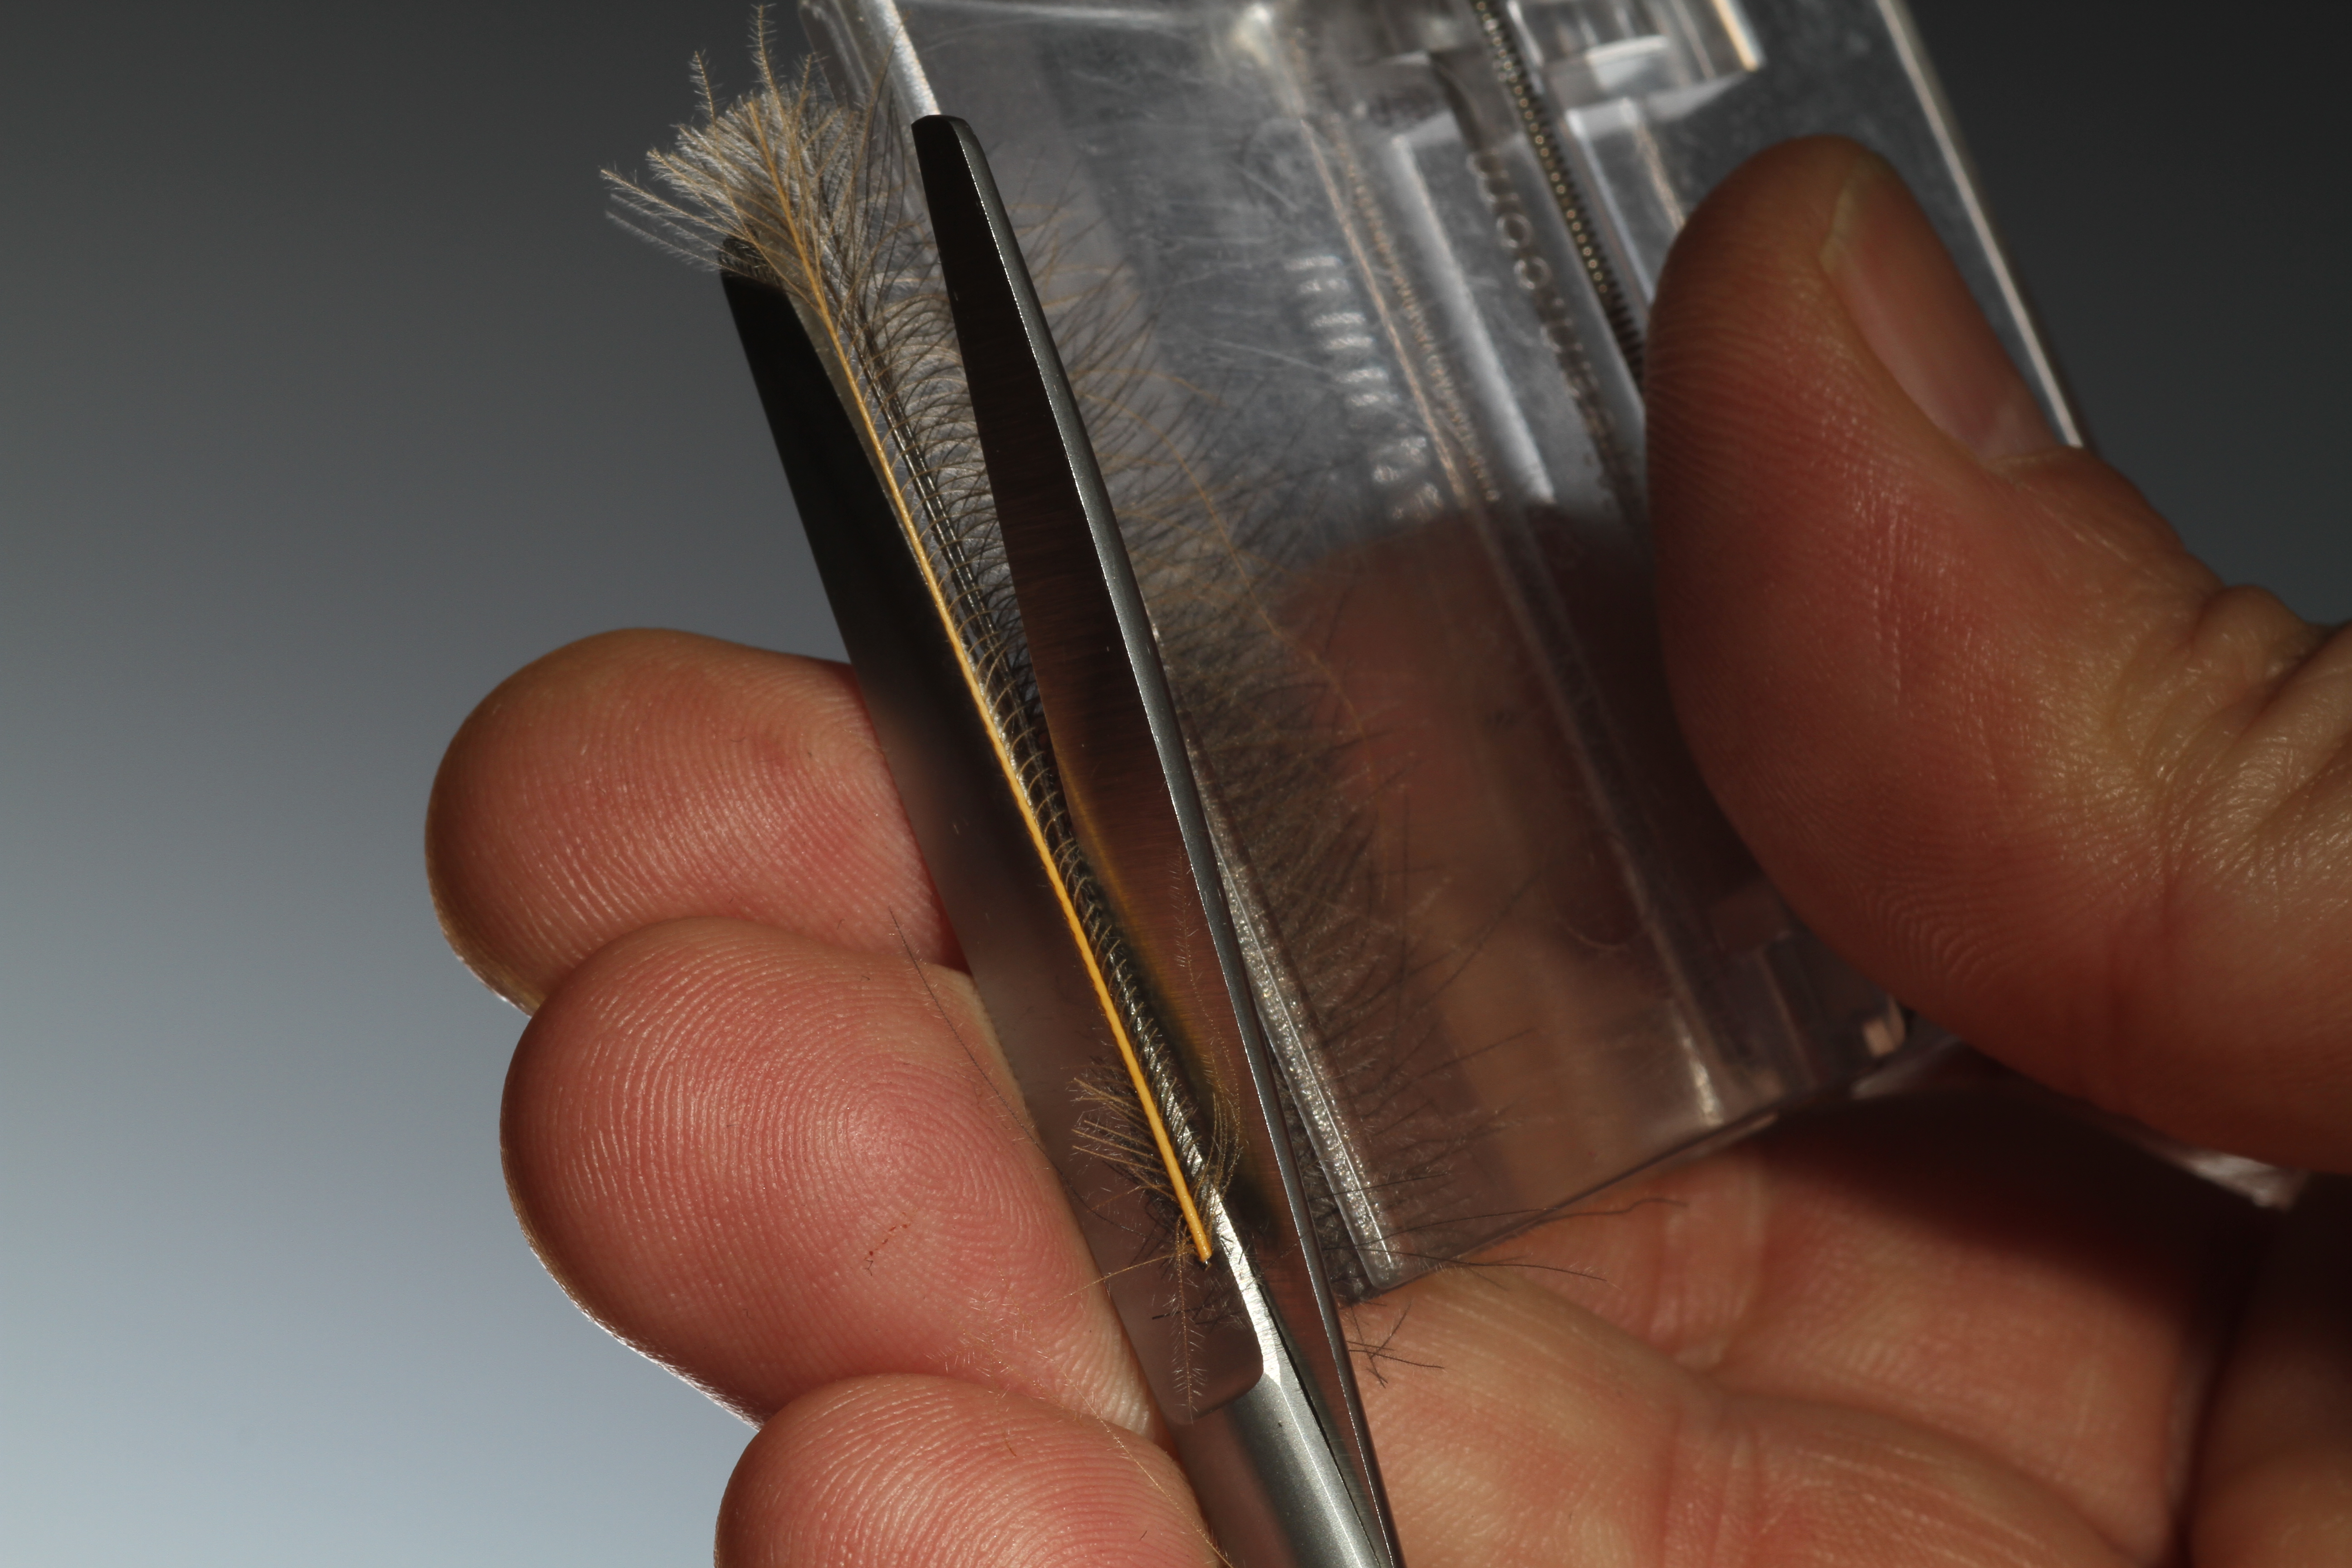
21. Choose the size of magic tool appropriate for the hook size used.

22. Take hold of all three hackles at the same time and pre s down into the magic tool.

23. Once in the magic tool trim off the ends of the CdC on both sides of the tool. This is very important otherwise the CdC will hang up in the spring of the clip.

24. Now place the receiving clip over the fibers of the CdC in the first clip.

25. Once the receiving clip is in place release the first clip and remove the CdC.
26. Now trim off the hackle stems.

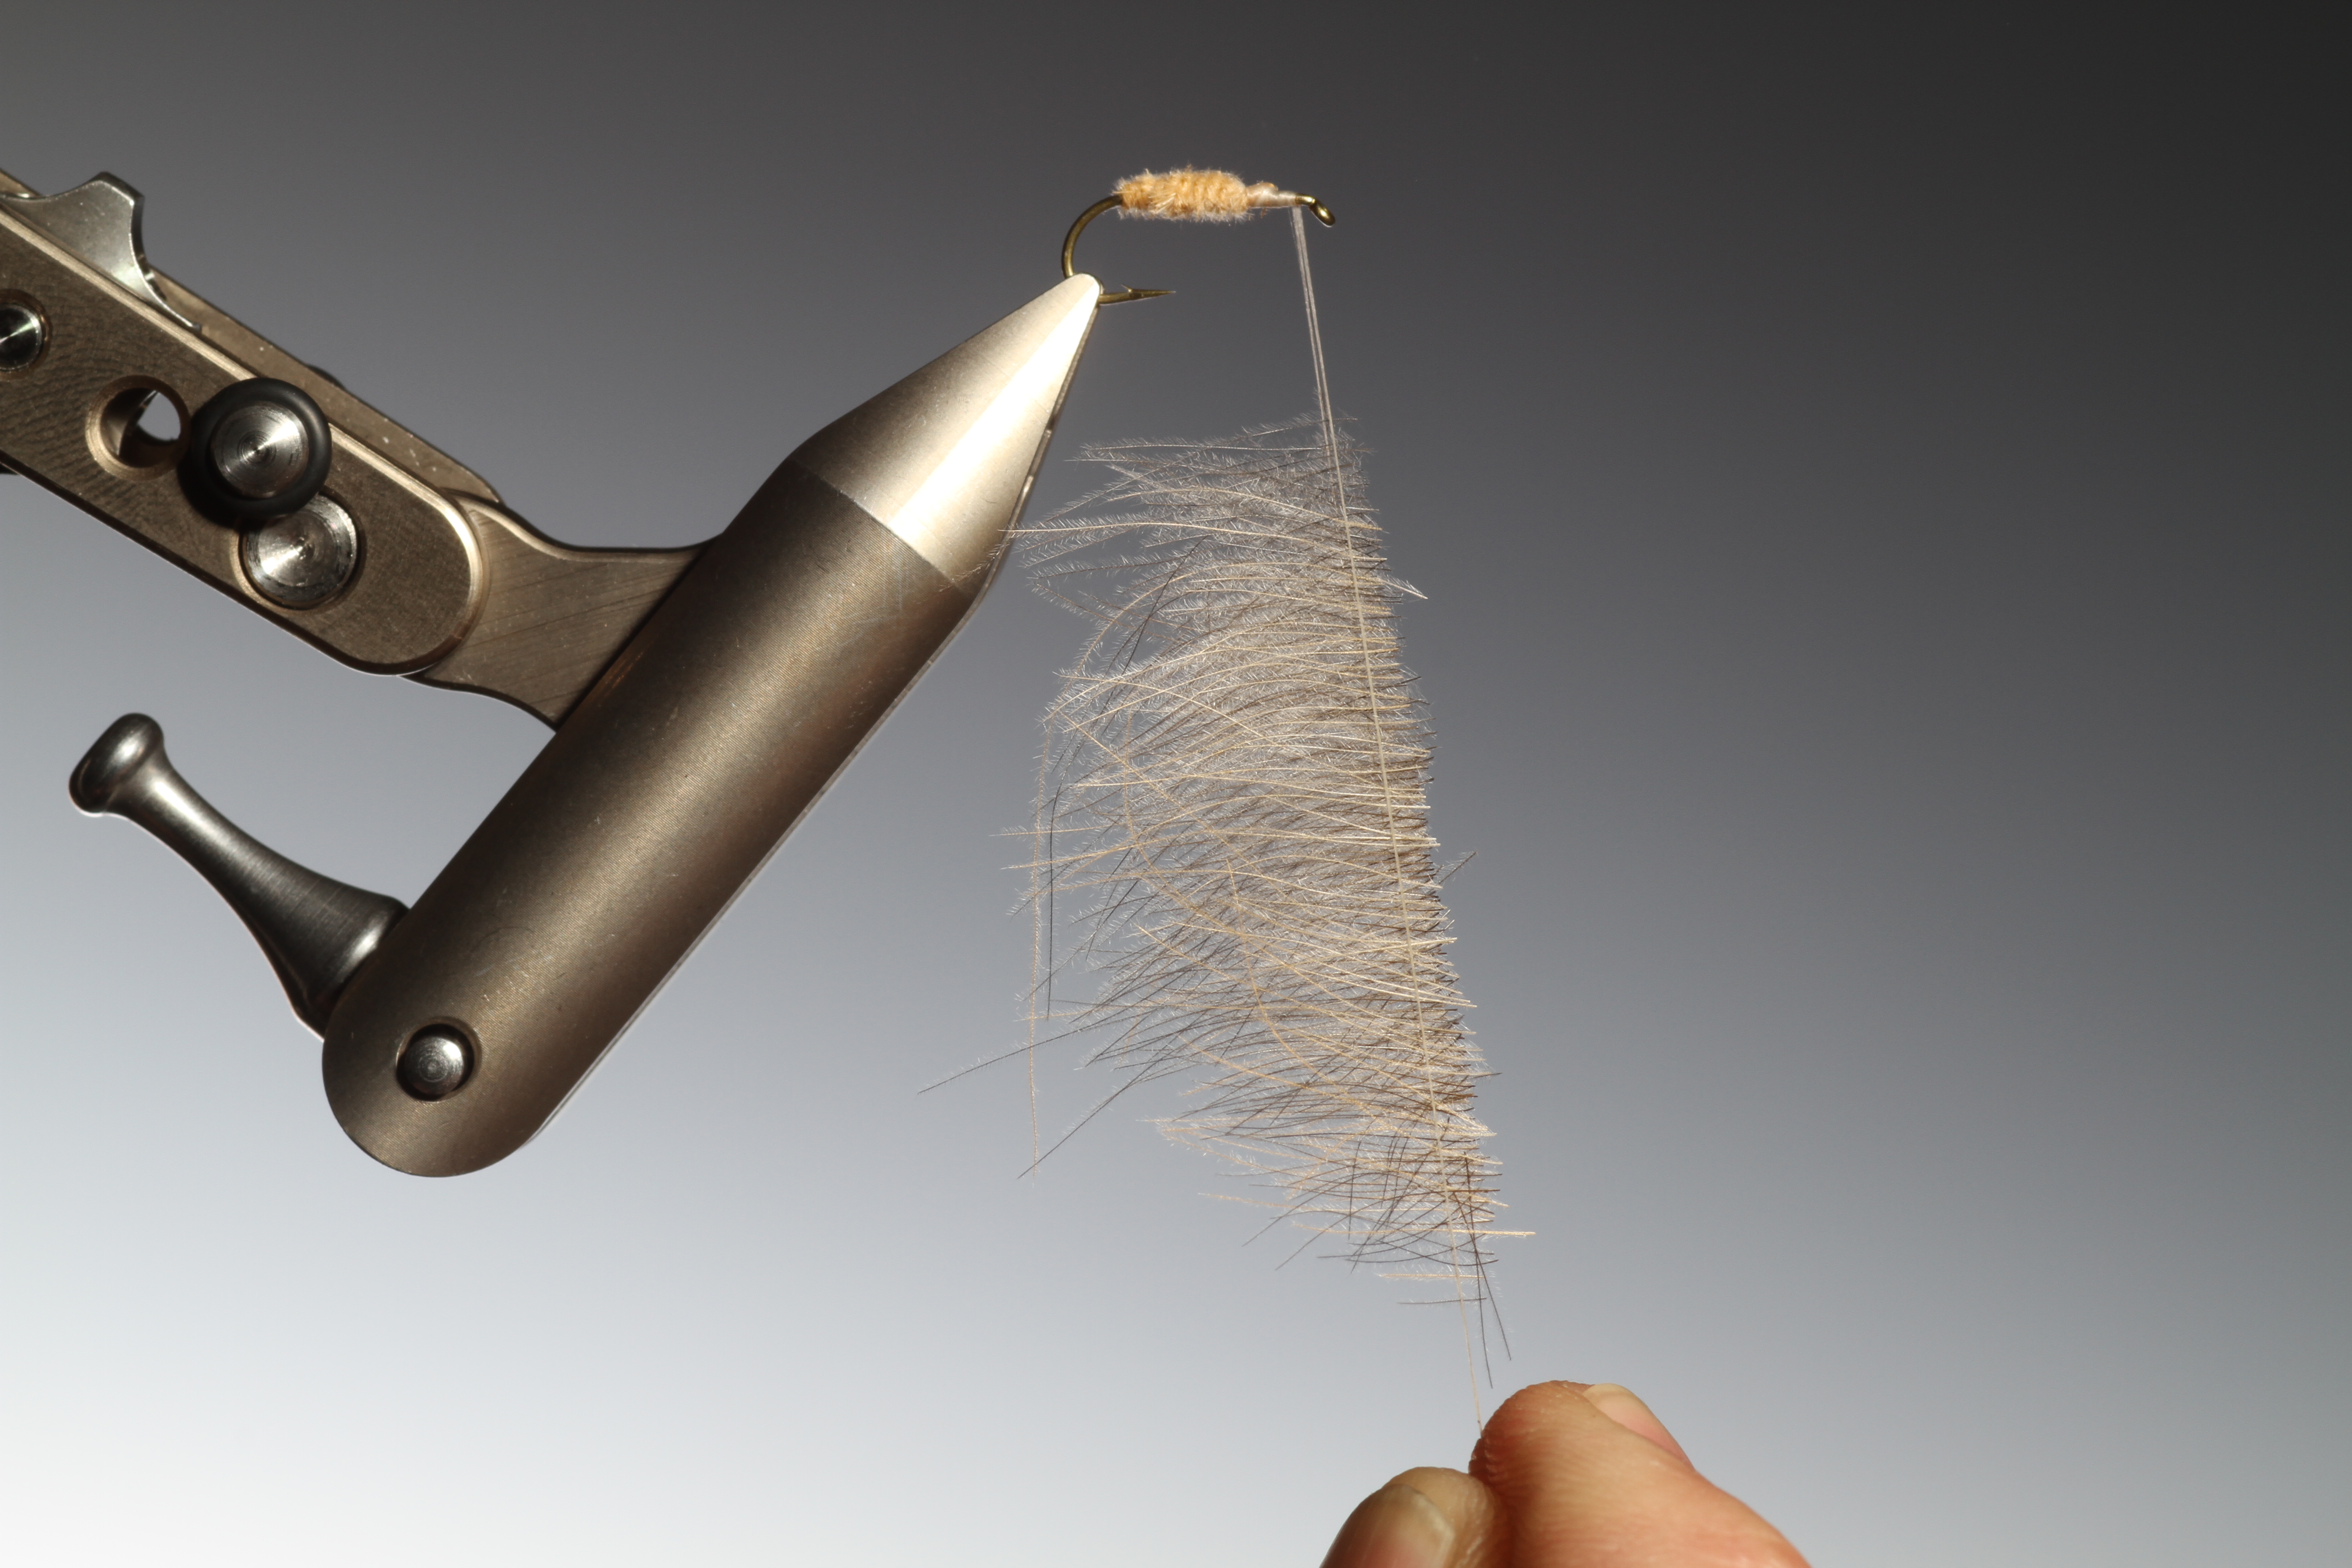
27. Your CdC should now look like this, ready to place in the dubbing loop.

28. Split your thread and place the CdC clip in the loop. Holding the loop closed with your right hand.
29. Remove the clip.

30. You can now spin your tying thread just a few times with your fingers to hold everything in place for the big spin.

31. While holding your bobbin up with the tying thread hanging on your finger between the bobbin and the dubbing, spin your bobbin clockwise.
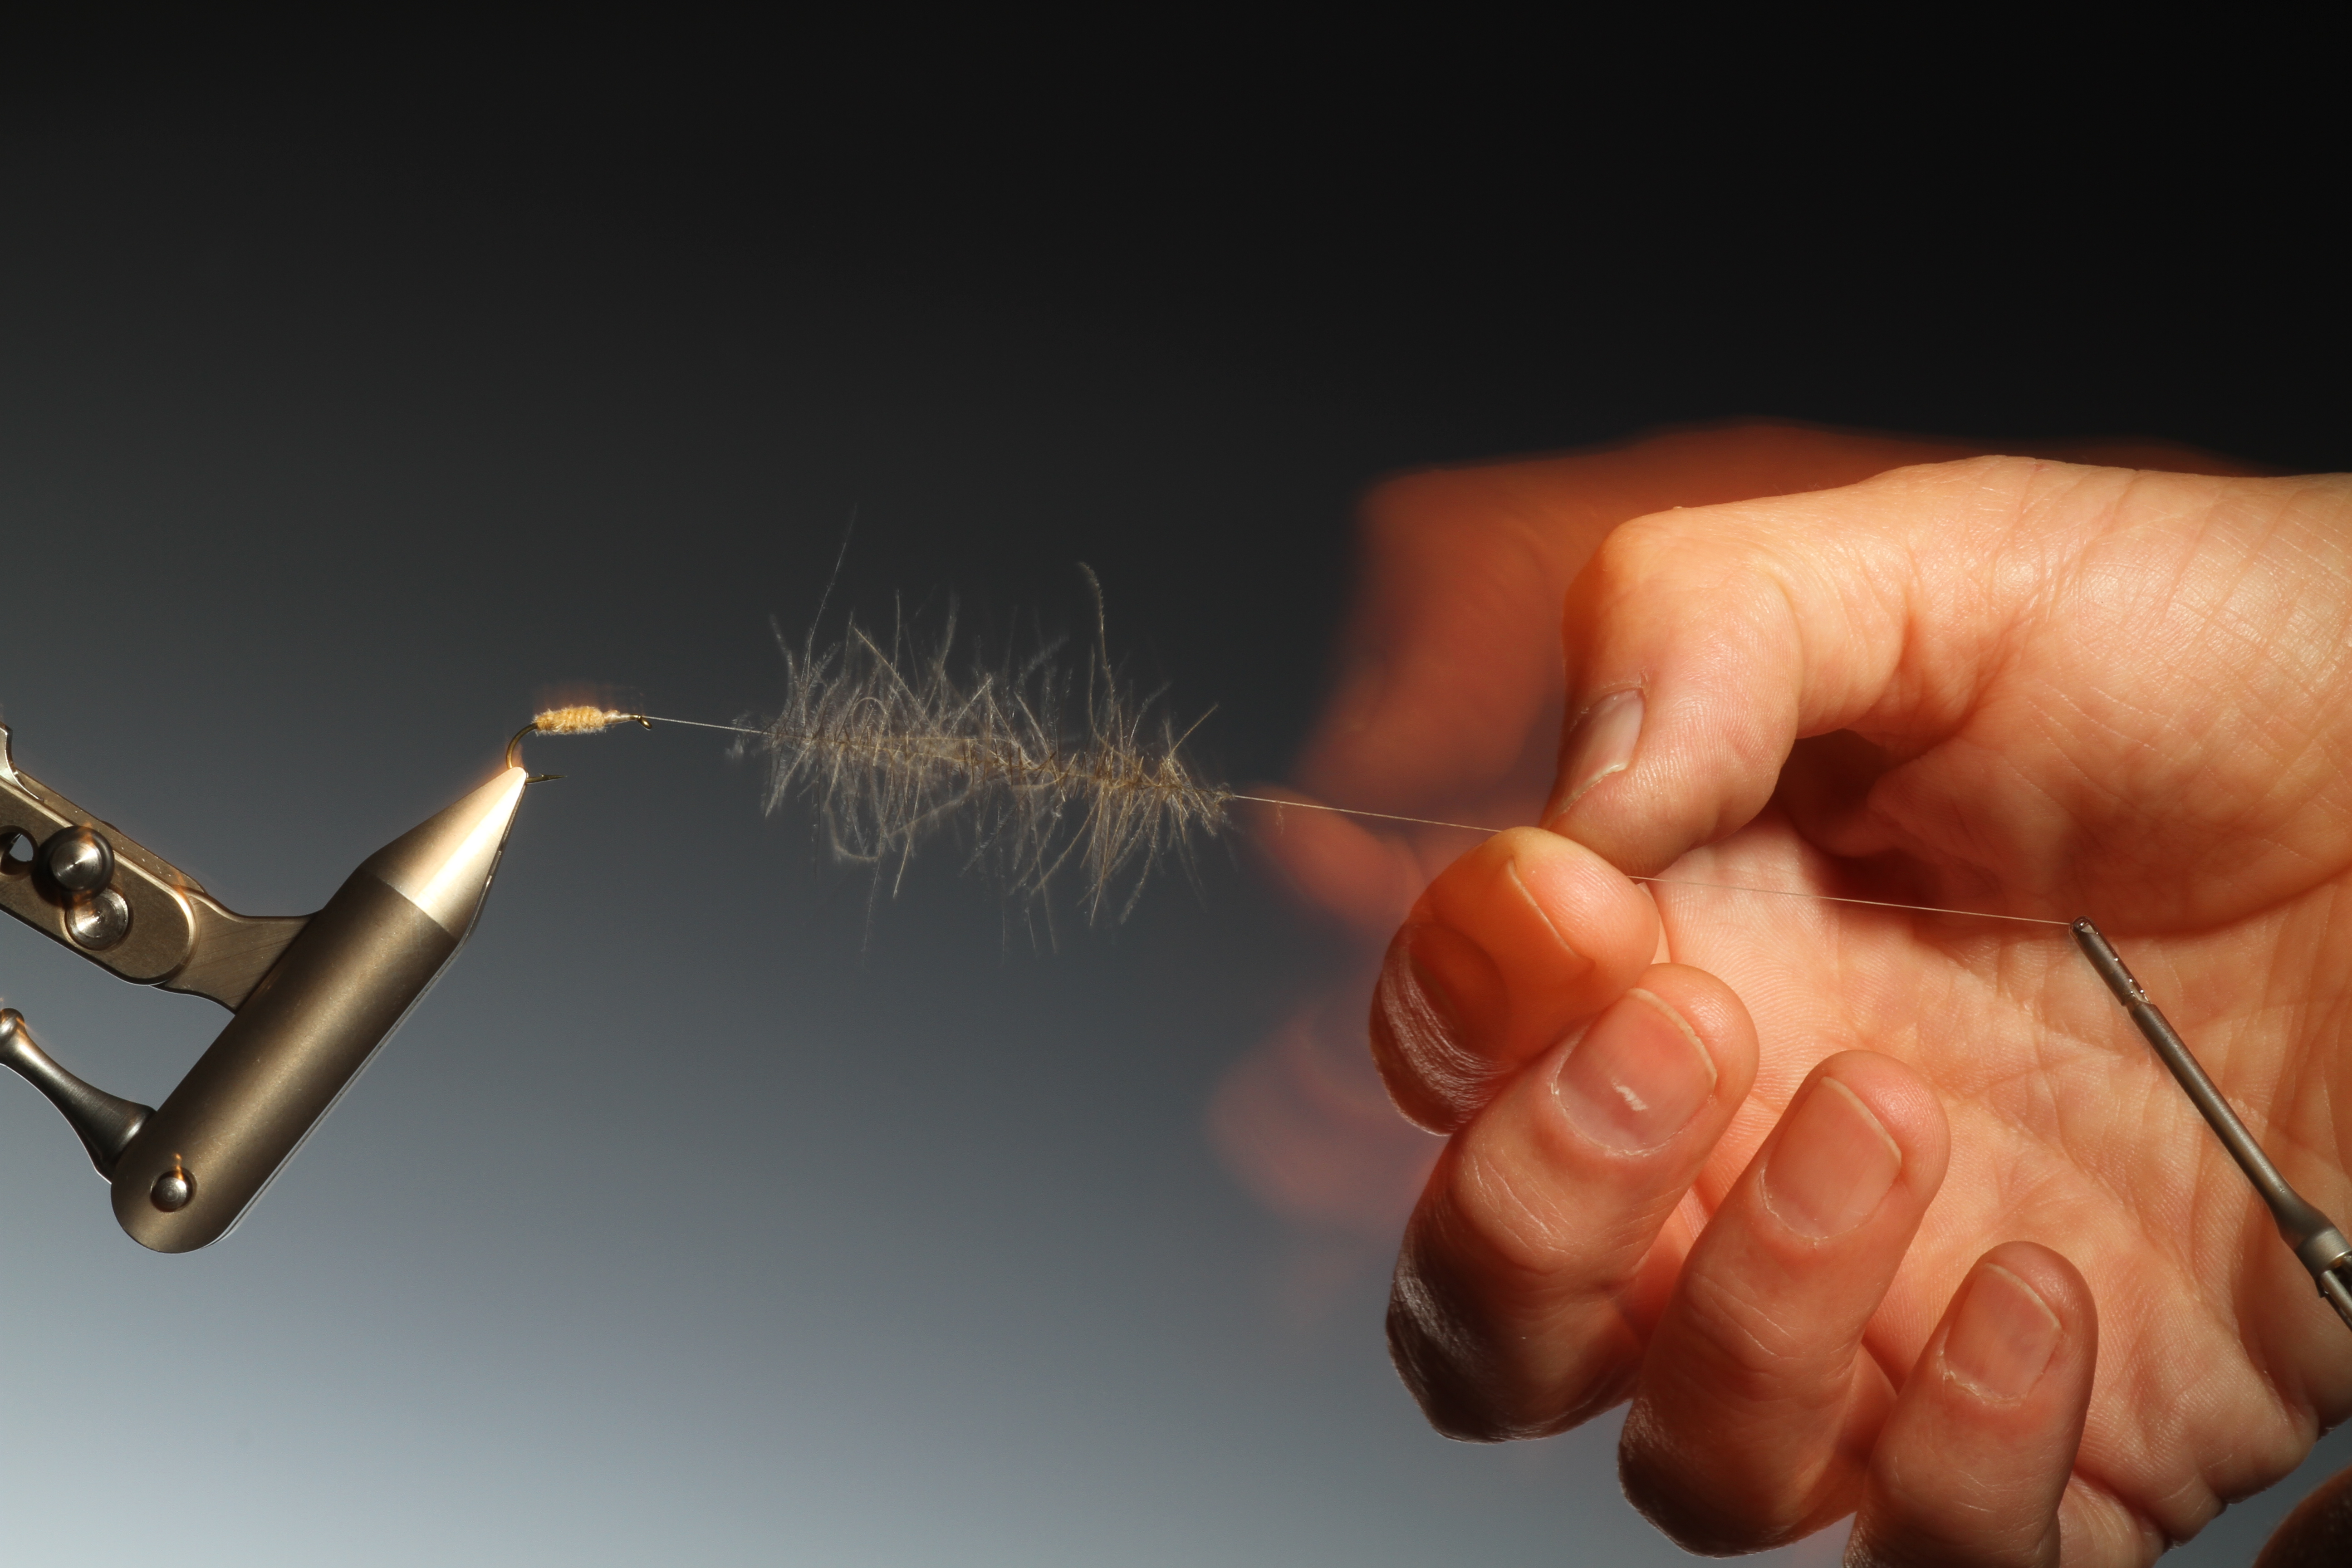
32. Once the bobbin has spun a little, put tension in the tying thread by pulling slightly on the bobbin and then run your index finger and thumb, up along the tying thread towards the dubbing. This will set tension in the thread and tighten the spin in your dubbing brush.

33. Now wind on your CdC dubbing brush, but take care to hold ALL the CdC fibers back in the wing position with every turn. That means after each turn of dubbing collect all the fibers from under the fly and hold as shown-
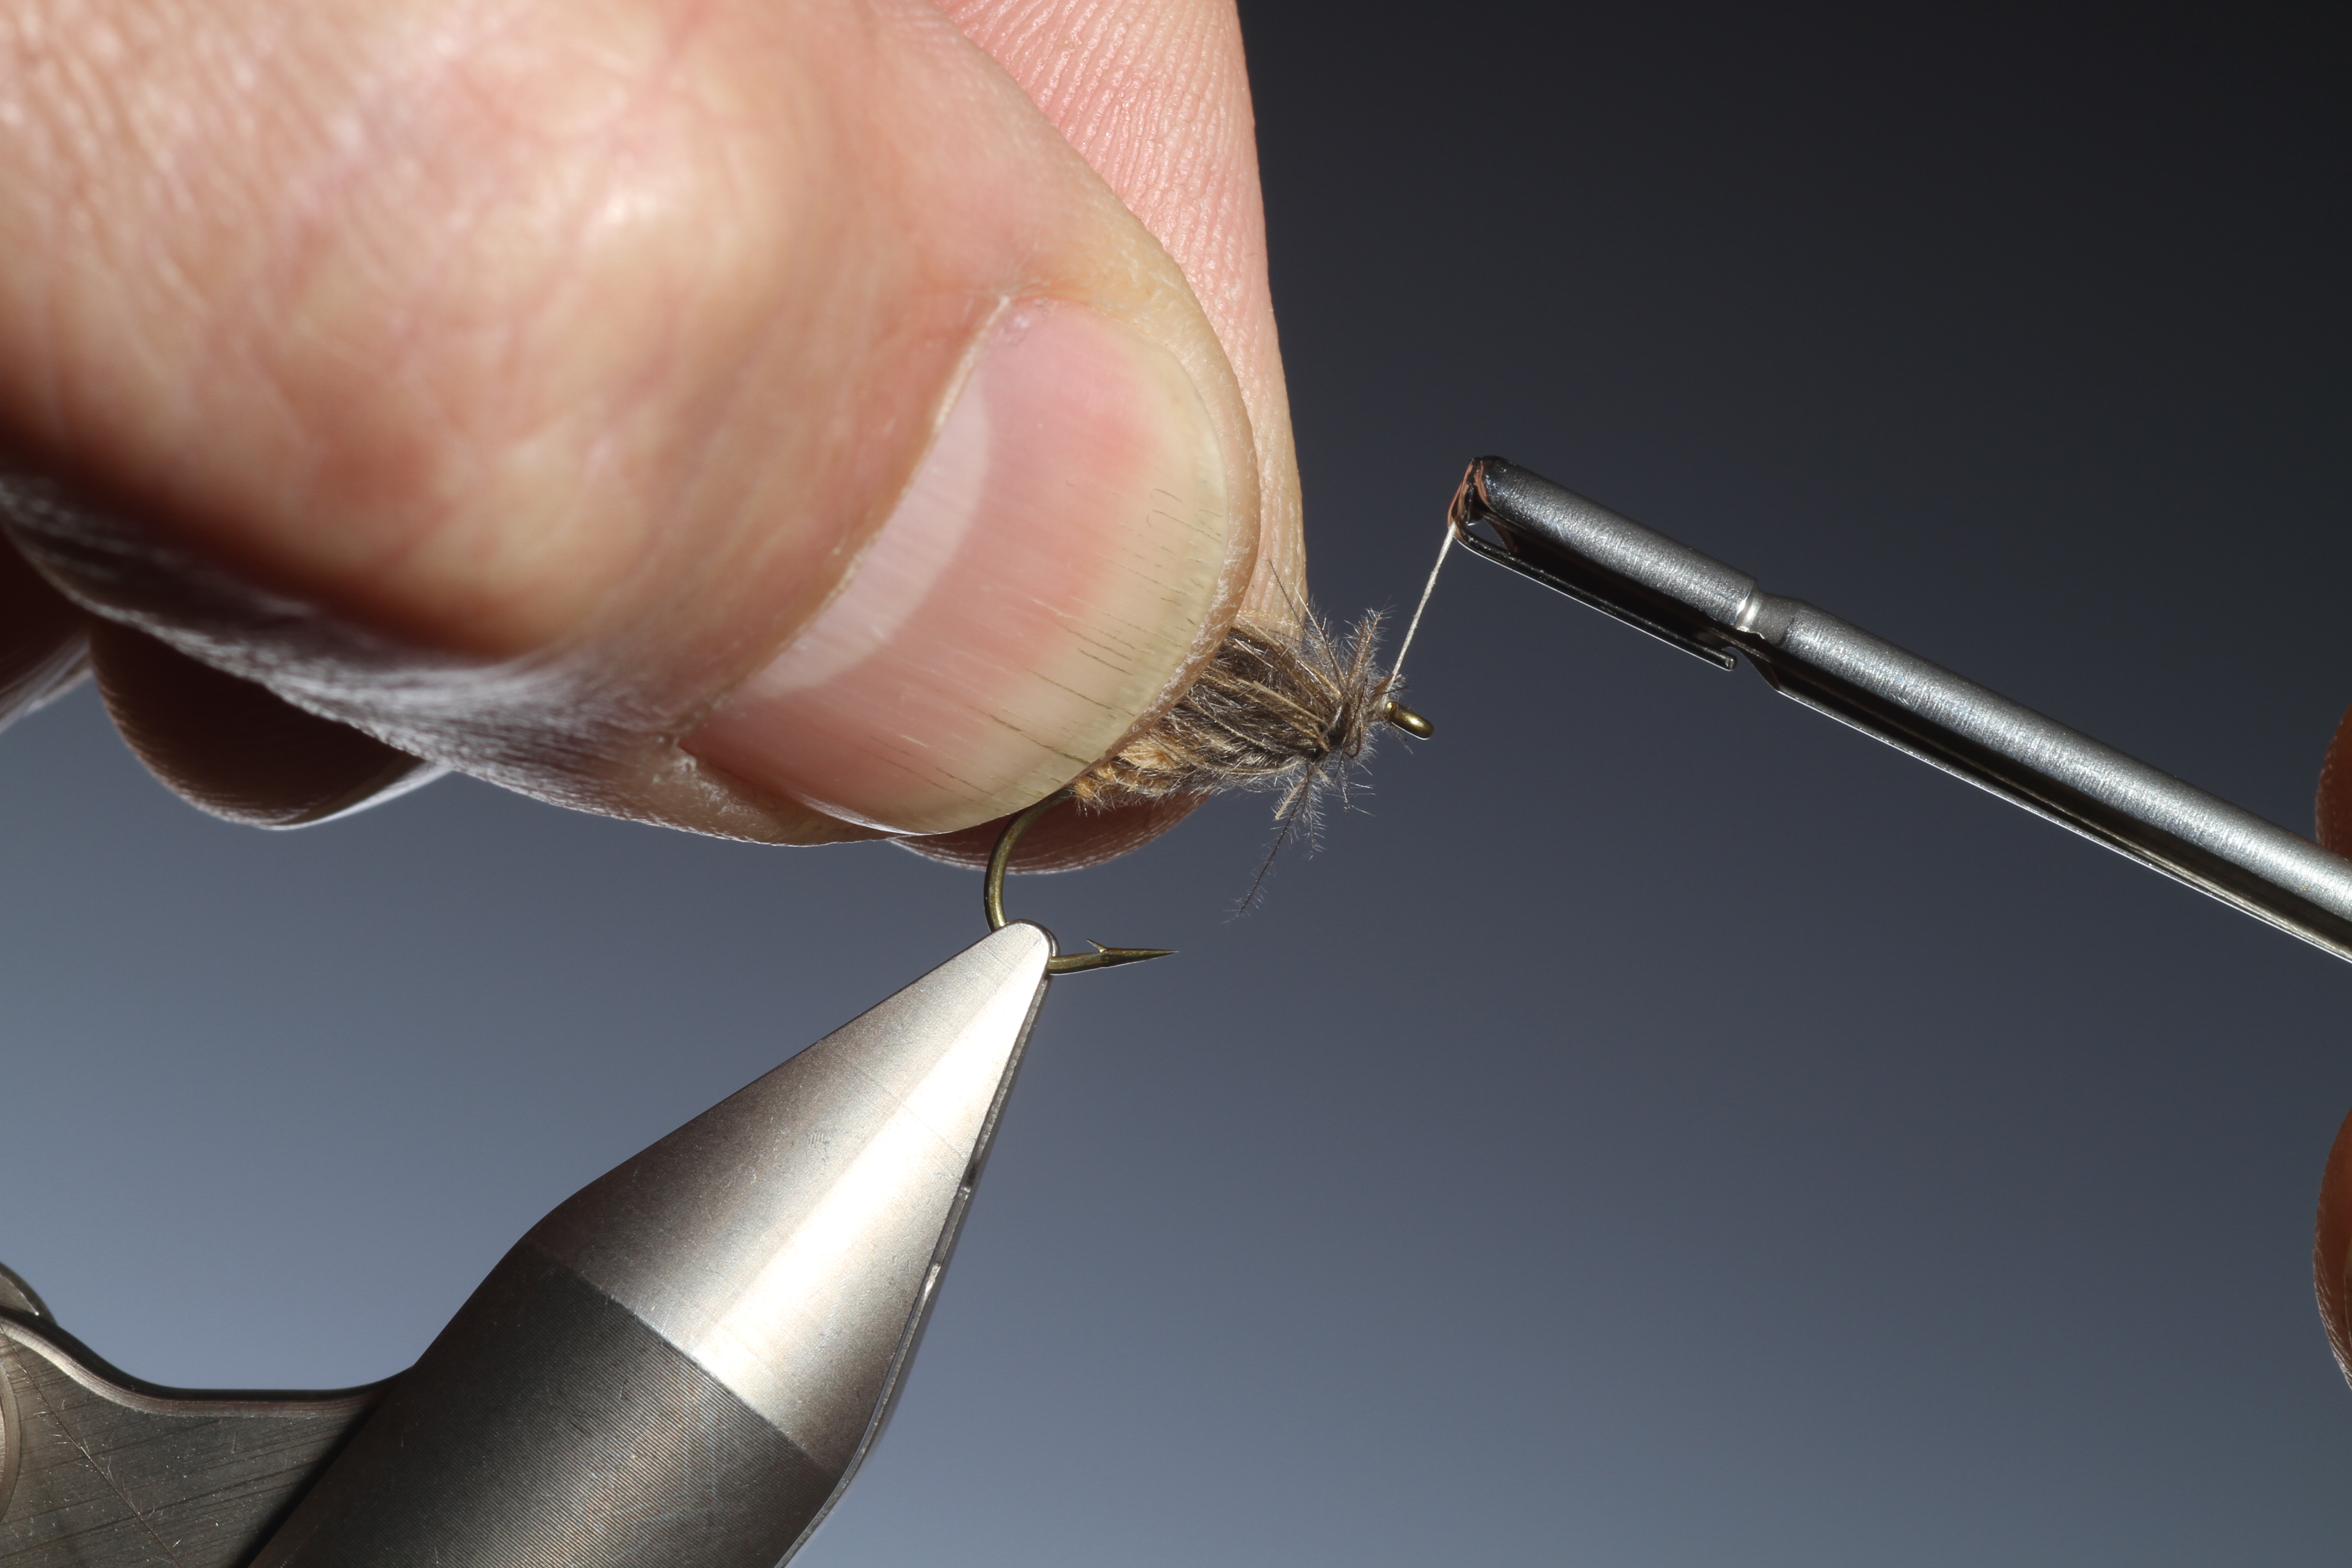
34. Once all the dubbing is wound on, while holding the wing in place make a few turns of tying thread to hold it in the correct position.

35. Whip finish.

36. Trim off the rear of the wing. About a half hook length from the hook bend.

37. Turn your fly up side down and pull the whole wing down on each side of the fly. Trim off the surplus on the underside.

38. The finished Petitjean CdC caddis. Although this has been a rather lengthy tutorial, Marc ties this extremely effective pattern in under 3 minutes.
The vice, tools and all materials used are Marc’s own and are available from http://www.petitjean.com/shop/
Table of Contents
My new book

Discover more from HOW TO TIE FLIES | THEFEATHERBENDER
Subscribe to get the latest posts sent to your email.


Really nice! Marc is just a big genius in fly tying and a very kind and helpful person! A big role model regarding modern fly tying!
Hi Holger, nice words. I couldn’t agree more! Thanks for your support and I look forward to seeing you at one of the shows, soon!
Have all of the Petitjean goodies love tying with them. Absolutly great flys wish you would do more of them.